In this tutorial, I will walk you through the process of making a chalkboard menu in Illustrator. We will use the basic tools and effects along with some basic vector shapes to achieve the final.
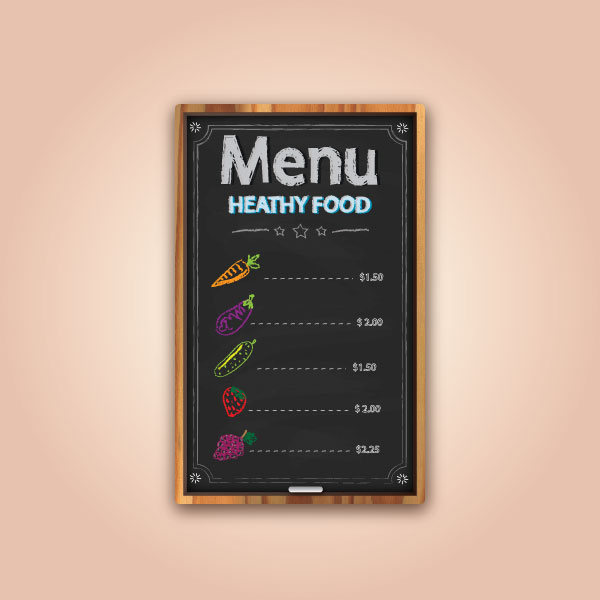
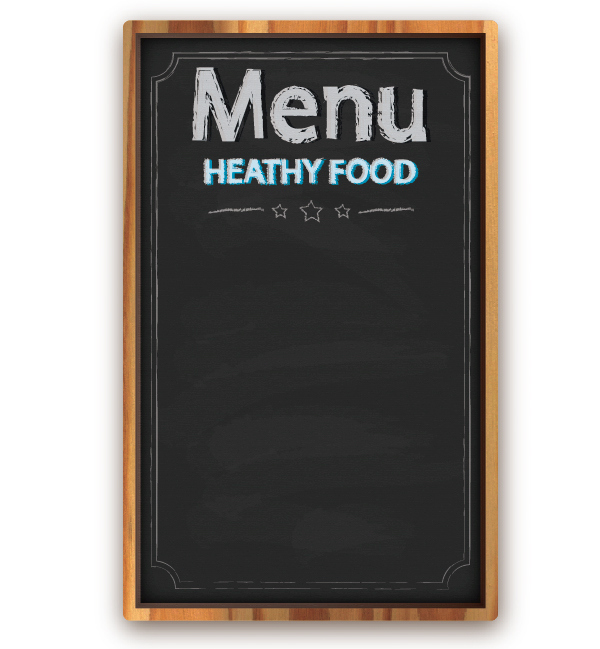
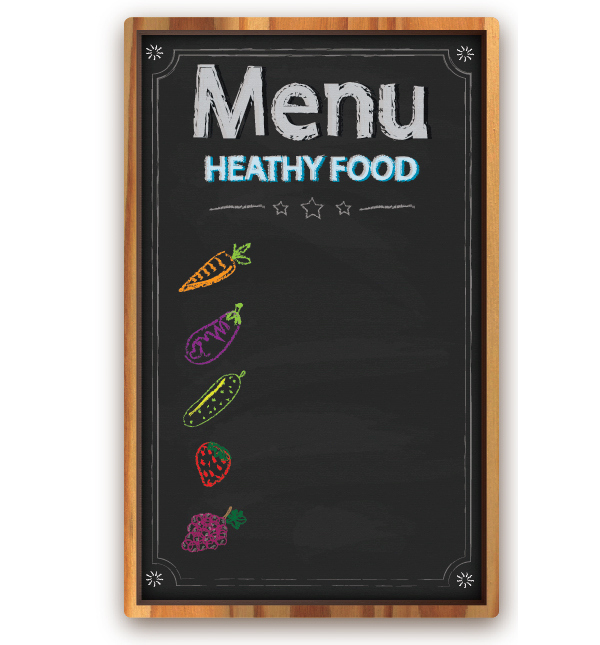
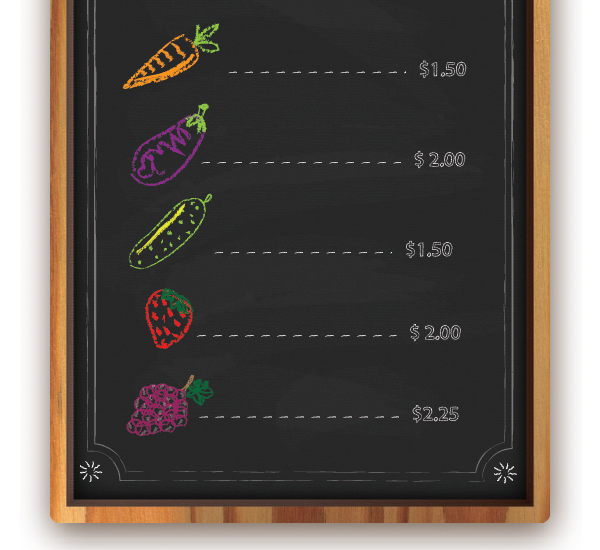
Final Image
As always, this is the final image that we’ll be creating:
Tutorial Details
- Program: Adobe Illustrator CS6
- Estimated Completion Time: 60 minutes
- Difficulty: Beginner-Intermediate
Resources
Step 1
Create a new document first. Make sure to set the dimensions to Width = 600px , Height = 600px and the Color Mode to CMYK.
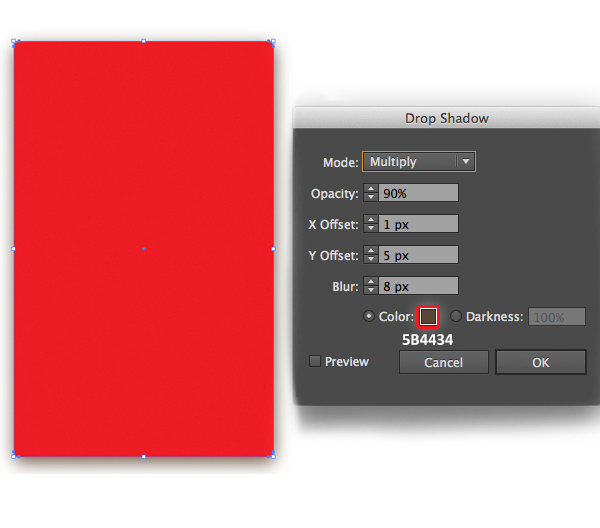
Create a rectangle with the Rectangle tool (M). Fill it with any color you like, it’s not important.
Duplicate this rectangle and put it aside, we will use it later.
Then go to Effect > Stylize > Drop shadow and set the values.
Step 2
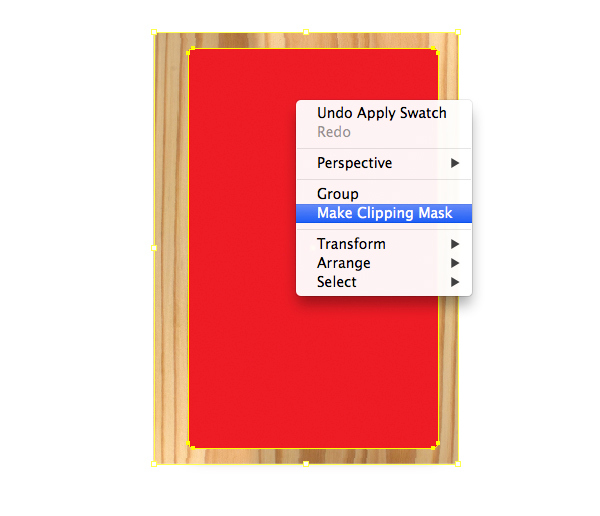
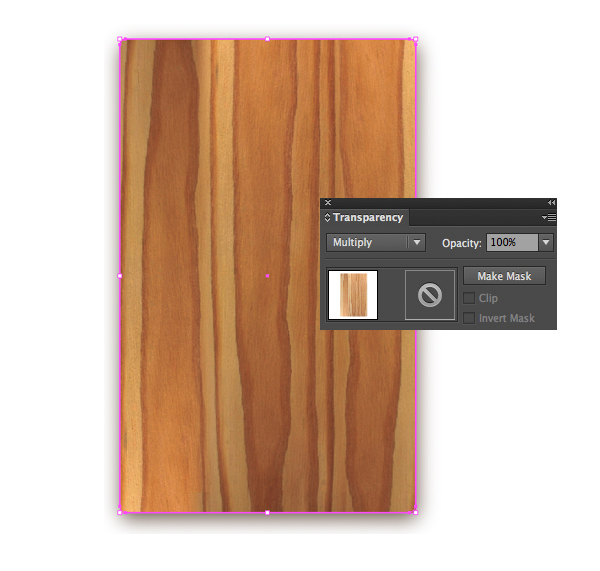
Now we place the wood texture that we have.
Back in Step 1, I mentioned placing a copy of the rectangle shape outside the Artboard. Go ahead and grab a copy to work with. Place the rectangle shape copy in front of the wood texture. Select both of them and go to Objects > Clipping Mask > Make.
This is how it should look:
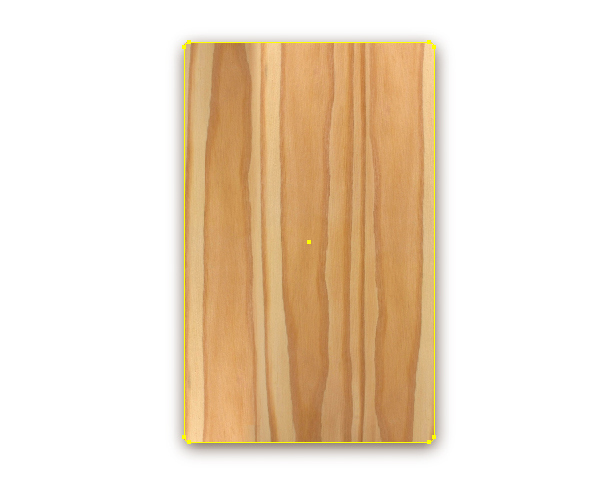
Duplicate Ctrl/Cmd + C (Copy) the wood texture then Ctrl/Cmd + F (Paste in front), apply the Multiply mode for the copy.
Step 3
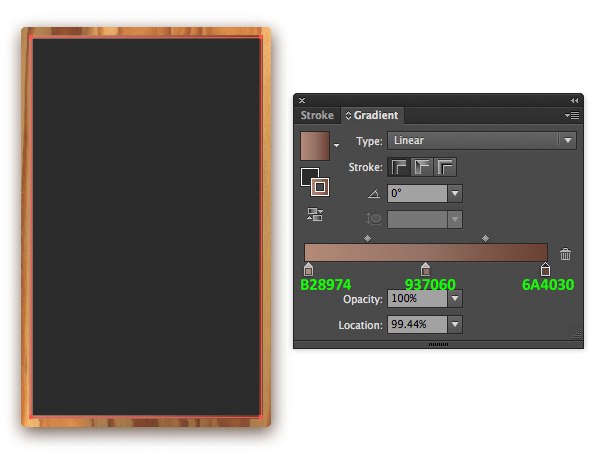
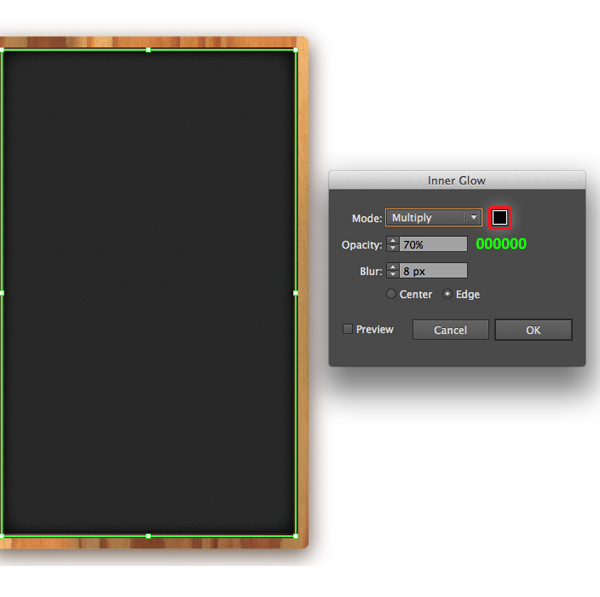
Create a new rectangle with the Rectangle tool (M), fill it with color #2A2A2A. Duplicate this rectangle and put it aside, we will use it later.
Set the stroke = 3,5pt and fill the stroke with gradient as shown in the image below.
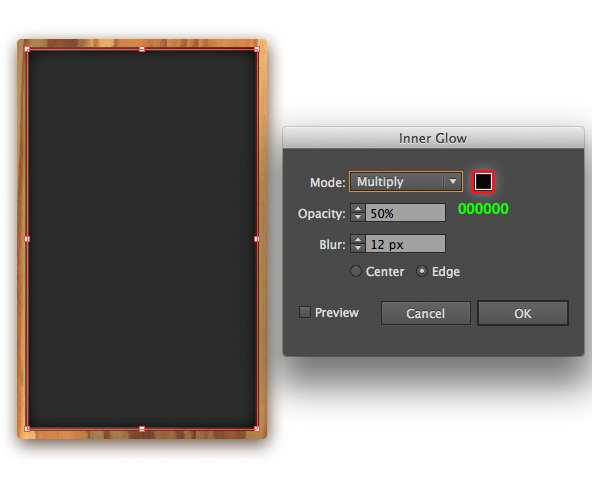
With the shape still selected, go to Effect > Stylize > Inner Glow and set the values.
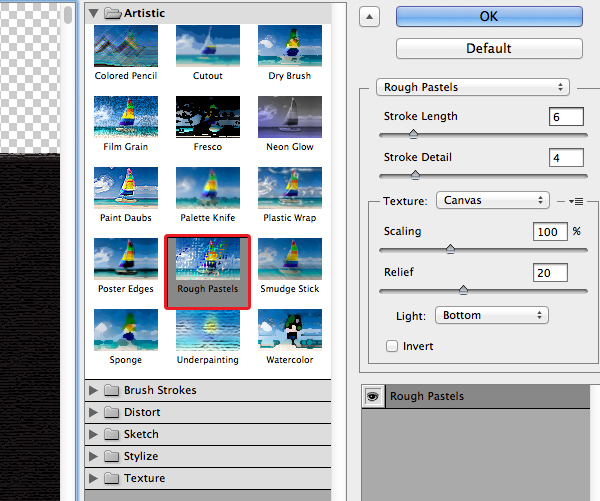
Grab the rectangle copy, place it in front, then go to Effect > Artistic > Rough Pastel and set the values like this.
With the new texture we have created, apply Soft light mode with Opacity = 30%. Then go to Effect > Stylize > Inner Glow and set the values as shown in this image.
Step 4
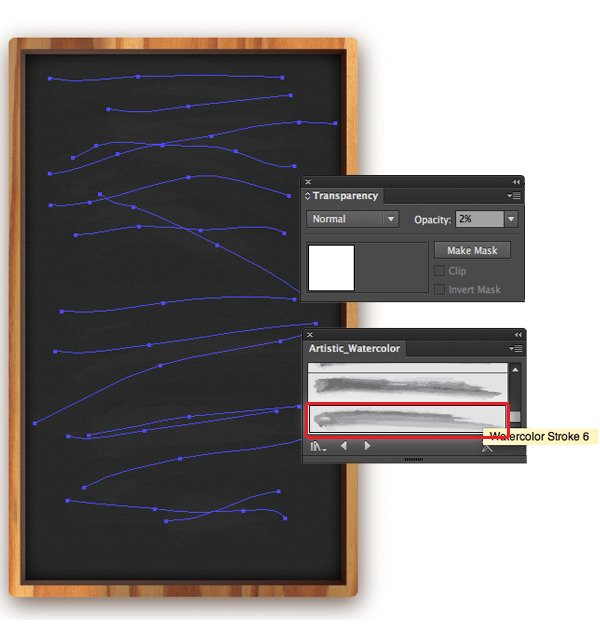
Select your Paintbrush tool (B) and draw some erratic overlapping paths on the chalkboard vector. Go to Open Brush Library > Artistic > Artistic_Watercolor and apply Watercolor Stroke 6.
Set the stroke brush = 1pt, then lower Opacity = 2%.
Step 5
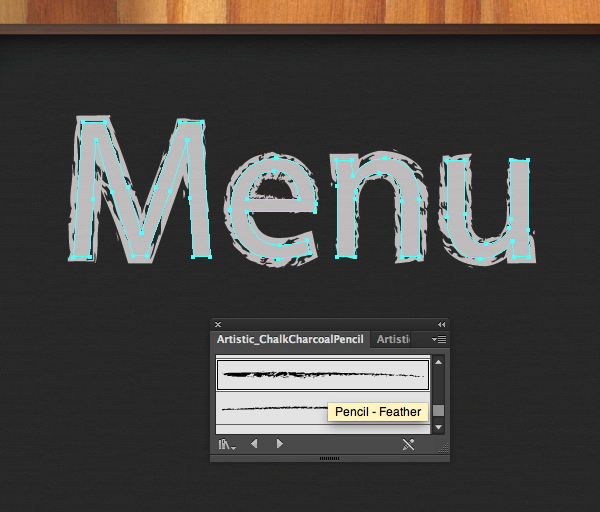
In this step, we will create the text. I used the font ” Myriad Pro “ for the ” Menu ” text. Fill it with color #FFFFFF. Set the stroke = 1pt.
Go to Open Brush Library > Artistic > Artistic_Chalkcharcoal Pencil and apply Pencil – Feather brush, and lower Opacity = 80% for the ” Menu “text.
Duplicate Ctrl/Cmd + C (Copy) the ” Menu “ text then Ctrl/Cmd + B (Paste in back). Fill the copy with black #000000.

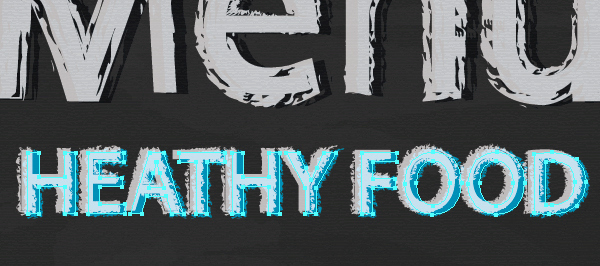
Repeat the previous step for our ” Healthy food “ text, but replace the brush stroke with Pencil brush.
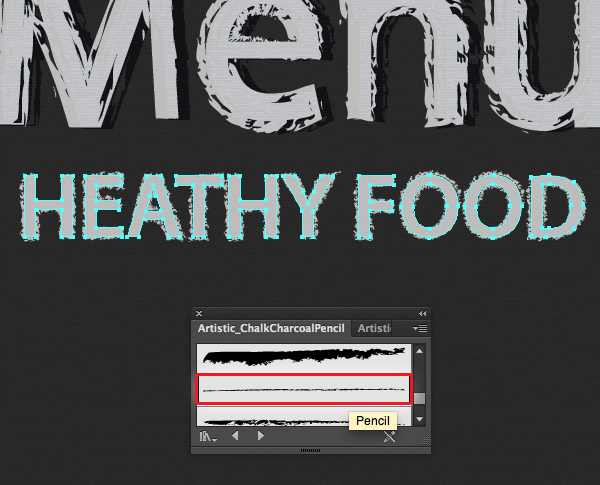
Duplicate Ctrl/Cmd + C (Copy) the ” Healthy food ” text then Ctrl/Cmd + B (Paste in back). Fill the copy with color #00ADEF.
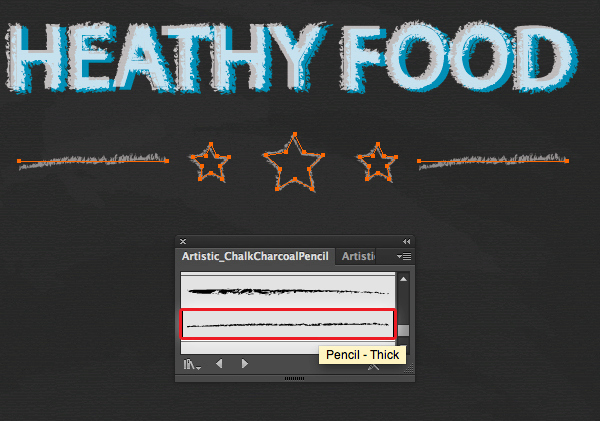
Grab the Star tool to create 3 stars and Pen Tool (P) to create the lines as in the image below.
Fill the stars and lines with no color, but use white #FFFFFF for the stroke. Apply the Pencil – Thick brush for the stars and the lines.
Step 6
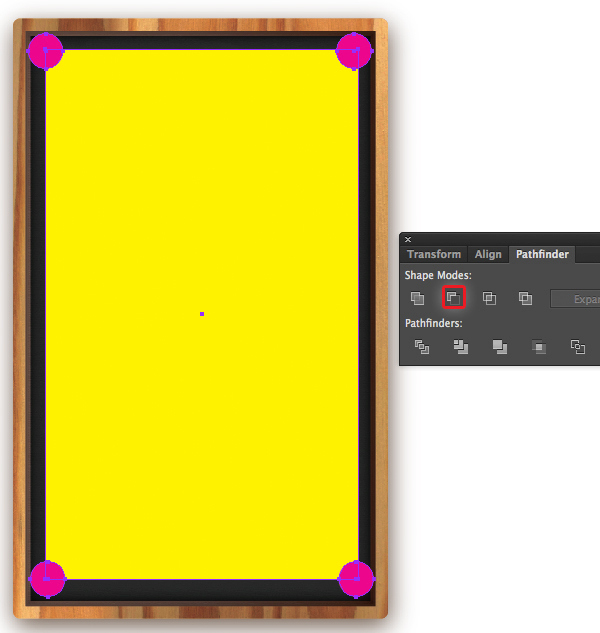
Pick the Rectangle tool (M) to create a rectangle, then use the Ellipse tool (L) to draw 4 circles and place them as in the image below.
Select the rectangle and 4 circles, then go to Windows > Pathfinder > Minus Front.
With the new shape that we have created, fill it with no color, but use white #FFFFFF for the stroke.
Apply the brush Pencil – Feather, with lower Opacity = 50%. Duplicate it then resize the copy shape a little smaller. Now you should get a result as in the image below.
Grab the Pen Tool (P) to create some lines as in the image below.
Fill it with white #FFFFFF. Apply the brush Pencil – Feather. Then duplicate the lines we have created and place them in every corner of the rectangle.
Step 7
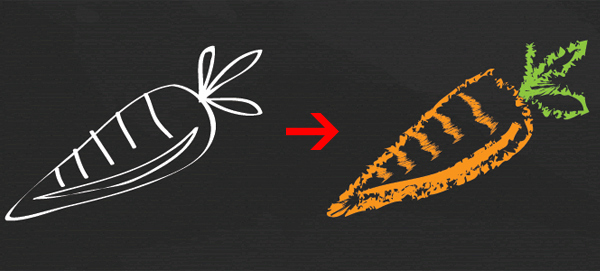
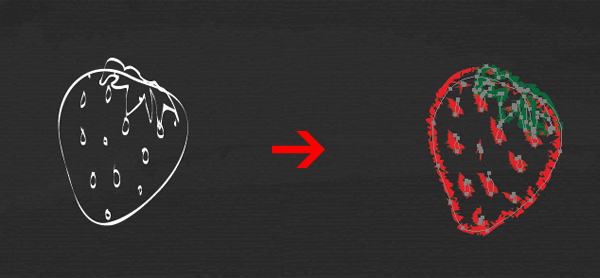
For this step, we’re going to create the fruits. It’s an easy step. Just grab the Brush Tool (B), feel free to draw them as you like. Here are my fruits below, I drew them in a simple way, and fill with no color, but color the stroke ( fill the stroke with any color you like).
Then apply the brush Pencil – Thickfor the strokes. Here is my result.
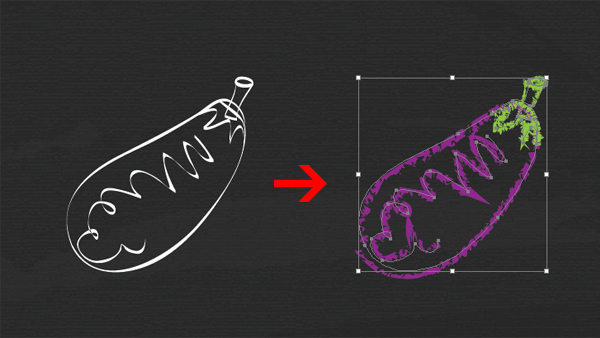
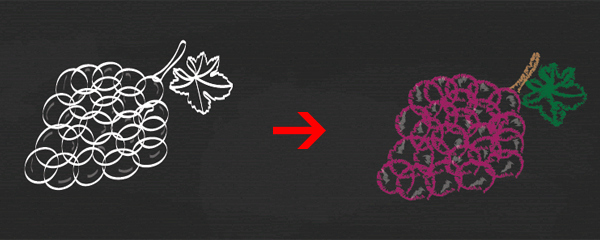
Repeat the previous step to create Eggplant…
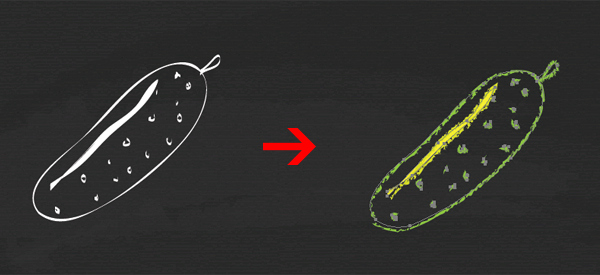
Using this technique feel free to create any fruits or vegetable you like. Here is my result…
Now you should end up with a result like this.
Step 7
We continue with the font ” Myriad Pro ” for the dots and ” $1.50 “ text.
Fill the text with no color, but use white #FFFFFF for the stroke, set the stroke = 0.25pt and apply brush Pencil for the stroke.
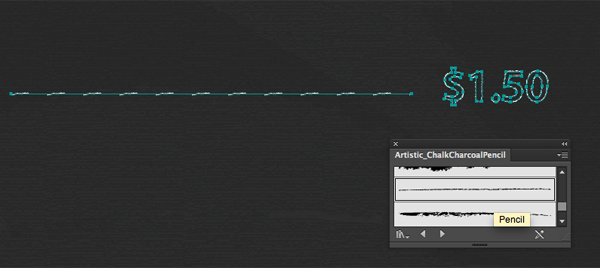
Repeat the previous steps, and we have a result as in the image below.
Step 8
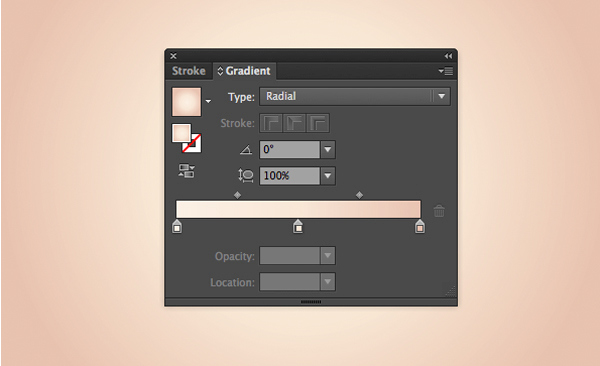
Pick the Rounded rectangle tool to create our chalk, then fill it with this gradient.

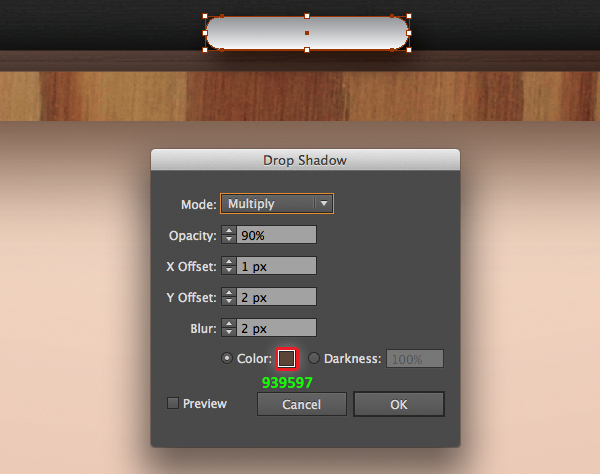
With the chalk still selected, go to Effect > Stylize > Drop shadow and set the values.
Step 9
We will now set a background for our final design. Grab the Rectangle Tool (M) from the Tools Panel and click somewhere on the Artboard. The Rectangle Options box will pop up. Set the dimensions to 600 x 600pixels.
In the Swatches palette, go to Open Swatches Library > Gradients > Skintones. We select Skintone 11 for the background.
And We’re Done!
Here is how it should look. I hope you’ve enjoyed this tutorial and can apply these techniques in your future projects.
