In this new tutorial you will learn how to create a cartoonish games text effect in Adobe Illustrator.
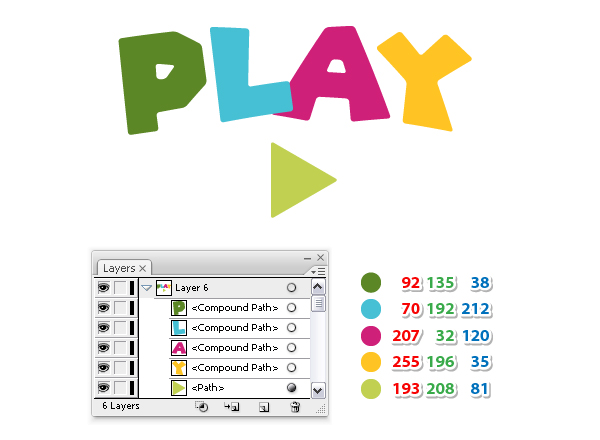
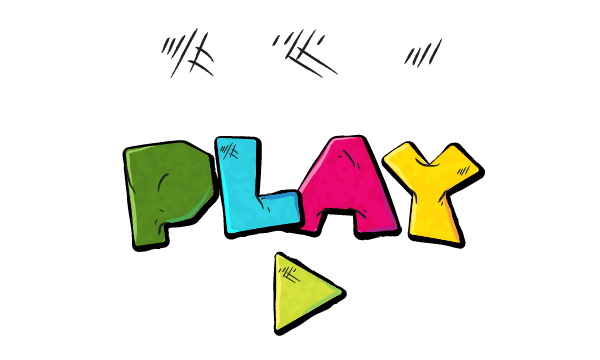
Final Image
As always, this is the final image that we’ll be creating:

Tutorial Details
- Program: Adobe Illustrator CS3+
- Estimated Completion Time: 1 hour
- Difficulty: Beginner-Intermediate
Resources
Step 1
Launch Illustrator and go to File > New to open a blank document. Type a name and set up the dimensions then select Pixels as Units and RGB as Color Mode. Next, go to Edit > Preferences > General and set the Keyboard Increment to 1px and while there, go to Units & Display Performance to make sure that the Units are as indicated. I usually work with these settings and they will help you throughout the drawing process.

Step 2
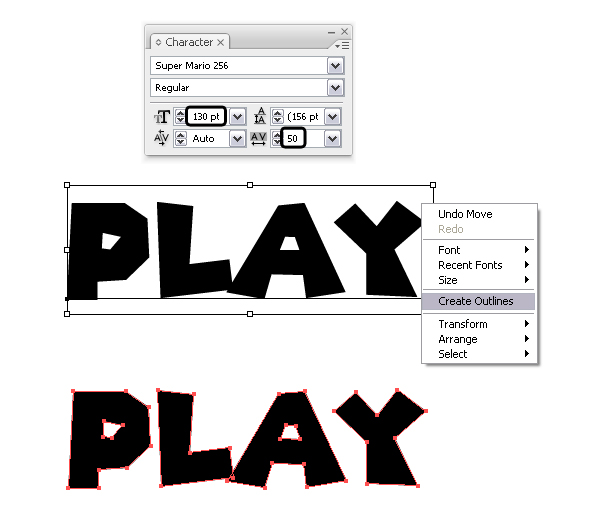
Let’s start with the letters. Grab the Type Tool (T) and type “PLAY” using the Super Mario 256 font and the settings shown. After that, select Create Outlines in order to expand the text. Do not Ungroup (Shift-Control-G) yet.
Step 3
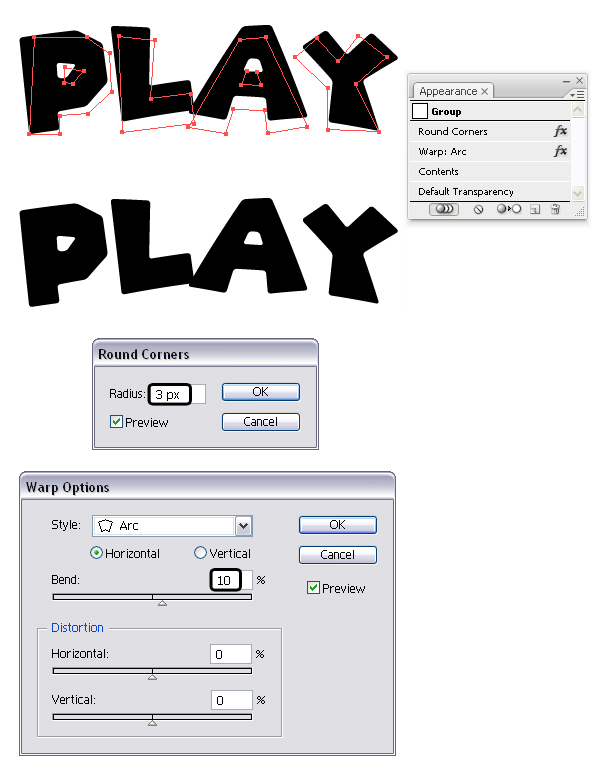
While the group of letters is selected, go to Effect > Stylize > Round Corners and apply a 3px Radius then go to Effect > Warp > Arc and apply a 10% Horizontal Bend.
Step 4
Still having the group of letters selected, choose Expand Appearance from the Object menu then Ungroup (Shift-Control-G) twice. Now that you have the individual letters, select and move the letter “A” closer to the letter “L” until they overlap a little. Also, move the letter “Y” closer to “A” if the space between them is too big.
Step 5
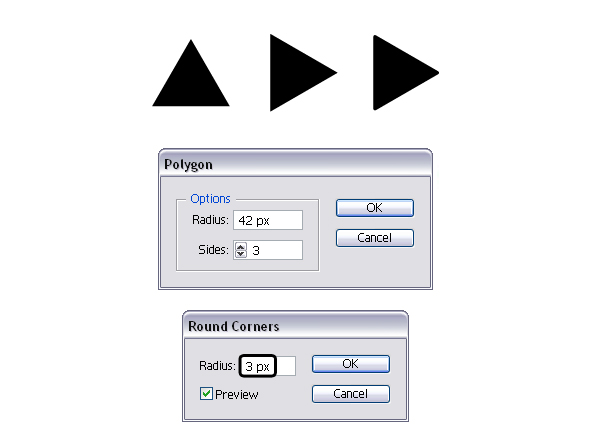
Let’s continue with the Play symbol. Grab the Polygon Tool and use the settings shown to draw a small triangle. Rotate it -90 degrees then go to Effect > Stylize > Round Corners and apply a 3px Radius. After that, select Expand Appearance and Ungroup (Shift-Control-G).
Step 6
Arrange the Play symbol under your letters and now you text is ready to be colored. Before you continue, make sure that your letters are not grouped.
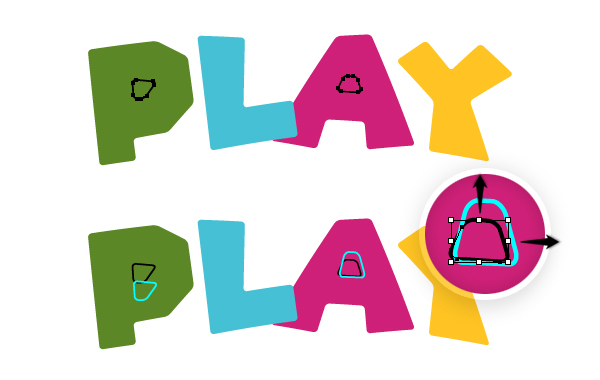
Step 7
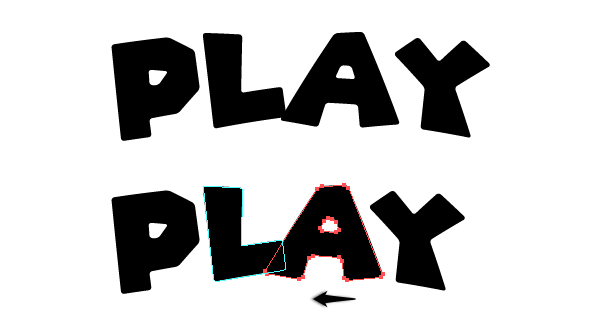
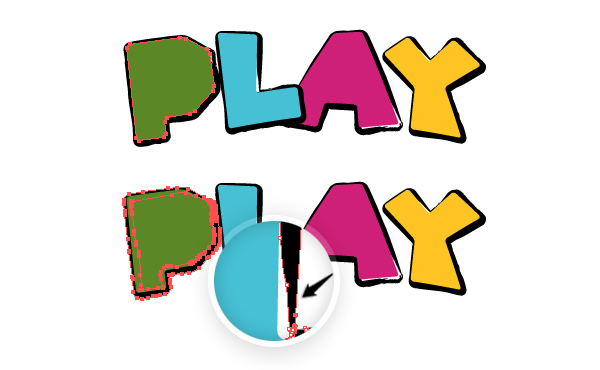
Select only the letters “P” and “A” and go to Object > Compound Path > Release. As a result you will get the two smaller shapes from the center of the letters. For the letter “P”, move the smaller shape lower and for the letter “A” make the shape slightly bigger by dragging the bounding box up and to the right with the Selection Tool (V). As a reference, in the image below the original shapes and black and the new ones are blue.
Let’s name these two shapes “insideP” and “insideA”. You won’t need them until later in the tutorial so it’s best to hide them until then.
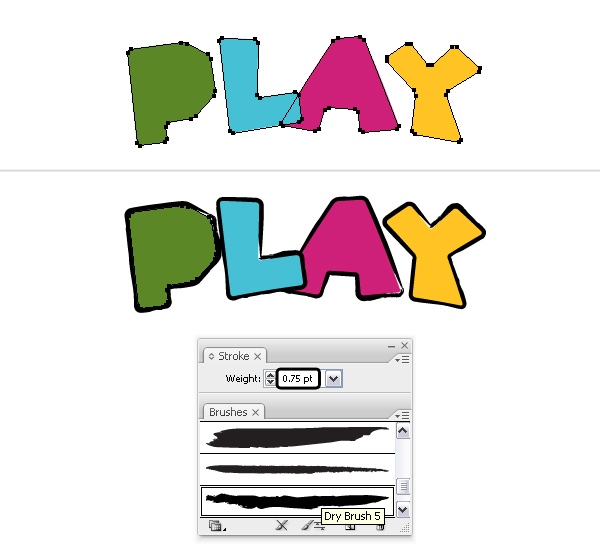
Step 8
Select then Copy and Paste in Back (Control-B) the four original letters and let’s name the new copies “Pstroke”, “Lstroke”, “Astroke” and “Ystroke”. Go to Brush Libraries Menu > Artistic > Artistic_Paintbrush > Dry Brush 5 and use this Art Brush to stroke these copies then set the Weight at 0.75 pt.
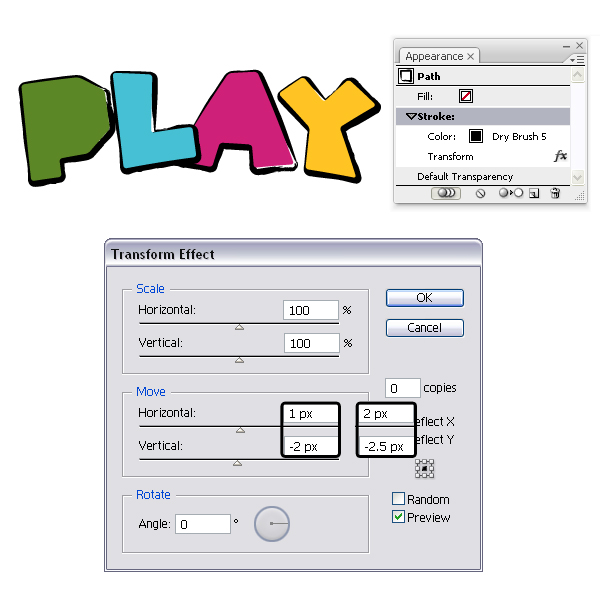
Step 9
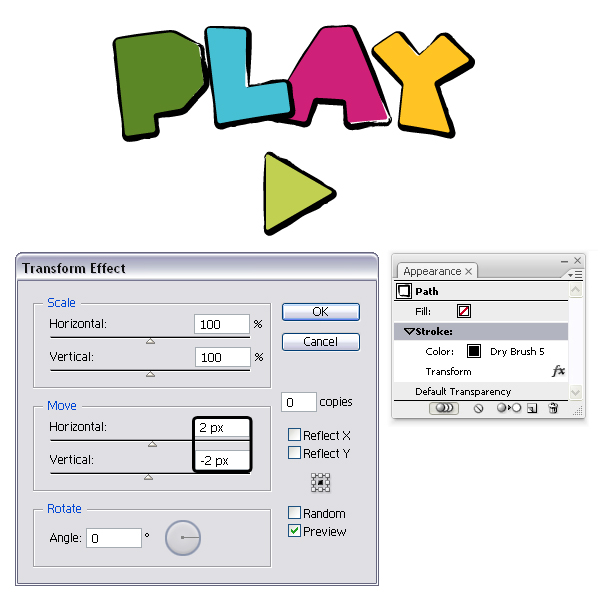
While “Pstroke”, “Lstroke”, “Astroke” are selected, go to Effect > Distort & Transform > Transform and in the Move field select 1px Horizontal and -2px Vertical then hit OK. For “Ystroke” select 2px Horizontal and -2.5px Vertical and hit OK. As a result of the Transform effect, the brush stroke will appear thicker in the bottom right side of the letters.
Step 10
Now, focus on the triangle and repeat the previous two steps. Make a copy in back “trianglestroke” then use Dry Brush 5 to stroke this copy and apply the Transform effect with the settings 2px Horizontal and -2px Vertical.
Step 11
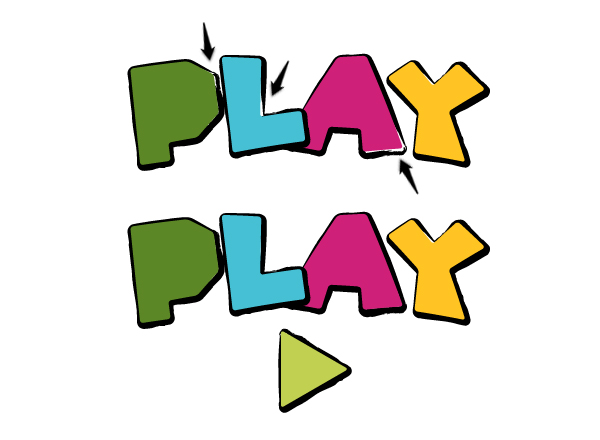
At this point you might see some empty space between the brush stroke and the letters and we will fix that now. If it doesn’t bother you then you can skip this part. You can also see the final result in the next image.
Step 12
Select “Pstroke”, “Lstroke”, “Astroke”, “Ystroke”, “trianglestroke” and choose Expand Appearance from the Object menu. As a result each brush stroke will turn into a shape filled with black. Now, you can grab the Direct Selection Tool (A), zoom as much as you need then select and move some of the anchor points closer to the edge of the letter to cover the empty space.
Step 13
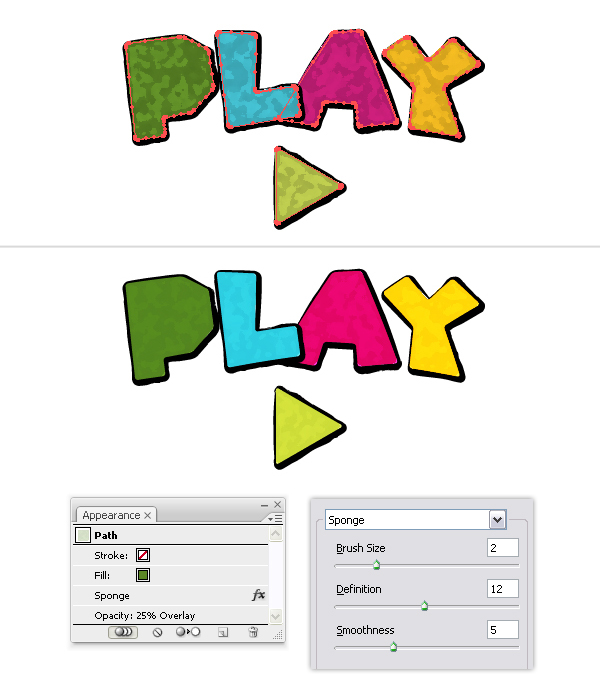
Now, select the original letters along with the triangle then Copy and Paste in Front (Control-F). I will name these copies “Pfront”, “Lfront”, “Afront”, “Yfront” and “trianglefront”. Having the five copies selected, go to Effect >Artistic > Sponge and apply the settings shown. Set the Blending Mode for all of them to Overlay but the Opacity for “Pfront” to 25%, for “Lfront” and “trianglefront” to 65%, for “Afront” and “Yfront” to 100% because the result depends on the colors.
Step 14
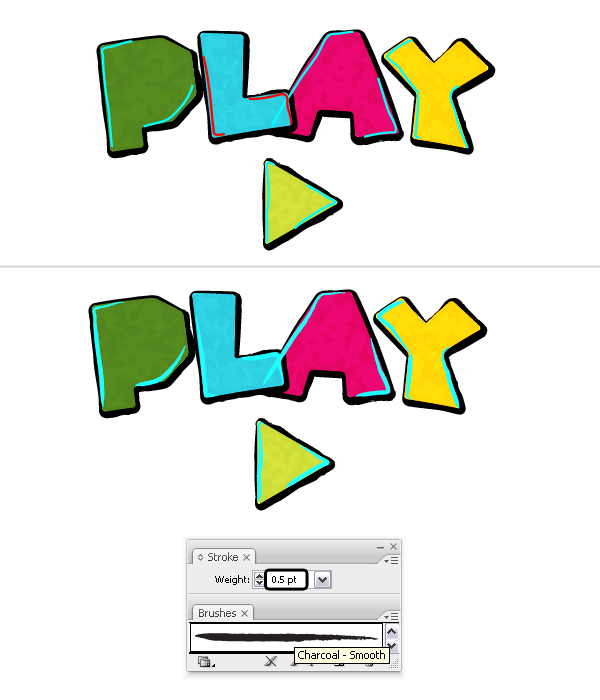
Next, grab the Pen Tool (P) or the Pencil Tool (N) and draw two paths on each letter including the triangle in the left and bottom-right side. Stroke all these paths with an Art Brush called Charcoal-Smooth that you can find in Brush Libraries Menu > Artistic > Artistic_ChalkCharcoalPencil. Set the Stroke Weight at 0.5 pt.
Step 15
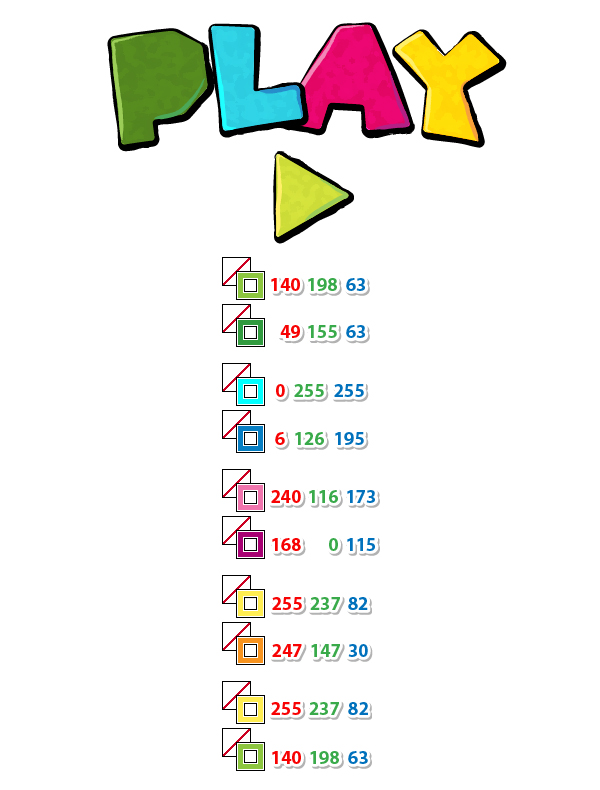
Since by default the Colorization Method of the Charcoal-Smooth Art Brush is set to Tints, if you change the stroke color the brush will pick up that specific color as well. Therefore, for each letter I’ve selected a lighter and a darker shade as the stroke colors. For the paths on the left side select the lighter shades as the stroke colors and this will act as the highlight. For the paths on the bottom-right side of the letters select the darker shades and this will act as the shading.
Step 16
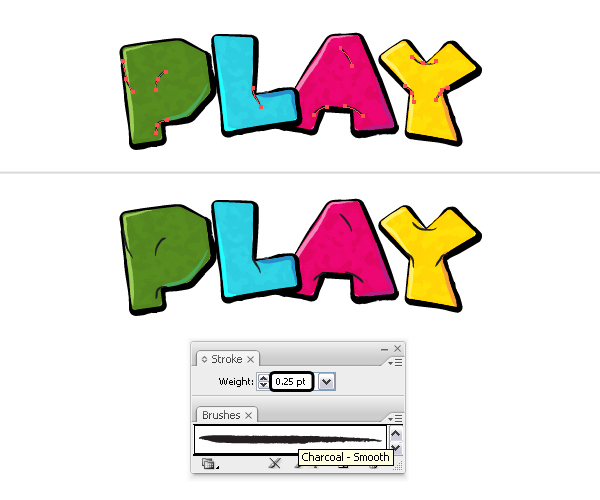
Next we will work on the details. Grab again the Pen Tool (P) or the Pencil Tool (N) and draw some short paths as in the following image. Stroke them all with the Charcoal-Smooth Art Brush, stroke color set to black and the Stroke Weight set to 0.25 pt.
Step 17
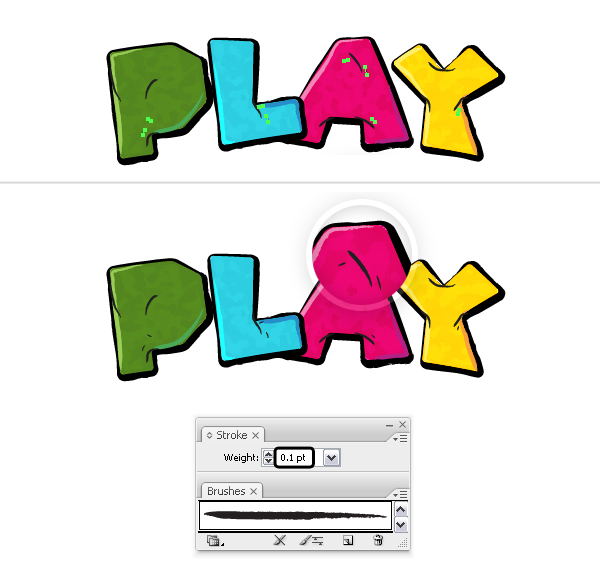
Still using the Pencil Tool (N) draw a few very short paths next to the ones added at the previous step. Use again the Charcoal-Smooth Art Brush to stroke them all and set the Stroke Weight at 0.1 pt this time.
Step 18
Still using the same Art Brush and settings draw some hatchings as in the next image with the Pencil Tool (N) or the Paintbrush Tool (B). When you are done, arrange them over the letters as you desire.
Step 19
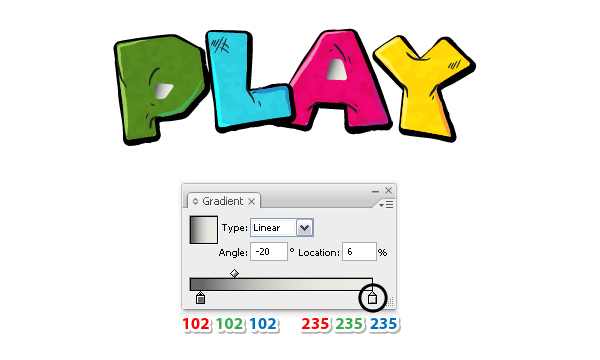
Next, unhide “insideP” and “insideA” and bring them in front of everything by going to Object > Arrange > Bring to Front (Shift-Control-]). Fill the two shapes with the linear gradient shown at a -20 degrees Angle.
In this case the background for the text effect is light gray so the second color of the gradient is light gray but if you choose a different color for your background then replace the light gray in this gradient with the color that you have chosen.
Step 20
Copy and Paste in Back (Control-B) “insideP” and “insideA” and first delete the existing gradient fill. Stroke the two new copies with Dry Brush 5, set the color to black and the Stroke Weight at 0.75 pt. Next go to Effect > Distort & Transform > Transform, apply the settings shown below and hit OK.

Step 21
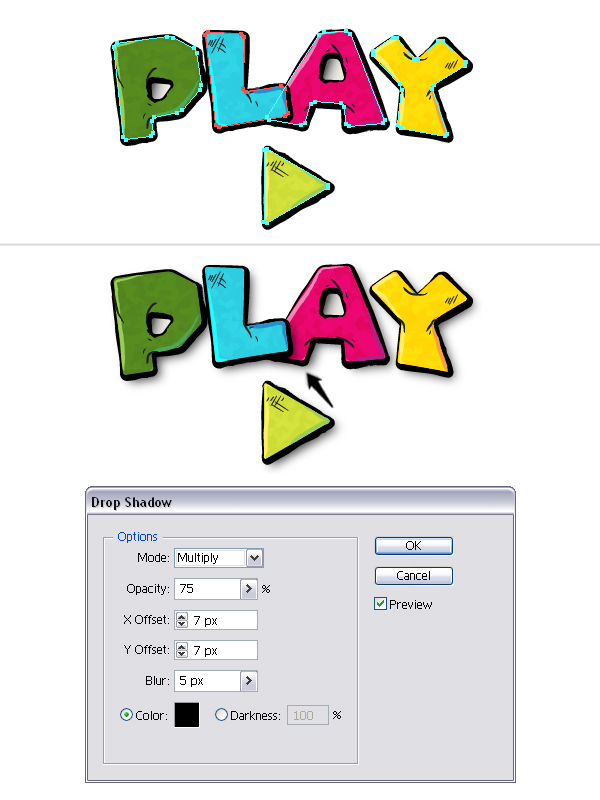
The final step is to add the shadow. Select all the original letters along with the triangle (step 6) then Copy and Paste in Back (Control-B). Make sure that these copies are behind everything by going to Object > Arrange > Send to Back (Shift-Control-[). Whilst they are still selected, go to Effect > Stylize > Drop Shadow and apply the settings from the next image. Move the shadow for the letter “L” in front of the letter “A” otherwise you won’t be able to see the shadow in the area where the two letters overlap.
Awesome work!
Here is the final image of the cartoonish games text effect. I hope you enjoyed this tutorial and that you learned new things today.
