Would you like to create a typical pen? If yes then let’s get started and you will undoubtedly learn the excellent Illustrator tools to create your own impressive and stunning artwork! You will work with Meshes, Gradients, Brushes. Open the Illustrator program, create a new document and let’s begin.
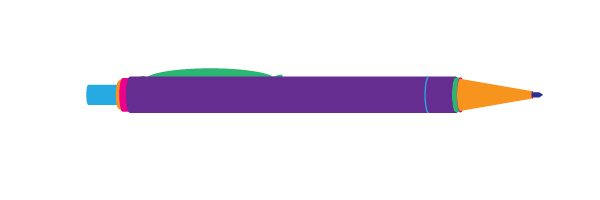
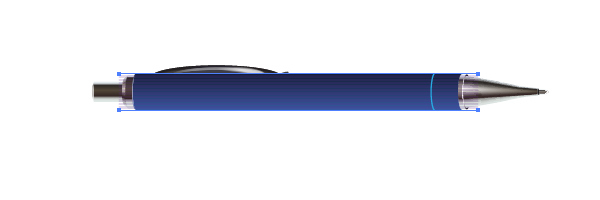
Final Image

Tutorial Details:
- Program: Adobe Illustrator CS3 – CS6
- Difficulty: Intermediate
- Estimated Completion Time: 2 hours
Step 1
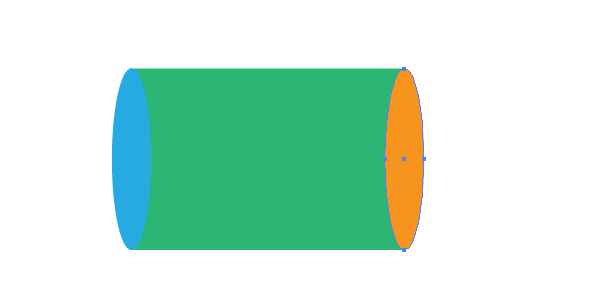
To begin you need to create the main geometry sketch of the pen which is shown in the diagram below.
This sketch is flat because it has no light distribution, but you should create it so you can plan the final image. Creating a pen in the horizontal position first is the most effective way of creating the sketch. Take the Rectangle Tool (M) and draw a path which will represent the left end of the pen. It has a usual rectangular shape. Change the Stroke to None, and the fill color to green.

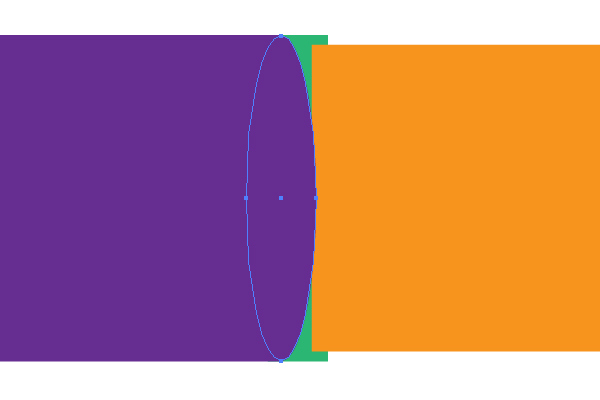
Grab the Ellipse Tool (L) and illustrate an elliptical path as shown in the image below.

Step 2
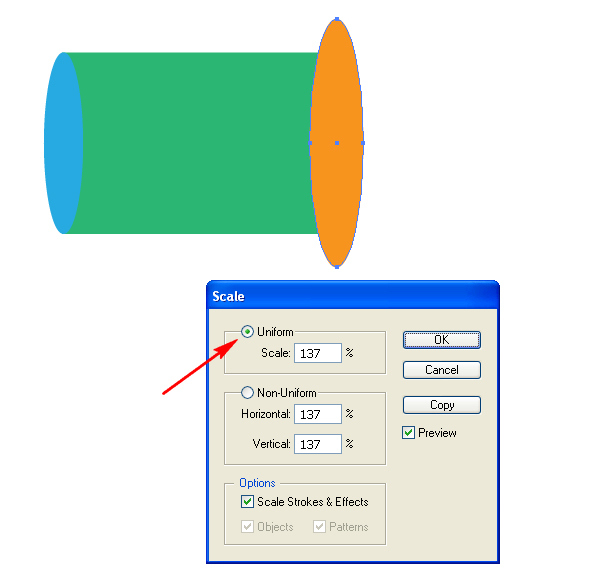
Copy the blue ellipse and Paste it in Front (Command + C then Command + F). Change the color of the copy to orange. Move it to the right end of the rectangle. See the helpful image below.
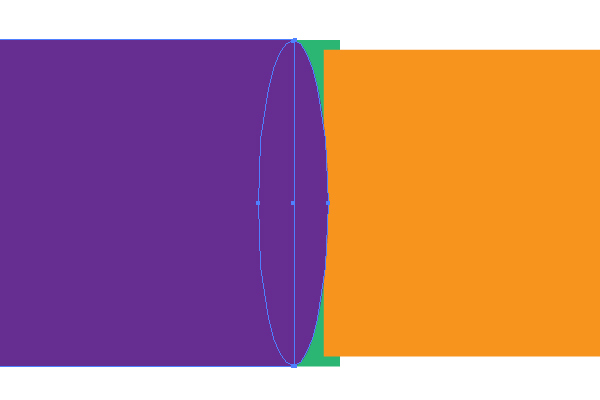
Go to Object > Transform > Scale and increase the ellipse. Be aware that you need to use the Uniform scaling in order to avoid problems with the perspective and the geometry of the image.
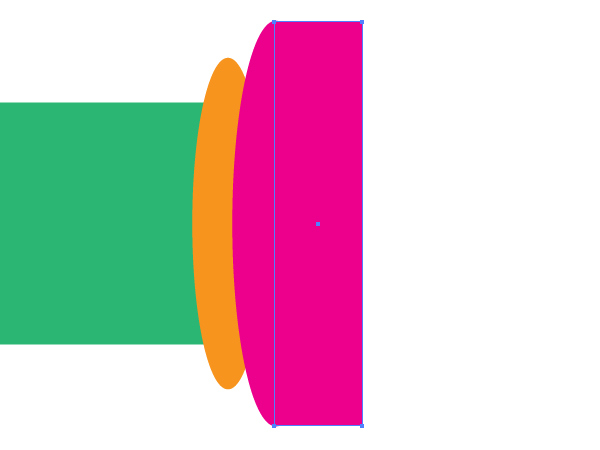
Step 3
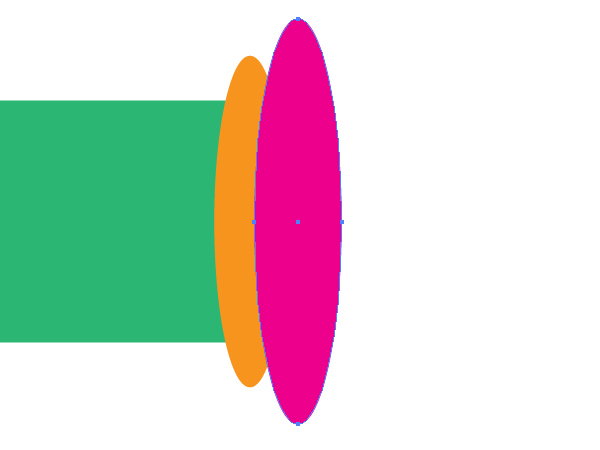
Create the next ellipse the same way. Change the fill color and move it somewhat to the right. See the image below for reference.
Take the Rectangle Tool (M) and draw a vertical path as shown below.
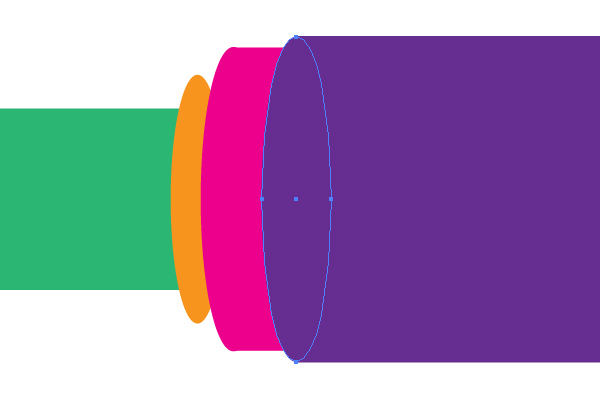
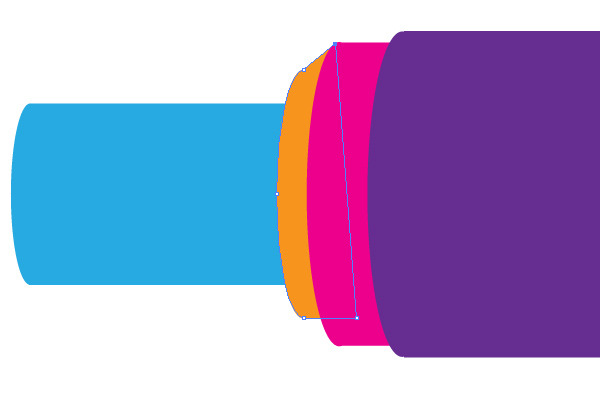
Step 4
Draw the main violet part of the pen using the same tool,…

…and draw an ellipse on the left side of it as you did before.
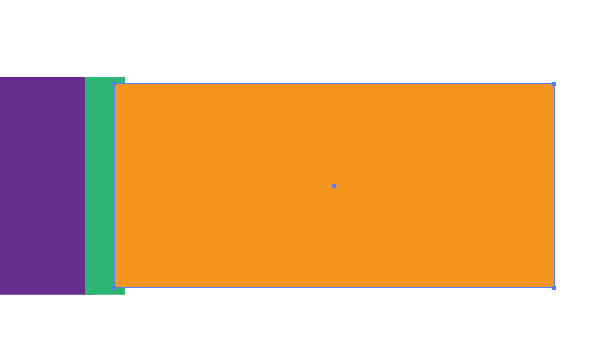
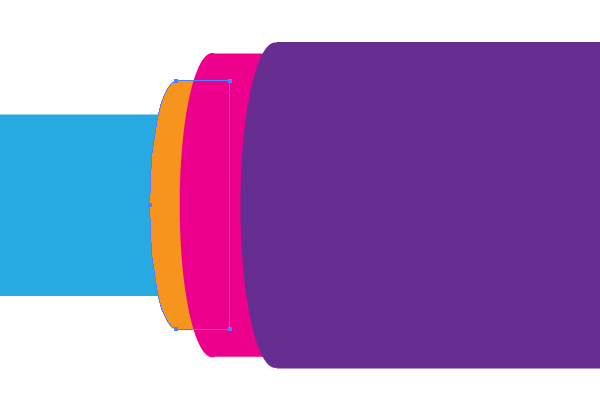
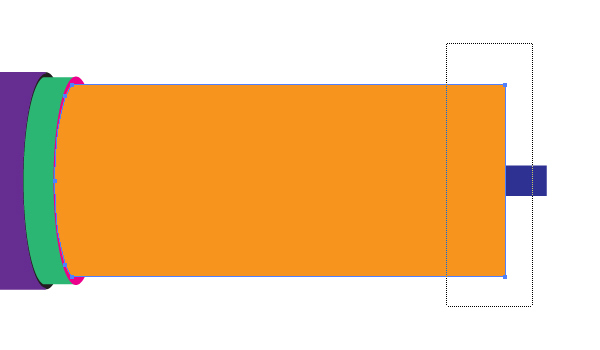
Step 5
The right side of the main violet path should be continued with the next rectangles shown in the images below. Make them yourself, following the helpful diagrams shown.


After these manipulations you should have the following result.

Step 6
Select both leftmost parts of the pen,…

…take the Shape Builder Tool (Shift + M), and drag the horizontal line through them as shown below.
Or go to the Pathfinder palette and click the Unite button.
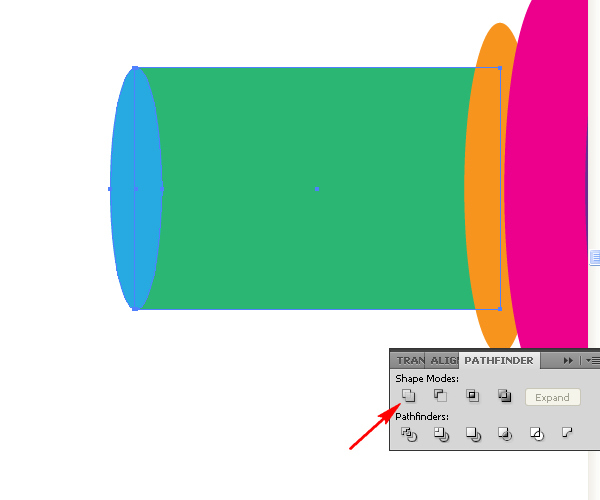
Using either method you should have the following result.

Step 7
Do the same with the following two selected and shown paths.
Step 8
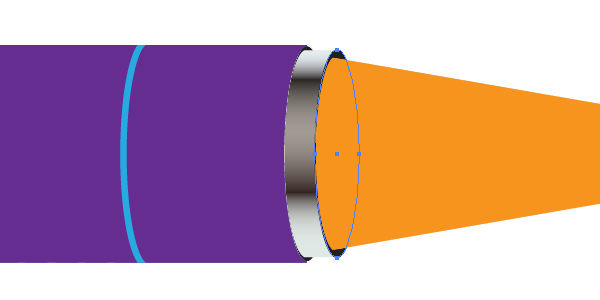
In order to form the main violet part of the pen, first, select the ellipse at the left side of it, Copy it and Paste in Front (Command + C then Command + F).
Then move the copy to the right side of the main violet path as you can see in the image below.
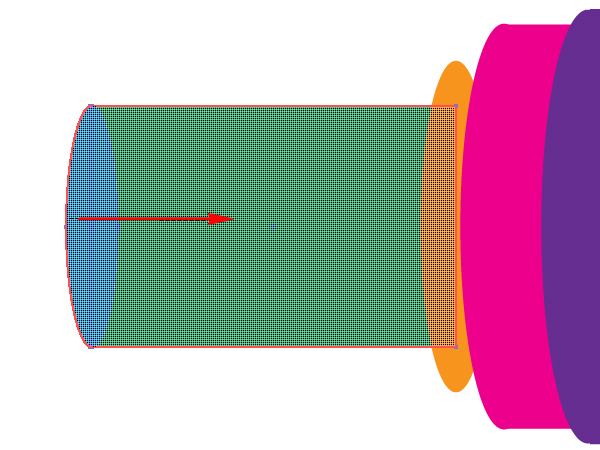
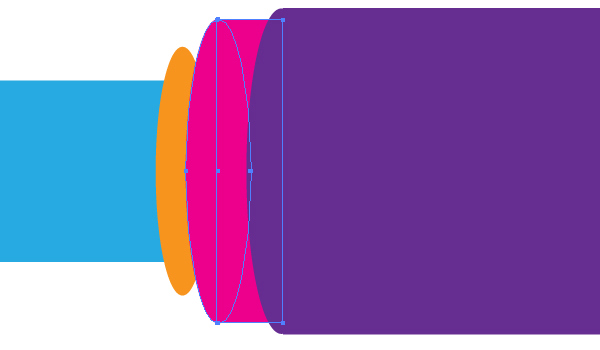
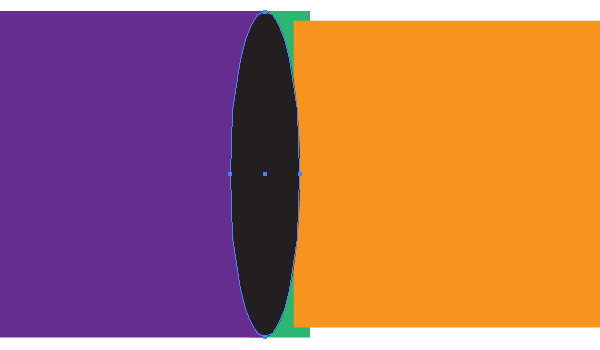
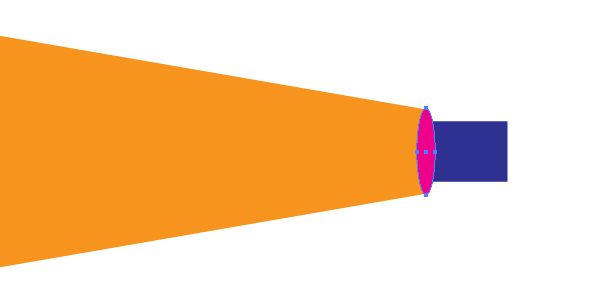
Step 9
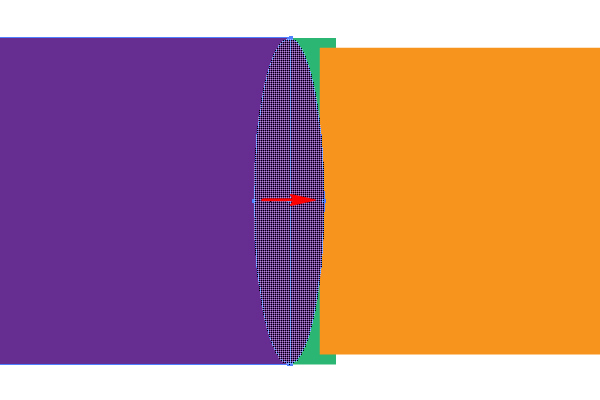
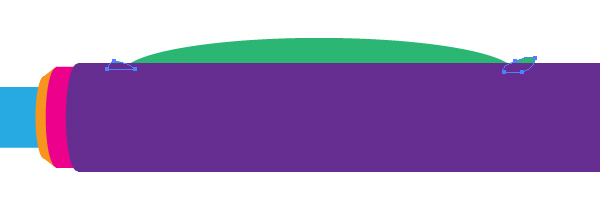
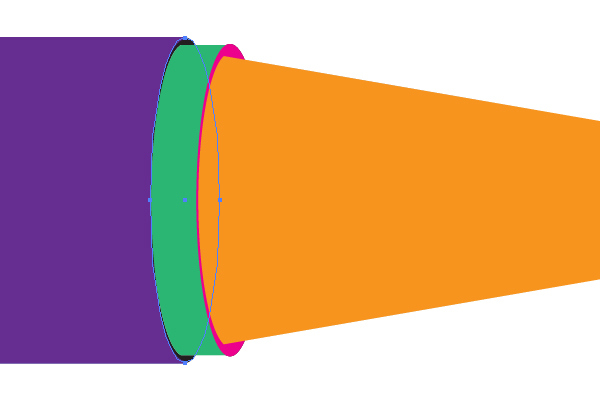
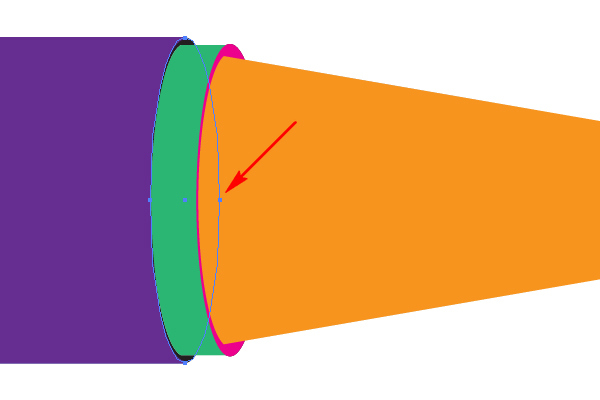
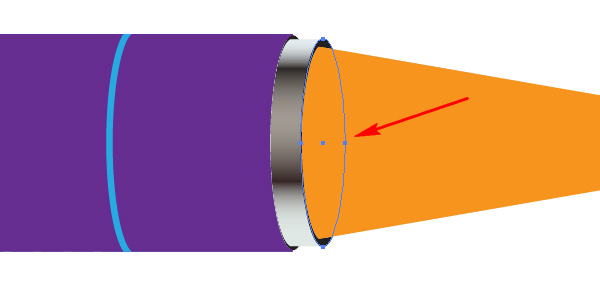
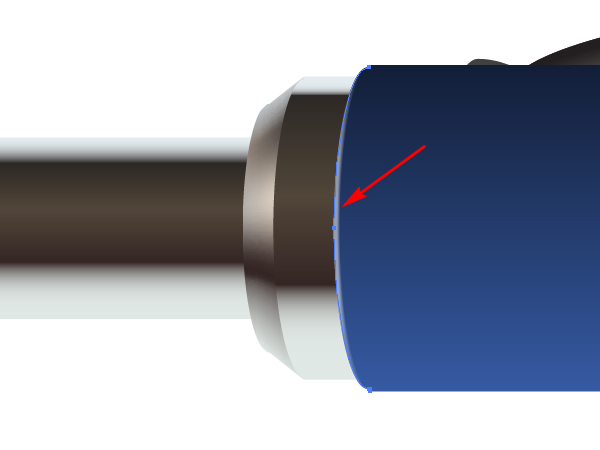
Select both: the right ellipse and the main violet path,…
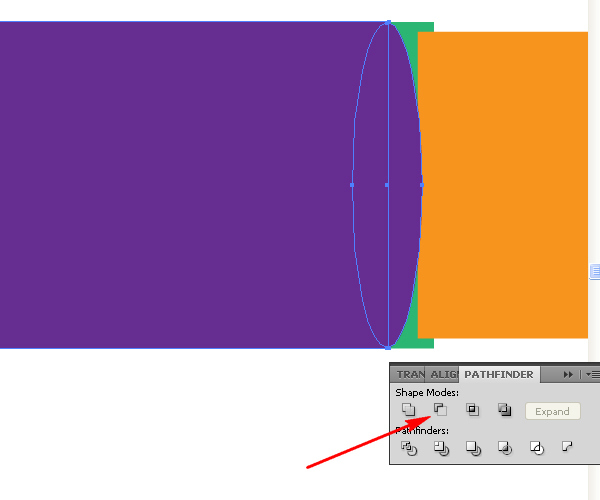
Then grab the Shape Builder Tool (Shift + M), drag the horizontal line over the right ellipse (indicated by a red arrow in the diagram below) while holding the Alt key down on your keyboard.
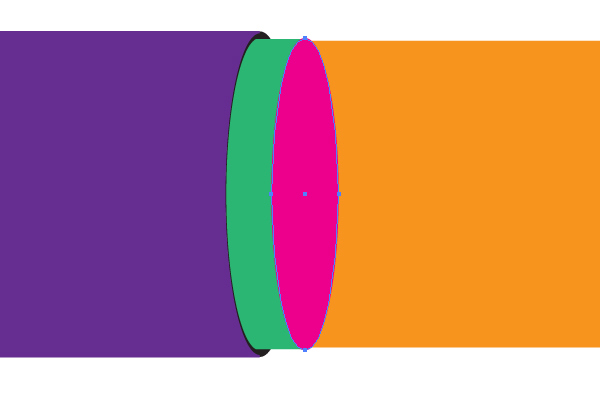
Or use the Pathfinder palette for this. Click the Minus Front button.
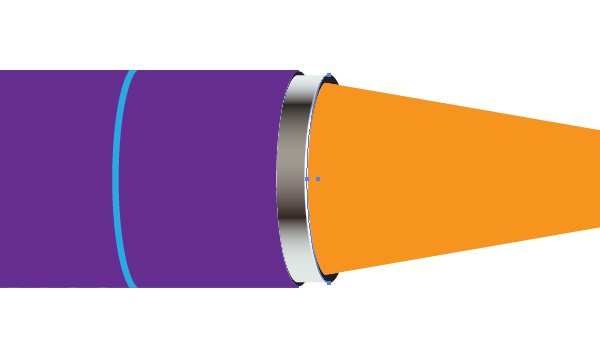
You need to achieve the following result.

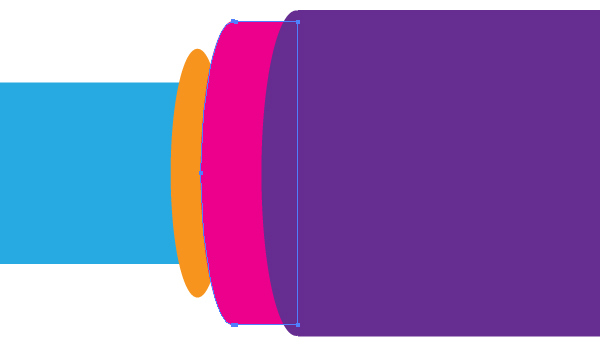
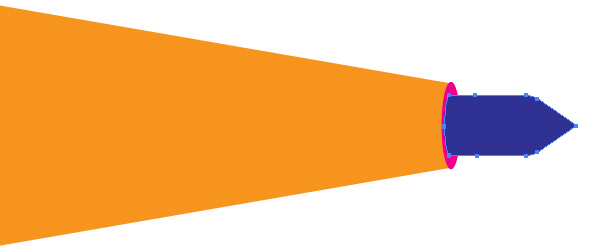
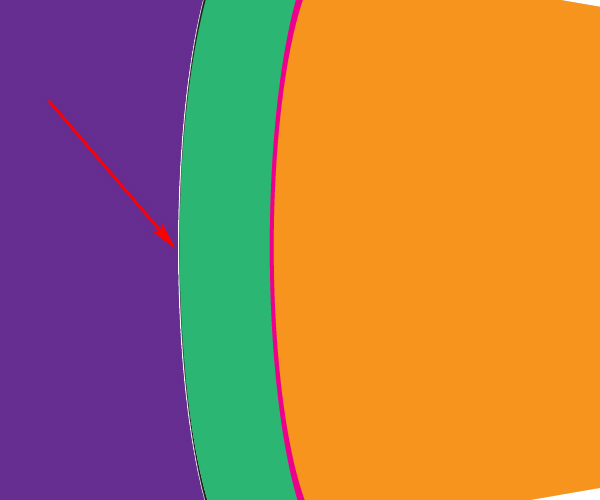
Step 10
Unite the left-side ellipse with the violet path.
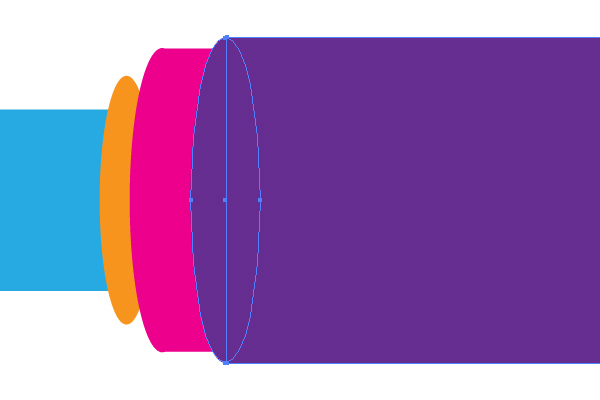

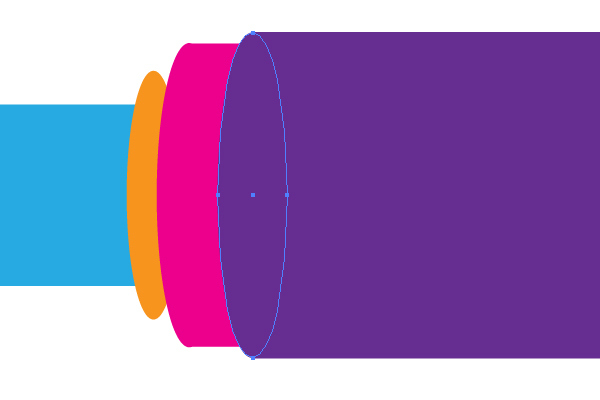
Step 11
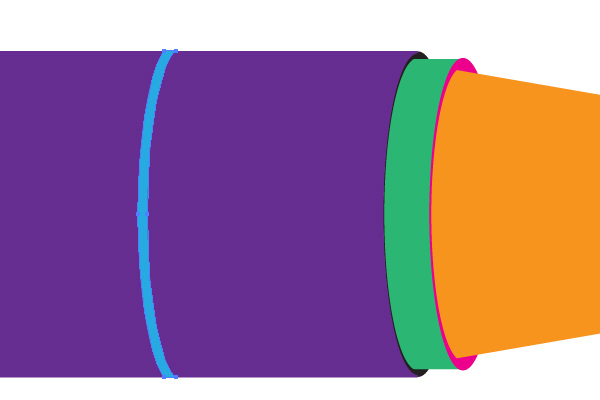
Select the orange ellipse at the left side of the pen, Copy it and Paste in Front (Command + C then Command + F).
Go to Effect > Convert to Shape > Rectangle, and set both Relative options to 0. Remember that are working with the copy of the ellipse!
Go to Object > Expand Appearance. Do not deselect the resulting rectangle!
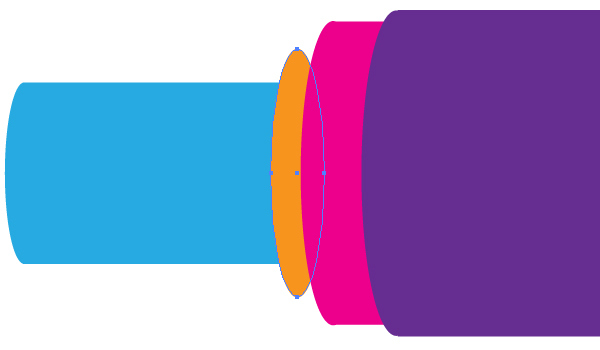
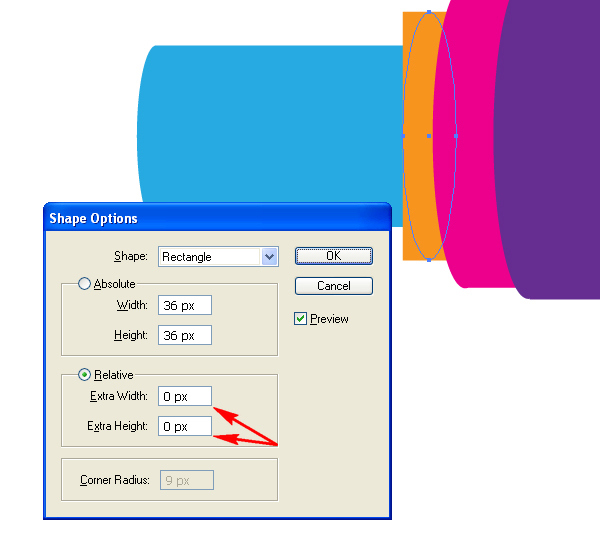
Step 12
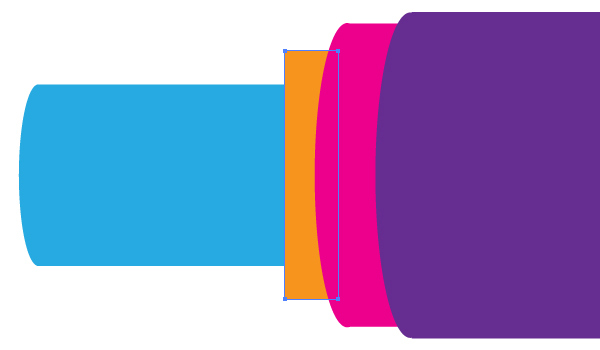
Open the Transform panel, select the W value with your mouse (17.81 pixels in my artwork; your value may be different), copy it by pressing Command + C keys on your keyboard.
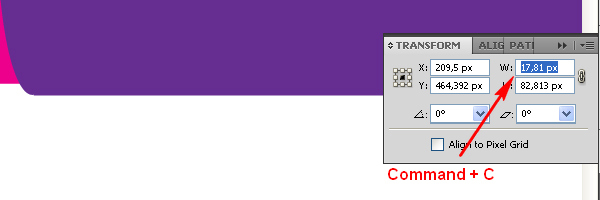
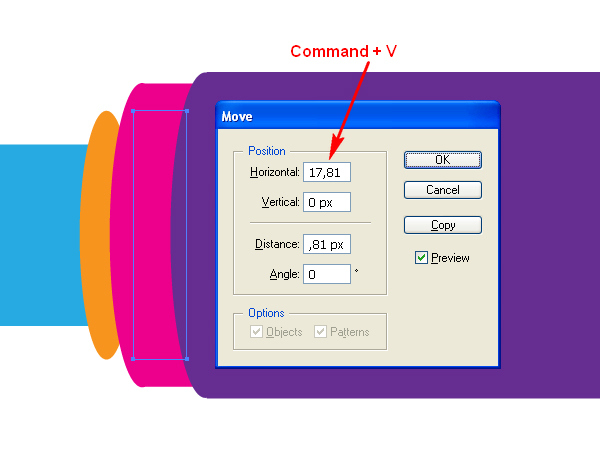
Go to Object > Transform > Move, paste the copied value into the Horizontal Position of the dialog window by pressing the Command + V keys on your keyboard. Do not click the OK button!
Step 13
When the Horizontal Position in the dialog window is active, press the End button on your keyboard and divide the value by 2 by pressing the corresponding buttons on your keyboard. See the image below for reference.
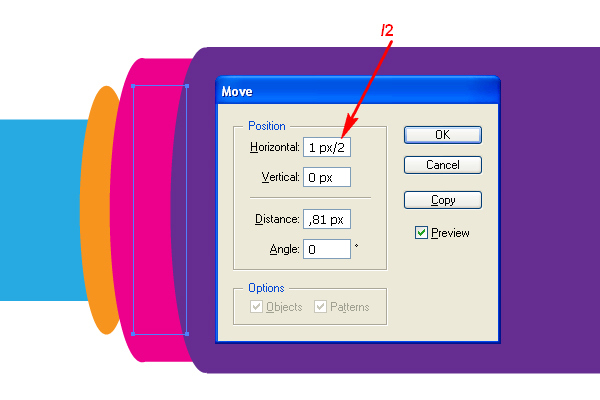
Click the OK button now and see the necessary result. Do you understand the mathematics? It is simple.
Step 14
Now unite both orange paths.

Step 15
Select one anchor point of the orange path with the help of the Direct Selection Tool (A), and move it as shown.
Another anchor point should be moved in the same way.

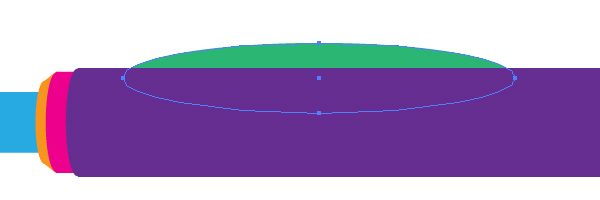
Step 16
Illustrate the black ellipse at the right side of the main violet part of the pen.
Then change the green path as you did before. Do it without assistance because up to this point in the tutorial you already know how to achieve this.

Create another ellipse as shown below.
Change the orange shape the same way as well.

Step 17
Take the Direct Selection Tool (A) and select the rightmost anchor points of the orange path.
Go to Object > Transform > Scale and set the value as you can see it in the image below in order to decrease the space between the anchor points.

Illustrate another ellipse.
And change the shape of the right end of the pen.
Step 18
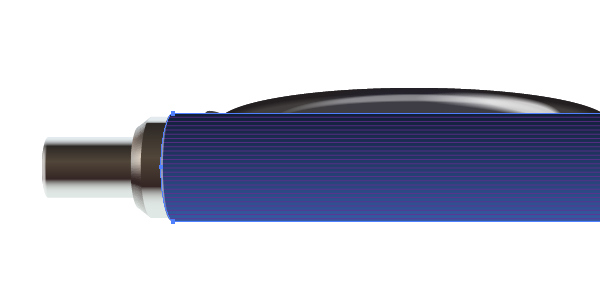
The holder of the pen is created using the Ellipse Tool (L) too,…
…and the Pen Tool (P).
Step 19
Illustrate the ring over the pen as well. See the image below for reference.
Step 20
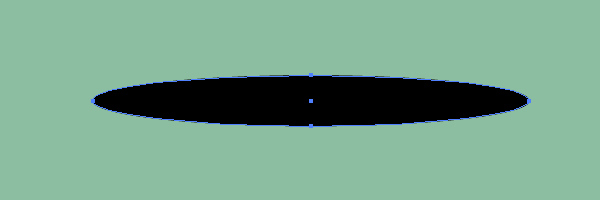
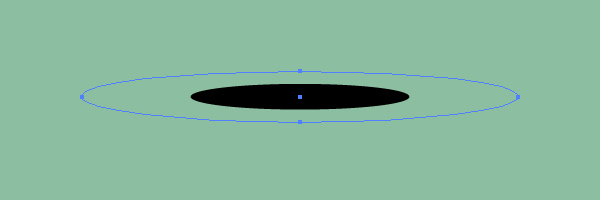
We are going to create an Art Brush to help with the shading of the finalized image. Using the Ellipse Tool (L), draw an elongated elliptical path filled with black.
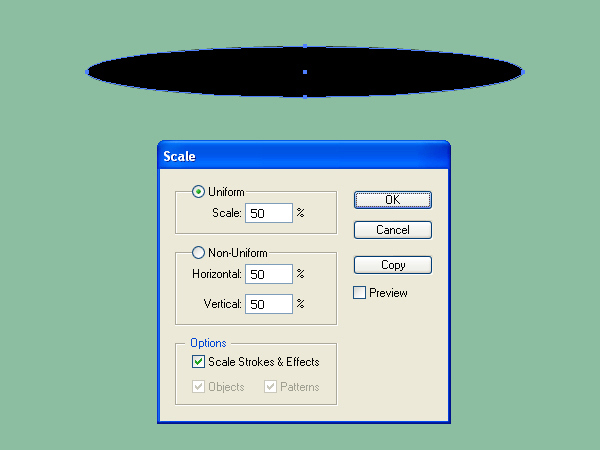
Copy it and Paste in Front (Command + C then Command + F). Go to Object > Transform > Scale and decrease the ellipse copy to half its size. In other words, set the percentage to 50%.
Change the Opacity of the biggest ellipse to 0.
Go to Object > Blend > Blend Options and set the values in the dialog box to about 75 Specified Steps.
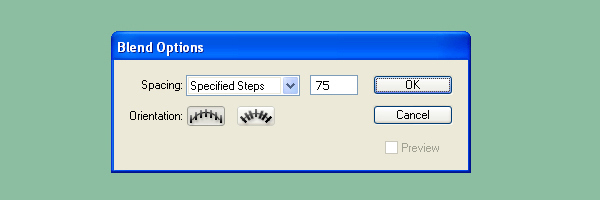
Select both ellipses and go to Object > Blend > Make (Command + Alt + B).

Step 21
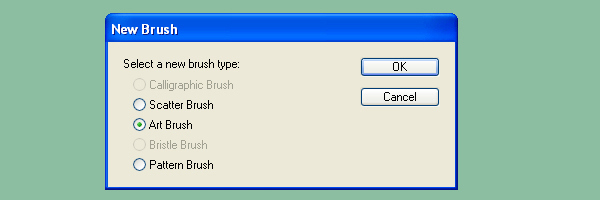
Drag and drop this blend into the Brushes panel, and choose the Art Brush option in the opened dialog box.
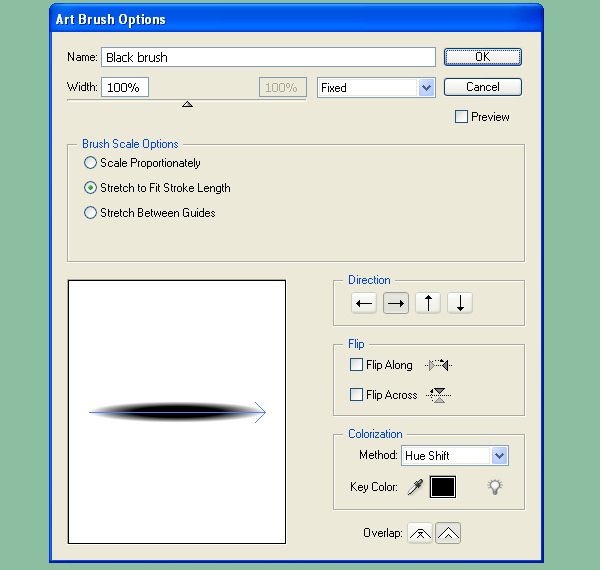
Specify the options for the brush in the second dialog box. Name this brush “Black brush.” Change the Colorization Method to Hue Shift in order to manage colors further in the tutorial more effectively.
Step 22
Select the black ellipse, Copy it and Paste in Front (Command + C then Command + F). Change the fill color to None.
Take the Scissors Tool (C), and click on the indicated anchor point with it.
Then apply the “Black brush” to the path, change the Stroke color to white, and decrease the Stroke Weight in order to get the following result.
Fill the green path with a vertical gradient.
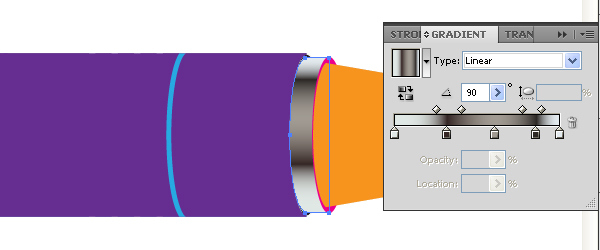
Step 23
The crimson path should be filled with black.
Copy this path, and Paste it in Front (Command + C then Command + F). Change the fill color to None. Select the indicated anchor point with the Direct Selection Tool (A).
Press the Delete button on your keyboard. And apply the “Black brush” to the path. Change the Stroke color to white. Decrease the Stroke Weight.
Step 24
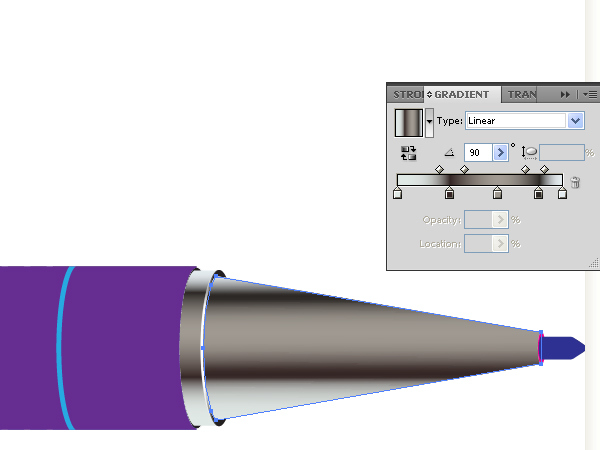
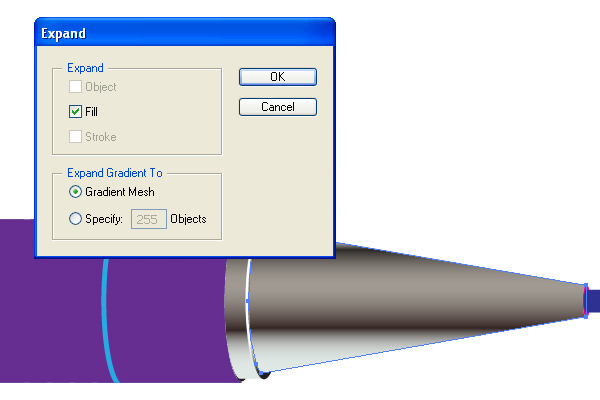
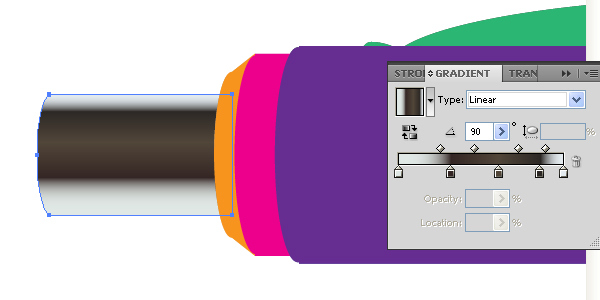
Select the orange path and fill it with a vertical gradient as shown.
After that go to Object > Expand and expand the gradient fill to gradient mesh.
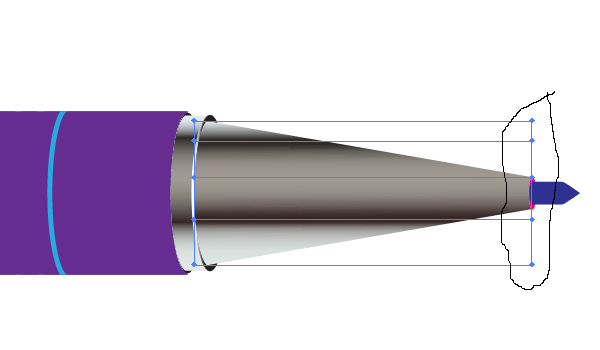
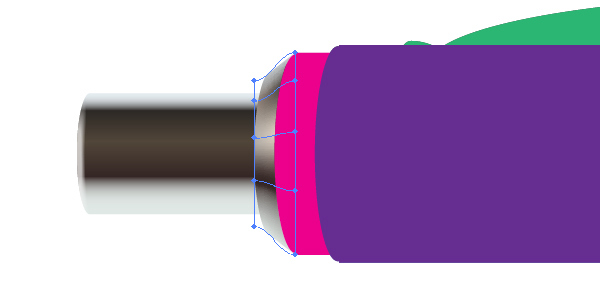
Go to Object > Ungroup, grab the Lasso Tool (Q) and select all the right mesh nodes as shown in the diagram below.
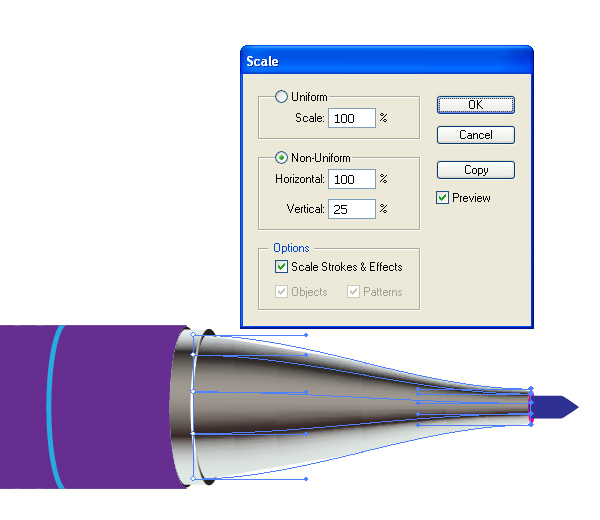
Go to Object > Transform > Scale and set the appropriate values in the dialog box.
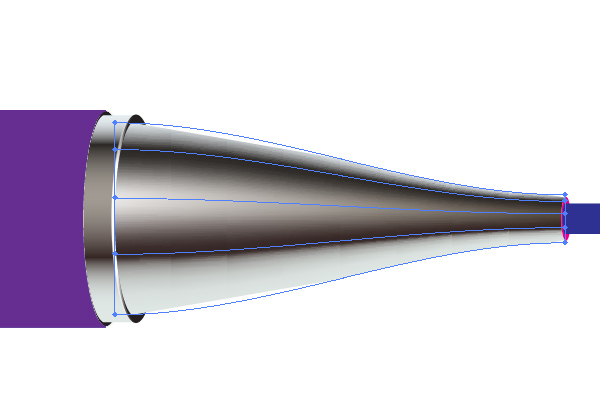
Change the colors of the several mesh nodes using the Mesh Tool (U).
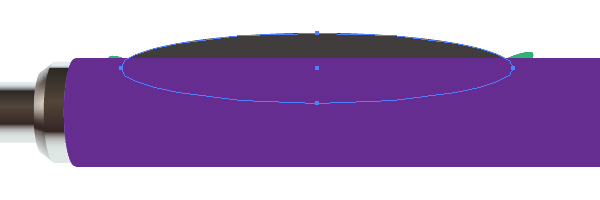
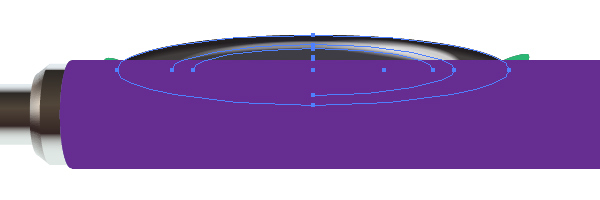
Step 25
Create the following part of the pen using both: black and white ellipses. Follow the helpful image below.
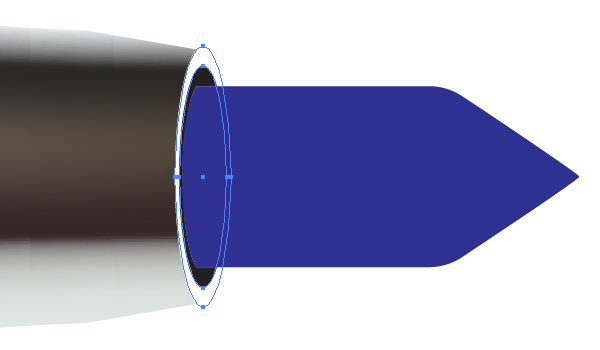
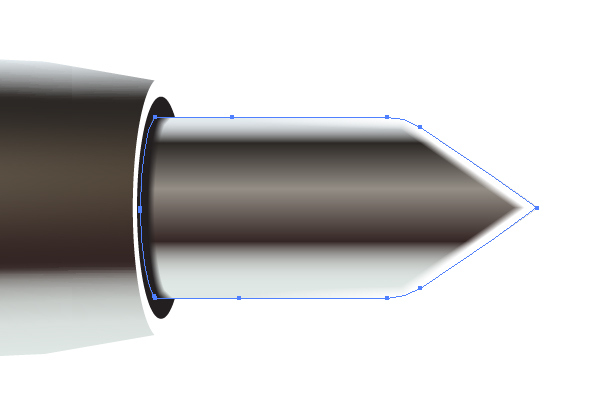
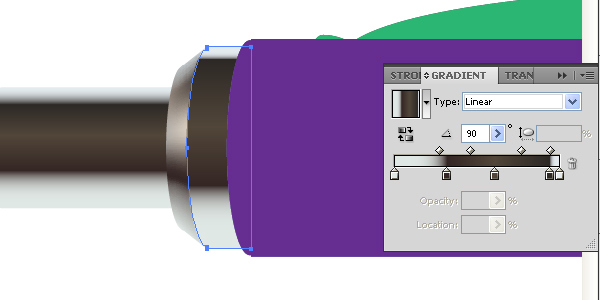
Fill the right end of the pen with a vertical gradient.
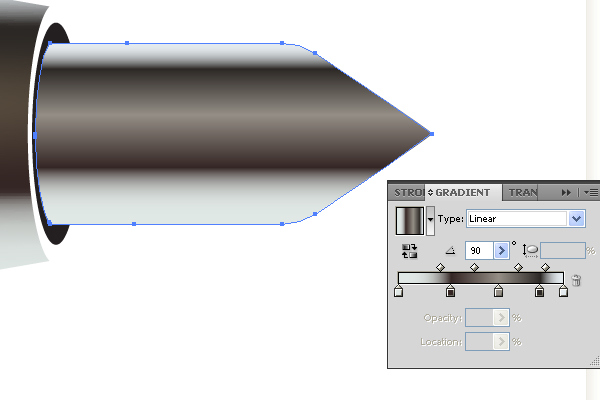
Step 26
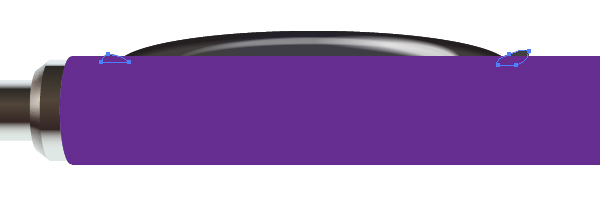
Copy this path and Paste it in Front (Command + C then Command + F). Change the fill color to None. Then apply the “Black brush” to the following path.
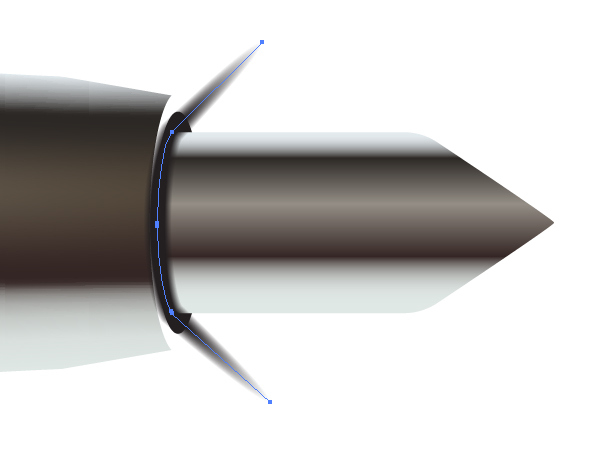
Apply the “Black brush” to the path shown below. Change the Stroke color to white.
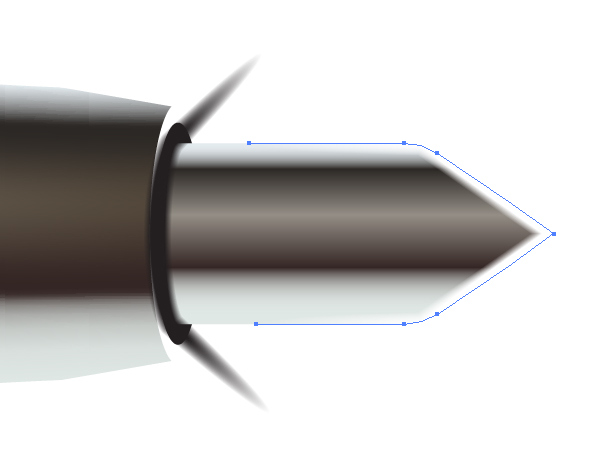
Select all three paths: the copy of the end path, and both paths to which the “Black brush” is applied. Then go to Object > Clipping Mask > Make (Command + 7).
Step 27
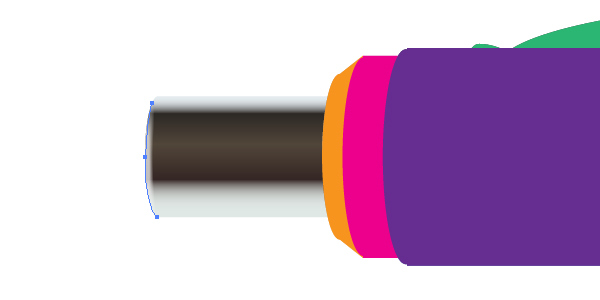
Fill the left end of the pen with the same vertical gradient.
Apply the “Black brush” to the path shown below, change the Stroke color to white, decrease the Opacity of the path. Crop the path with the corresponding clipping mask.
Step 28
The orange path is filled with a mesh. You did this before. Thus, do it without assistance.
The crimson path is filled with a vertical gradient.
Step 29
The pen holder should be filled, first, with gray.
Then the light distribution is made by using the same “Black brush”. Create this by yourself. Follow the helpful image below.
The lateral parts of the holder are filled with gray.
Step 30
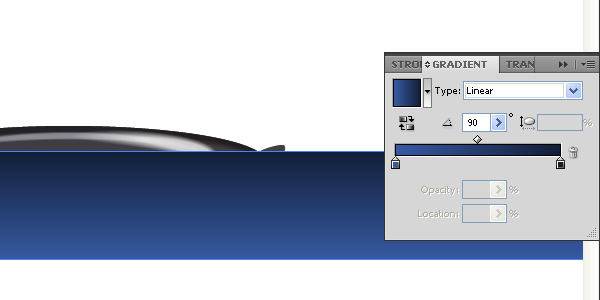
Fill the main part of the pen with a vertical gradient as shown.
Apply the “Black brush” to the path shown below. Change the Stroke color to white. Decrease the Stroke Weight and the Opacity.
Step 31
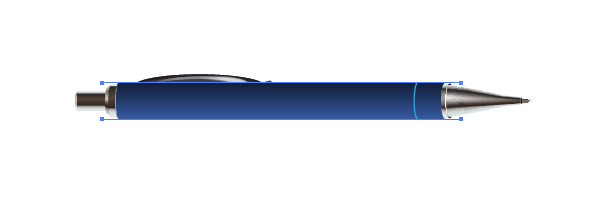
Take the Pen Tool (P), change the Stroke color to violet, and the fill color to None. Draw two paths over the blue main part of the pen as shown.
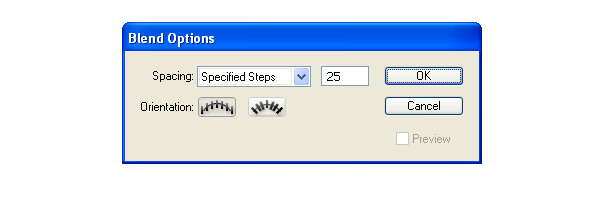
Go to Object > Blend > Blend Options and set the Spacing to Specified steps and the number of steps to about 25.
Go to Object > Blend > Make (Command + Alt + B). Decrease the Opacity of the Blend if necessary on your own artwork.
Crop the Blend with the corresponding clipping mask.
Step 32
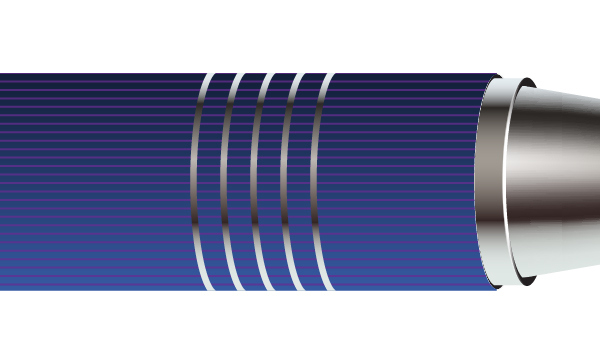
Fill the ring over the pen with a vertical gradient.

Draw as many rings as you desire.
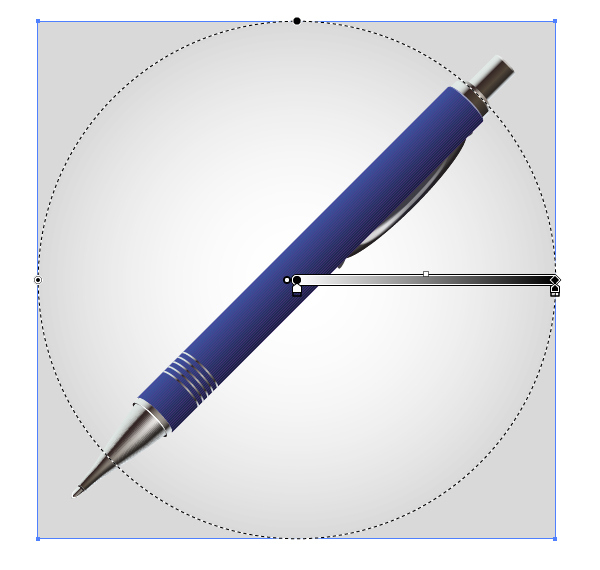
Step 33
Select all of the pen and rotate it by going to Object > Transform > Rotate.
Take the Rectangle Tool (M). draw a path and fill it with a radial gradient as shown. The opacities of the gradient stops go from 15% to 0%.
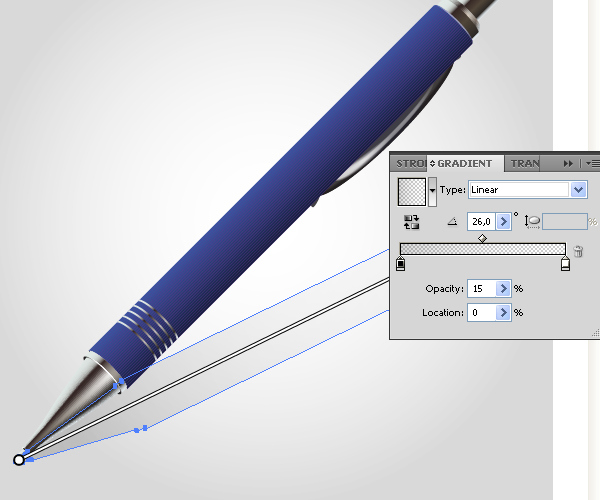
Step 34
Create the shadow of the pen using a linear gradient that goes from black to white and from 15% to 0% in opacity. Follow the helpful image below.
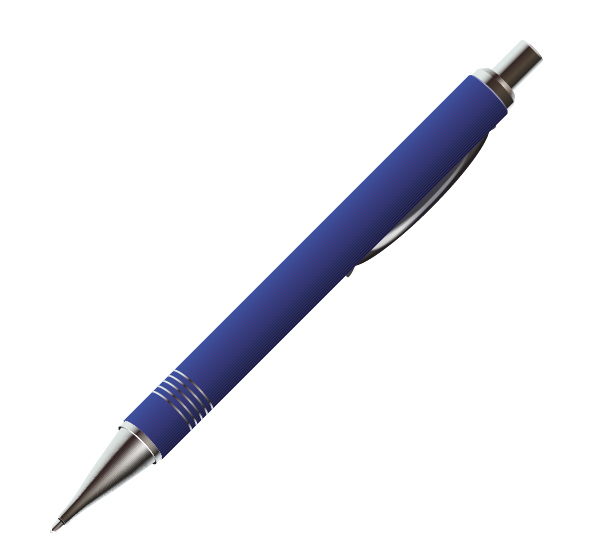
And We’re Done
The final image is below. Use the techniques you’ve learned here in your own artwork. I hope you’ve enjoyed this tutorial.
