In this tutorial, I will walk you through the process of making a yummy donut text in Illustrator.
We will use the basic tools and effects along with some basic vector shape to achieve the final outcome in short time.
Final Image
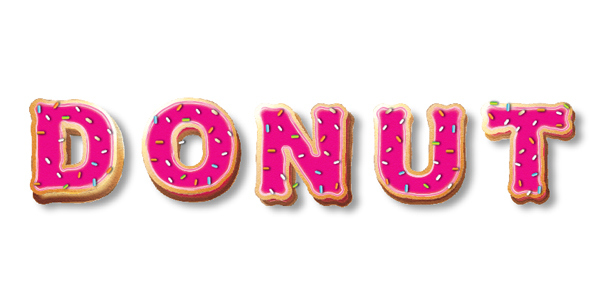
As always, this is the final image that we’ll be creating:

Tutorial Details
- Program: Adobe Illustrator CS6
- Estimated Completion Time: 30 minutes
- Difficulty: Beginner-Intermediate
Step 1
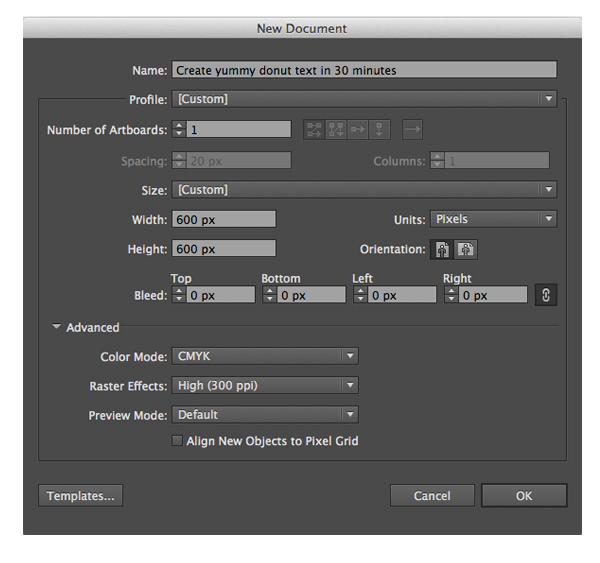
Create a new document first. Make sure to set the dimensions to Width = 600px, Height = 600px and the Color Mode to CMYK.
Step 2
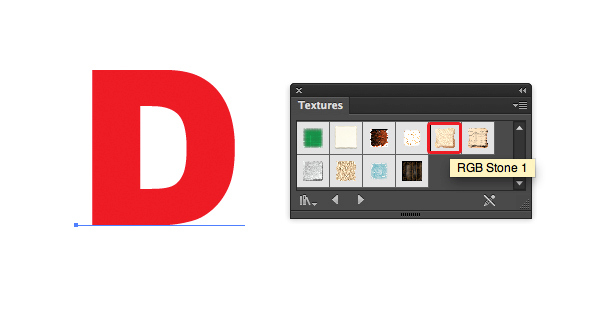
Using the Type Tool (T), add the “D” piece of text, set the color to whatever you want and the size is not important, we will resize it later. I used the ” Arial Black “ font.
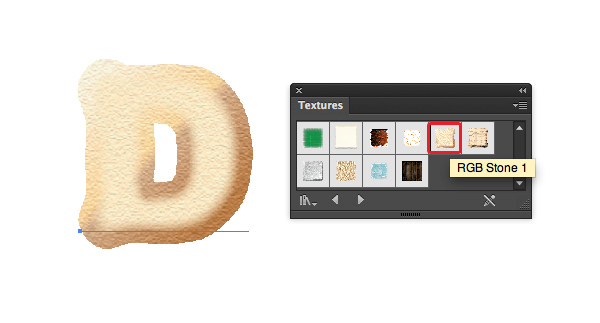
Go to Window > Graphic Styles and Open Graphic Styles Library > Textures then we select ” RGB Stone 1″
And your result should look like this.
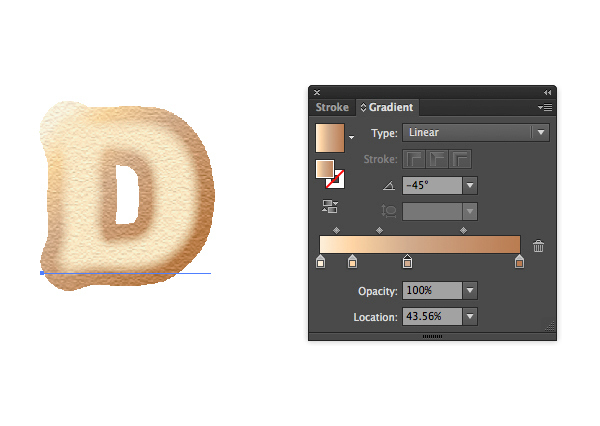
With the ” D ” letter still selected, go to Window > Gradients and we modify the gradient a little bit.
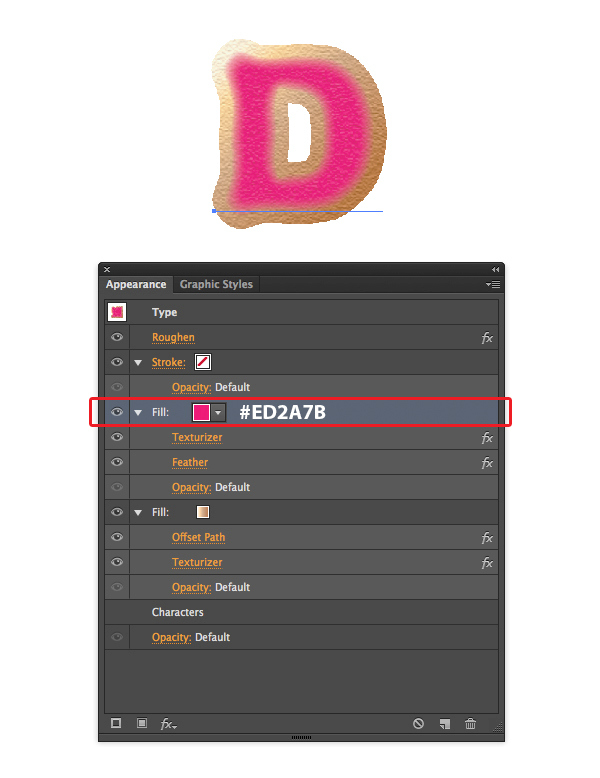
Select the ” D ” letter, focus on the Appearance panel ( Window > Appearance ), we are going to change the fill color to #ED2A7B as in the image below.
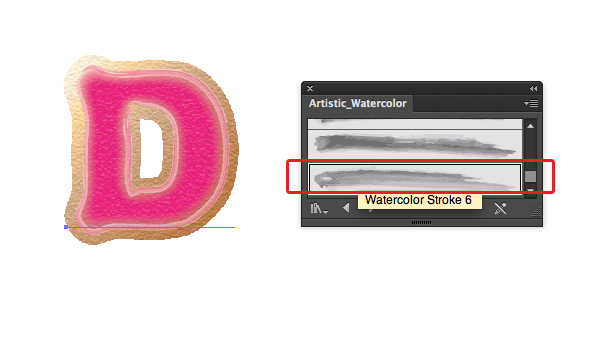
And for the stroke line, we set the color to #ED2A7B and set the stroke size = 0.07pt, then go to Window > Brushes. Select Open Brush Library > Artistic > Artistic_Watercolor. You should end up with this result.
Select the text and go to Type > Create Outlines (Shift + Command/Ctrl + O). Now duplicate (Command/Ctrl + C , Command/Ctrl + B) the ” D ” letter and paste it to the back, place the copy as shown in the image below and apply the Multiply blending mode for the copy.
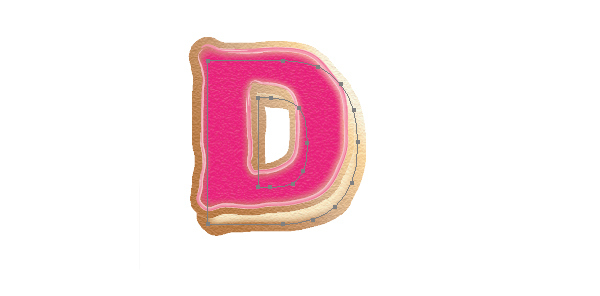
In this step, we duplicate (Command/Ctrl + C , Command/Ctrl + B) the ” D ” letter copy.
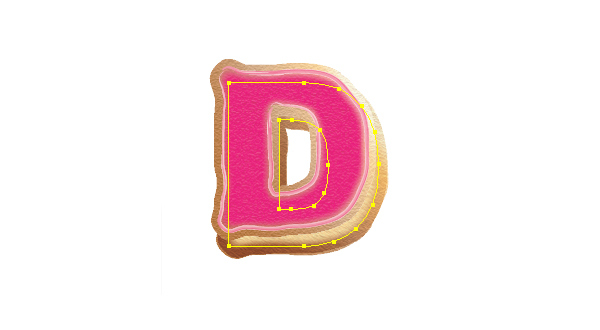
We now duplicate (Command/Ctrl + C , Command/Ctrl + B) the ” D ” letter copy again and paste it to the back. Then apply the Normal blending mode for the last copy.
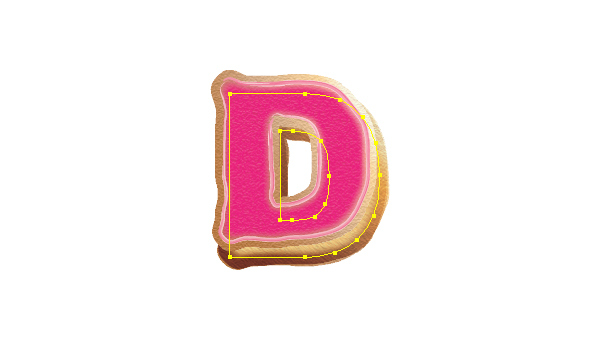
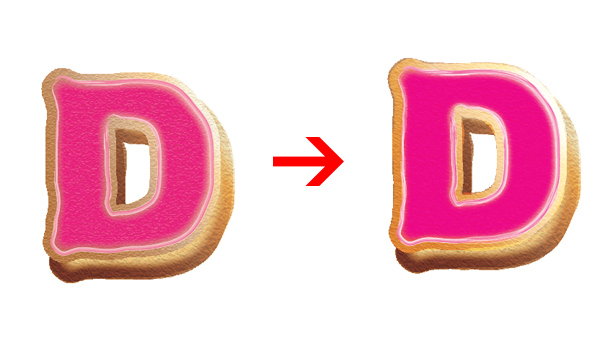
Now I want our ” D ” letter much lighter, so duplicate (Command/Ctrl + C , Command/Ctrl + F) the main shape and paste in front, apply the Overlay blending mode for the copy. You should end up with the result shown in the image below.
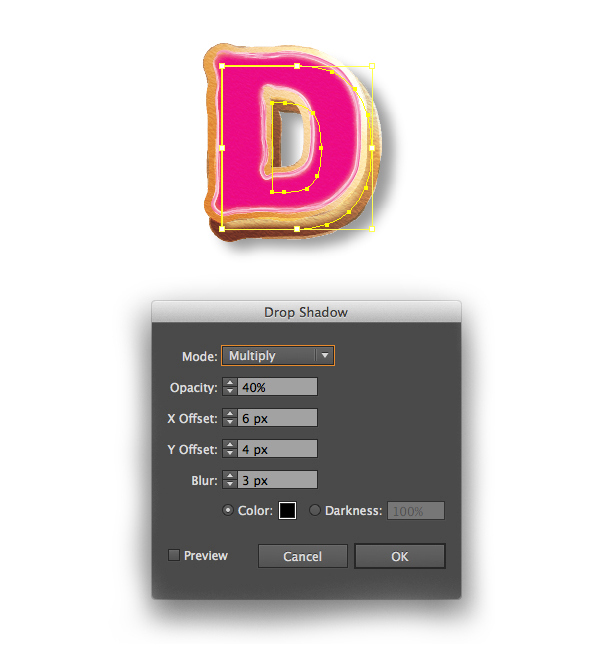
Group (Command/Ctrl + G) all the ” D ” letter elements, then go to Effect > Stylize > Drop shadow and set the value as shown below.
Step 2
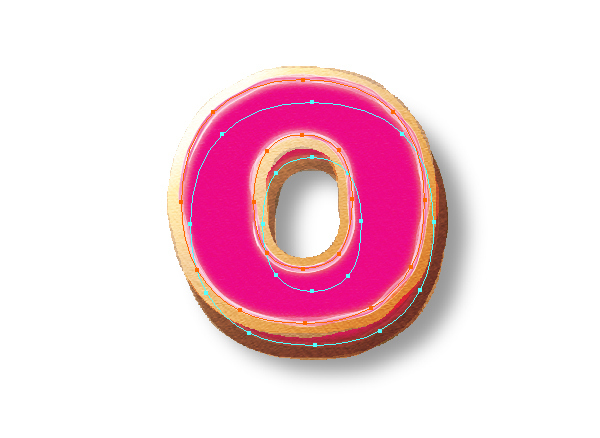
After we have done with the ” D ” letter. Repeat the techniques used in the previous steps for the rest of the ” Donut ” text. Remember to create the text separately. Here is the result for our ” O ” letter.
Step 3
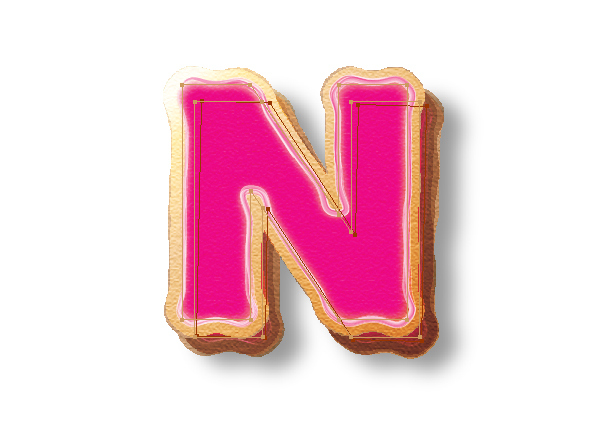
You should end up with this result for the ” N ” letter.
Step 4
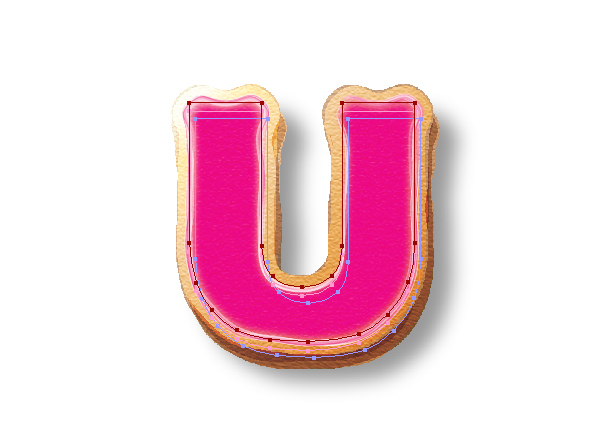
And this is the result for ” U ” letter.
Step 5
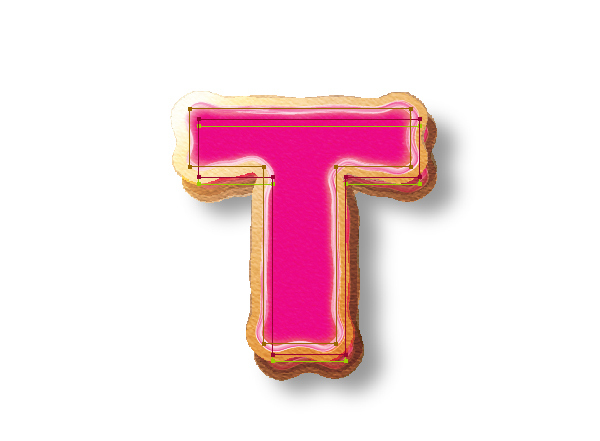
Finally, our ” T ” letter will come out as shown in the image below.
Step 6
It is time to create the sprinkles, just grab the Rounded rectangle Tool to create the sprinkle shapes. Fill them with any color you like. Then go to Window > Stylize > Drop shadow and set the values as shown in the image below. Here is my result.
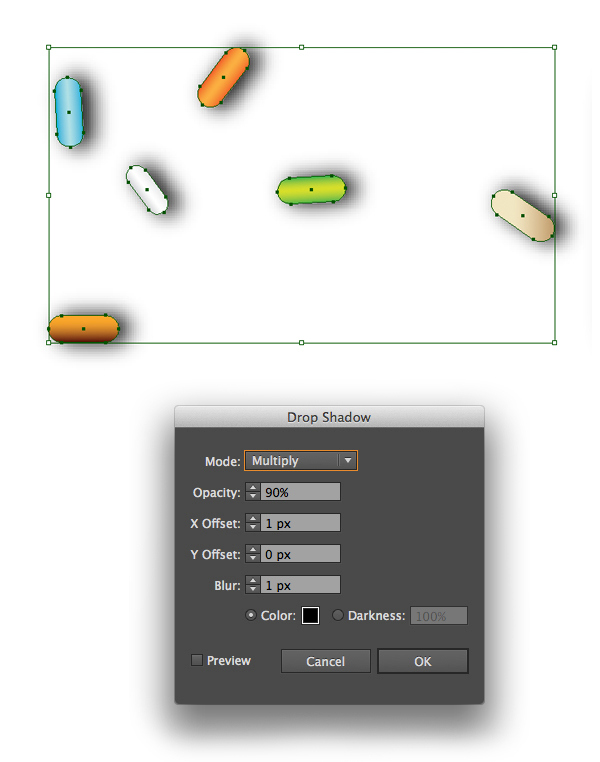
Place the sprinkles as shown in the image below.
Step 7
Now we create more sprinkles, we pick the Ellipse tool (L) to draw the circles and repeat the previous step for our sprinkles, then we place them as shown below.

Step 8
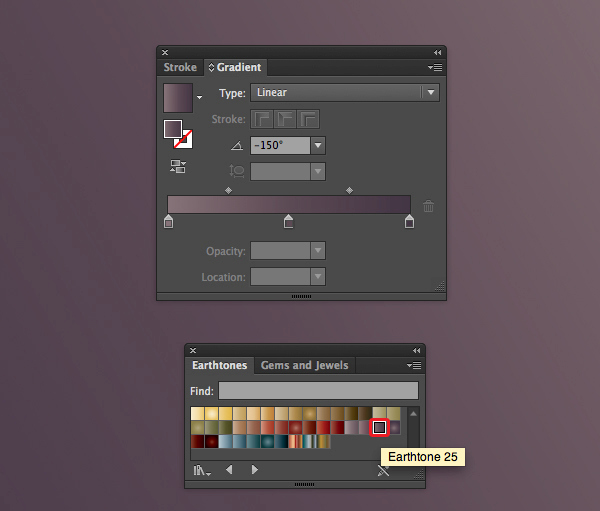
We set a background for our final design. Grab the Rectangle Tool (M) from the Tools Panel and click somewhere on the Artboard. The Rectangle Options box will pop up. Set the dimensions to 600 x 600 pixels. in the Swatches palette go to Open Swatches Library > Gradients > Earthtones. Apply the Earthtone 25 gradient to the shapes as shown below.
And We are Done!
Here is how it should look. I hope you have enjoyed this tutorial and can apply these techniques in your future projects.
