In the following tutorial you will learn how to create a simple graffiti text effect in Adobe Illustrator.
For starters, you will learn how to add simple text and how to adjust it. Taking full advantage of the Appearance panel, you will learn to create the editable part of your text effect. Using a bunch of simple circles, you will learn how to add some of the final touches for your text effect. Finally, you will learn how to create a subtly textured background.
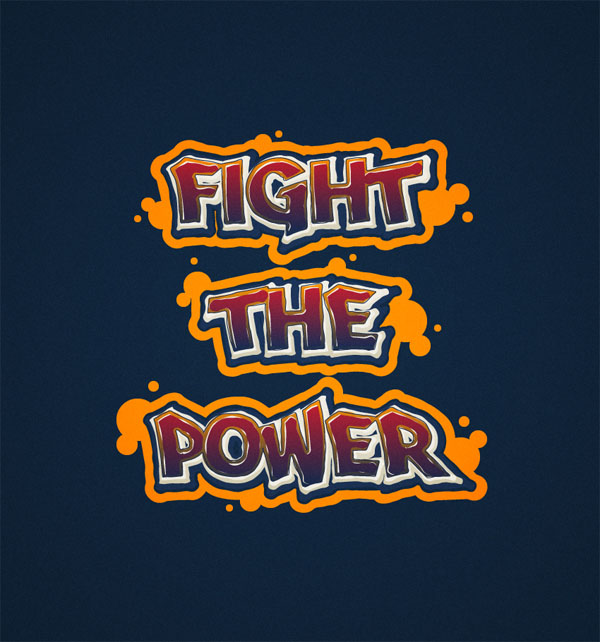
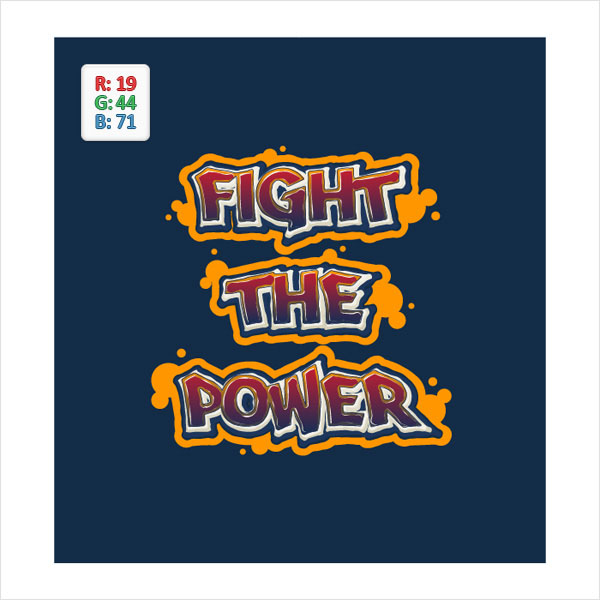
Final Image
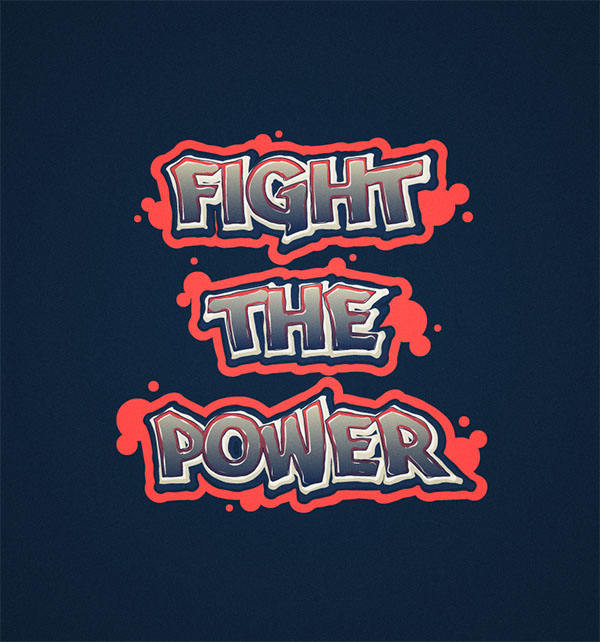
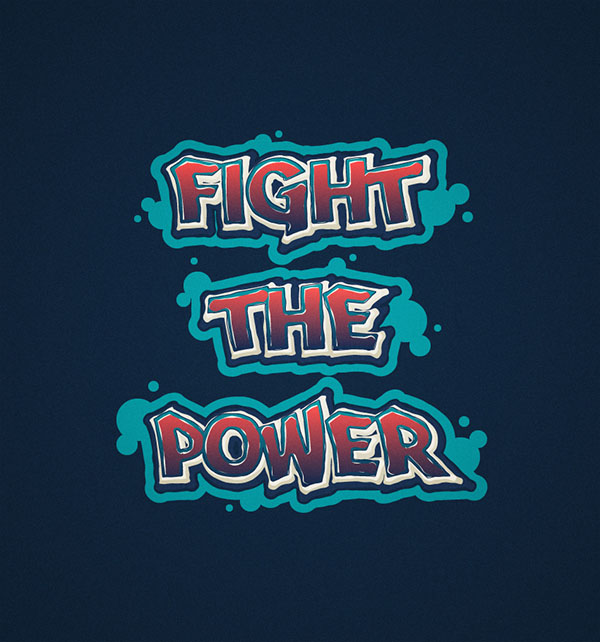
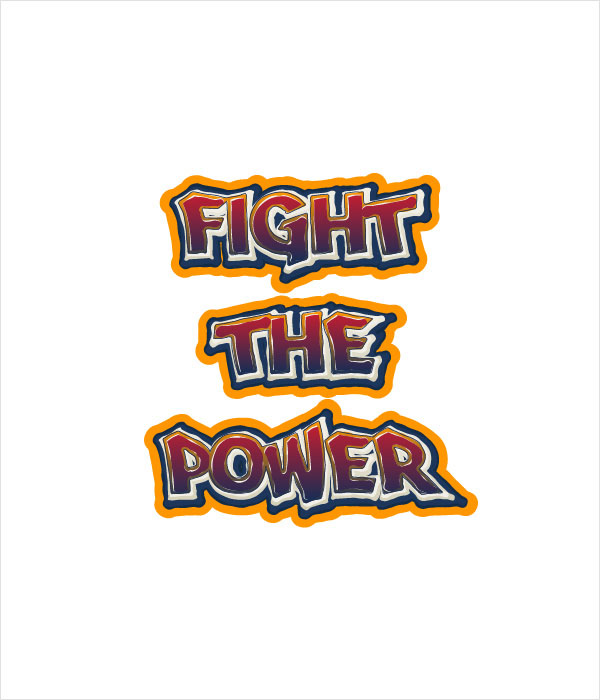
As always, this is the final image that we’ll be creating:
Tutorial Details
- Program: Adobe Illustrator CC
- Estimated Completion Time: 45 minutes
- Difficulty: Beginner-Intermediate
Resources
Step 1
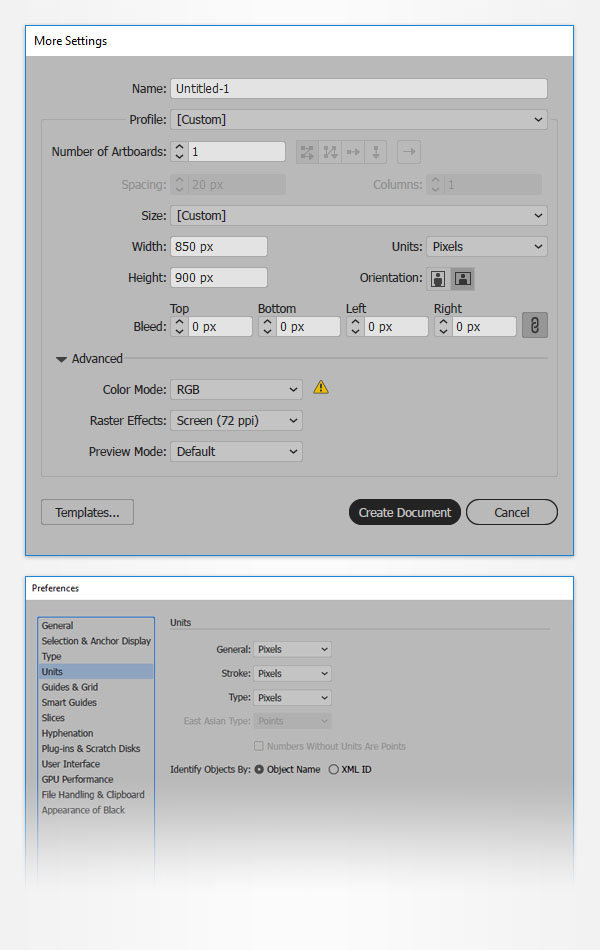
Hit Control + N to create a new document. Select Pixels from the Units drop-down menu, enter 850 in the width box and 900 in the height box and the click the Advanced button. Select RGB, Screen (72ppi) and make sure that the Align New Objects to Pixel Grid box is unchecked before you click OK.
You should also set the measurement unit to pixels from Edit > Preferences > Units > General. All these options will significantly increase your work speed.
Step 2
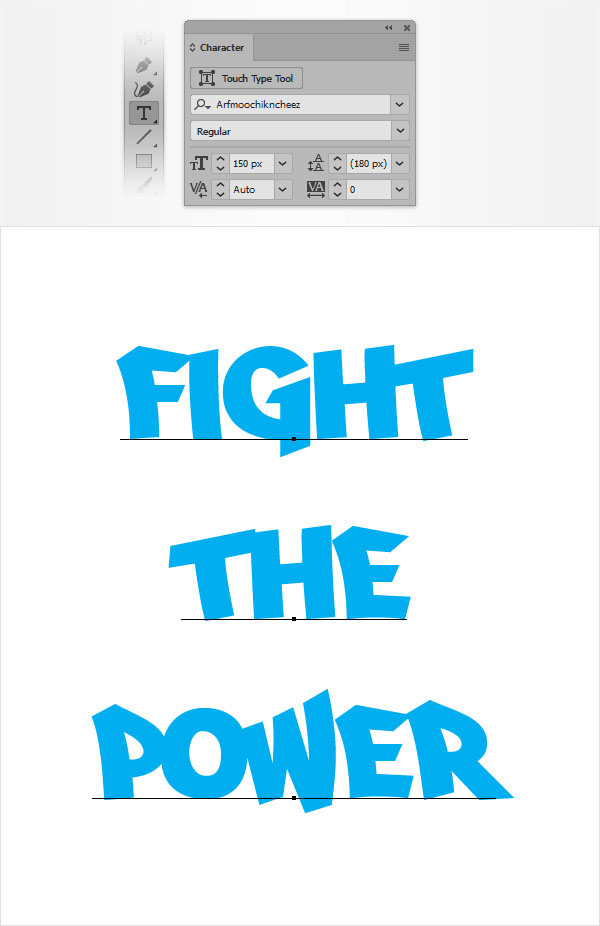
Pick the Type Tool (M) and open the Character panel (Window > Type > Character). Select the Arfmoochikncheez font and set the size to 150 px.
Click on your artboard, add the "FIGHT" piece of text and pick a random blue for the color. Use the same tool and attributes to add the other two piece of text shown below.
Step 3
Select one of your pieces of text and focus on the Appearance panel (Window > Appearance). Click the Add New Fill button to add a new fill and be sure that it lies above the Characters attribute.
Make sure that your fill remains selected, add the linear gradient shown below and then go to Effect > Stylize > Rounded Corners.
Enter a 2 px Radius, click the OK button and then go to Effect > Distort & Transform > Roughen. Enter the attributes shown in the following image and then click the OK button.

Step 4
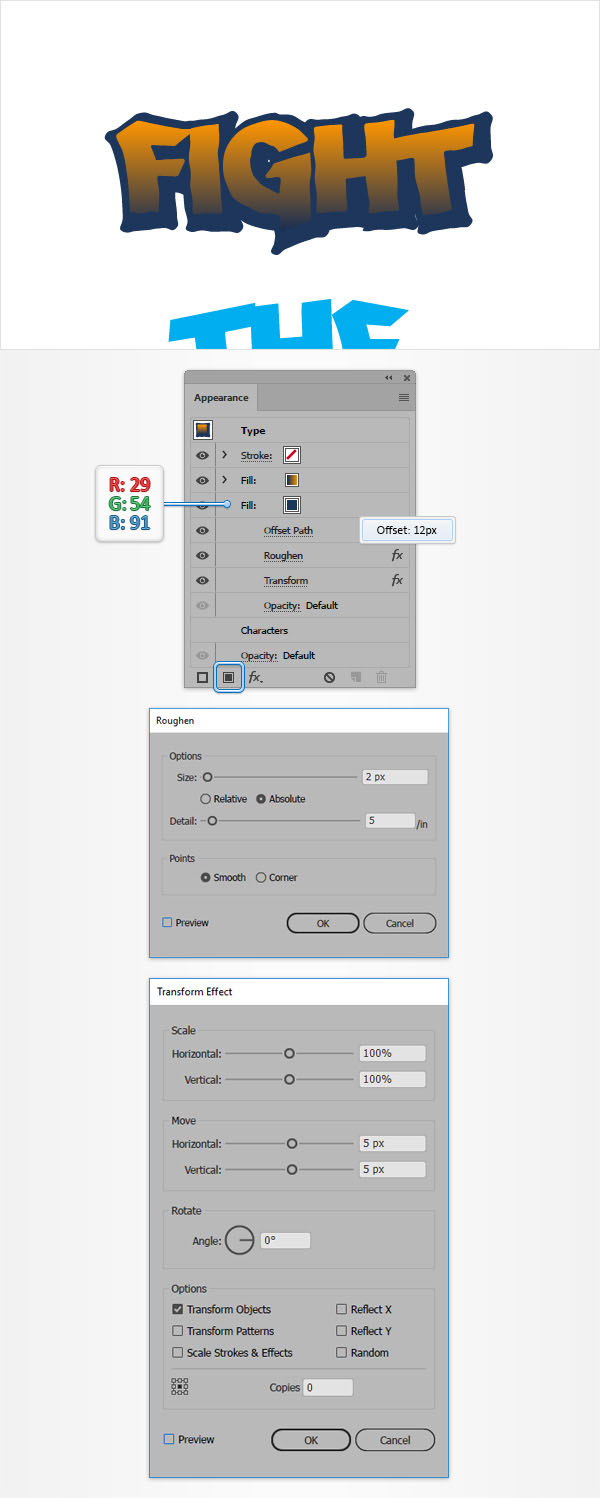
Make sure that your piece of text stays selected and keep focusing on the Appearance panel. Add a second fill and drag it below the other fill.
Set its color to R=29 G=54 B=91 and then go to Effect > Path > Offset Path. Enter a 12 px Offset, click the OK button and then go to Effect > Distort & Transform > Roughen. Enter the attributes shown below, click the OK button and then go to Effect > Distort & Transform > Transform.
Drag both Move sliders to 5 px and then click the OK button.
Step 5
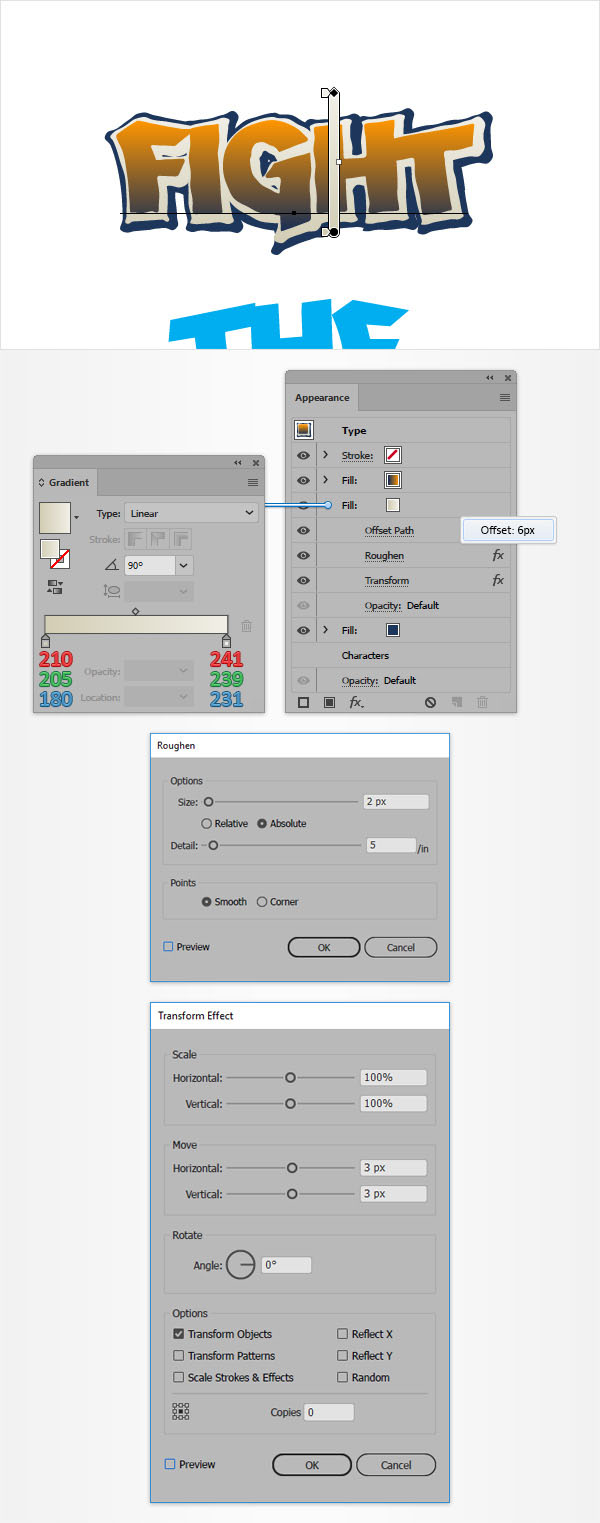
Make sure that your piece of text is still selected and keep focusing on the Appearance panel. Add a third fill and drag it between the other two fills.
Apply the linear gradient shown below and then go to Effect > Path > Offset Path. Enter a 6 px Offset, click the OK button
Go to Effect > Distort & Transform > Roughen. Enter the attributes shown below, click the OK button.
Go to Effect > Distort & Transform > Transform. Drag both Move sliders to 3 px and then click the OK button.
Step 6
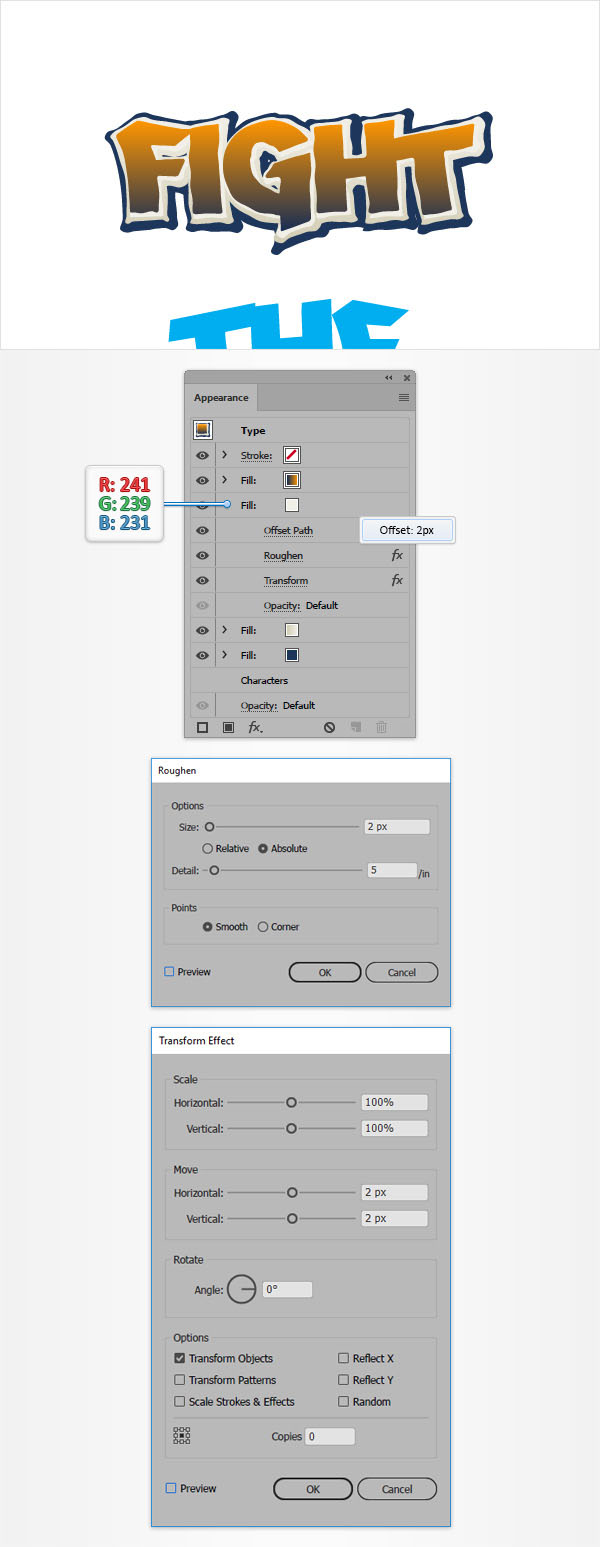
Make sure that your piece of text is still selected and keep focusing on the Appearance panel. Add a fourth fill and drag it right below the top fill. Set its color to R=241 G=239 B=231.
Go to Effect > Path > Offset Path. Enter a 2 px Offset, click the OK button.
Go to Effect > Distort & Transform > Roughen. Enter the attributes shown below, click the OK button.
Go to Effect > Distort & Transform > Transform. Drag both Move sliders to 2 px and then click the OK button.
Step 7
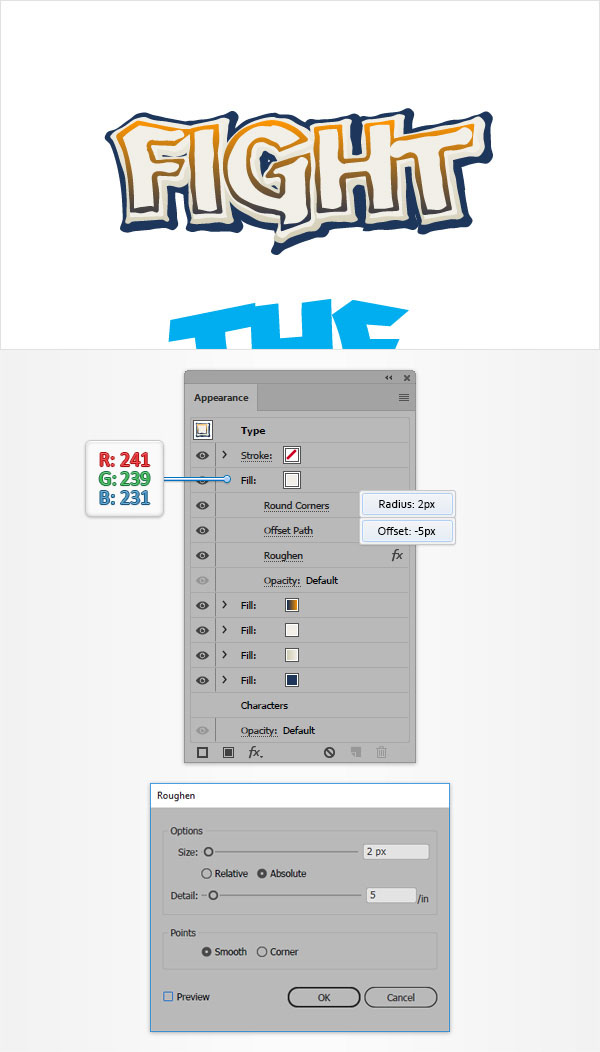
Make sure that your piece of text is still selected and keep focusing on the Appearance panel. Add a fifth fill and drag it above the other fills. Set its color to R=241 G=239 B=231.
Go to Effect > Stylize > Rounded Corners. Enter a 2 px Radius, click the OK button.
Go Effect > Path > Offset Path. Enter a -5 px Offset, click the OK button.
Go to Effect > Distort & Transform > Roughen. Enter the attributes shown below and then click the OK button.
Step 8
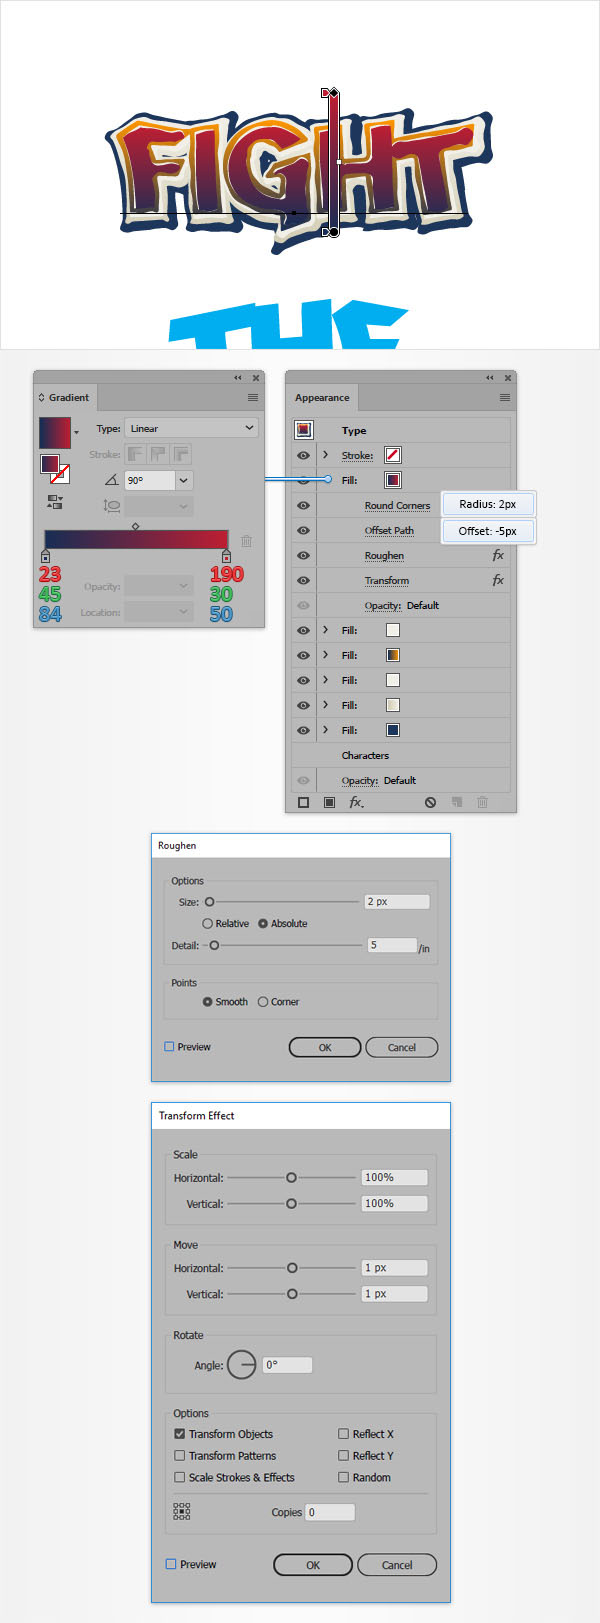
Make sure that your piece of text is still selected and keep focusing on the Appearance panel. Add a sixth fill and drag it above the other fills.
Apply the linear gradient shown below.
Go to Effect > Stylize > Rounded Corners. Enter a 2 px Radius, click the OK button.
Go Effect > Path > Offset Path. Enter a -5 px Offset, click the OK button.
Go to Effect > Distort & Transform > Roughen. Enter the attributes shown below, click the OK button.
Go to Effect > Distort & Transform > Transform. Drag both Move sliders to 1 px and then click the OK button.
Step 9
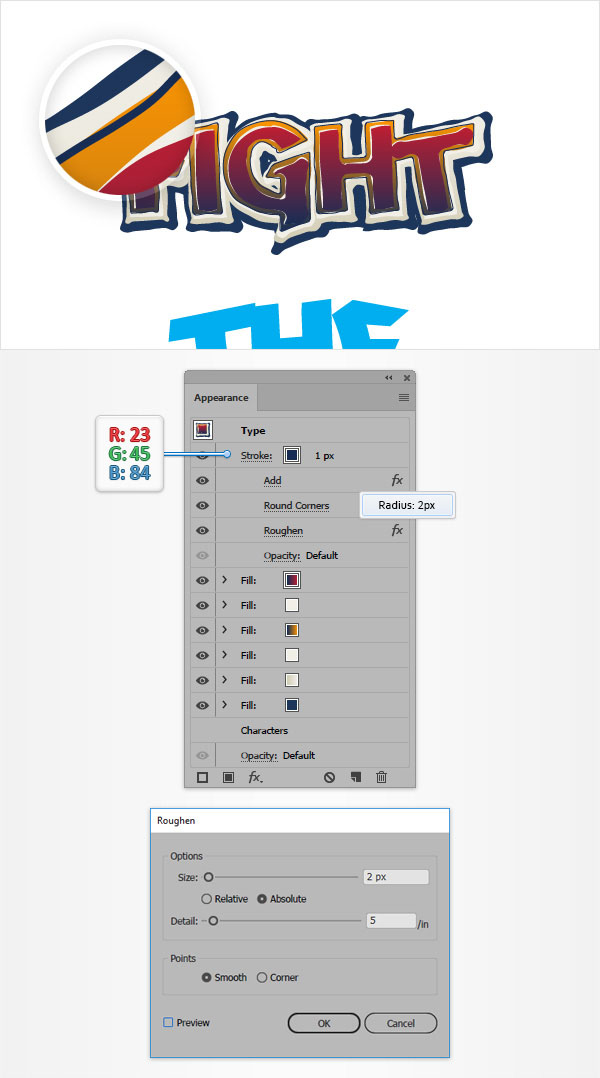
Make sure that your piece of text is still selected and keep focusing on the Appearance panel. Select the stroke and set its color to R=23 G=45 B=84.
Go to Effect > Pathfinder > Add.
Go to Effect > Stylize > Rounded Corners. Enter a 2 px Radius, click the OK button.
Go to Effect > Distort & Transform > Roughen. Enter the attributes shown below and then click the OK button.
Step 10
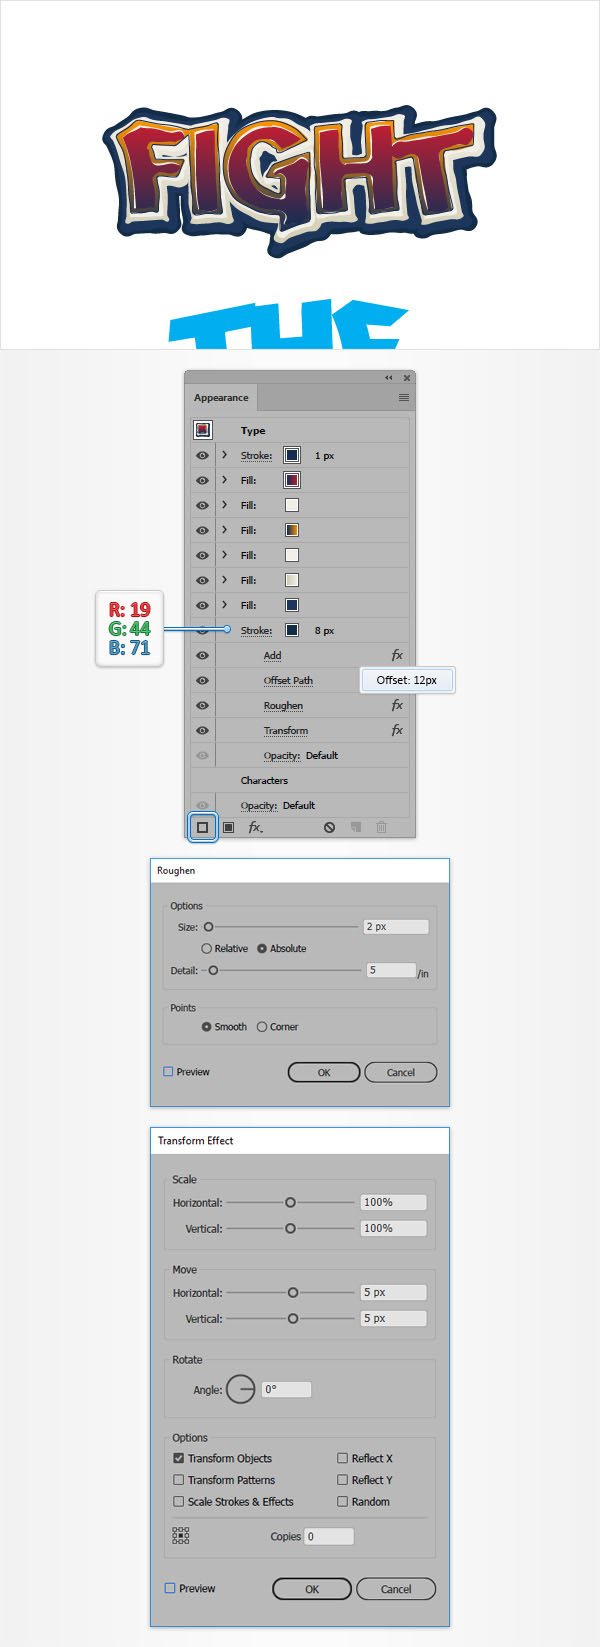
Make sure that your piece of text is still selected and keep focusing on the Appearance panel. Add a second stroke using the Add New Stroke button and place it below all the other fills.
Set its color to R=19 G=44 B=71 and increase the Weight to 8 px.
Go to Effect > Pathfinder > Add.
Go to Effect > Path > Offset Path. Enter a 12 px Offset, click the OK button.
Go to Effect > Distort & Transform > Roughen. Enter the attributes shown below, click the OK button.
Go to Effect > Distort & Transform > Transform. Drag both Move sliders to 5 px and then click the OK button.
Step 11
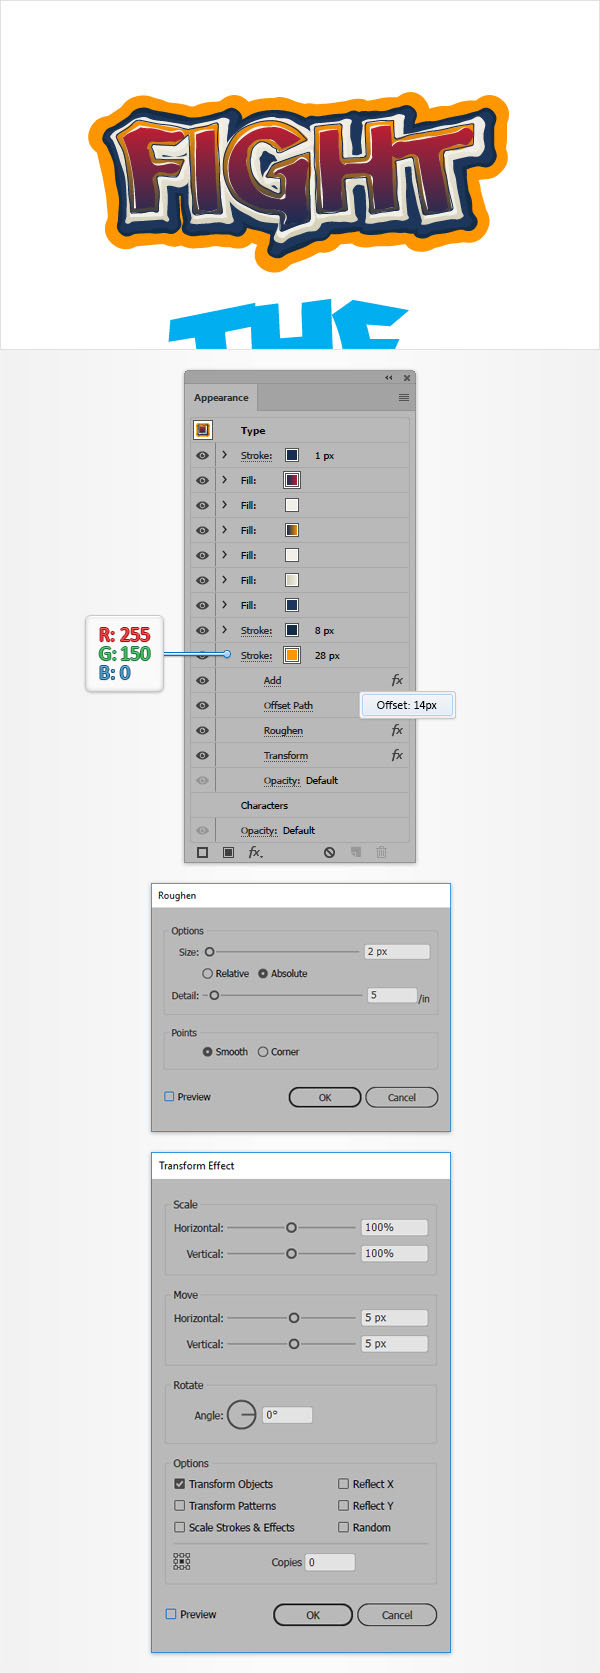
Make sure that your piece of text is still selected and keep focusing on the Appearance panel. Add a third stroke and place it below the bottom stroke. Set its color to R=255 G=150 B=0 and increase the Weight to 28 px.
Go to Effect > Pathfinder > Add.
Go to Effect > Path > Offset Path. Enter a 14 px Offset, click the OK button.
Go to Effect > Distort & Transform > Roughen. Enter the attributes shown below, click the OK button.
Go to Effect > Distort & Transform > Transform. Drag both Move sliders to 5 px and then click the OK button.
Step 12
Next, you need to copy the attributes used for your top piece of text and paste them onto the other pieces of text. You can easily do it from the Layers panel (Window > Layers).
Open this panel, focus on the right side and notice that every shape comes with a little grey circle, a target icon. Hold the Alt key, click the target icon that stands for your stylized piece of text and then drag the cursor onto the circle that stands for one of the other pieces of text.
Step 13
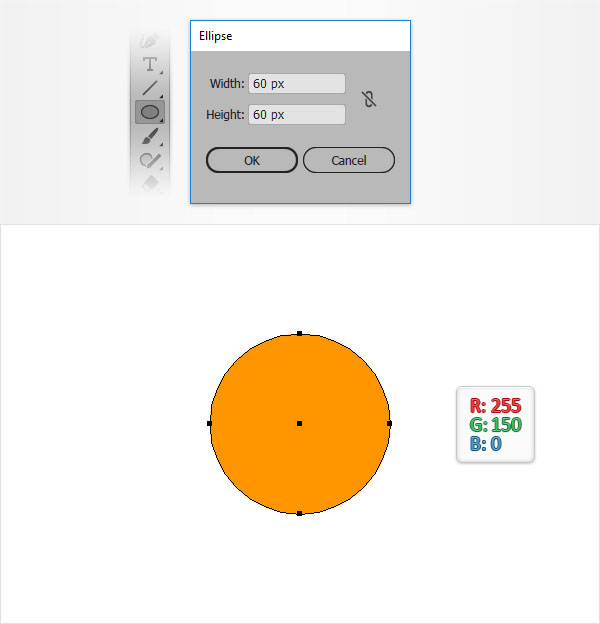
Pick the Ellipse Tool (L) and click on your artboard to open the Ellipse window. Set both width and height to 60 px and then click the OK button to create your 60 px circle. Fill it with R=255 G=150 B=0.
Step 14
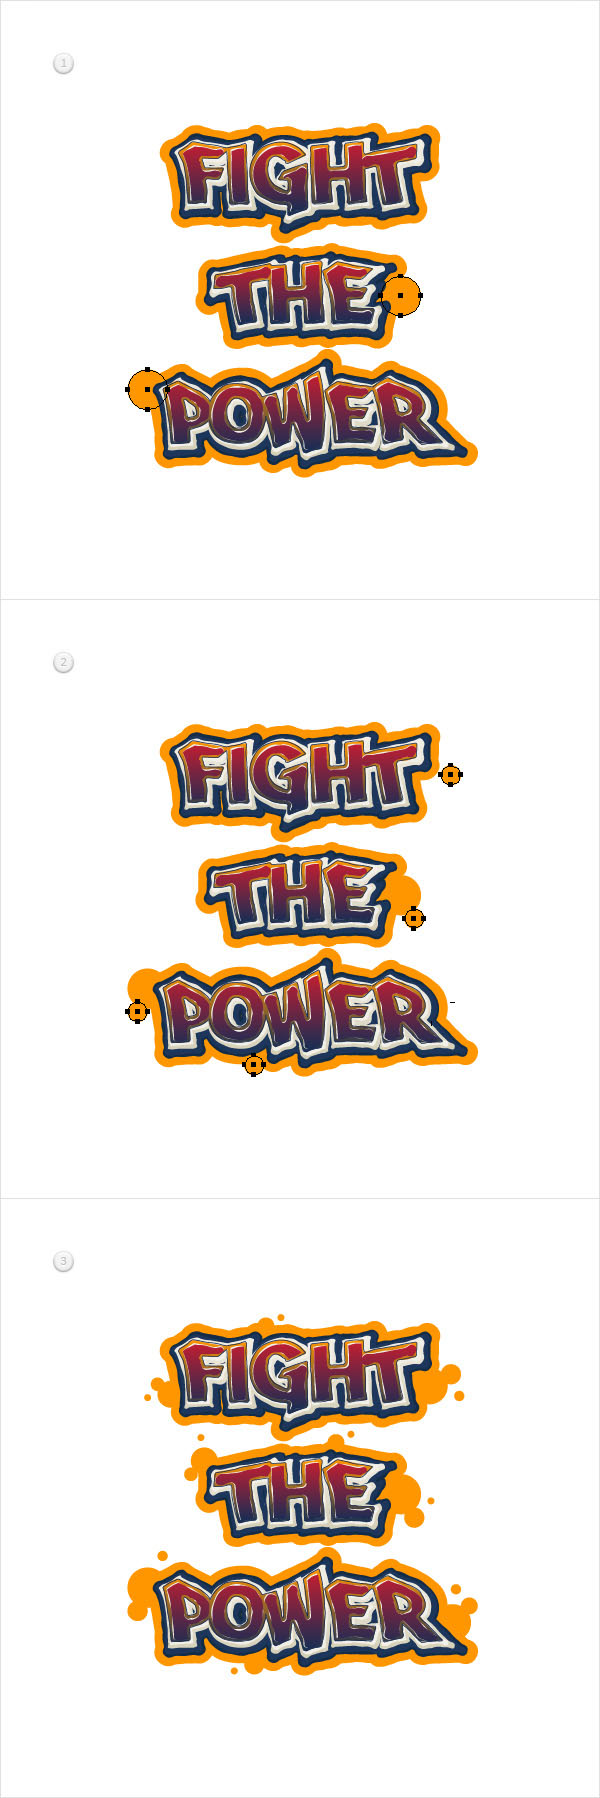
Send your yellow circle to back (Shift + Control + [), duplicate it (Control + C > Control + V) and then place the two shapes as shown in the first image.
Use the Ellipse Tool (L) to create a bunch of new circles, make them different sizes and spread them around your text roughly as shown below.
Step 15
Using the Rectangle Tool (M), create a shape the size of your artboard (850 x 900 px). Make sure that this new rectangle covers your entire artboard, fill it with R=19 G=44 B=71 and send it to back (Shift + Control + [).
Step 16
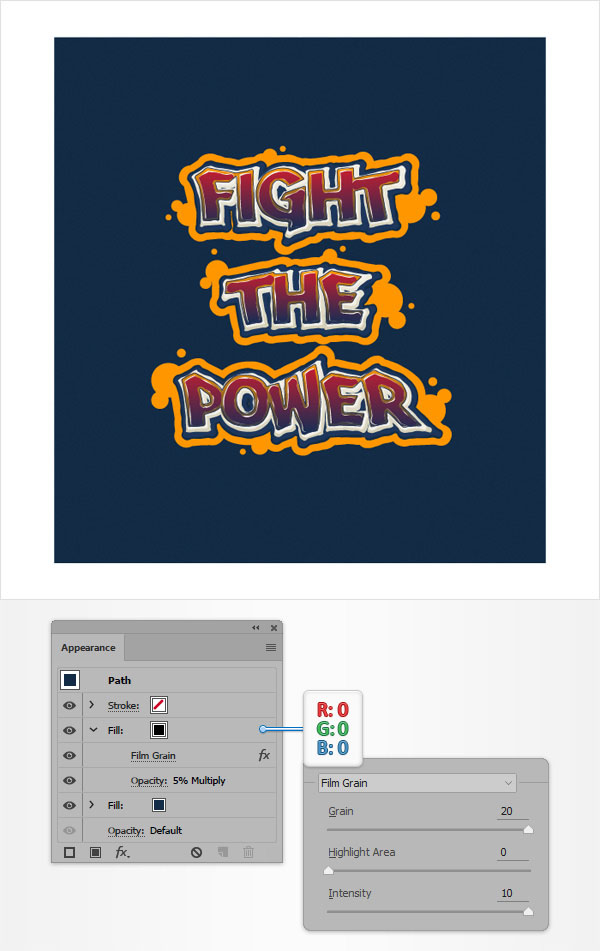
Make sure that your background shape is still selected, focus on the Appearance panel and add a second fill. Select it and set the color to black (R=0 G=0 B=0).
Lower its Opacity to 5%, change the Blending Mode to Multiply and then go to Effect > Artistic > Film Grain. Enter the attributes shown below and then click the OK button.
Step 17
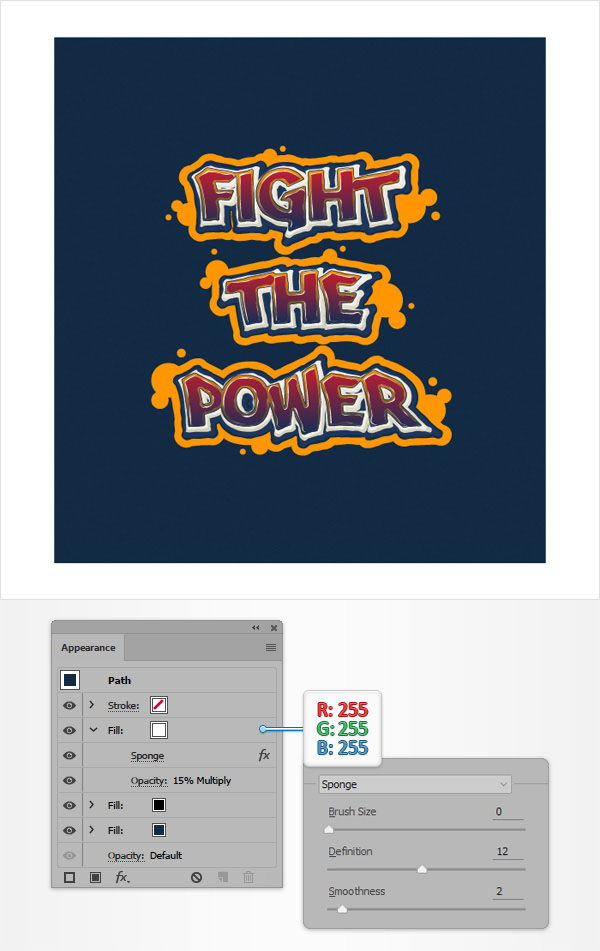
Make sure that your background shape is still selected, focus on the Appearance panel and add a third fill. Select it and set the color to white (R=255 G=255 B=255).
Lower its Opacity to 15%, change the Blending Mode to Multiply and then go to Effect > Artistic > Sponge. Enter the attributes shown below and then click the OK button.
Step 18
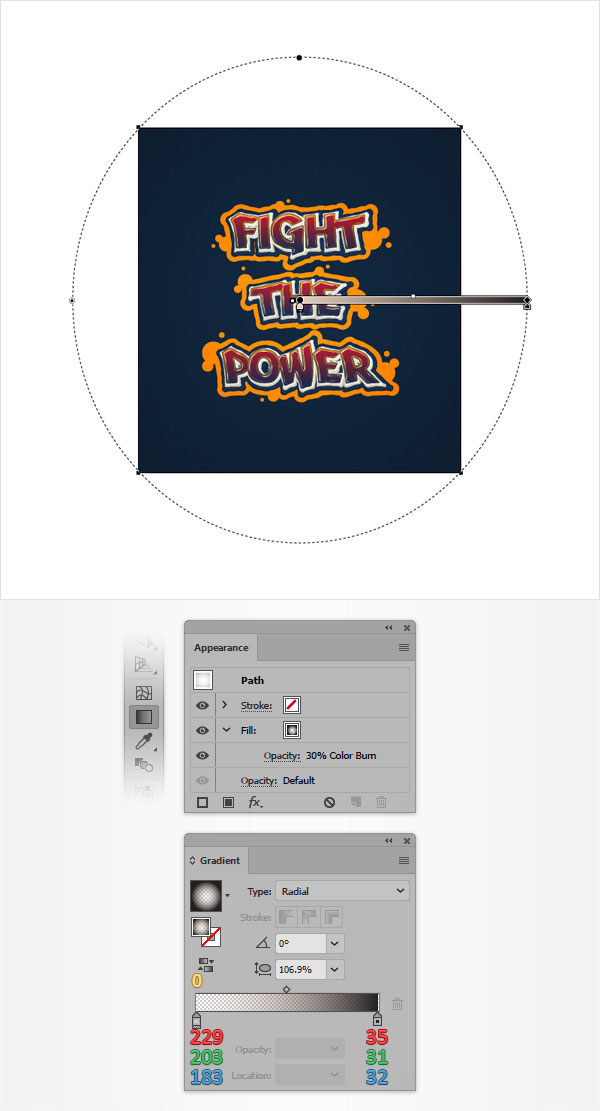
Using the Rectangle Tool (M), create a second shape the size of your artbaord. Fill it with the radial gradient shown below and focus on the Appearance panel.
Select the existing fill, lower its Opacity to 30% and change the Blending Mode to Color Burn.
Keep in mind that the yellow zero from the Gradient image stands for Opacity percentage and use the Gradient Tool (G) to adjust your gradient as shown below.
Step 19
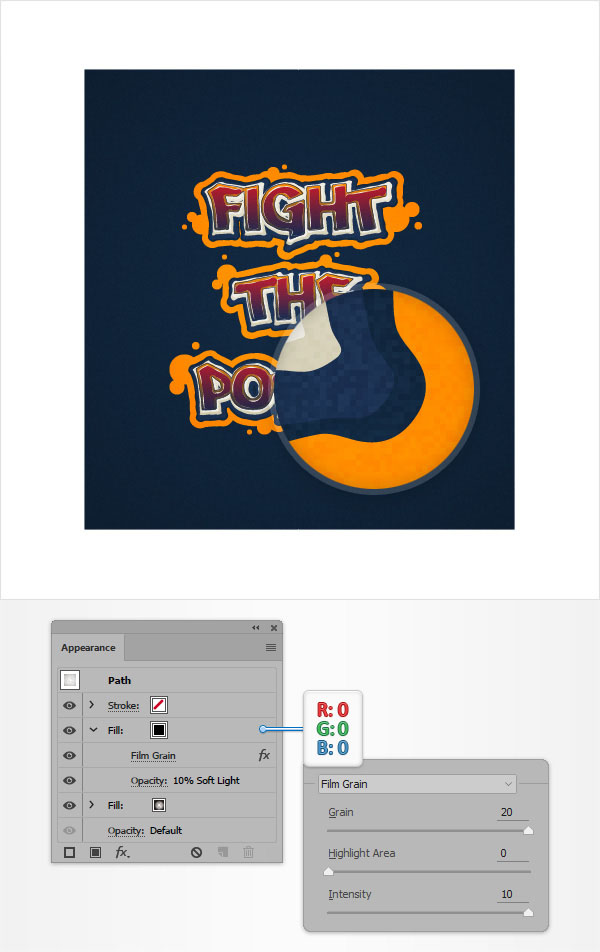
Make sure that the rectangle made in the previous step is still selected and focus on the Appearance panel. Add a second fill and set the color to black.
Lower its Opacity to 10%, change the Blending Mode to Soft Light and then go to Effect > Artistic > Film Grain. Enter the attributes shown below and then click the OK button.
And We’re Done!
Here is how it should look. I hope you’ve enjoyed this tutorial and can apply these techniques in your future projects.
Feel free to try different colors for your final text effect.