In this tutorial you will learn how to create a Halloween poster using the Pen Tool and Gradient Tool in Adobe Illustrator.
Final Image
As always, this is the final image that we’ll be creating:

Tutorial Details
- Program: Adobe Illustrator CS6
- Estimated Completion Time: 120 minutes
- Difficulty: Beginner-Intermediate
Step 1
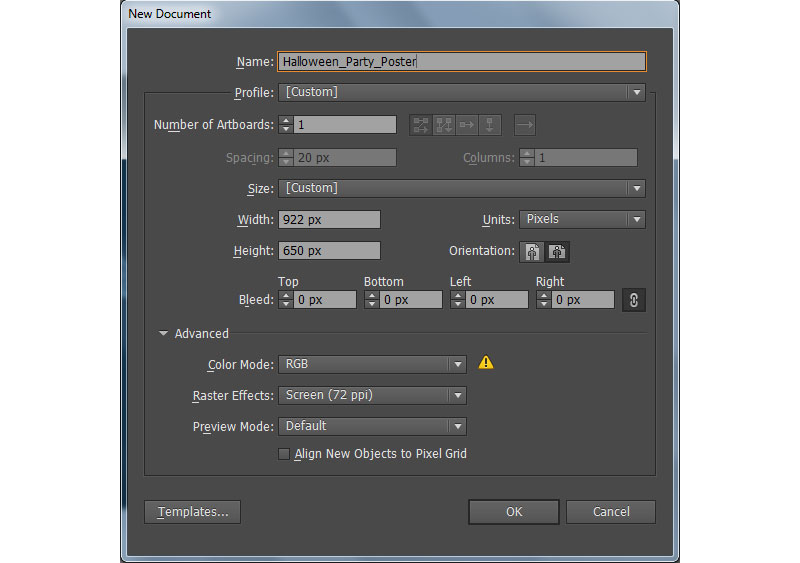
Launch Illustrator and then press (Ctrl + N) to create a New document. Select Pixels from the Units drop-down menu, enter 922 in the width box and 650 in the height box then click on the Advanced button.
Select RGB, Screen (72ppi) and make sure that the Align New Objects to Pixel Grid box is unchecked before you click OK
Step 2
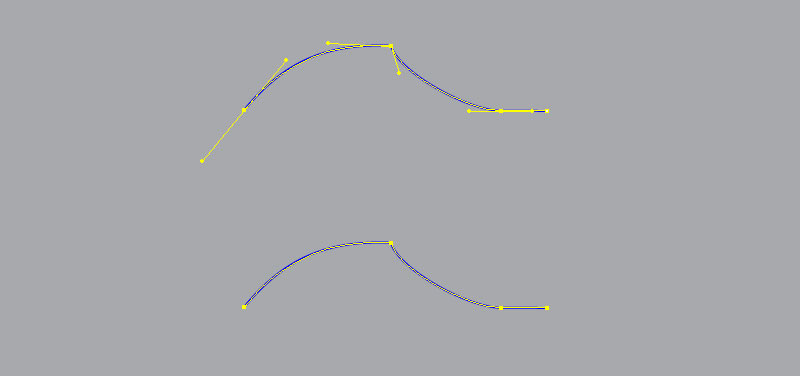
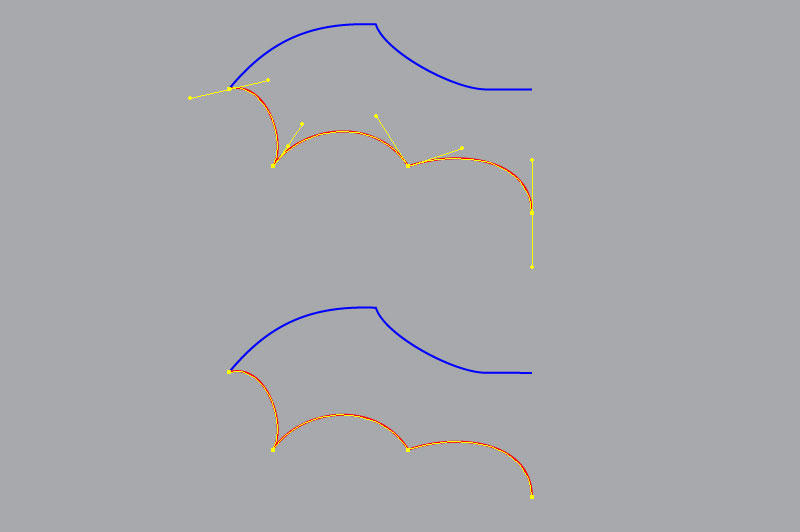
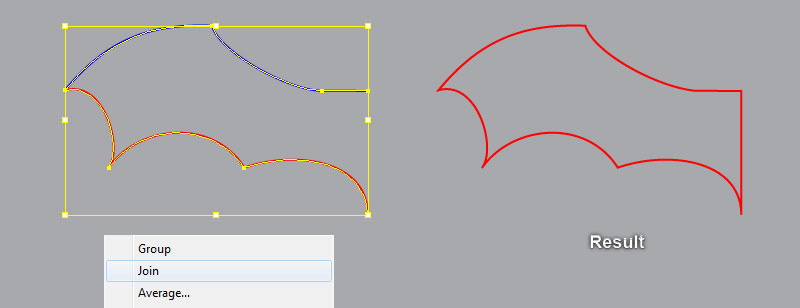
Pick the Pen Tool (P) and create two curved paths like you see in the images below. Once your paths are drawn, reselect them, then right click on the artboard and select the Join section from the drop-down menu. Continue right click on the artboard again and select the Join section.
The resulting object should look like the last image below.
Step 3
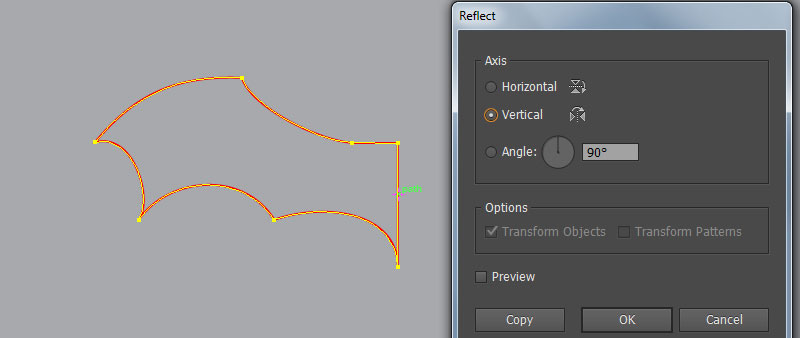
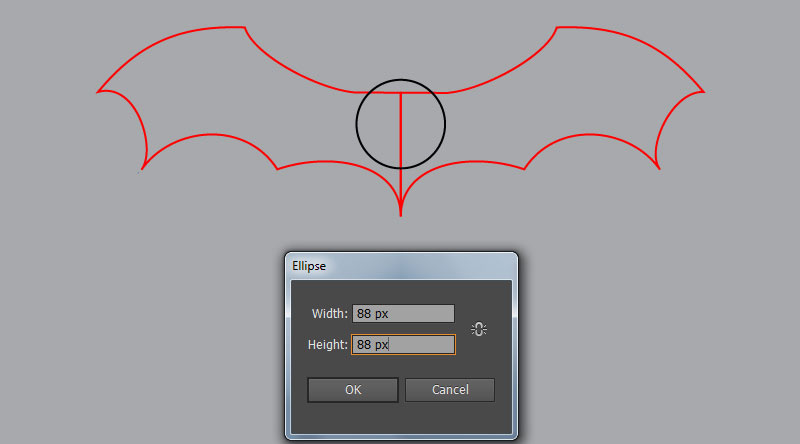
Select the red object created in the step 2, pick the Reflect Tool (O) and hold down the Alt, then click on the right side of the red object. In the Reflect dialog box, check the Vertical and click Copy.
Continue with the Ellipse Tool (L), create a 88 by 88px black ellipse and then place it to the position as shown in the last image.

Step 4
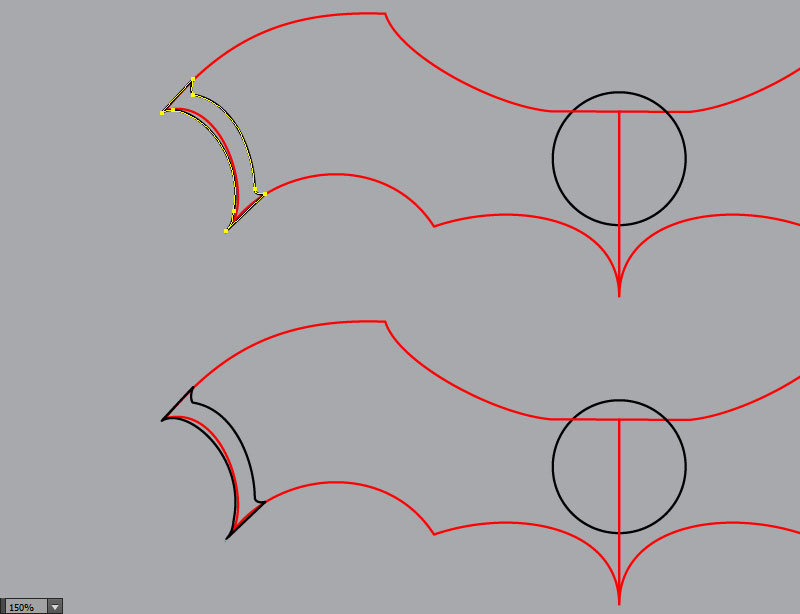
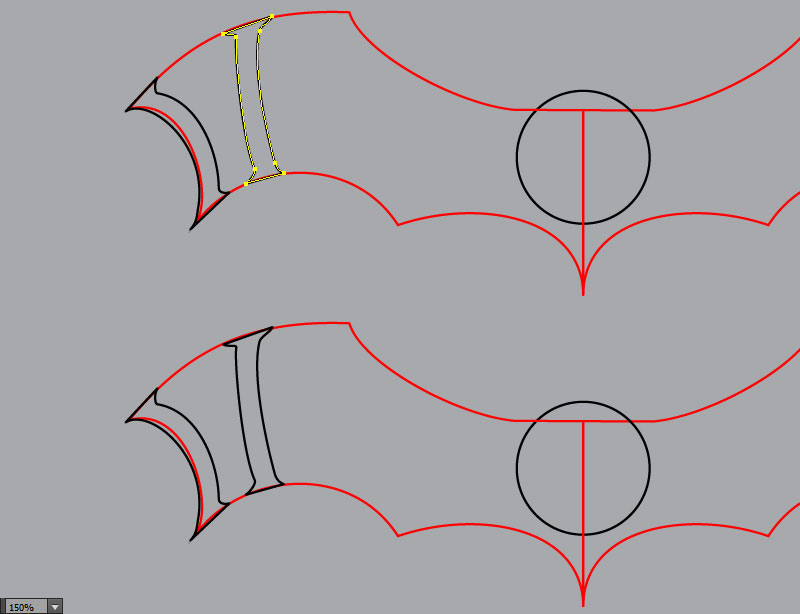
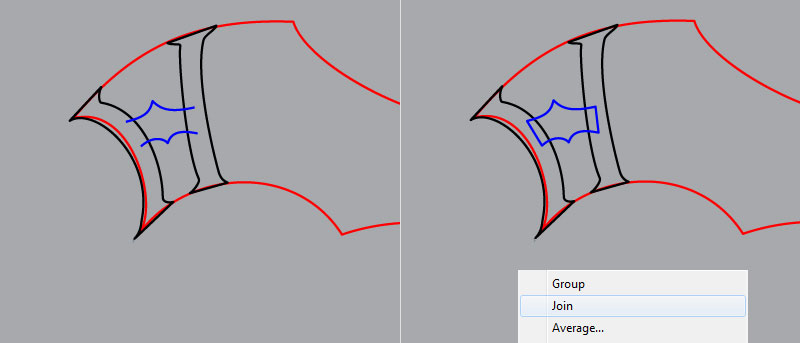
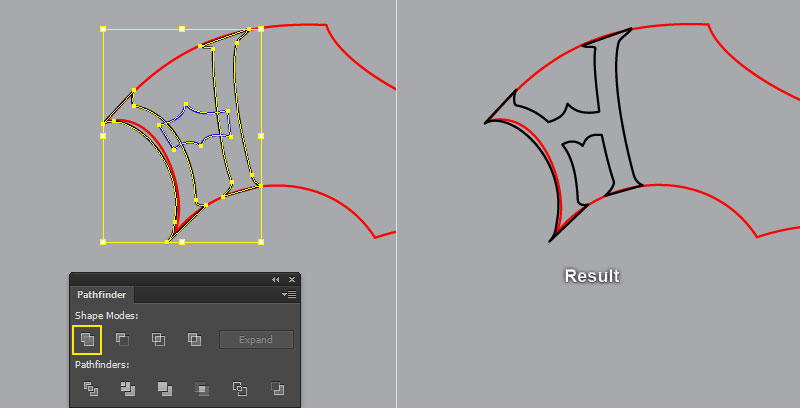
Pick the Pen Tool (P) and create two black objects like you see in the images below. Focus on the fifth image, create two blue curved paths using the Pen Tool (P). Once your blue paths are drawn, reselect them, then right click on the artboard and select the Join section from the drop-down menu.
Continue right click on the artboard again and select the Join section. Keep the resulting object selected, hold down the Shift and click on the two black objects created in this step. Then open the Pathfinder panel (Window > Pathfinder) and click on the Unite button.
The resulting object should look like the last image below.
Step 5
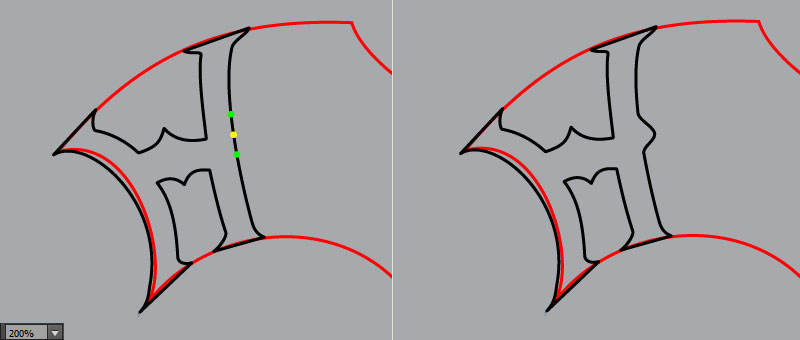
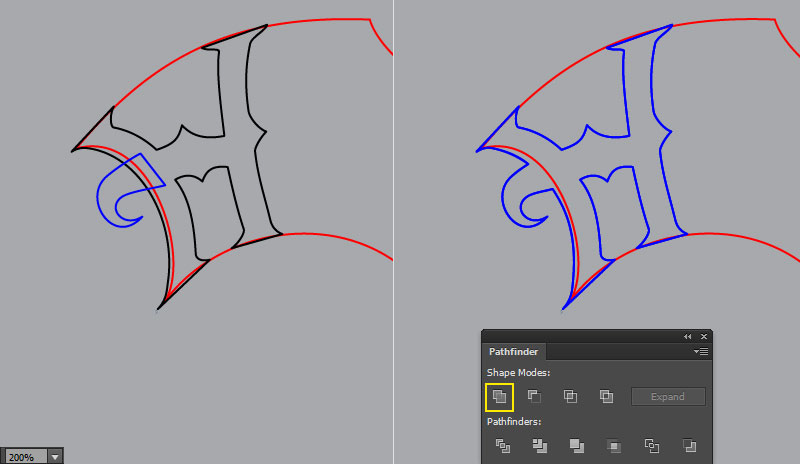
With the help of the Add Anchor Point Tool (+), add three anchor points at the points highlighted with green and yellow.
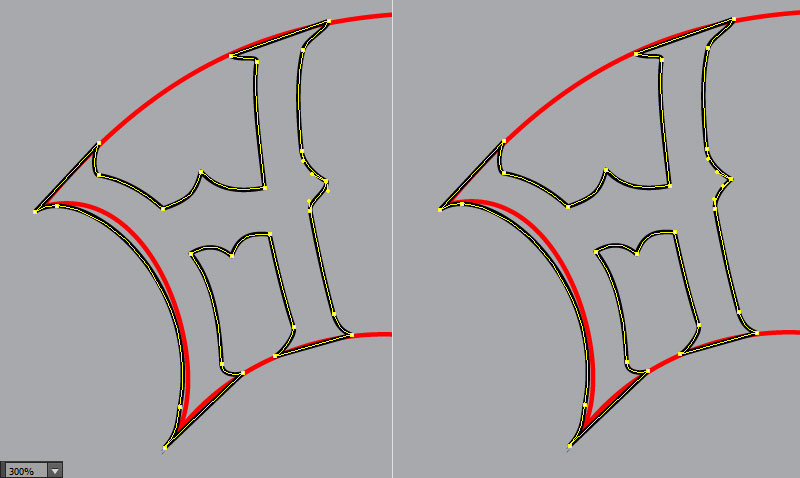
Next pick the Direct Selection Tool (A), select the new anchor point highlighted with yellow and move it 7px to the right. Continue with the Convert Anchor Points Tool (Shift +C), click on the upper handle of the anchor point you just moved, hold mouse, then drag it to the left and down. Next click on the lower handle, hold mouse, then drag it to the left and up.
You should end up with something like in the fourth image. Now pick the Pen Tool (P) and create a blue object like you see in the next to last image. Once your blue object is drawn, reselect it and the black object of the letter "H". Then open the Pathfinder panel (Window > Pathfinder) and click on the Unite button.
Step 6
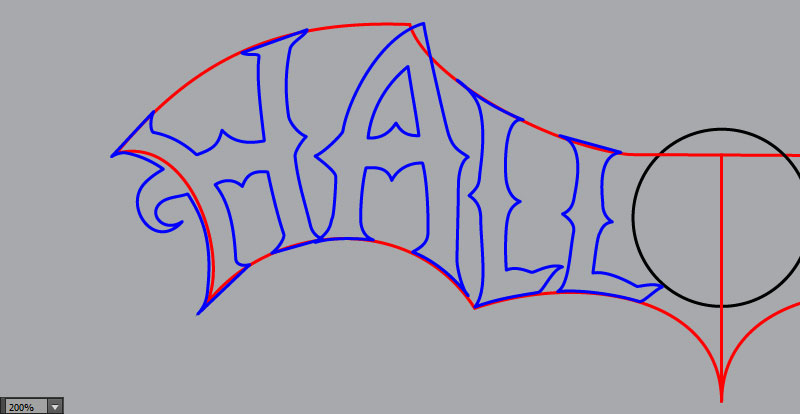
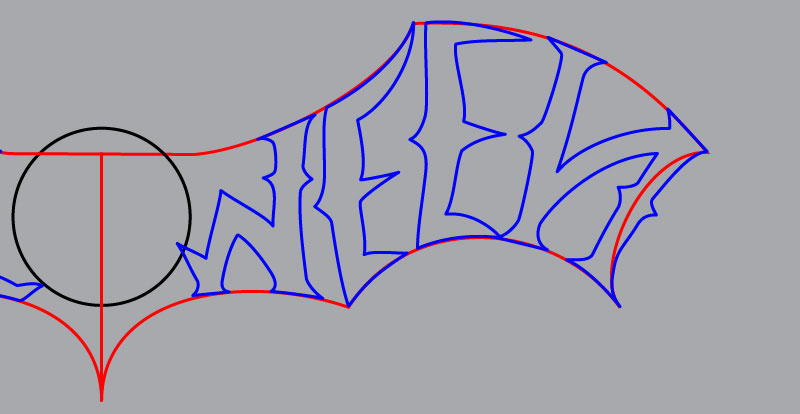
Likewise, repeat the same process as the previous steps to draw more letters.
This process will take some time but you will not be disappointed with the final result. Also you can see them all in the last image.

Step 7
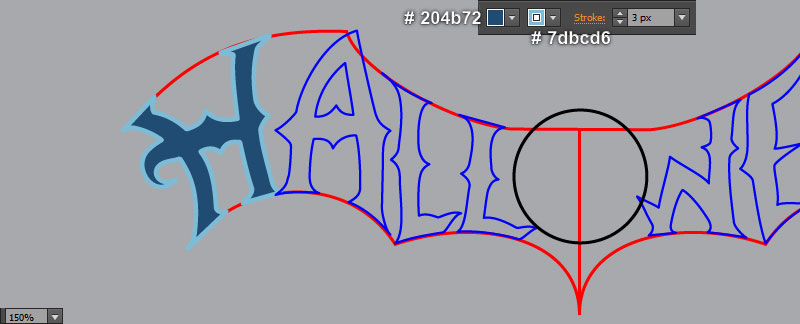
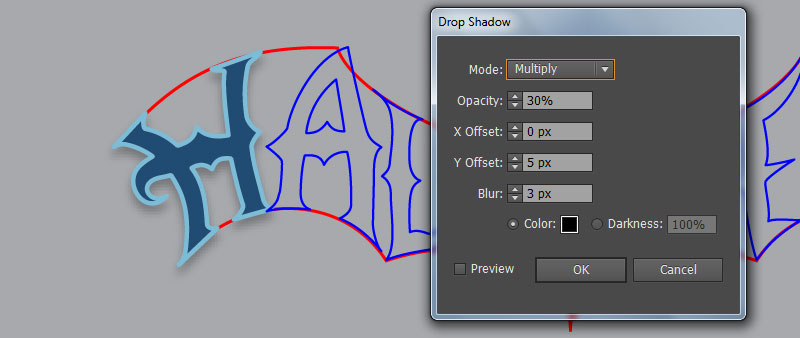
Select the blue object of the letter "H", fill it with very dark blue (# 204b72) and add a 3px slightly blue stroke (# 7dbcd6). Keep the resulting shape selected and go to the Effect > Stylize > Drop Shadow… Follow the data like you see in the second image and click OK.
Now reselect the blue objects of the remaining letters, then pick the Eyedropper Tool (I) and click on the shape of the letter "H". This will copy all existing appearances from the shape of the letter "H" onto the the blue objects of the remaining letters. The resulting shapes should look like the last image below.

Step 8
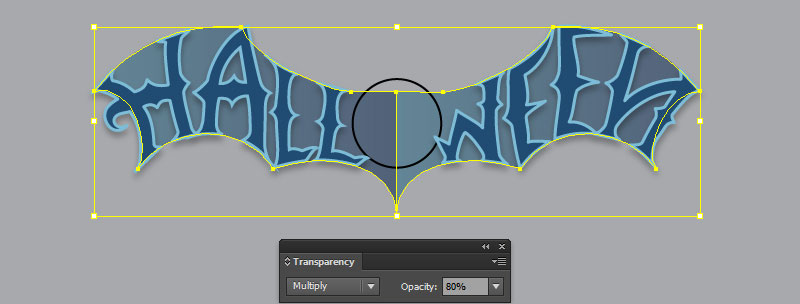
Select the left red object created in the step 2, remove its stroke and fill this object with the linear gradient as shown in the first image. Next select the remaining red object, remove its stroke and fill this object with the linear gradient as shown in the second image.
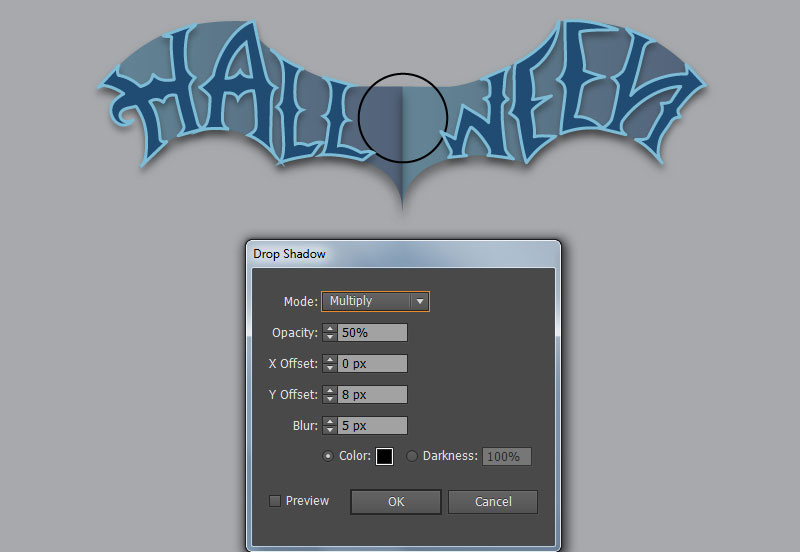
Now reselect the two newly created shapes, change the Blending Mode to Multiply and reduce its Opacity to 80%. Still having the resulting shapes selected and go to the Effect > Stylize > Drop Shadow… Follow the data like you see in the last image and click OK.


Step 9
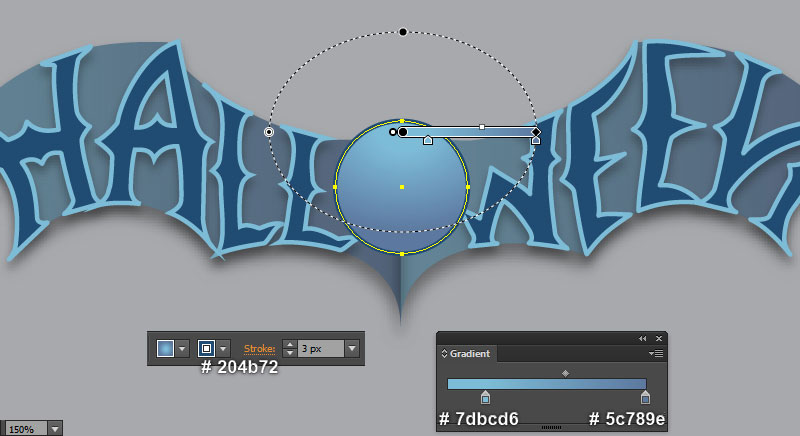
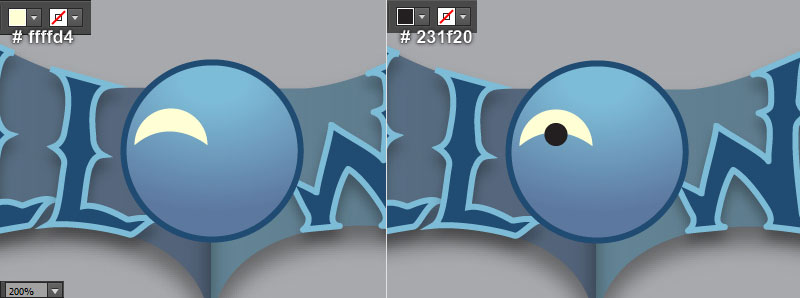
It’s time to draw the head of the bat. Select the black ellipse created in the step 3, change the stroke weight to 3px and replace the existing stroke color with very dark blue (# 204b72). Then fill the resulting ellipse with the radial gradient as shown in the first image. We will continue with the eye.
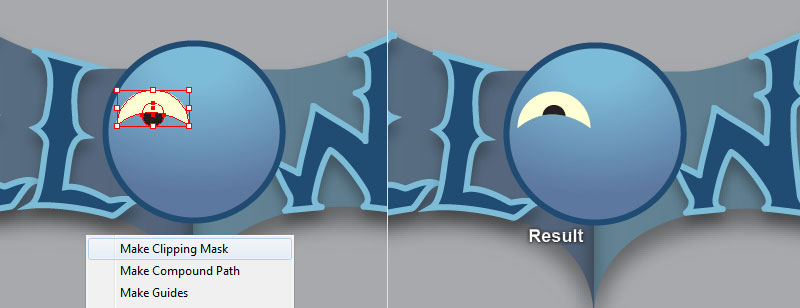
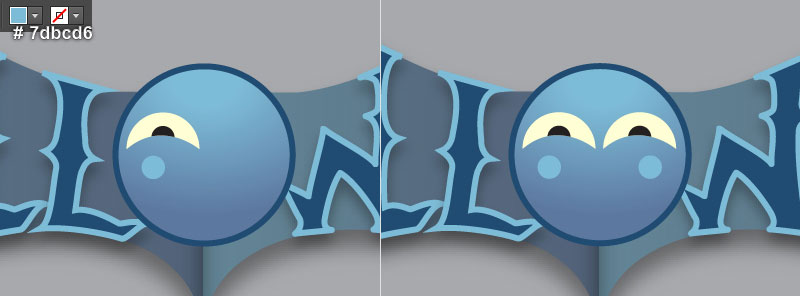
With the Pen Tool (P) create two shapes like you see in the second and the third image. Once your shapes are drawn, reselect the white shape and make a copy (Ctrl +C, Ctrl +F) of it, then bring the copy forward (Ctrl +Right Square Bracket). Keep this copy selected, hold down the Shift and click on the black ellipse created in this step. Right click on the artboard and then select the Make Clipping Mask section from the drop-down menu. Focus on the sixth image, pick the Ellipse Tool (L) and create a slightly blue ellipse (# 7dbcd6). Now reselect the newly created ellipse and the objects of the eye, then go to the Object > Transform > Reflect… Check the Vertical and click Copy. Then drag the copies we have just created to the right. Don’t forget to hold the Shift key on the keyboard for straight dragging.
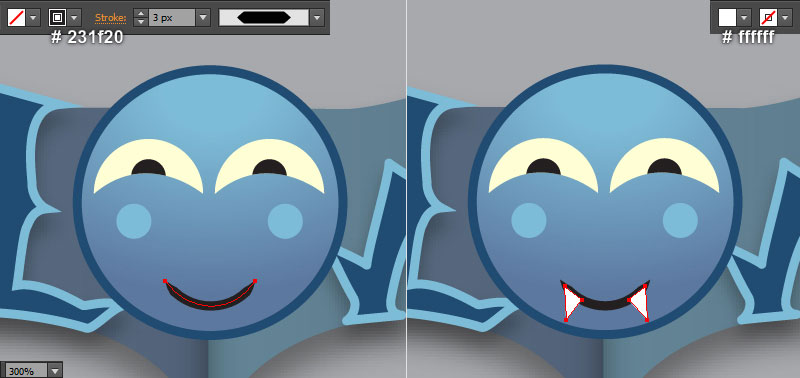
Next comes the mouth of the bat. Focus on the next to last image, draw a curved path with the Pen Tool (P) and give it a 3px black stroke (# 231f20) for the moment. Then apply the Width Profile 3 for the newly created path. Finally create two white shapes (# ffffff) like you see in the last image.
Step 10
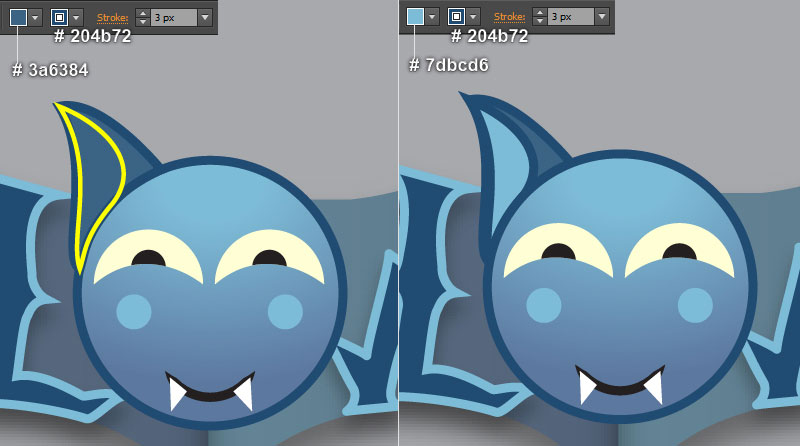
It’s time to draw the ears. Pick the Pen Tool (P) and create two objects like you see in the first and the second image. Once your objects are drawn, reselect the red object, change the stroke weight to 3px and replace the existing stroke color with very dark blue (# 204b72). Then fill the resulting object with dark blue (# 3a6384).
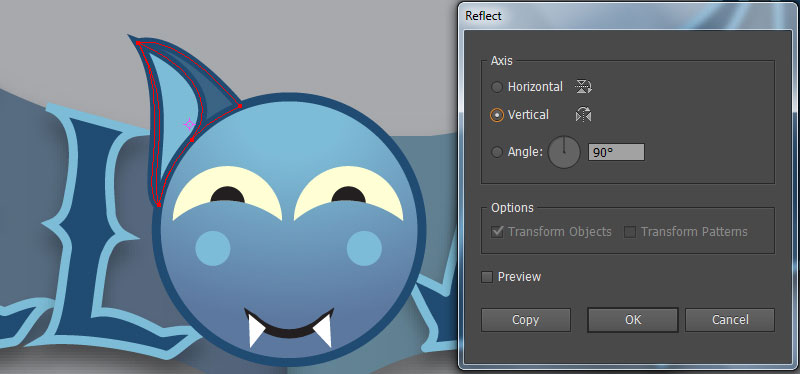
Next select the yellow object, change the stroke weight to 3px and replace the existing stroke color with very dark blue (# 204b72). Then fill the resulting object with slightly blue (# 7dbcd6). Now reselect the two newly created shapes and go to the Object > Transform > Reflect… Check the Vertical and click Copy.
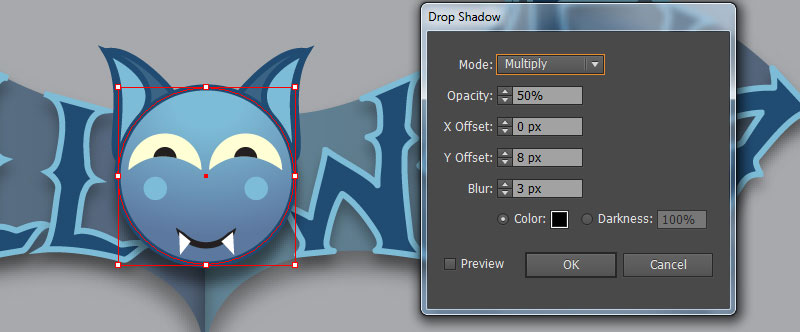
Drag the copies we have just created to the right and place them as shown in the next to last image. Don’t forget to hold the Shift key on the keyboard for straight dragging. Next select the first ellipse created in the step 9 and go to the Effect > Stylize > Drop Shadow… Follow the data like you see in the last image and click OK.


Step 11
At this point your illustration should look like in the next image:

Step 12
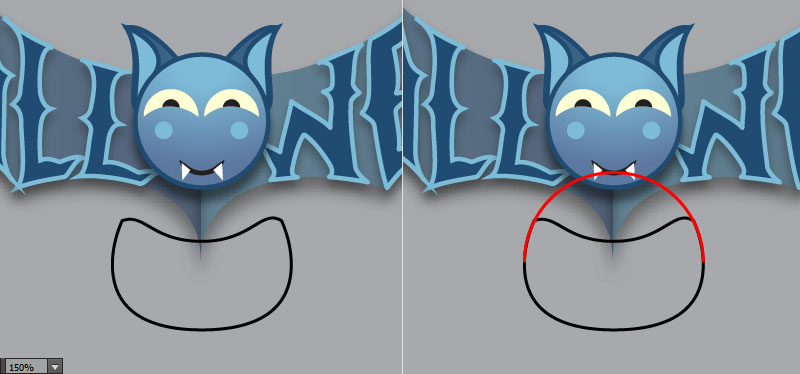
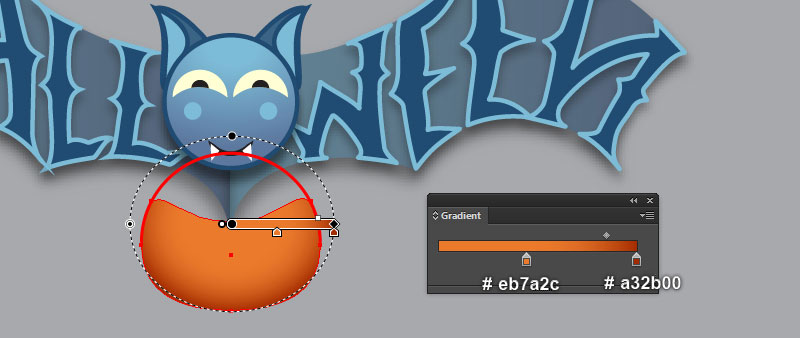
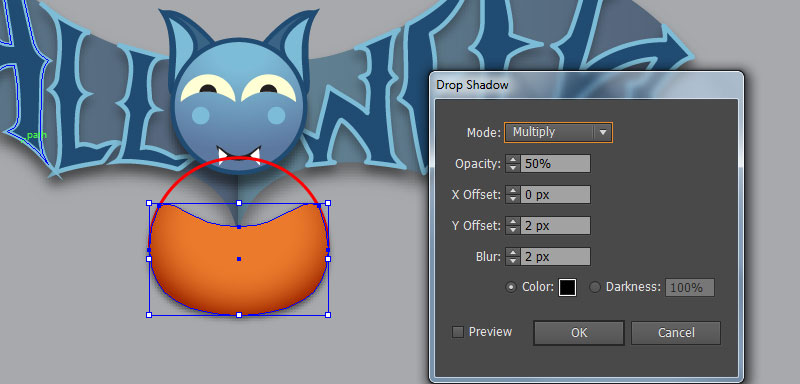
With the help of the Pen Tool (P), create two objects like you see in the first and the second image. Once your objects are drawn, reselect the black object, remove its stroke and fill this object with the radial gradient as shown in the third image. Keep the resulting shape selected and go to the Effect > Stylize > Drop Shadow… Follow the data like you see in the next to last image and click OK.
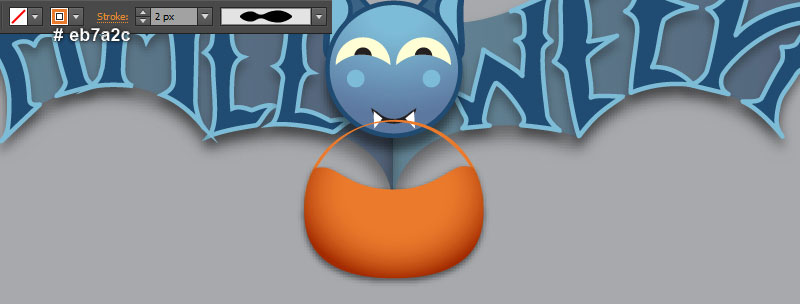
Next select the red curved path, change the stroke weight to 2px and replace the existing stroke color with bright orange (# eb7a2c). Finally apply the Width Profile 4 for the resulting path and then hide it behind the bright orange shape created in this step.
Step 13
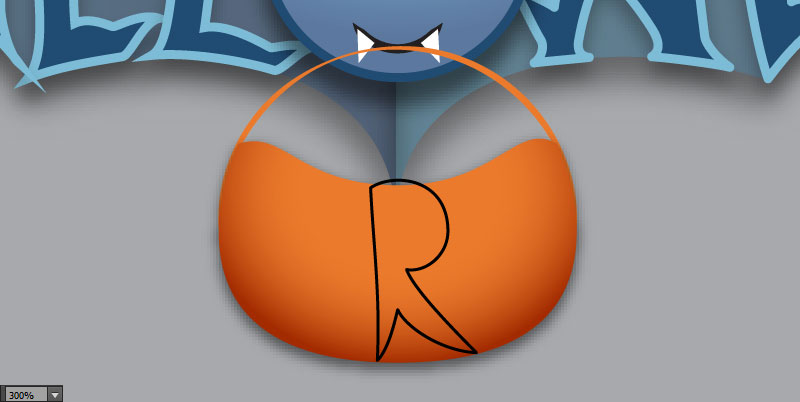
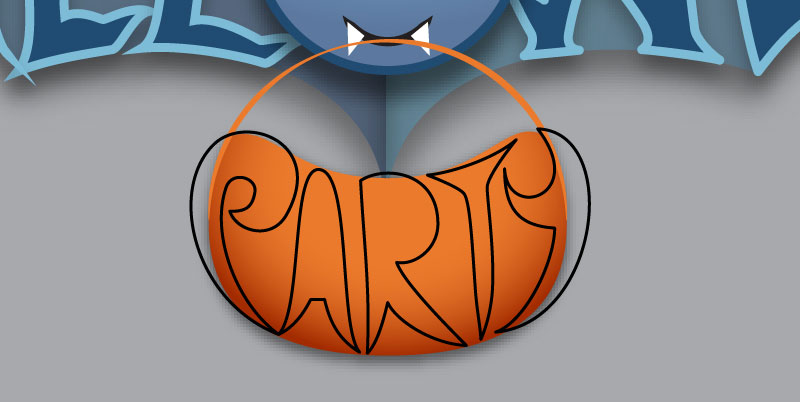
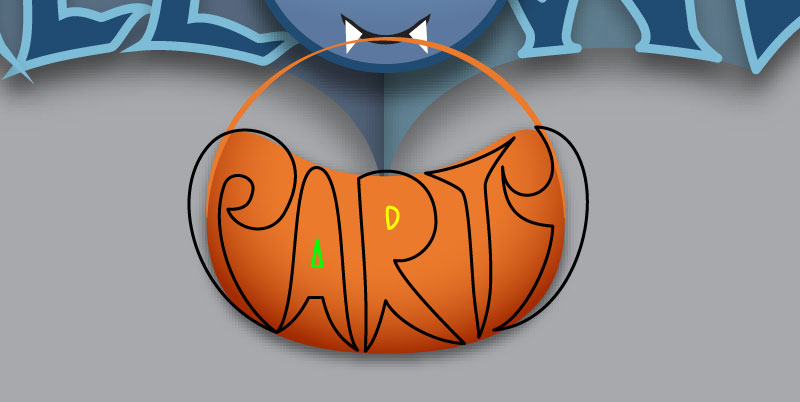
We are going to add the "PARTY" piece of text. Pick the Pen Tool (P) and create five black objects like you see in the images below. Continue draw two objects using the Pen Tool (P) as shown in the fourth image.
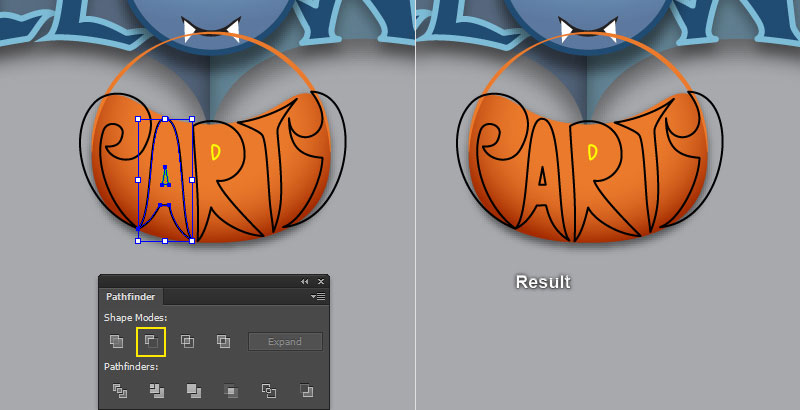
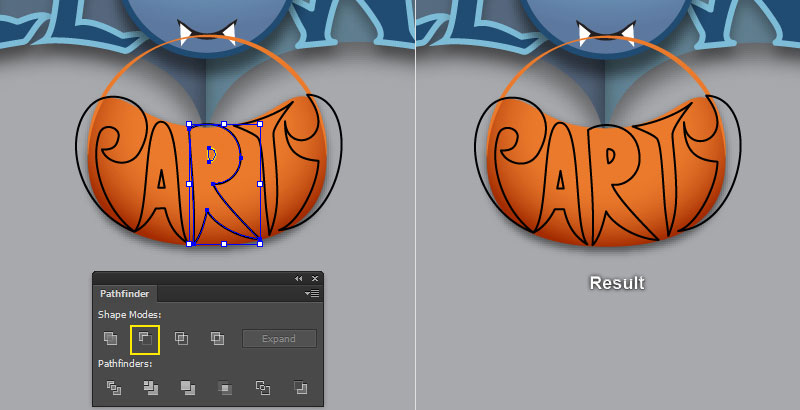
Now select the black object of the letter "A" and the green object created in this step. Then open the Pathfinder panel (Window > Pathfinder) and click on the Minus Front button. Continue select the black object of the letter "R" and the yellow object, then click on the Minus Front button from the Pathfinder panel.

Step 14
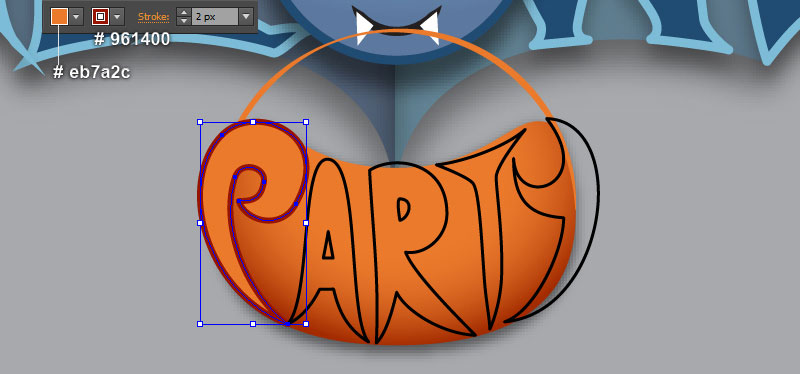
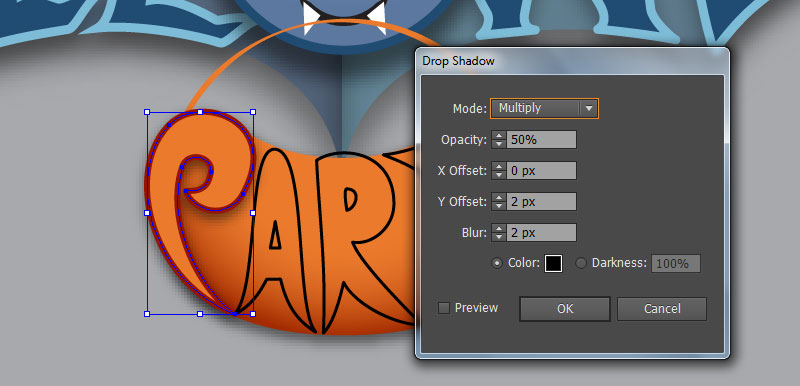
Select the black object of the letter "P", fill it with bright orange (# eb7a2c) and add a 2px dark red stroke (# 961400). Keep the resulting shape selected and go to the Effect > Stylize > Drop Shadow… Follow the data like you see in the second image and click OK.
Now reselect the black objects of the remaining letters, then pick the Eyedropper Tool (I) and click on the shape of the letter "P". This will copy all existing appearances from the shape of the letter "P" onto the the black objects of the remaining letters. The resulting shapes should look like the third image below.
Finally select the two fangs of the bat and bring them to front (Ctrl +Shift +Right Square Bracket).


Step 15
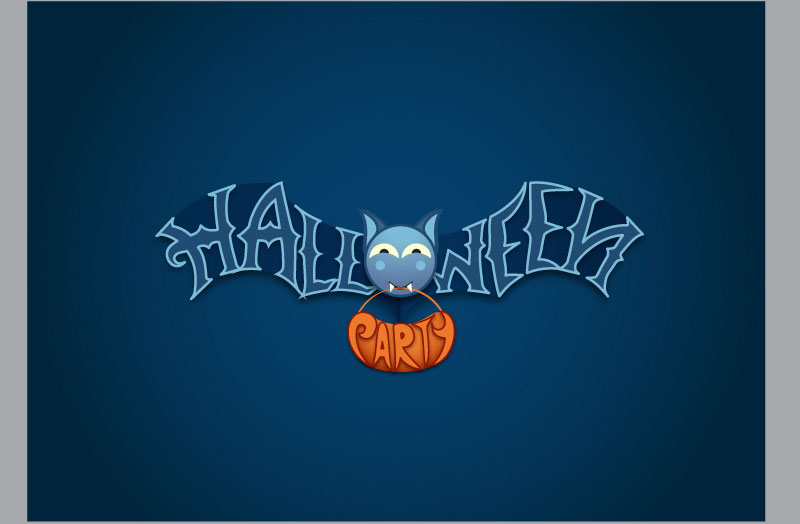
Select and group (Ctrl +G) all objects created from beginning step 2 to this time. At this point your illustration should look like in the next image:

Step 16
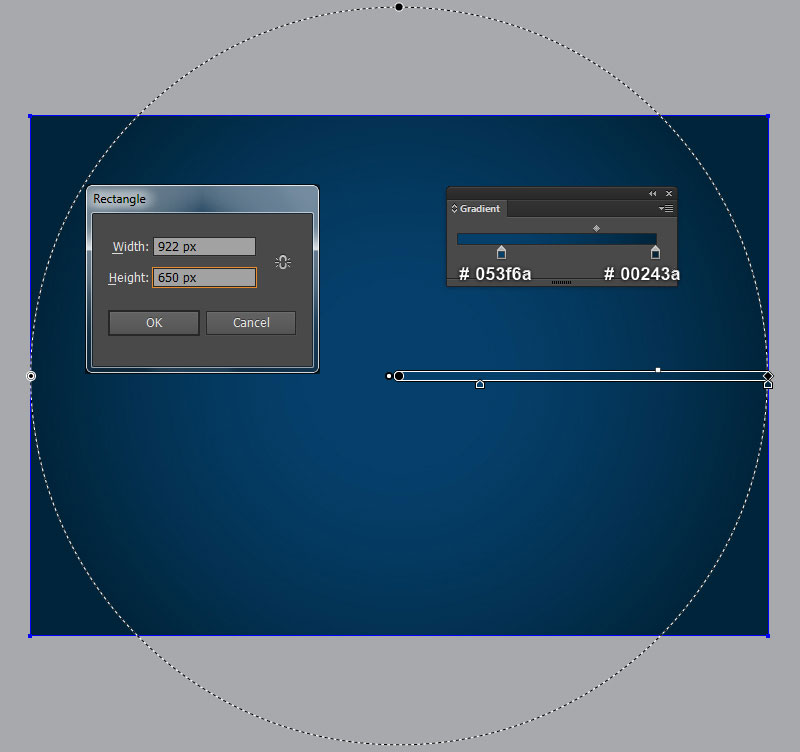
It’s time to draw the background. With the help of the Rectangle Tool (M) and the Gradient Tool (G), create a 922 by 650px very dark blue rectangle. Then place the group created in the step 15 into the newly created background.
Step 17
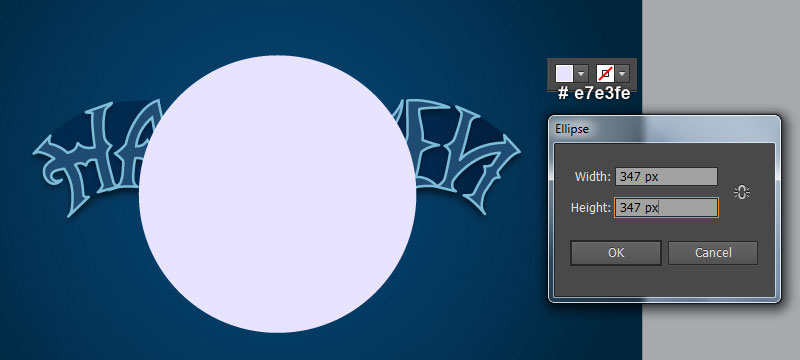
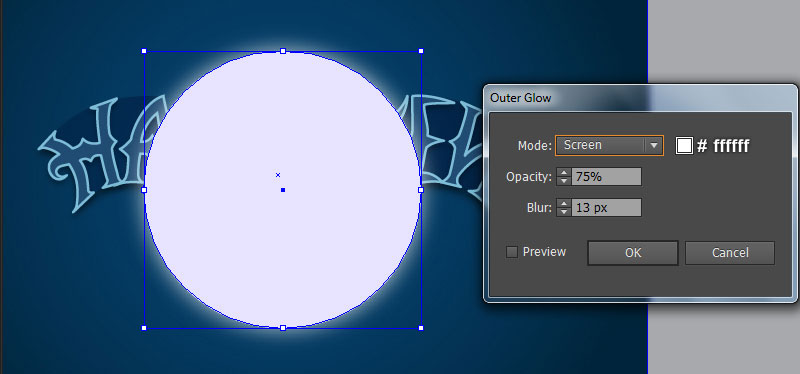
We’re done with the background. It’s time for the moon now. With the Ellipse Tool (L), create a 347 by 347px light grayish blue ellipse (# e7e3fe), then place it to the position as shown in the first image. Still having the newly created ellipse selected and go to the Effect > Stylize > Outer Glow… Enter the data like you see in the second image and click OK. Finally hide the moon behind the bat.

And We’re Done!
