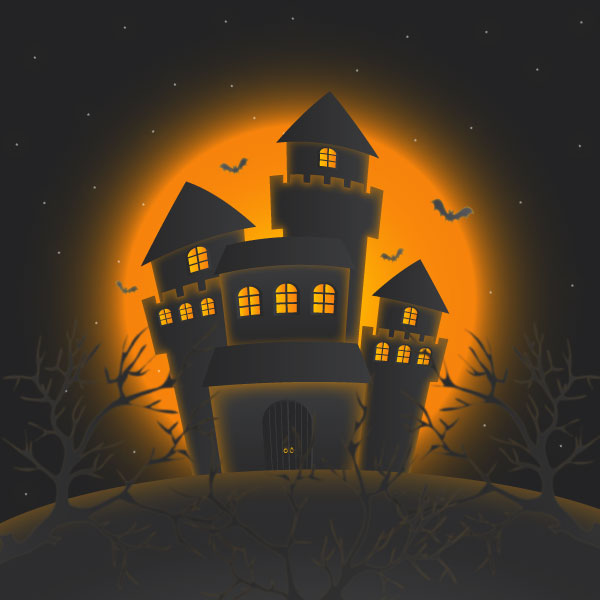
In this Illustrator tutorial, we will learn how to illustrate a haunted castle using very simple techniques.
Halloween is here and we will use the effects along with some basic vector shapes to achieve the final outcome of this tutorial.
Final Image
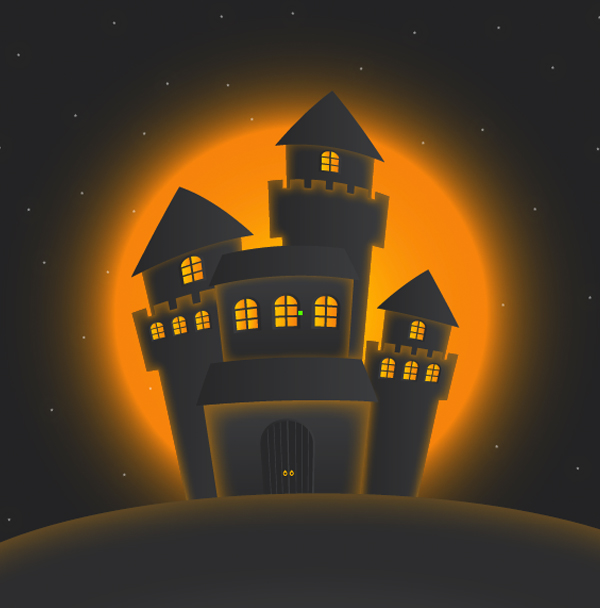
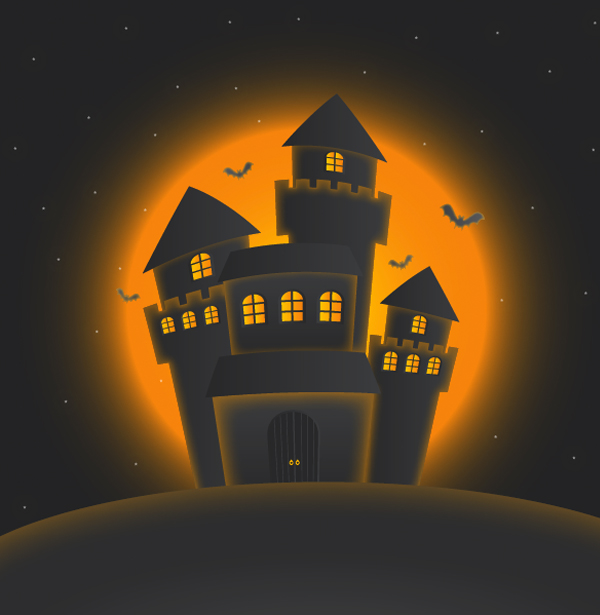
As always, this is the final image that we’ll be creating:

Tutorial Details
- Program: Adobe Illustrator CS6
- Estimated Completion Time: 45 minutes
- Difficulty: Beginner-Intermediate
Step 1
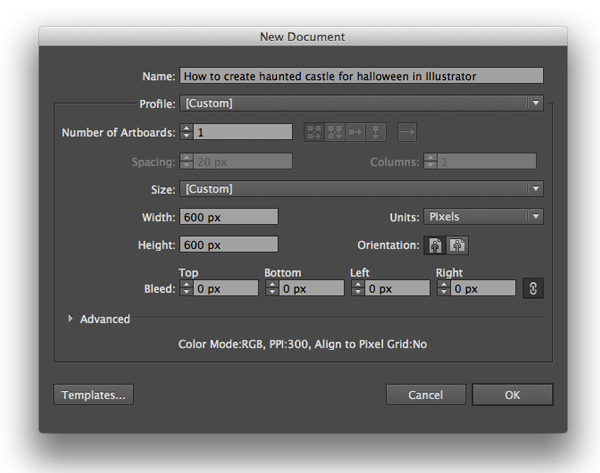
Let’s create a new document first. Make sure to set the dimensions to 600 x 600 pixels and the Color Mode to RGB.
Step 2
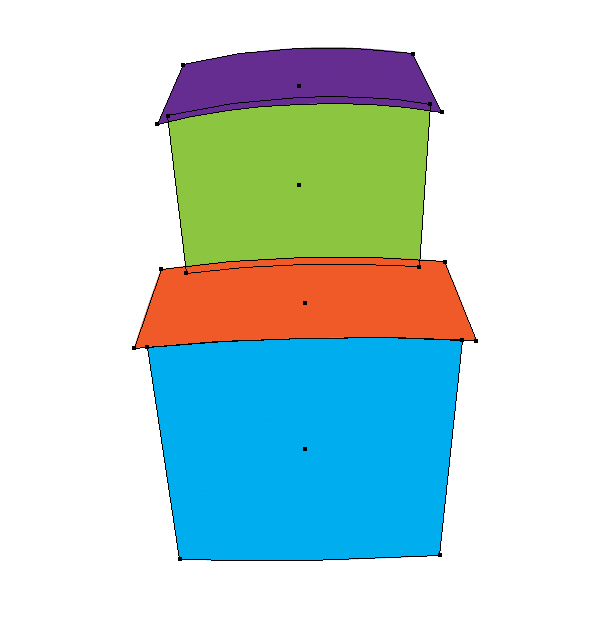
Starting with the Pen Tool (P). Let’s try to draw our castle, I’ve drawn the base shapes – imperfect rectangles for the main wall like this image below.
Step 2
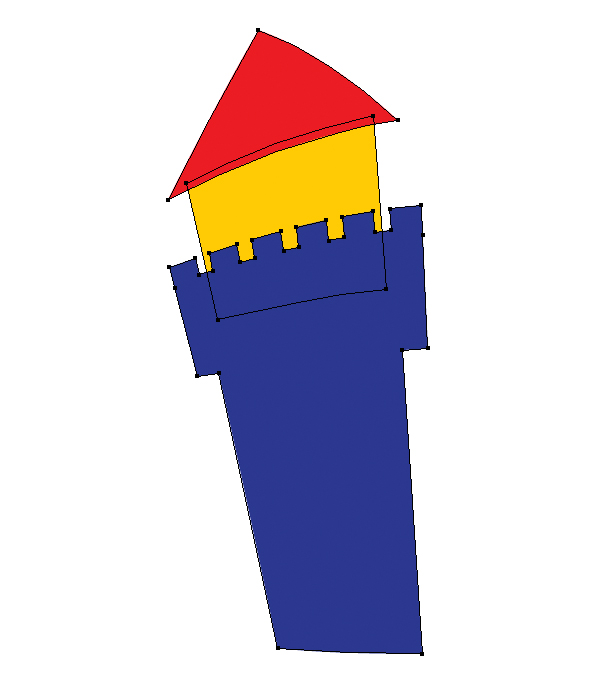
Add two more rectangles for the towers and triangles to form the conical spire.
Step 3
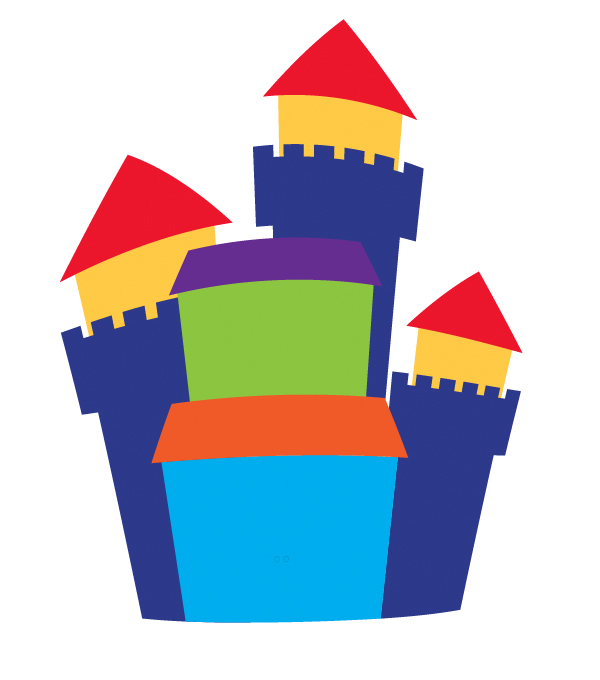
Now we duplicate (Ctrl / Cmd + C, Ctrl / Cmd + V) the tower and place the copies as shown below.
Step 4
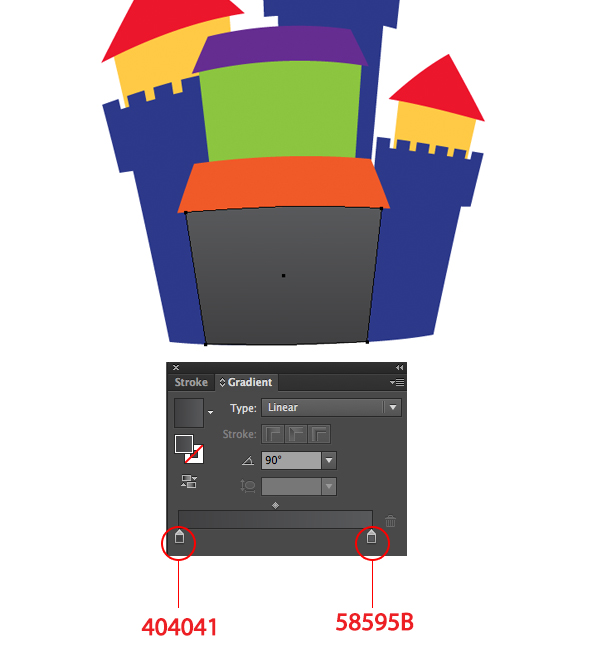
To create a mysterious, Halloween atmosphere to our image, we’re going to add a dark gradient to our castle.
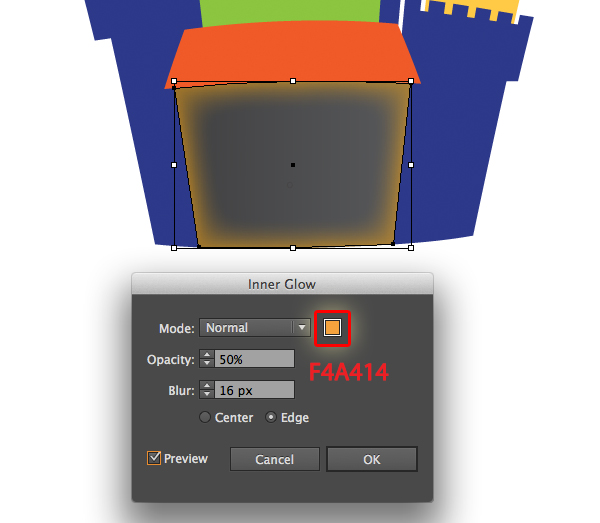
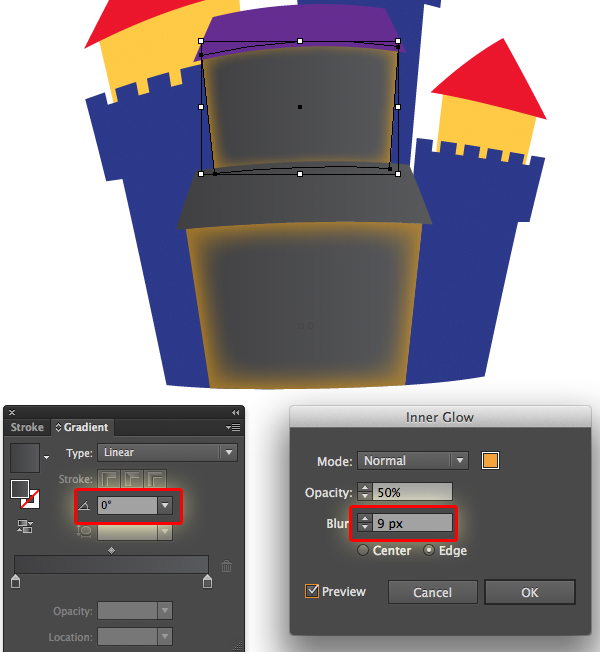
Make sure that the shape is selected, then go to Effect > Stylize > Inner Glow. Enter the attributes shown in the following image and then click the OK button. This will give the illusion of shining light in the dark.
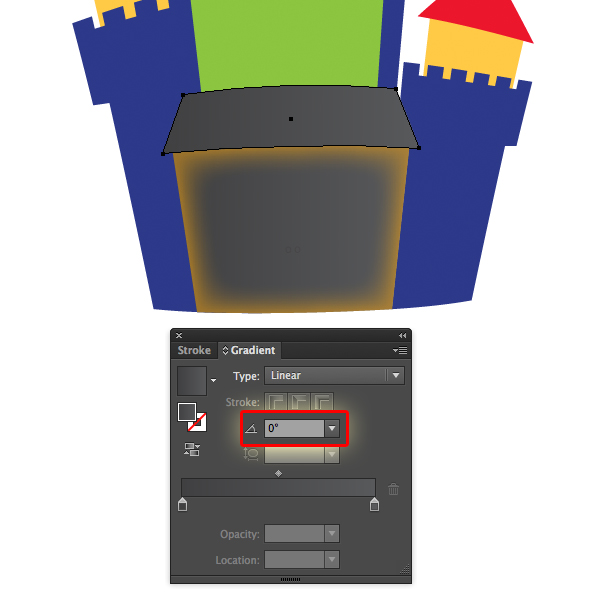
Now we apply the same gradient for the roof, make sure to set Angle = 0.
Step 5
Repeat Step 4 for the other parts of the main wall, but in this step, we change the Inner Glow effect setting as shown in the image below.
Step 6
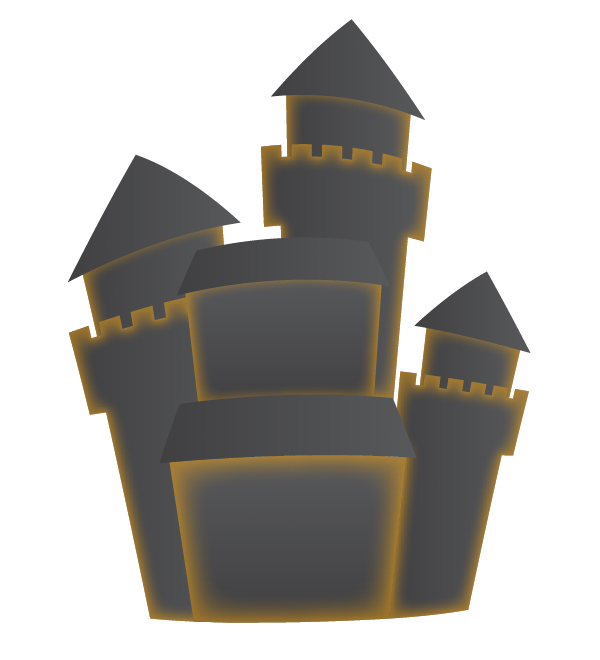
Work on the other parts of the castle in the same way, but remember not to apply the Inner Glow effect to the roofs. Here is my result.
Step 7
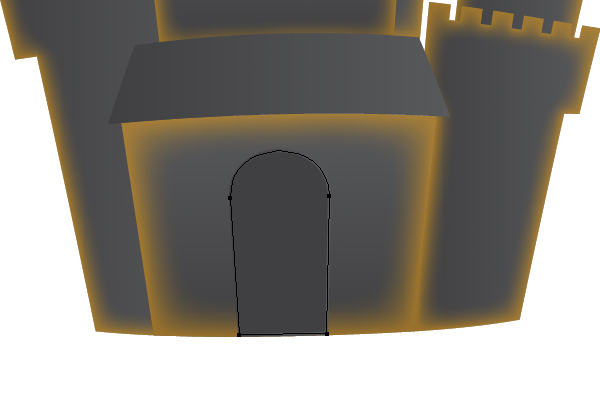
Let’s create the door for our castle. For this step I use the Pen Tool (P) to create a half-ellipse shape, but you can use the Pencil Tool (N) if you prefer.
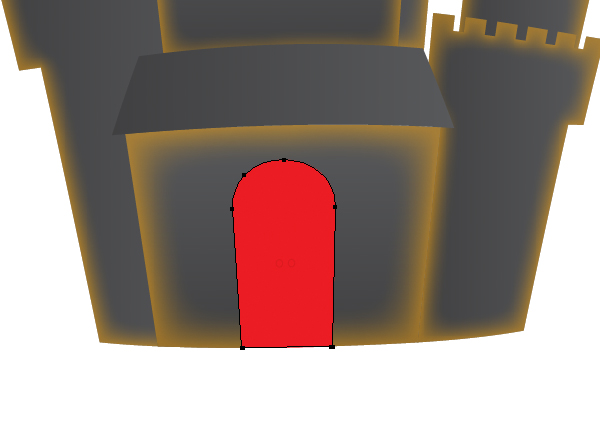
Apply the same gradient as in the previous steps, make sure to set Angle = 0.
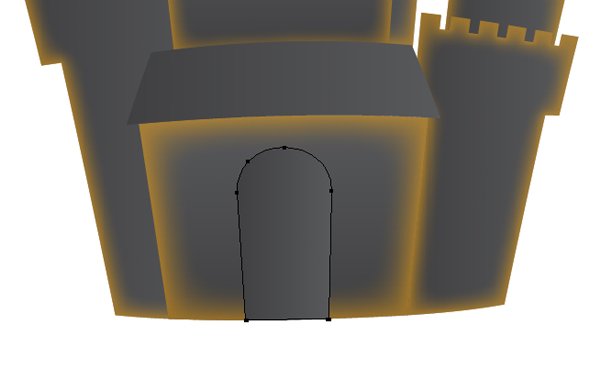
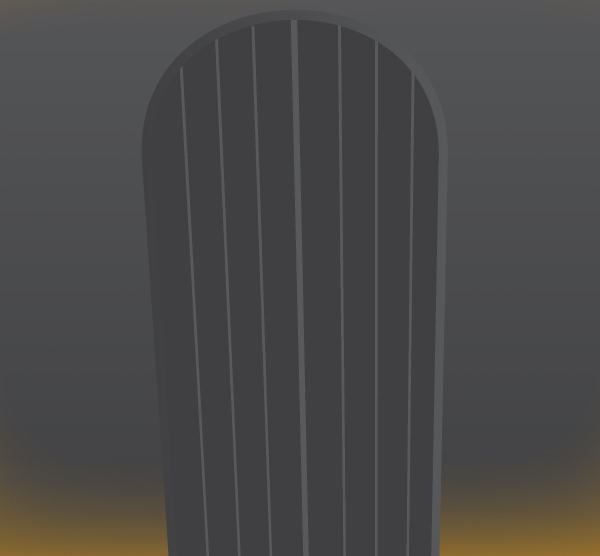
Duplicate (Ctrl / Cmd + C, Ctrl / Cmd + F) the door shape one more time and resize it smaller. Then fill it with white #404041.
Then add some vertical rectangles, then fill them with color #58595B.
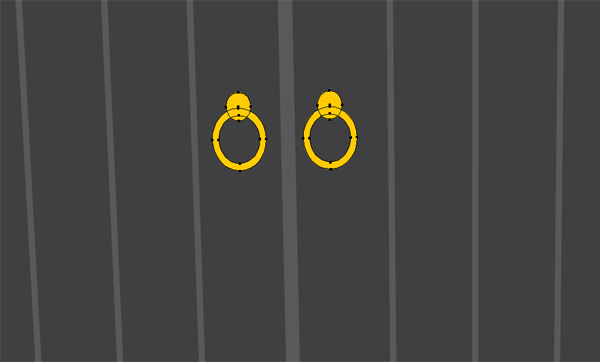
Now we pick the Ellipse tool (P) and create the door handles, fill them with color #FFCB04. Here is my result.
Step 8
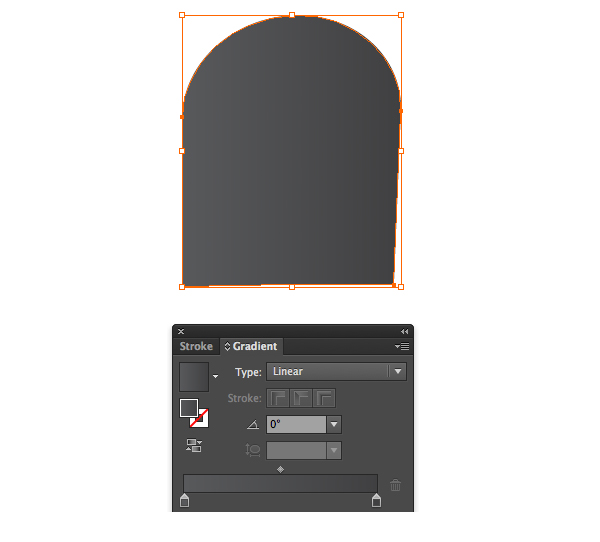
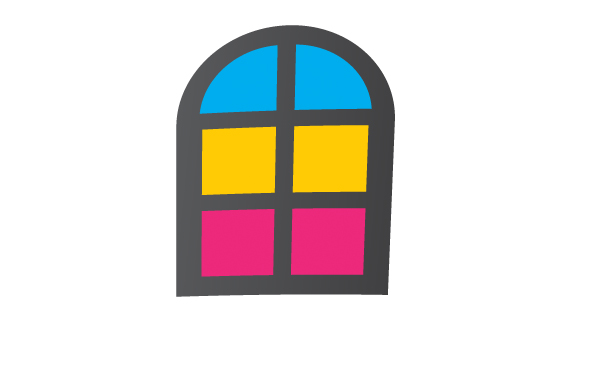
Let’s create an illusion of a bright light coming through the windows of the castle, adding a touch of mystery. For this step I used the Pen Tool (P) to create a half-ellipse shape shorter than the door shape. Fill it with same gradient as in the previous steps.
Using the Pen tool (P) and the Rectangle tool (M) create some shapes as shown in the images below.
Apply the gradient to the shapes that we’ve created. Here is my result.
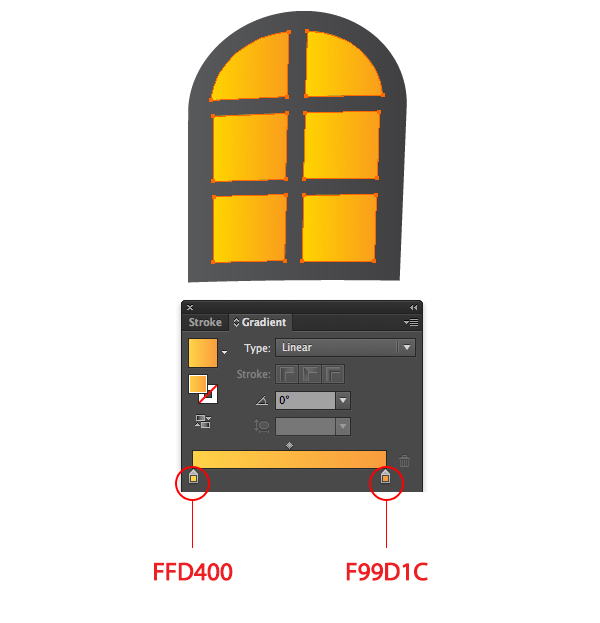
Group (Cmd + G) the window shapes elements together then duplicate (Ctrl / Cmd + C, Ctrl / Cmd + V) and place them as shown below. Here is my result.
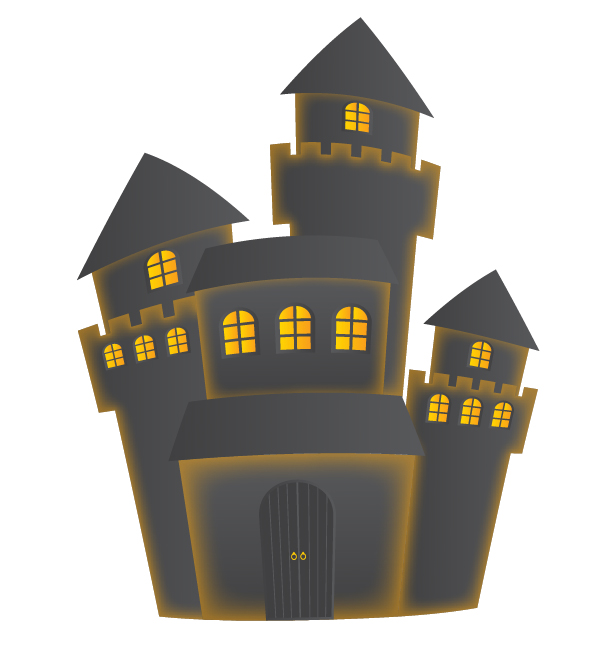
Step 9
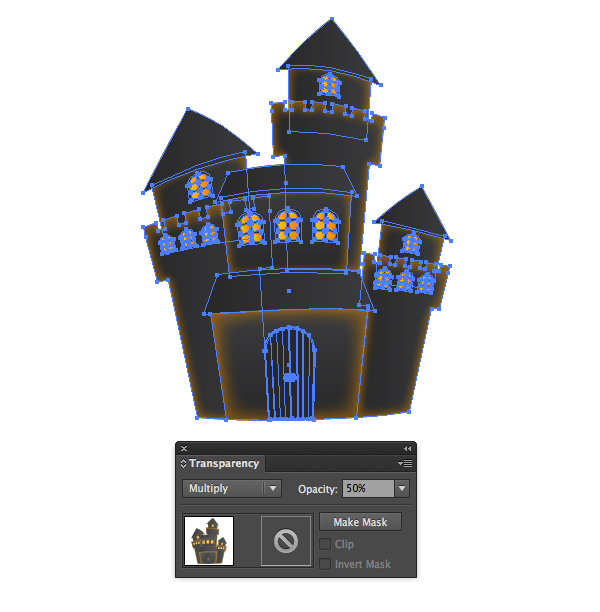
I want this castle to look darker, so duplicate (Ctrl / Cmd + C, Ctrl / Cmd + F) it and paste the copy in front, switch the Blending Mode to Multiply with Opacity = 50%.
Step 10
Pick the Ellipse Tool (L) to create the hill, draw an ellipse and fill it with the same gradient as in the previous steps. Don’t forget to apply the Inner Glow effect to it.
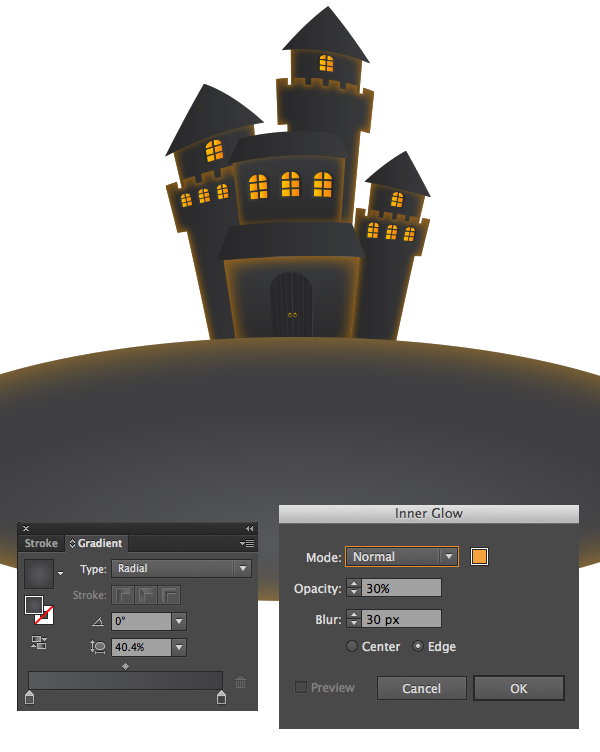
Pick the Rectangle tool (M) to create a rectangle with the dimensions 600×600 pixels, place it above the hill shape.
Then select both rectangle shapes and the hill shape at the same time, and click the Make/Release Clipping Masks button at the bottom of the Layers panel or select Make Clipping Mask from the Layers panel menu.
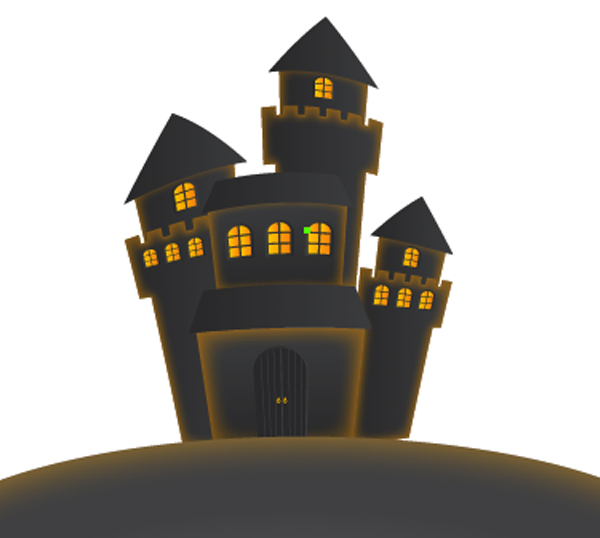
I want this hill shape to look darker, so duplicate (Ctrl / Cmd + C, Ctrl / Cmd + F) it and paste the copy in front, switch the Blending Mode to Multiply with Opacity = 40%.
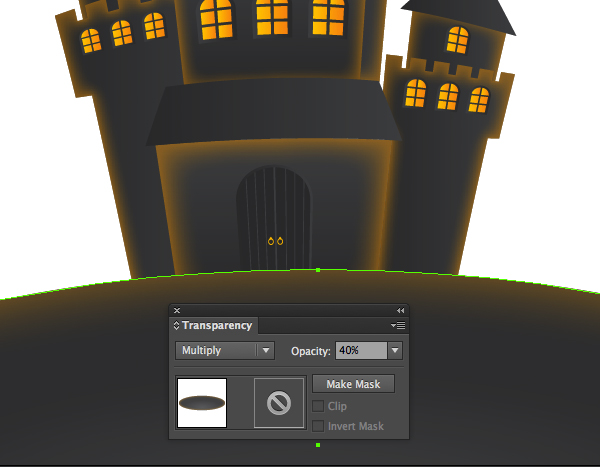
Step 11
Create a rectangle for the background, using the Rectangle Tool (M), and Send to Back (Shift-Control-[). Fill the background with the radial gradient.
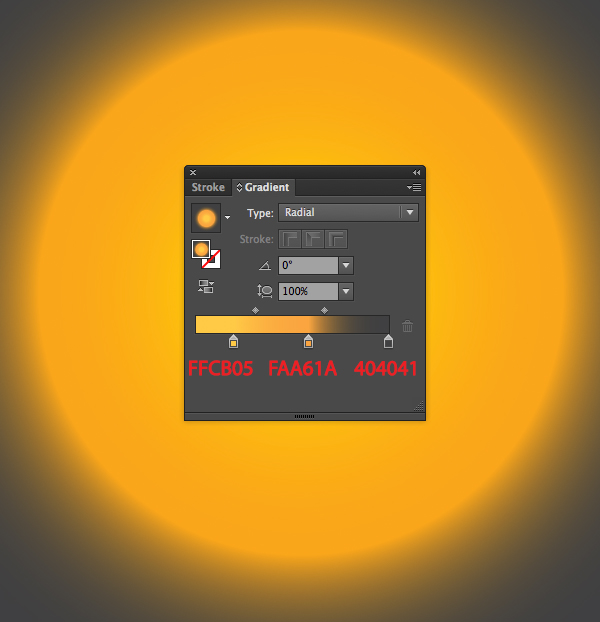
Duplicate (Ctrl / Cmd + C, Ctrl / Cmd + F) this background and paste the copy in front, switch the Blending Mode to Multiply with Opacity = 50%.
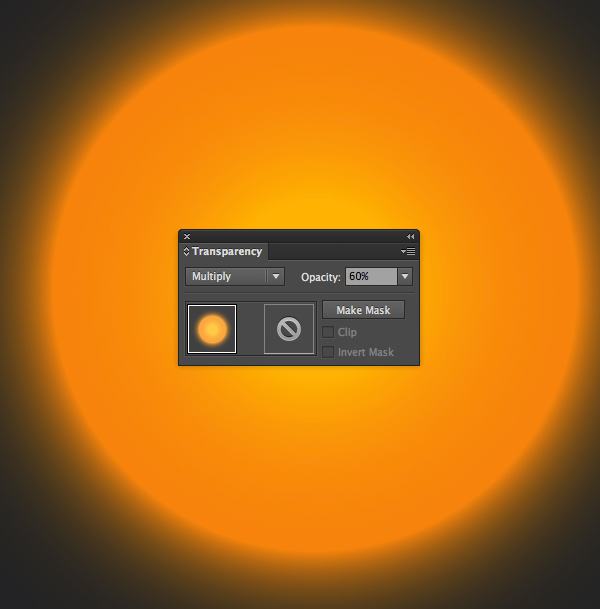
Now we will add some stars to our sky, just pick the Star tool and create some stars, then place them randomly as you like. Here is my result.
Step 12
Our picture is almost complete! Let’s add some interesting elements, which will attract more attention and enliven the composition. We need some characters suitable for a Halloween theme. So let’s add some bats flying in the sky.
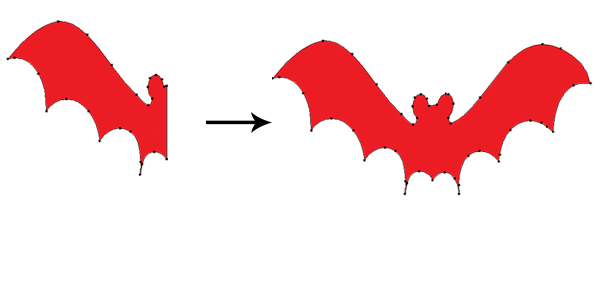
Draw a curved shape using the Pencil Tool (N) to depict the left part of a bat’s silhouette. Reflect the shape over the Vertical Axis and combine the halves, forming a single silhouette.
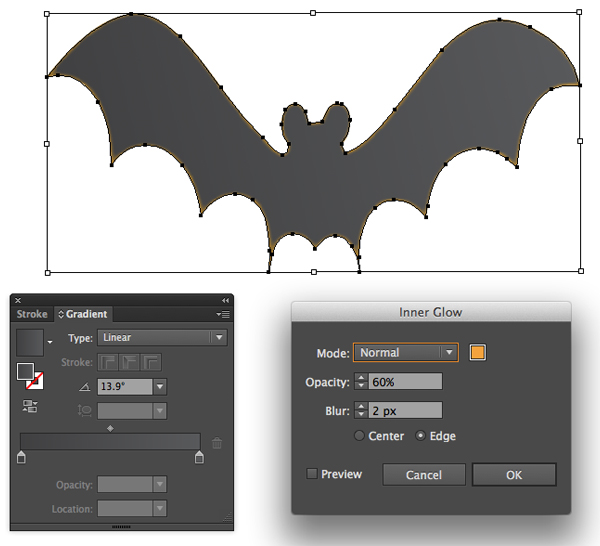
Use the same filling gradient and Inner Glow effect as in the previous steps for our bat.
Duplicate (Ctrl / Cmd + C, Ctrl / Cmd + V) this bat and place copies around the castle. Here is my result.
Step 13
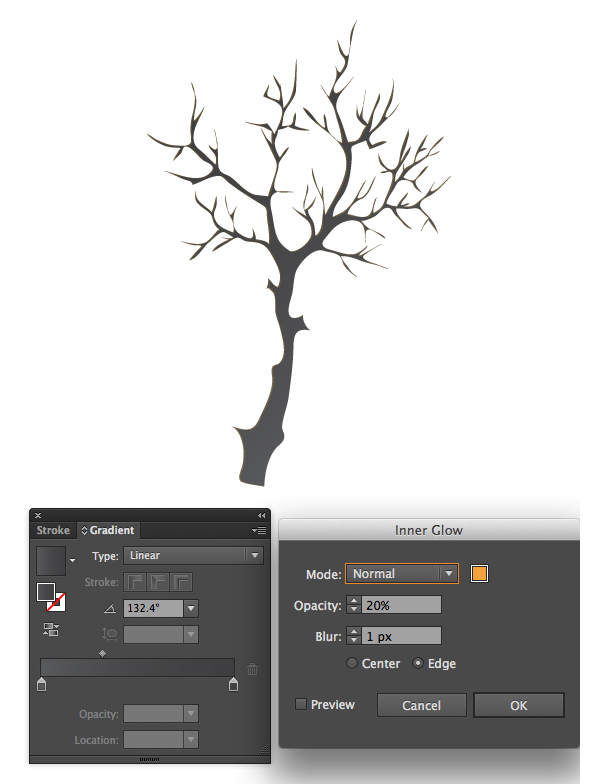
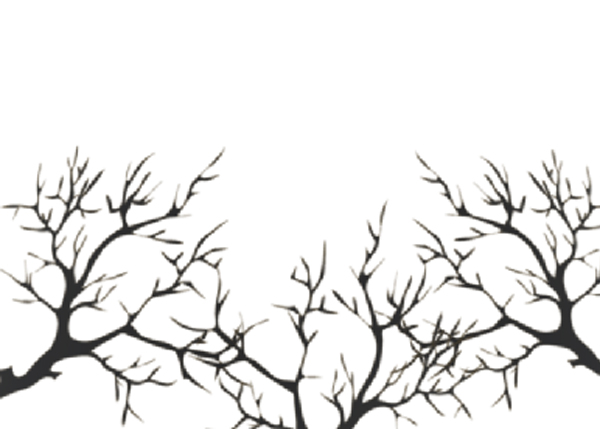
Draw out a scribbled shape , imitating the tree. Use the same filling gradient and Inner Glow effect as in the previous steps for our tree.
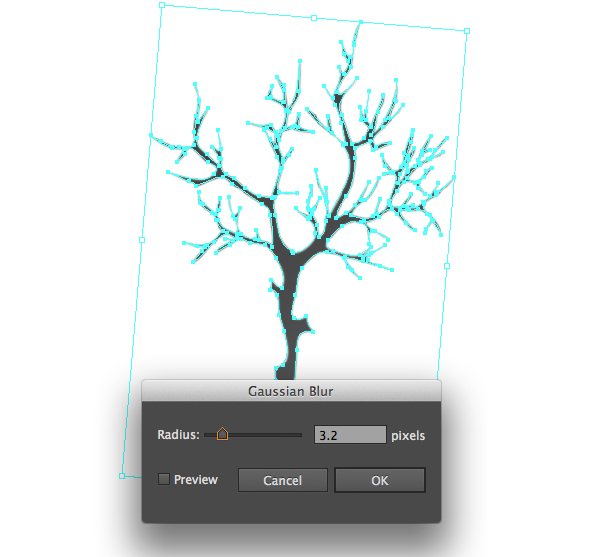
With the shape still selected, go to Effect > Blur > Gaussian Blur and set the value.
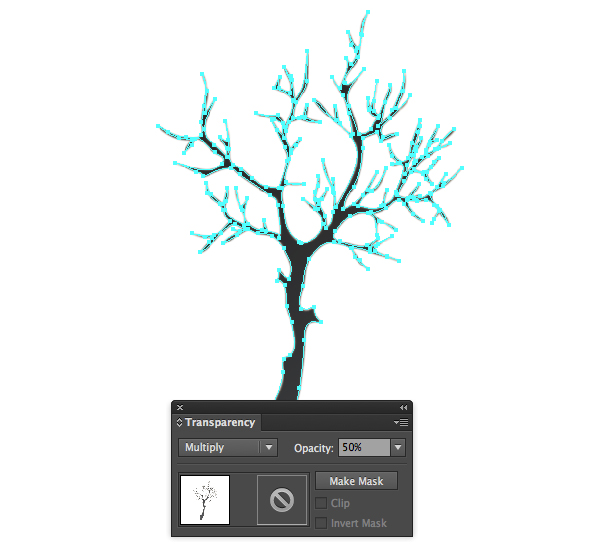
I want this tree shape to look darker, so duplicate (Ctrl / Cmd + C, Ctrl / Cmd + F) it and paste the copy in front, switch the Blending Mode to Multiply with Opacity = 50%.
Duplicate (Ctrl / Cmd + C, Ctrl / Cmd + V) this tree shape and place copies around the hill. Here is my result.
And We’re Done!
Here is how it should look. I hope you’ve enjoyed this tutorial and can apply these techniques to your future projects.
