In this new tutorial you will learn how to create colorful wrapped candy in Adobe Illustrator. These sweet treats are waiting for you so let’s get started!
Final Image
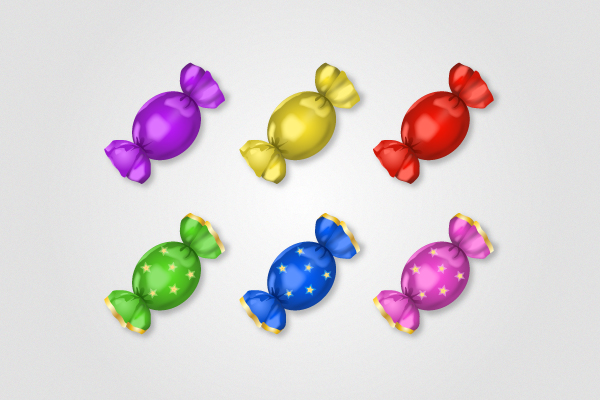
As always, this is the final image that we’ll be creating:
Tutorial Details
- Program: Adobe Illustrator CS5
- Estimated Completion Time: 45 min
- Difficulty: Beginner-Intermediate
Step 1
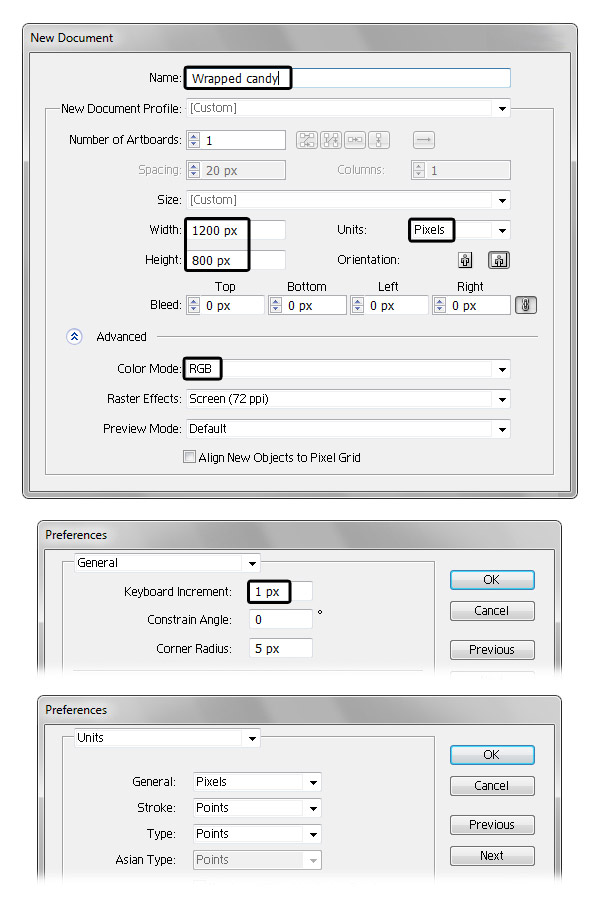
Launch Illustrator and go to File > New in order to open a blank document. Type a name for your file and set up the dimensions then select Pixels as Units and RGB as Color Mode. Next, go to Edit > Preferences > General and set the Keyboard Increment to 1 px and while there, also go to Units and make sure that they are set as in the following image. I usually work with these settings and they will help you throughout the drawing process.
Step 2
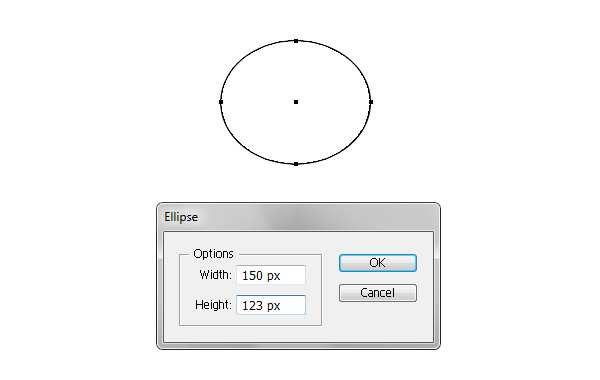
Grab the Ellipse Tool (L) and draw the first ellipse on your artboard. This will be the “body” of the candy.
Step 3
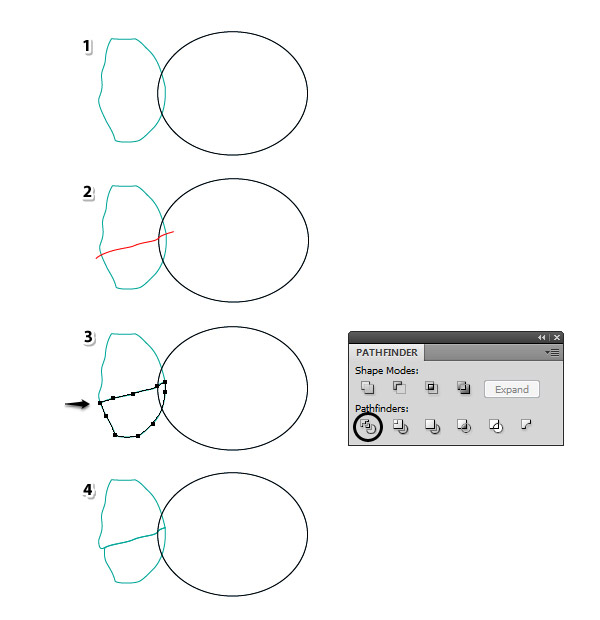
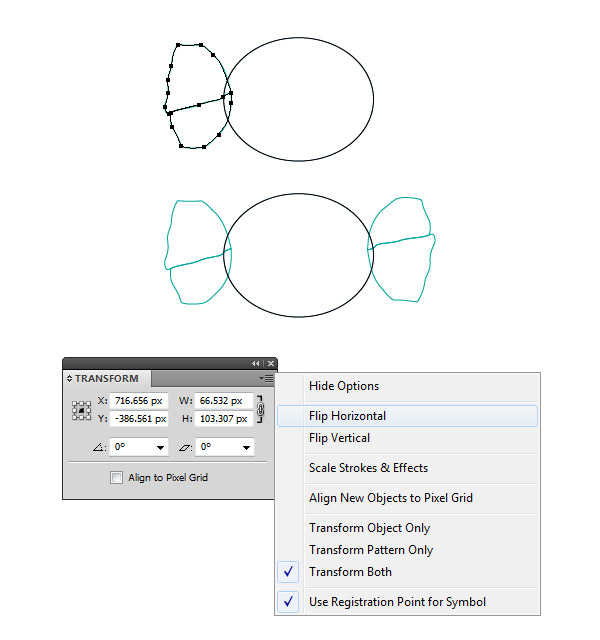
Next, grab the Pen Tool (P) or Pencil Tool (N) and draw a similar shape in the left side (1), then draw a red path over it (2). Now, select the green shape along with the red path and press Divide in the Pathfinder panel and then Ungroup (Shift-Control-G). As a result of this action, you will get two separate shapes.
Use the Direct Selection Tool (A) to select only the anchor point indicated (3) and move it inwards a little (4). Let’s name these two shapes “top-left-foil” and “bottom-left-foil”.
Step 4
Select “top-left-foil” and “bottom-left-foil” and Copy and Paste in Front (Control-F), then go to the Transform panel and from the fly-out menu, choose Flip Horizontal and Flip Vertical. Move the two new shapes in the right side of the ellipse. Let’s name them “top-right-foil” and “bottom-right-foil”.
Step 5
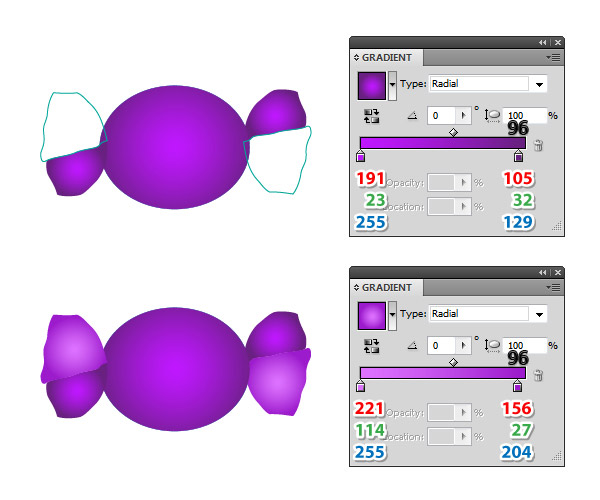
Fill the “bottom-left-foil”, “top-right-foil” and the “body” with the first radial gradient shown and then use the second gradient for the “top-left-foil” and the “bottom-right-foil”.
The two shapes from the left side should be in front of the “body” but send the other two shapes from the right behind it.
Step 6
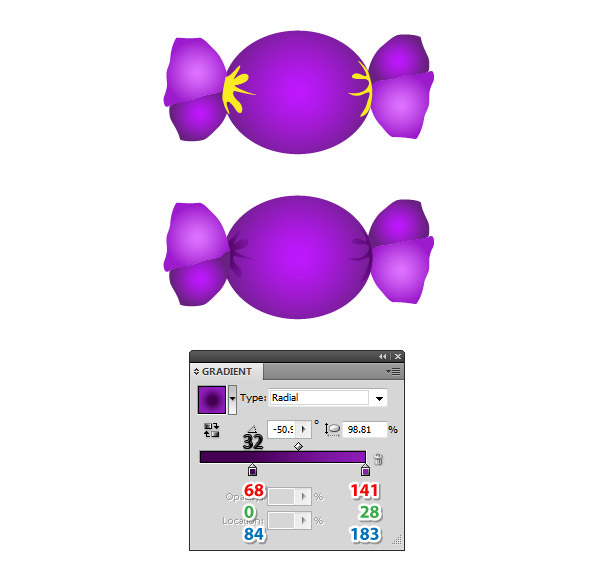
Use the Pen Tool (P) or the Pencil Tool (N) to draw the yellow shapes from the next image but you don’t have to be precise here. When you’re done, fill them with the radial gradient shown.
Step 7
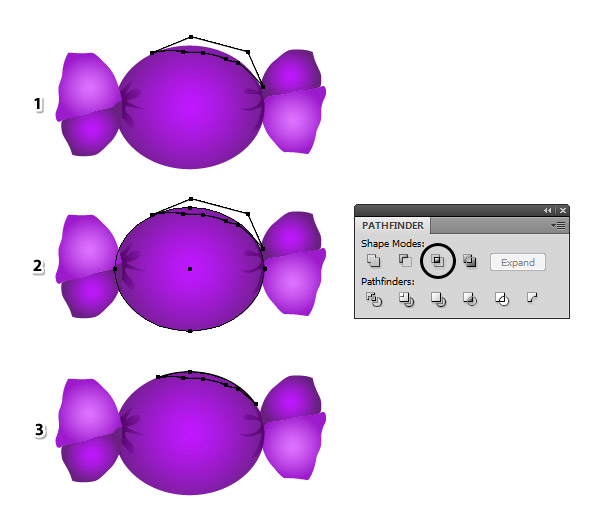
It’s time to create all the reflections, add highlights and shading on the foil wrapper.
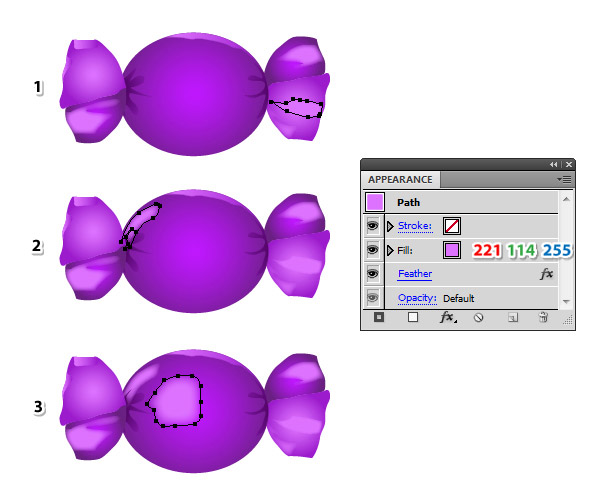
Use the Pen Tool (P) to draw the black shape from the next image (1). Next, select the “body” and then Copy and Paste in Front (Control-F). Now, select the black shape along with the copy of the “body” and press Intersect in the Pathfinder panel (2). As a result, you will get the thin shape at the top (3).
Step 8
Draw more random shapes on the candy and following the technique explained above, subtract to make them fit perfectly.
Step 9
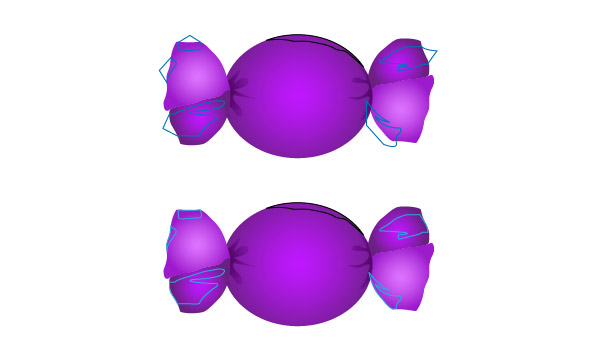
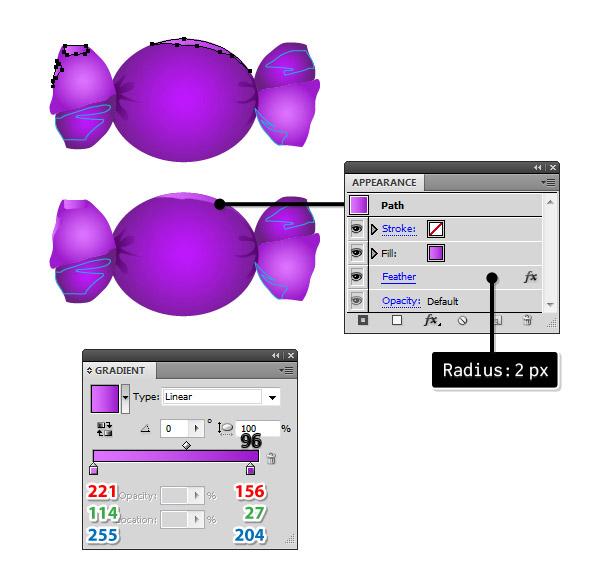
Fill the three shapes selected with the linear gradient shown. Select only the thin shape at the top, go to Effect > Stylize > Feather and apply a Radius of 2 px.
Step 10
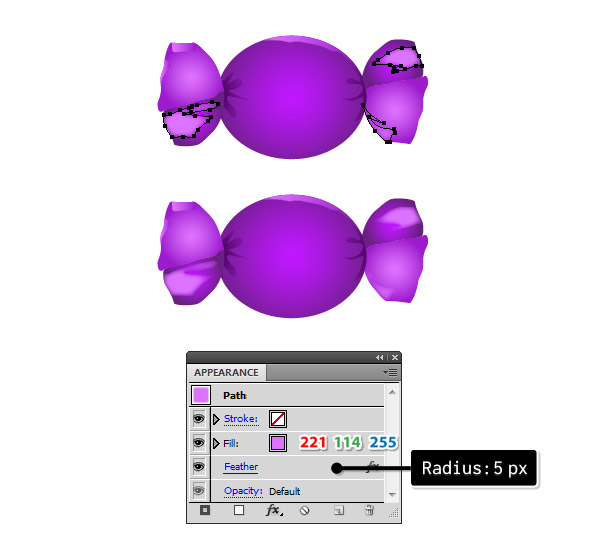
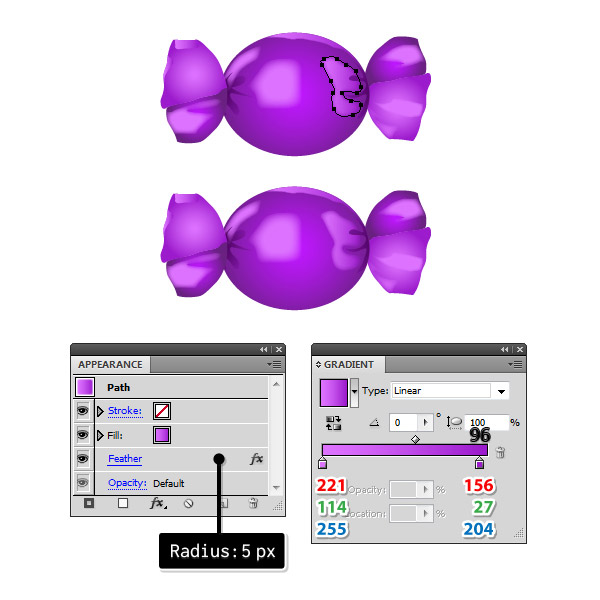
Fill the three shapes selected with pink, go to Effect > Stylize > Feather and apply a Radius of 5 px.
Step 11
Draw a new shape on the “bottom-right-foil” (1), in the top left side of the “body” (2) and almost in the center (3). Fill these shapes with pink and apply the Feather effect but using different Radius values: 3 px, 5 px and respectively 10 px.
Step 12
Draw a new shape in the right side of the “body” and fill it with the linear gradient shown. Go to Effect > Stylize > Feather and apply a Radius of 5 px.
Step 13
To add more details, draw a few small shapes as in the following image. Fill them with pink and then apply the Feather effect using a Radius of 2-3 px.
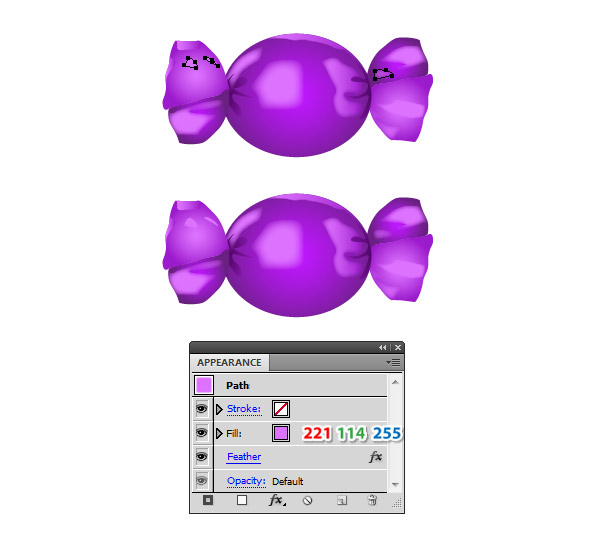
Step 14
Continue with the next two shapes. Fill the blue one with purple (1) and the yellow one with the radial gradient shown (2). You can see the final result in the image below (3).

Step 15
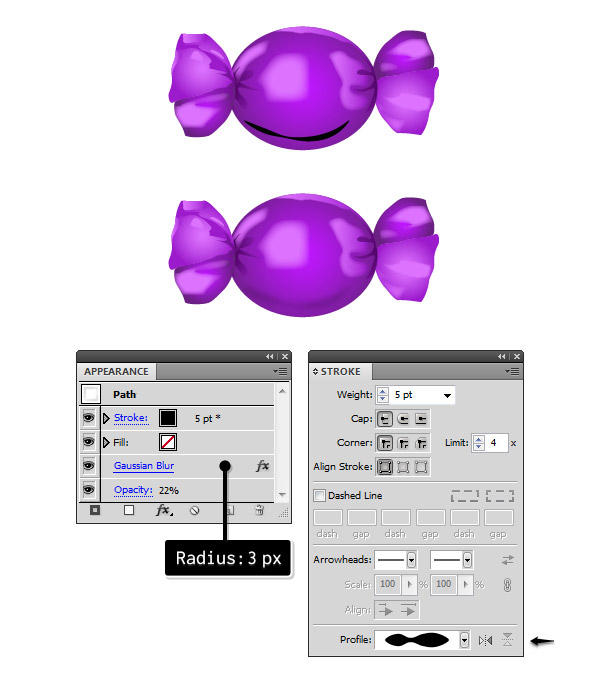
Let’s add shading and highlights on the candy. Grab the Pen Tool (P) or the Pencil Tool (N) and draw a curved path at the bottom of the “body”. Select a 5 pt black Stroke along with the Width Profile 2 in the Stroke panel.
With this path still selected, go to Effect > Blur > Gaussian Blur and apply a Radius of 3 px. After that, reduce the Opacity to 22%.
Step 16
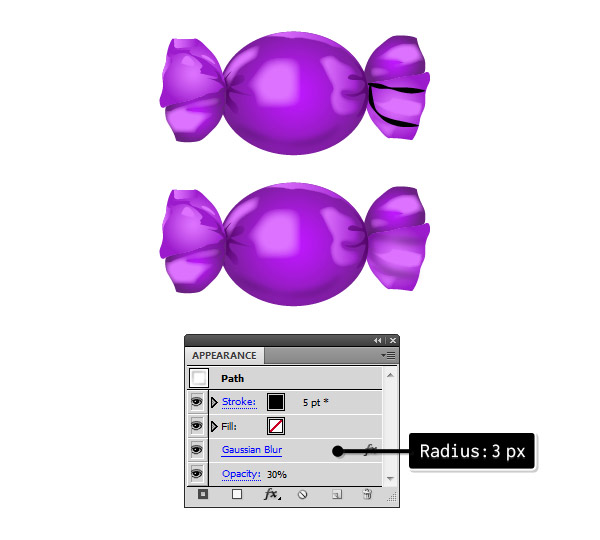
Draw other two paths on the “bottom-right-foil” as in the next image. Select a 5 pt black Stroke and the Width Profile 2 again, then apply a 3 px Gaussian Blur and reduce the Opacity to 30%.
Step 17
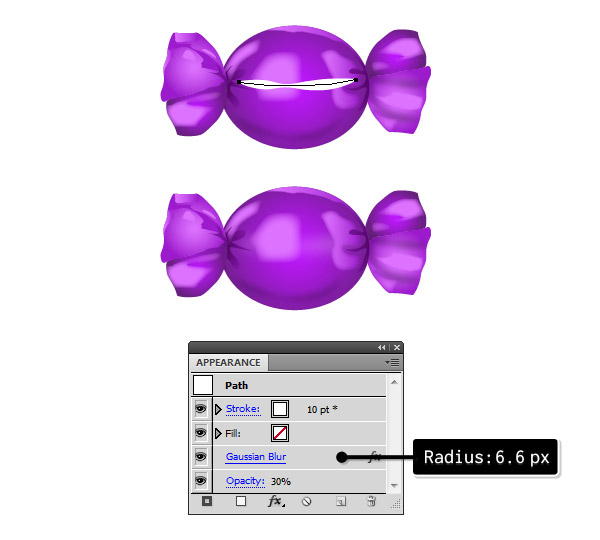
For the highlight, draw a new path over the “body”. Select a 10 pt white Stroke and the Width Profile 2, then apply a 6.6 px Gaussian Blur and reduce the Opacity to 30%. Move this path behind all the other shapes on the “body” of the candy.
At this point the wrapped candy is pretty much done but we will continue with a few extra decorations. Select and Group (Control-G) all the shapes that compose the purple candy and name the group “plain candy”.
Step 18
Grab the Pen Tool (P) or the Pencil Tool (N) and draw a path following the edge of the “top-left-foil” (1). Select using the Direct Selection Tool (A) the “top-left-foil” and then Copy and Paste in Place (Shift-Control-V). Now, select the path along with the copy of “top-left-foil” and press Divide in the Pathfinder panel (2).
Ungroup (Shift-Control-G), keep only the thin edge and delete the other resulting shape. Fill the edge shape with a Gold gradient that you can find in the Swatch Libraries menu under Gradients > Metals. Set the Angle at -90 degrees (3).

Step 19
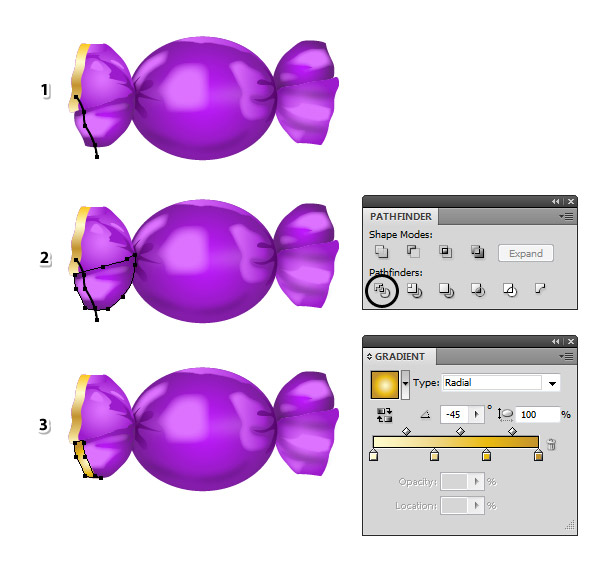
Draw a new path following the edge of the “bottom-left-foil” (1). Now, select the “bottom-left-foil” with the Direct Selection Tool (A) and Copy and Paste in Place (Shift-Control-V). Select the path along with the copy of “bottom-left-foil” and press Divide in the Pathfinder panel (2). Ungroup (Shift-Control-G), keep only the thin edge and delete the other resulting shape. Fill the edge shape with a Gold Radial gradient that you can find in the Swatch Libraries menu under Gradients > Metals. Set the Angle at -45 degrees (3).
Step 20
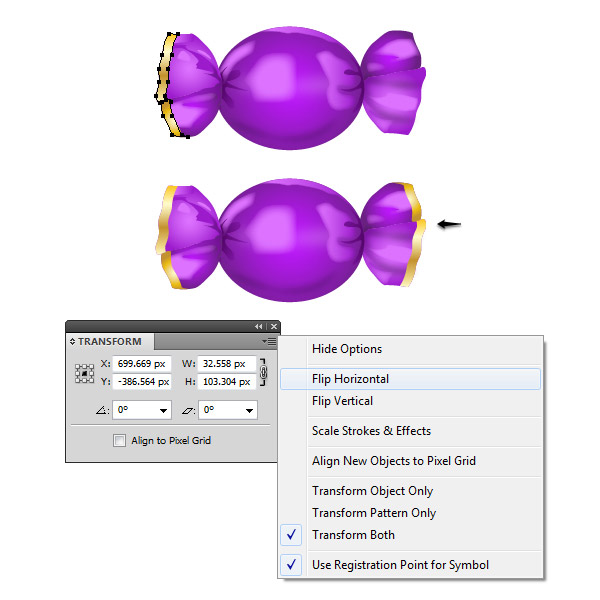
Having the two gold edges from the left side selected, go to the Transform panel and from the fly-out menu, choose Flip Horizontal and Flip Vertical. As a result, you will get the two gold edges from the right side and you need to arrange them in place.
Step 21
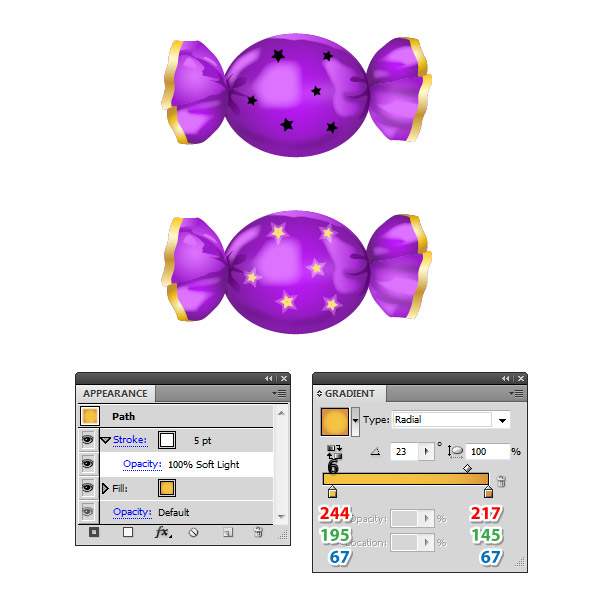
To make the candy even more festive, draw a few little stars with the Star Tool on the “body” and then fill all of them with the radial gradient shown. Also select a 5 pt white Stroke and set the Blending Mode to Soft Light but only for the Stroke attribute.
Step 22
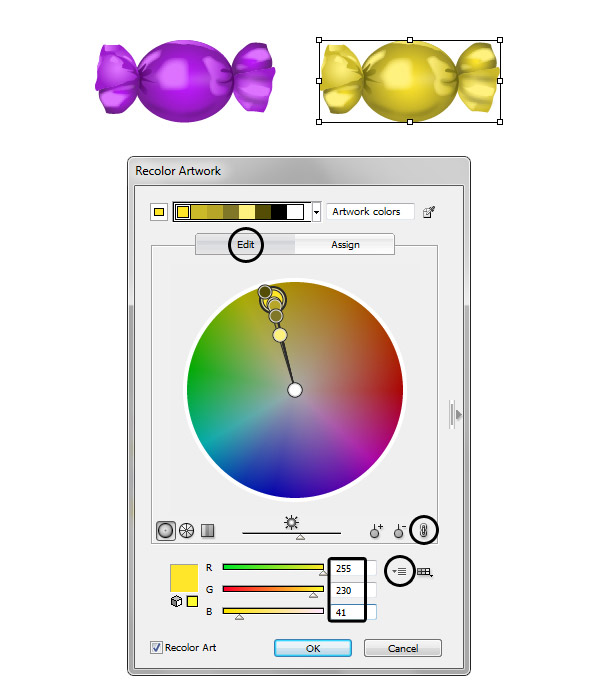
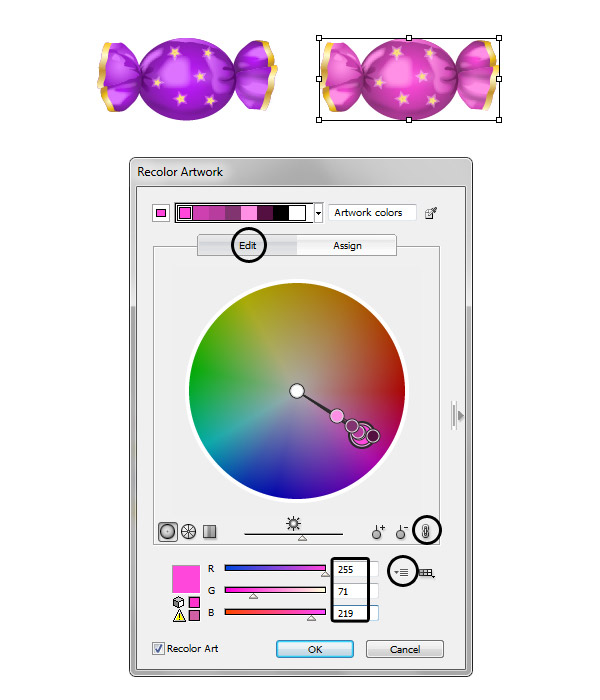
It’s time to recolor and create more candy of various colors. Select the “plain candy” group and first make a copy. Now, go to Edit > Edit Colors > Recolor Artwork, select the Edit tab, select Link Harmony Colors and the RGB mode, and after that you can pretty much choose any color although not all of them will generate a good looking result. In the image below you can see the shade of yellow that I’ve used to obtain the golden candy.
Step 23
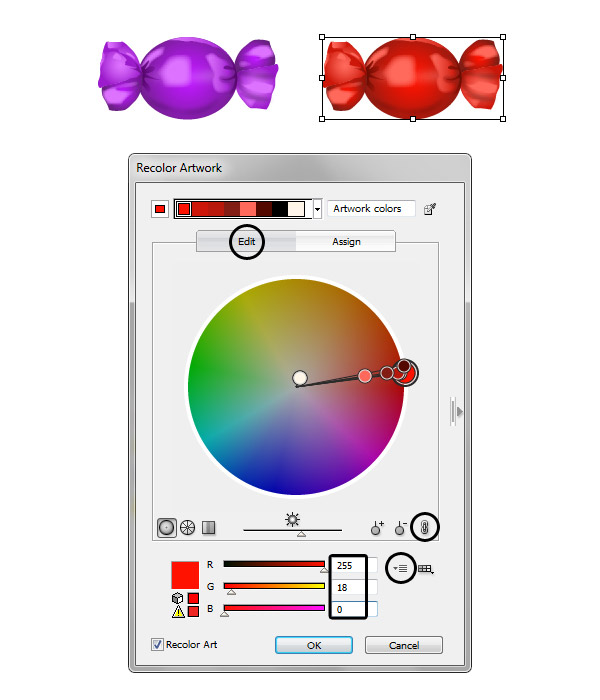
Make a new copy of “plain candy”, go to Edit > Edit Colors > Recolor Artwork and use the shade of red indicated to obtain the red candy.
Step 24
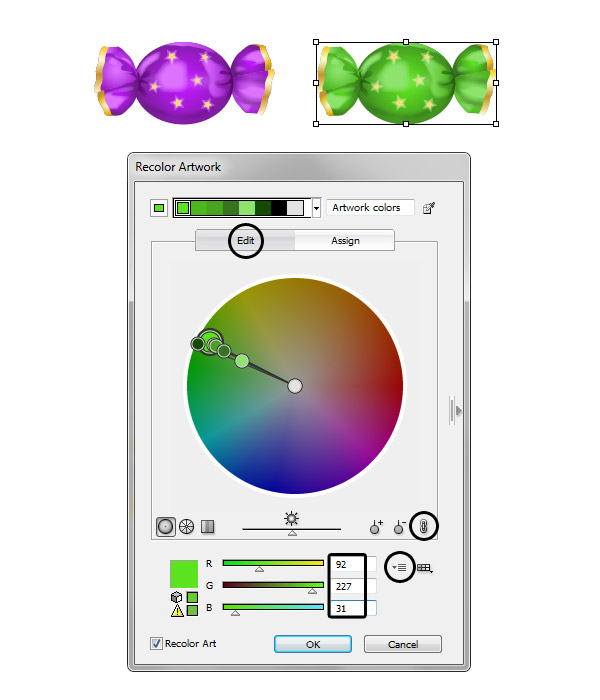
Next, select and make a copy of the festive purple candy. To recolor it, select everything except the gold edges and the stars because you don’t want to change those. Type the shade of green indicated in the Recolor Artwork window and hit OK.
Step 25
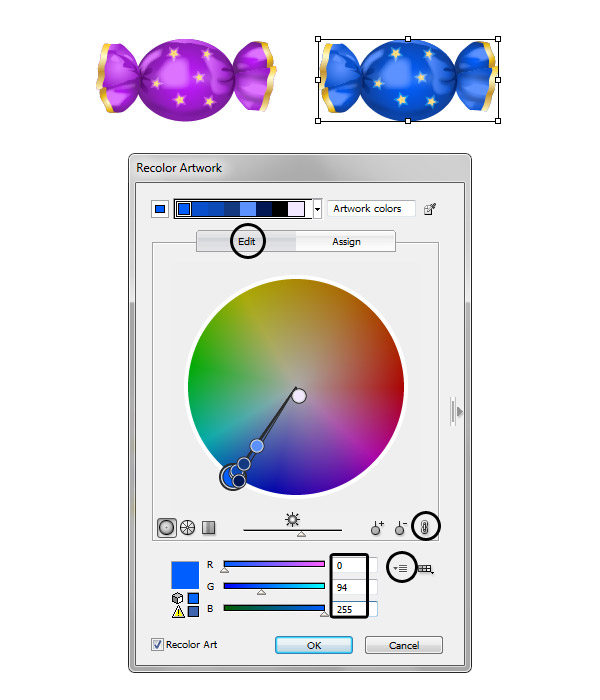
Make another copy of the festive purple candy. Select everything except the gold edges and the stars, then go to Edit > Edit Colors > Recolor Artwork and apply the shade of blue to obtain the blue candy.
Step 26
The same thing goes for the pink candy.
Step 27
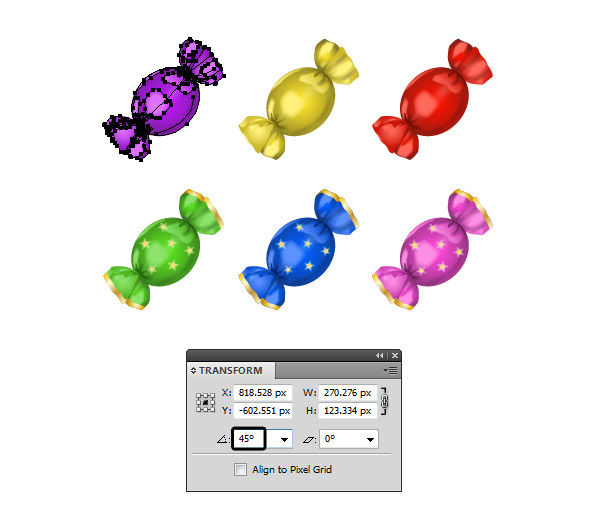
Here are the six different candies. Group (Control-G) all the shapes that compose each candy and name the groups accordingly. In my case, I have: “plain purple”, “plain gold”, ”plain red”, “festive green”, “festive blue” and “festive pink” candy.
Rotate each group 45 degrees with the help of the Transform panel.
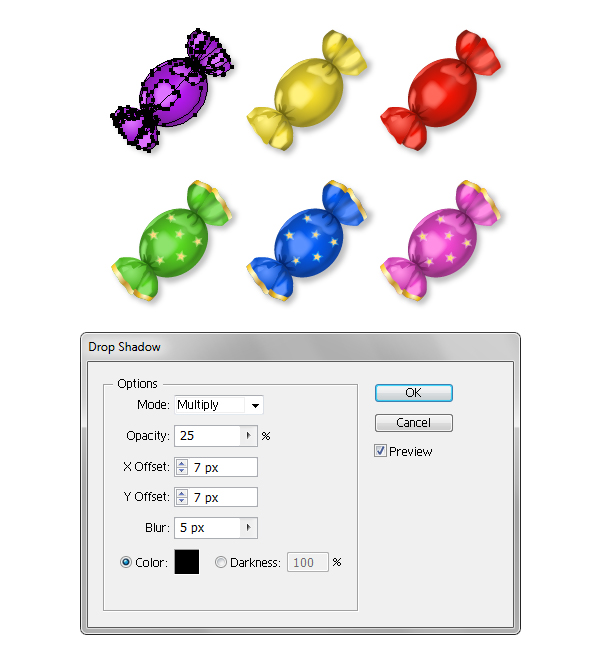
Step 28
Select each candy and go to Effect > Stylize > Drop Shadow. Apply the settings shown and hit OK.
Awesome work!
Here is the final image with all the wrapped candy. I hope you enjoyed this tutorial and that you learned new things today. Now go and eat some candy!
