In this Illustrator tutorial, we will learn how to create a cool robot using very simple techniques.
We will use the effects along with some basic vector shapes to achieve the final outcome in a short time. Hopefully you will learn some useful tips along the way.
Final Image
As always, this is the final image that we’ll be creating:

Tutorial Details
- Program: Adobe Illustrator CS6
- Estimated Completion Time: 15 minutes
- Difficulty: Beginner-Intermediate
Step 1
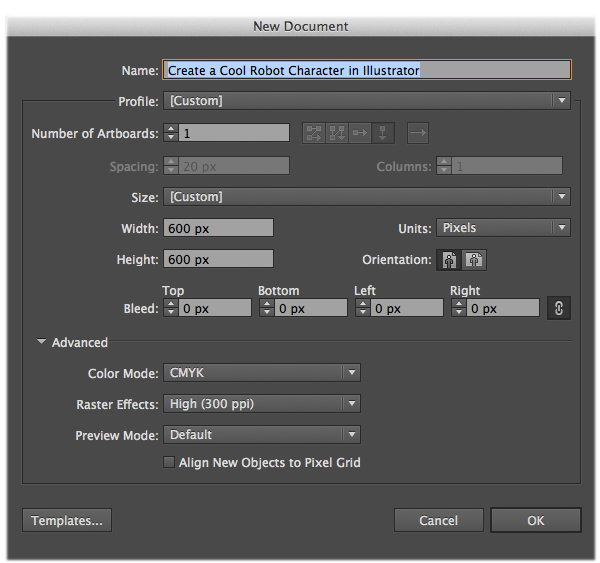
Let’s create a new document first. Make sure to set the dimensions to 600 x 600 pixels and the Color Mode to CMYK. Use the Rectangle Tool (M) to draw a rectangle and fill it with black color #000000 for our background.
Step 2
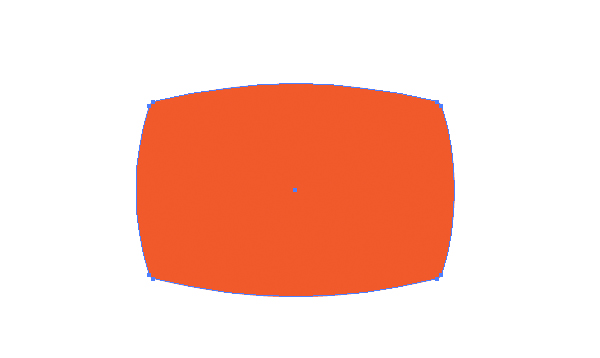
Pick the Pen Tool (P) and draw the robot’s face shape as in the image below.
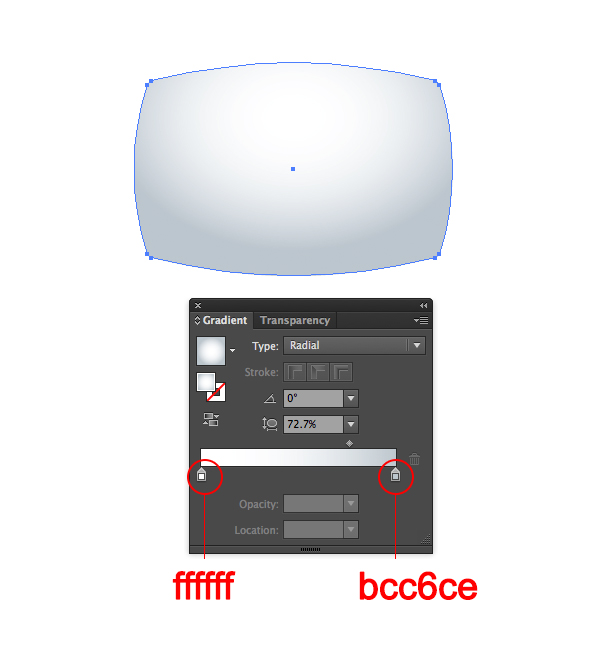
Then fill the shape with the gradient.
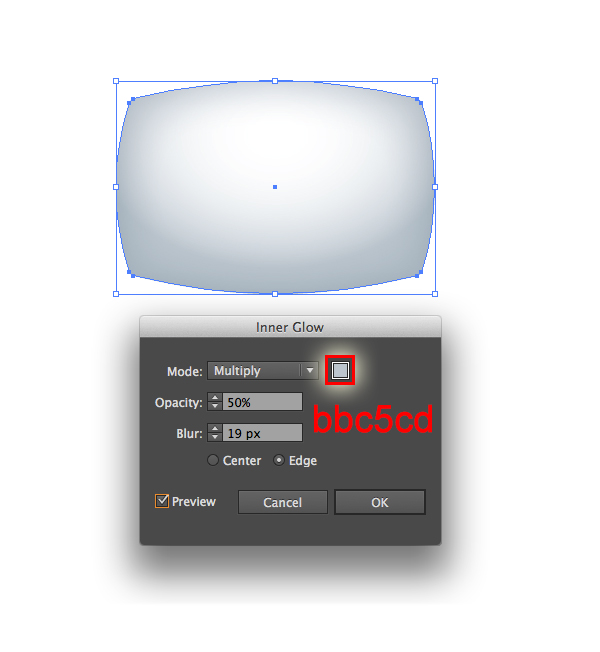
With the shape still selected, go to Effect > Stylize > Inner Glow and set the values.
With the shape still selected, go to Object > Path > Offset Path and Enter a 10px Offset and click OK.
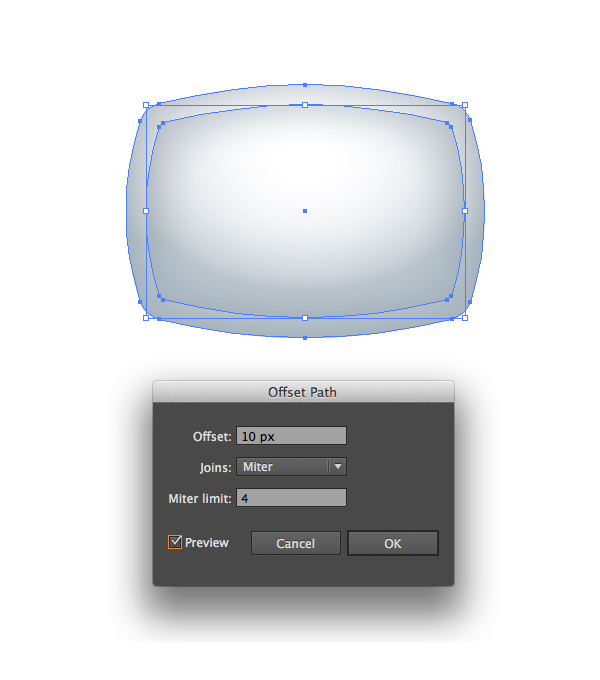
Select the resulting shape and go to Window > Appearance. Now we change the values of the Inner Glow effect a little bit.
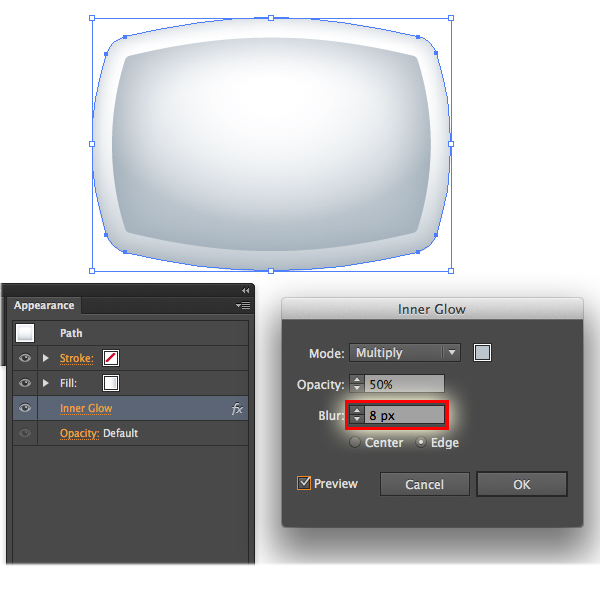
Now we duplicate (Ctrl / Cmd + C, Ctrl / Cmd + F) the robot’s face shape and place a copy in front, then we apply Soft light Blending Mode to the copy.
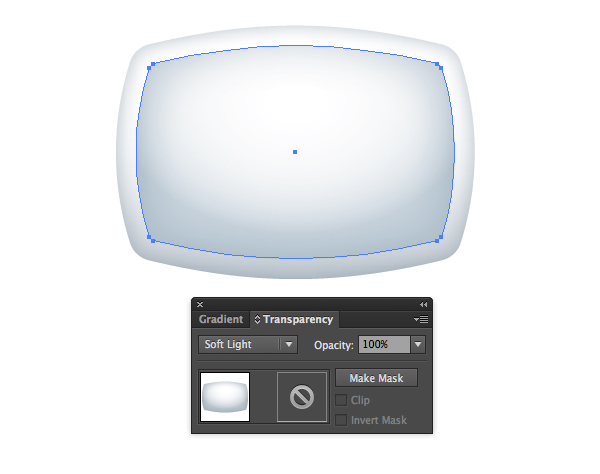
Step 3
Pick the Ellipse tool (L) to create a shape and place it behind the robot’s face shape and apply this gradient.
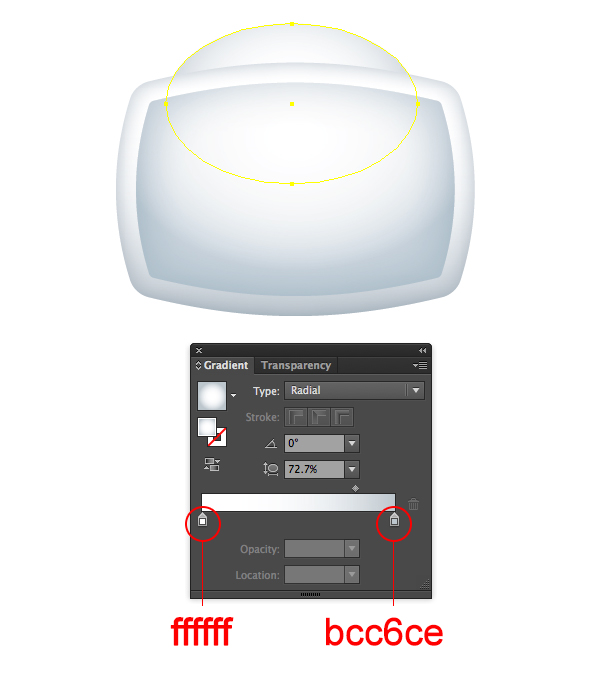
Use the Ellipse tool (L) to create a small circle and apply the gradient as shown in the image below.
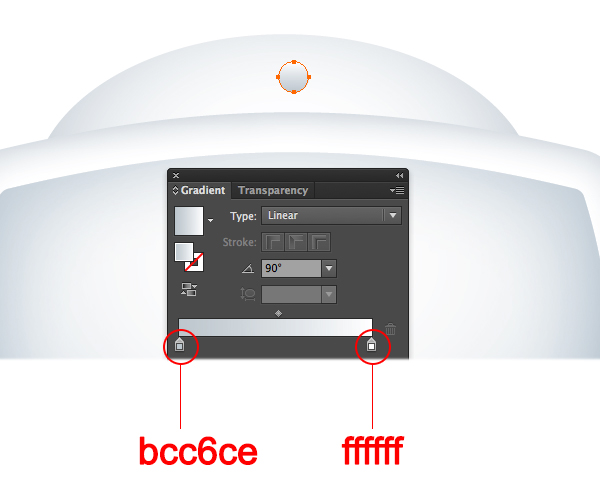
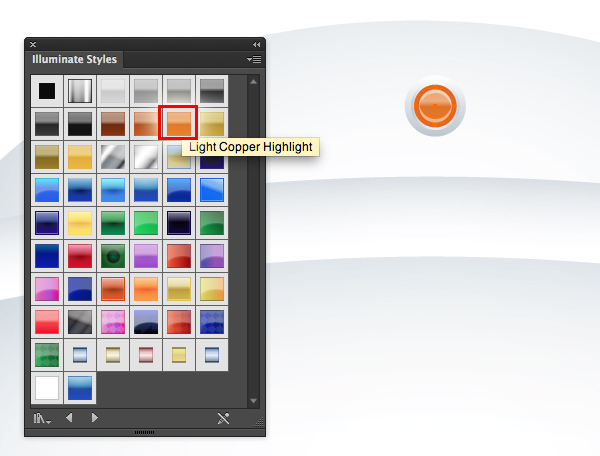
Duplicate (Ctrl / Cmd + C, Ctrl / Cmd + F) that circle and paste in front. We scale the copy circle smaller. Then go to Window > Graphic Styles > Illuminate Style and apply Light Copper Highlight for the copy circle.
I want that circle to look lighter so we duplicate (Ctrl / Cmd + C, Ctrl / Cmd + F) that circle copy one more time and paste in front. Now we apply Overlay Blending Mode to the copy.
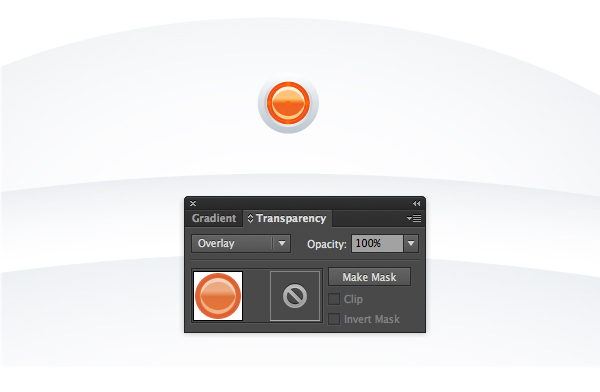
Here is my result

Step 4
Pick the Rectangle tool (M) to create a shape as shown in the image below. Then go to Object > Transform > Rotate and change the Angle.
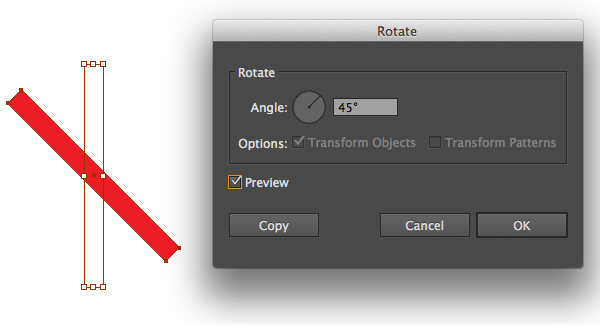
Apply the gradient for this rectangle and place it like this.
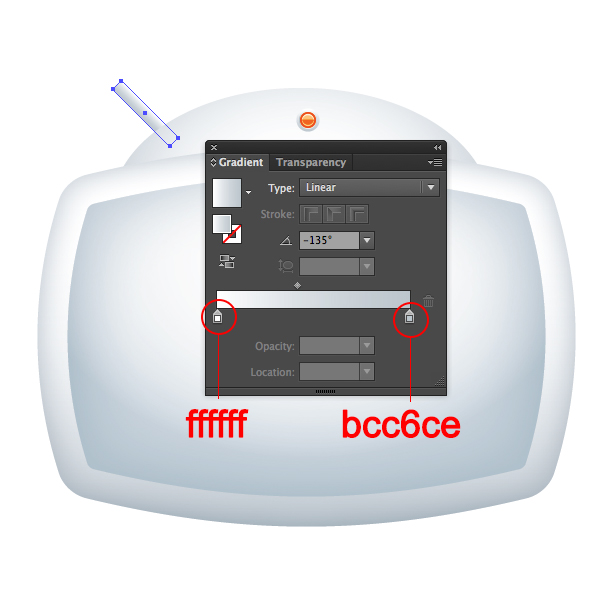
Using the Ellipse tool (L) to create a small circle as the bulb shape and place it as shown below.

With the circle still selected, apply the Dusk style to this circle.
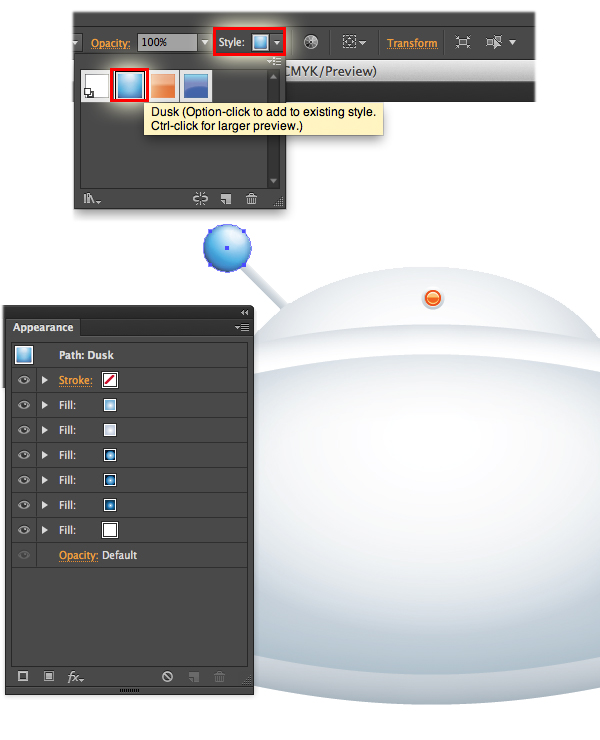
Duplicate (Ctrl / Cmd + C, Ctrl / Cmd + F) the new shape we have created and place it opposite. Here is my result.

Step 5
In this step, we will create the ears for our robot. Pick the Rounded Rectangle tool to create a shape and place it behind the robot’s face shape, and then apply this gradient.
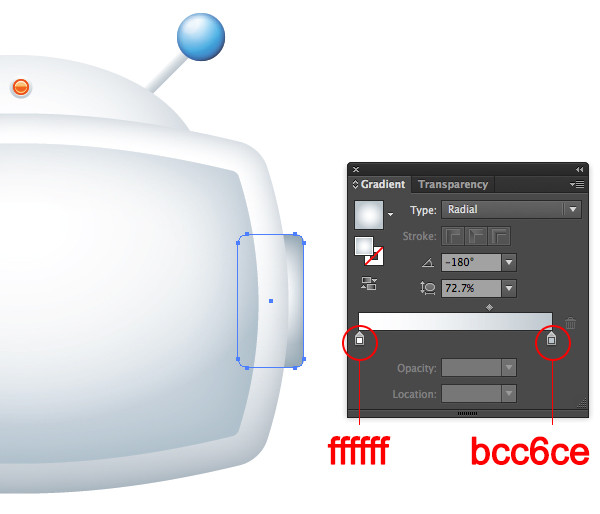
Use the Rounded Rectangle tool to create another shape and apply this gradient.
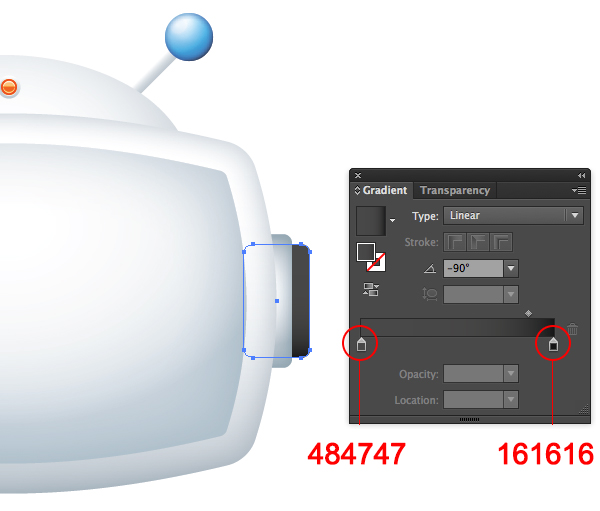
Use the Rounded Rectangle tool to create one more shape and apply the Dusk style to this shape.
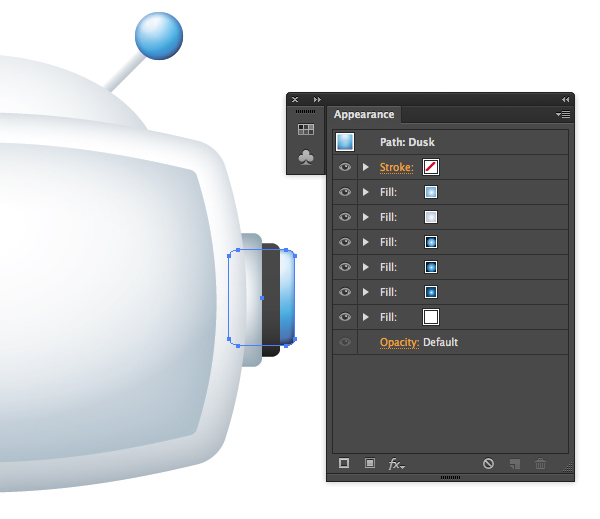
Now group (Cmd + G) all the ear shapes and duplicate (Ctrl / Cmd + C, Ctrl / Cmd + V), then place the ear copy as shown in this image. Here is my result.

Step 6
Now proceed to the creation of the robot’s eyes. Take the Ellipse Tool (L) and create a circle and apply this gradient.
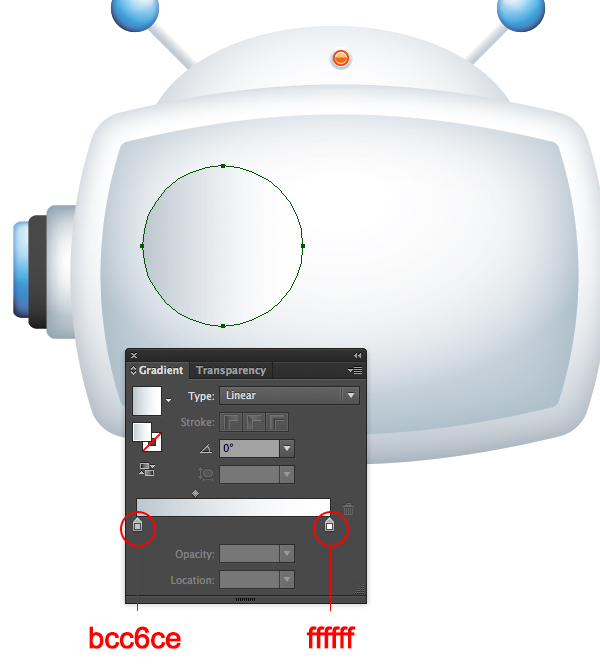
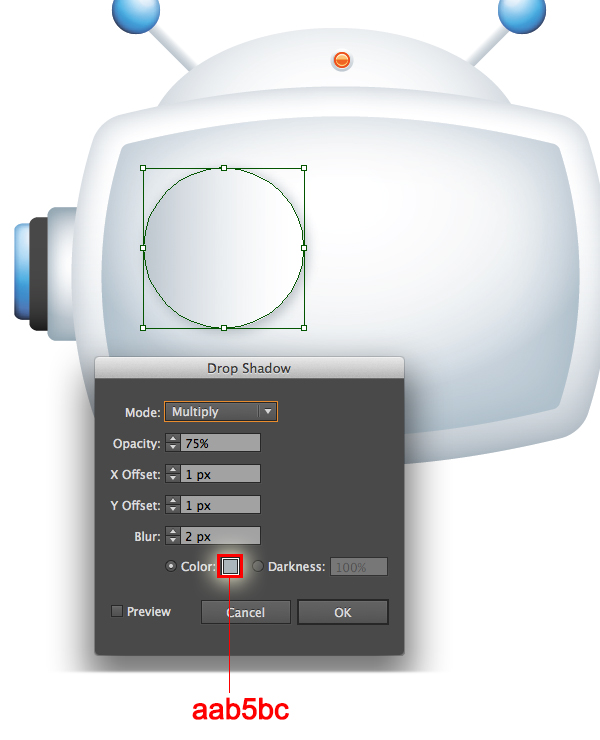
With the shape still selected, go to Effect > Stylize > Drop Shadow and set the values.
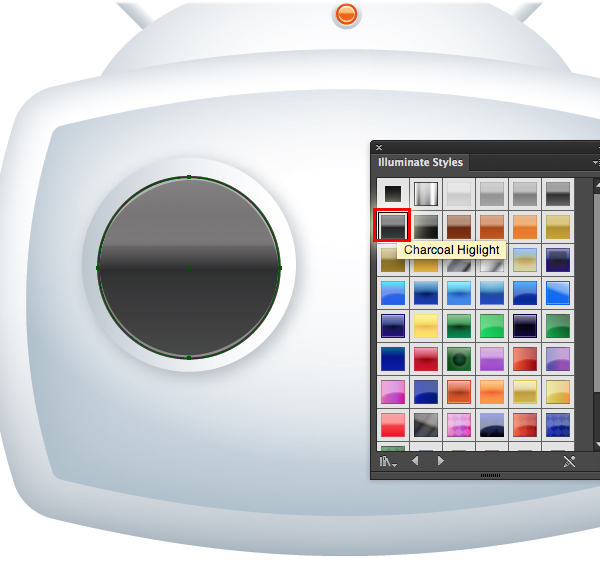
Use the Ellipse tool (L) to create a new small circle and place in front , then go to Window > Graphic Styles > Illuminate Style and apply Charcoal Highlight to the new circle.
Use the Ellipse tool (L) to create one more new small circle and place in front, then apply the Dusk style to this shape.
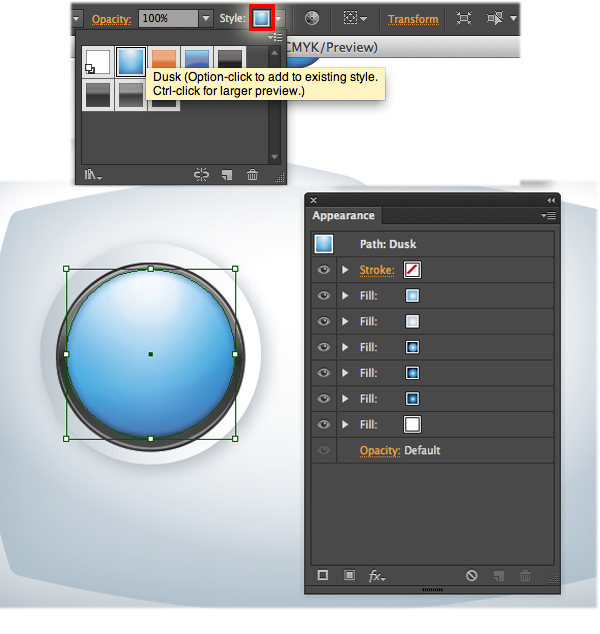
Duplicate (Ctrl / Cmd + C, Ctrl / Cmd + F) that blue circle and paste in front, then apply Multiply Blending Mode to the copy.
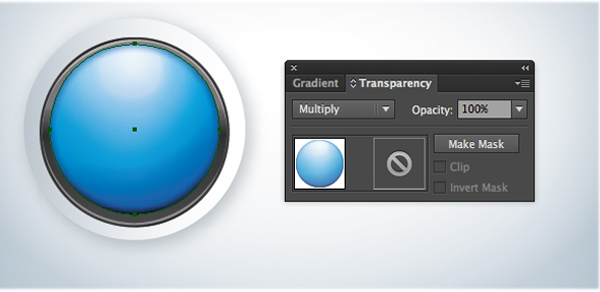
Now group (Cmd + G) all the eye shapes and duplicate (Ctrl / Cmd + C, Ctrl / Cmd + V), then place the eye copy as shown in this image. Here is my result.

Step 7
With the help of the Ellipse Tool (L) create the neck shape and apply this gradient.
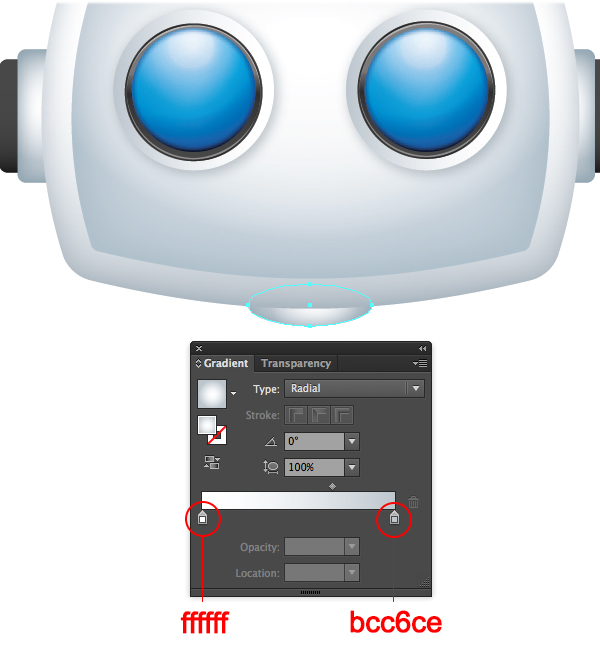
With the shape still selected, go to Effect > Stylize > Inner Glow and set the values.
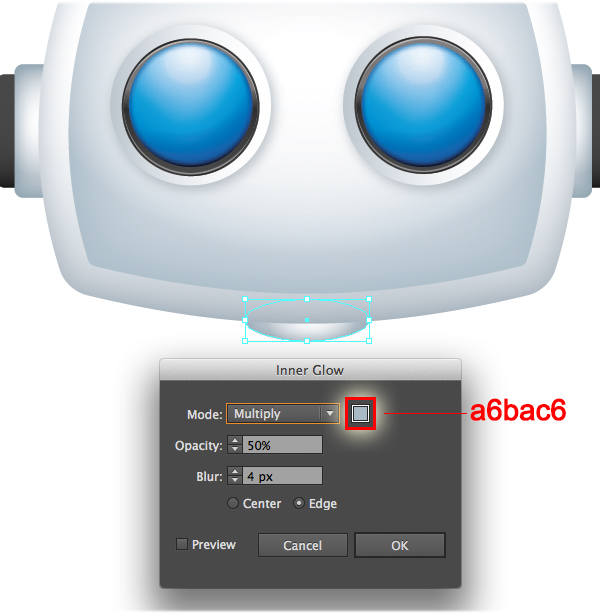
Now duplicate (Ctrl / Cmd + C, Ctrl / Cmd + B) two more ellipses and place them as shown in the image below. Here is my result.

Step 8
Next, pick the Pen tool (P) and draw a shape as the body part, as shown here.

Fill the shape with a gradient like this.
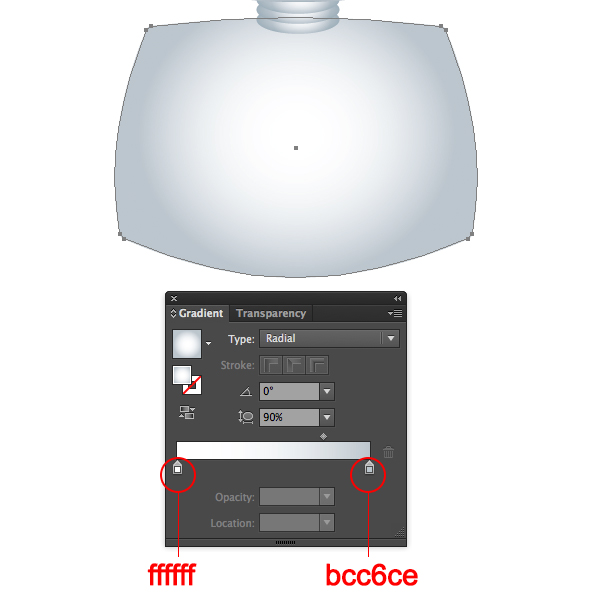
With the shape still selected, go to Effect > Stylize > Inner Glow and set the values.
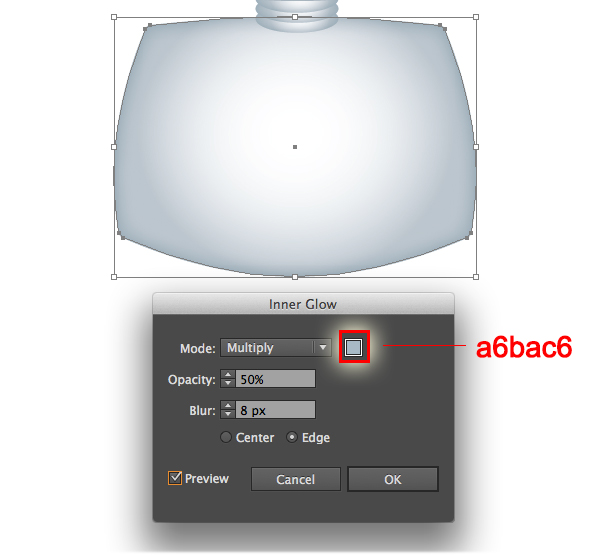
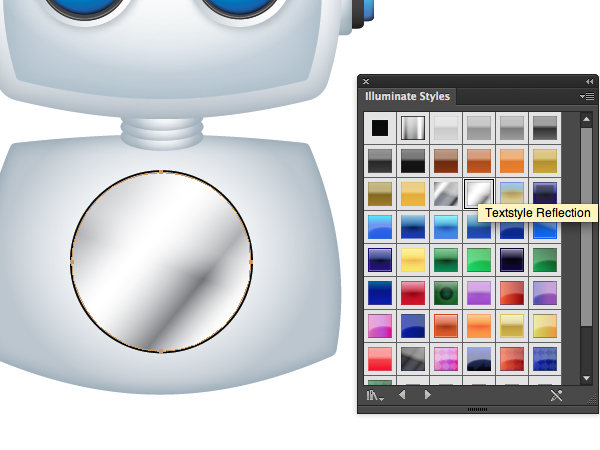
Use the Ellipse tool (L) to create a circle and place in front of body part.

With the shape still selected, go to Window > Graphic Styles > Illuminate Style and apply Textstyle Reflection to the circle.
Now we notice that there is a black stroke outside this circle. We don’t want that stroke. Go to Window > Appearance, change the settings as in the image below.
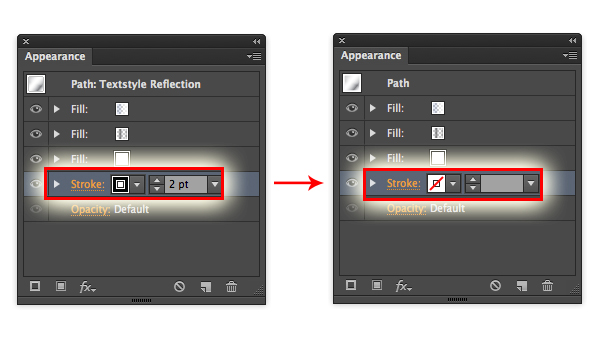
Now you should get a result as shown in the image below.
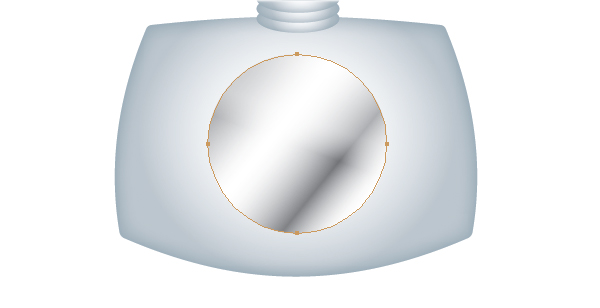
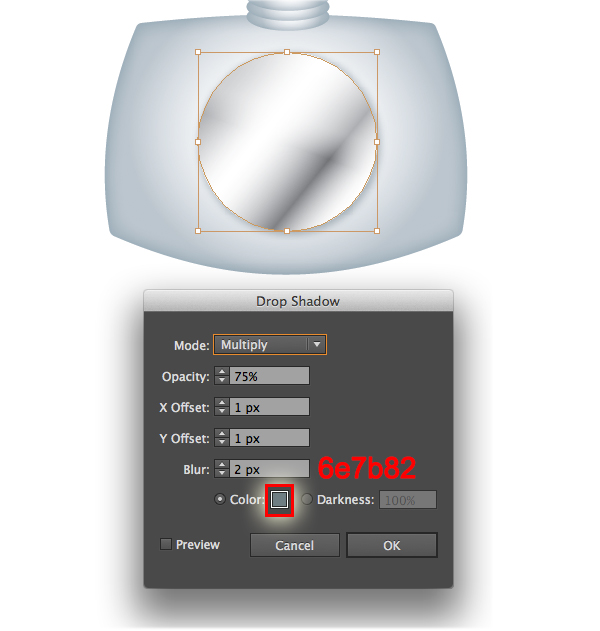
With the shape still selected, go to Effect > Stylize > Drop Shadow and set the values.
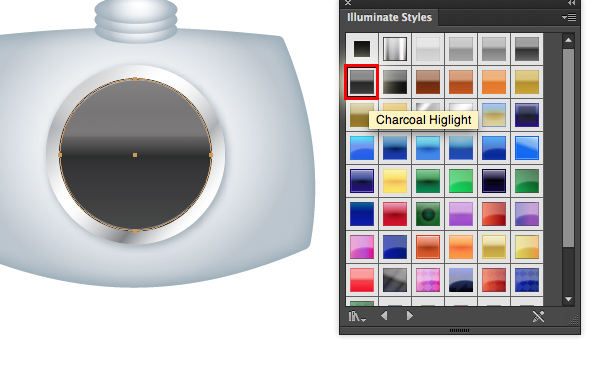
Use the Ellipse tool (L) to create a new small circle and place in front, then go to Window > Graphic Styles > Illuminate Style and apply Charcoal Highlight to the new circle.
Use the Ellipse tool (L) to create one more new small circle and place in front, then apply the Dusk style to this shape.
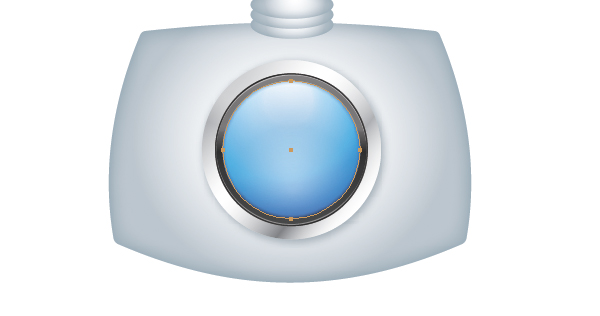
Duplicate (Ctrl / Cmd + C, Ctrl / Cmd + F) that blue circle and paste in front, then apply Multiply Blending Mode to the copy.
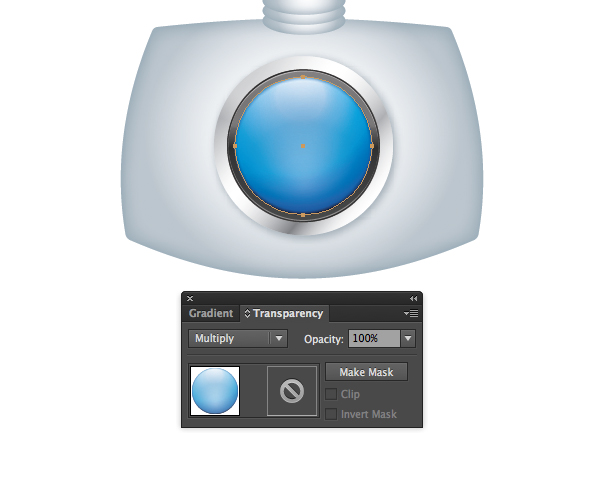
Use the Ellipse tool (L) to create one more new circle and place in front, then go to Window > Graphic Styles > Illuminate Style and apply Royal Blue Arrow Arched for this circle.
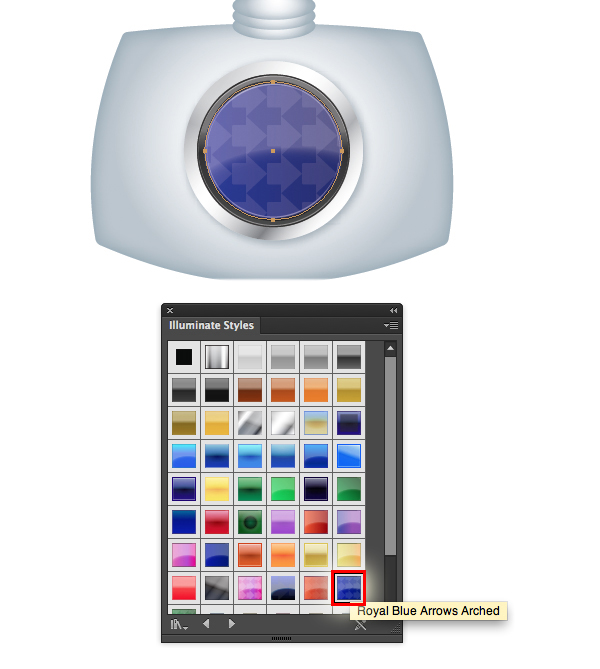
Then apply Overlay Blending Mode to this circle.
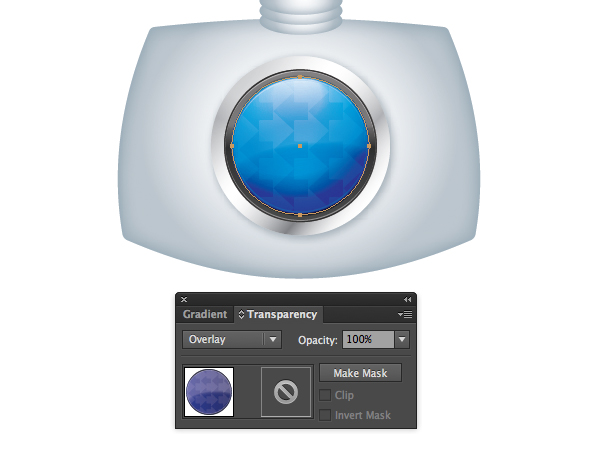
Now you should have a result as shown in the image below.

Step 9
Now proceed to the creation of the robot’s hands. Pick the Rounded Rectangle tool and create a shape like this.

Then go to Window > Graphic Styles > Illuminate Style and apply Charcoal Highlight for this shape.
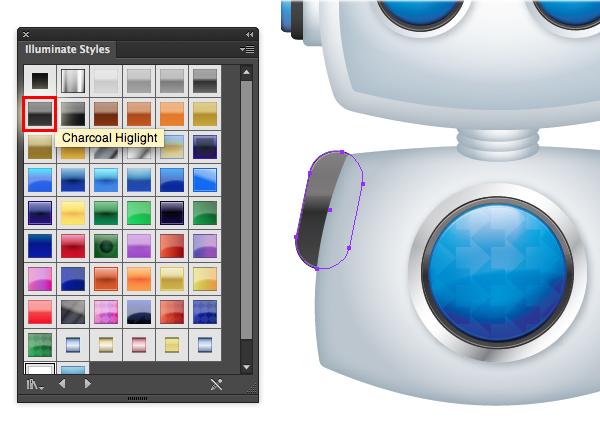
Now we notice that there is a black stroke outside this circle. We don’t want that stroke. Go to Window > Appearance to view and adjust the appearance attributes , we remove all the strokes as shown in the image below.
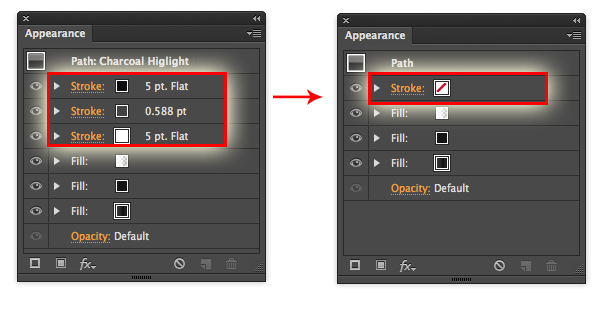
Here is my result.

Use the Rounded Rectangle tool to create one more shape and place it behind the first one we have created. Then apply the Dusk style to this shape.
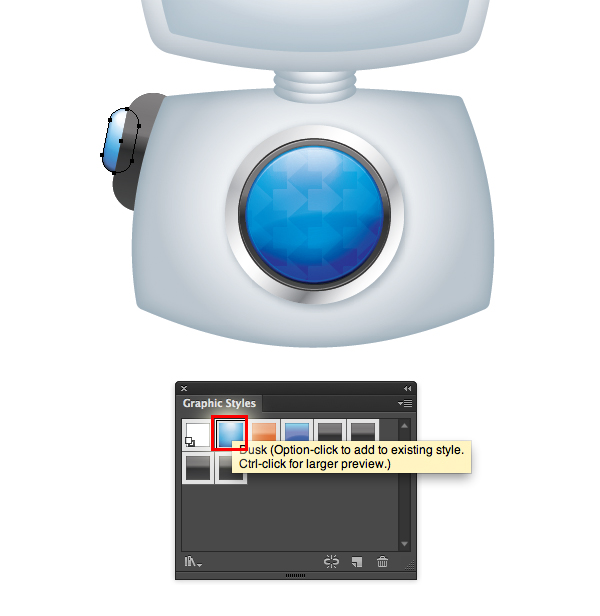
Duplicate (Ctrl / Cmd + C, Ctrl / Cmd + F) that blue shape and paste in front, then apply Multiply Blending Mode to the copy.
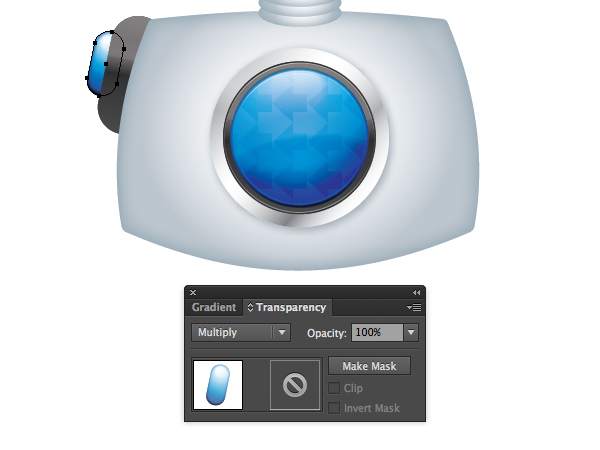
With the help of the Pen Tool (P) create a shape like this.

Apply the gradient to this shape.
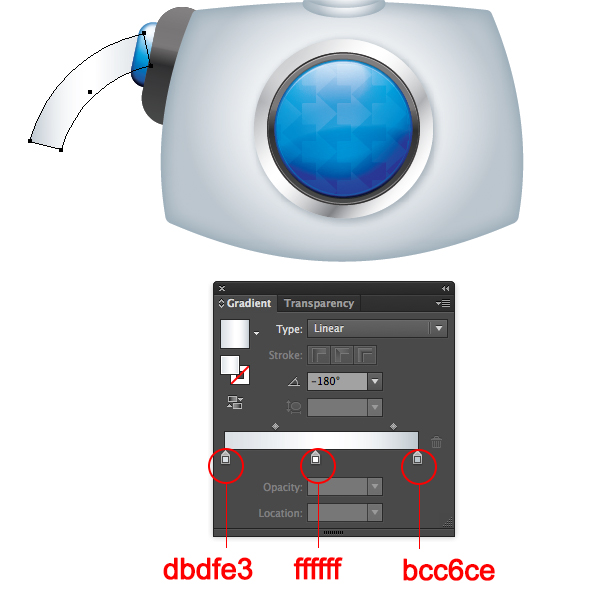
With the shape still selected, go to Effect > Stylize > Inner Glow and set the values.
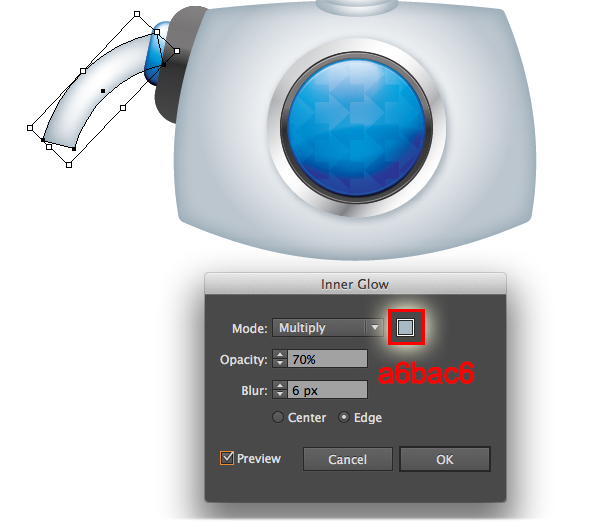
Next, take the Ellipse Tool (L) and create a circle and place it in front, then apply this gradient.
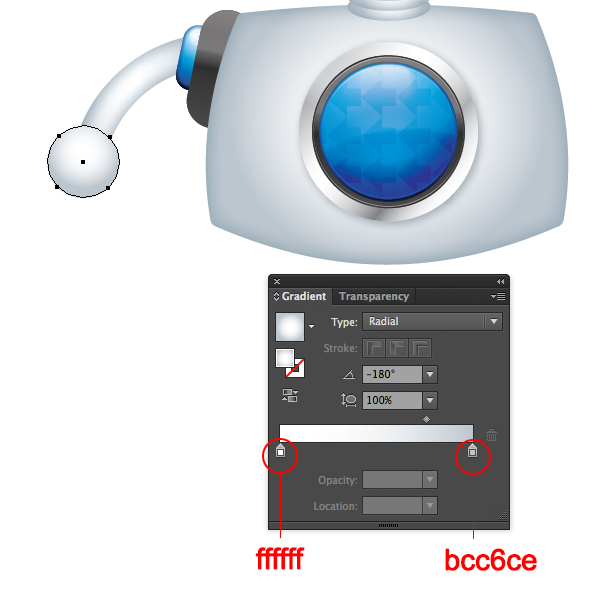
Then apply the same inner Glow style as in the previous step. Here is my result.

With the help of the Pen Tool (P) create the robot’s hands, draw a shape as in the image below.

Apply the gradient for this shape.
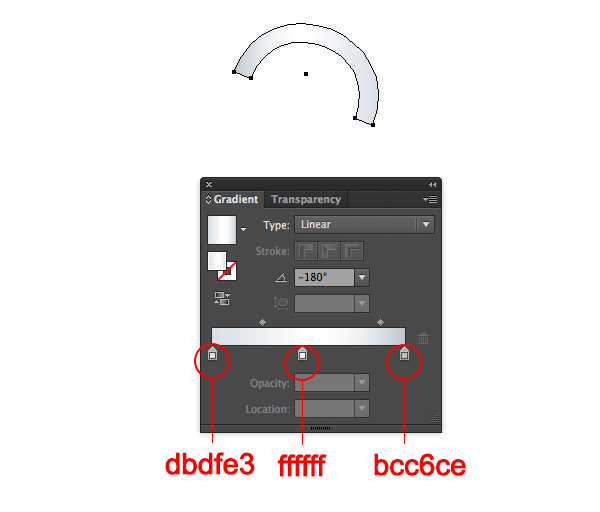
Then apply Inner Glow style.
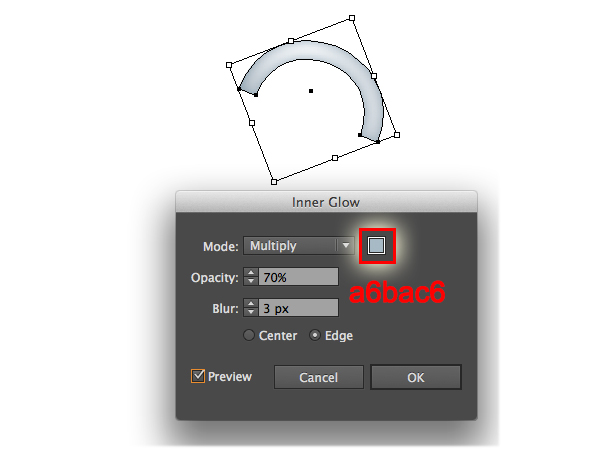
Now we’ve done with robot’s hand. Now you should have a result like this image below.

Now group (Cmd + G) all the hand shapes and duplicate (Ctrl / Cmd + C, Ctrl / Cmd + V), then place the hand copy as in this image. Here is my result.

Step 10
Now proceed to the creation of the robot’s feet. Pick the Rounded Rectangle tool and create a shape and place it like this.
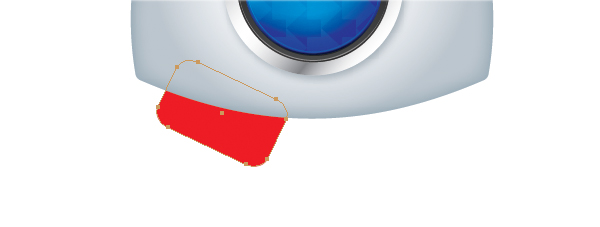
Apply the gradient for this shape.
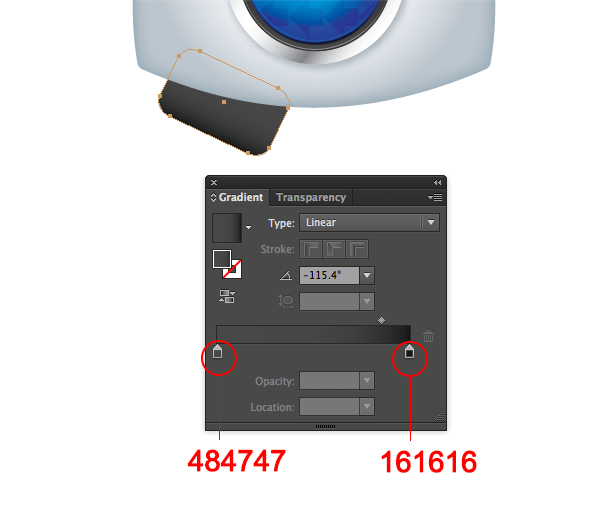
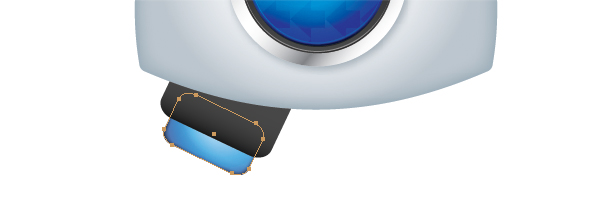
Use the Rounded Rectangle tool to create one more shape and place it behind the first one we have created. Then apply the Dusk style to this shape.
Now pick the Pen tool (P) to create a shape as in the image below.

Then repeat Step 7, apply the same gradient and Inner Glow style for this shape. And you should have a result like this.
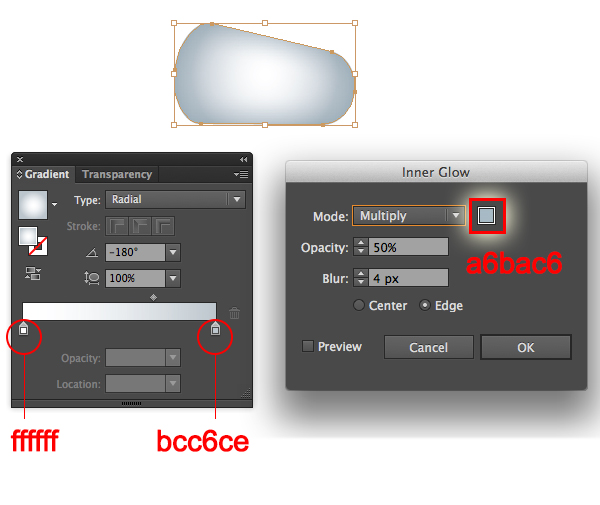
Duplicate (Ctrl / Cmd + C, Ctrl / Cmd + V) that shape we have created, go to Object > Transform > Rotate to modify the copies and place them as in the image below.

Next, pick the Pen tool (P) and create a shape as in the image below.
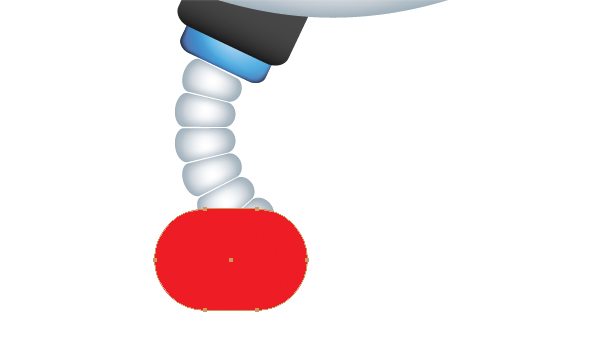
Then apply the gradient to this shape.
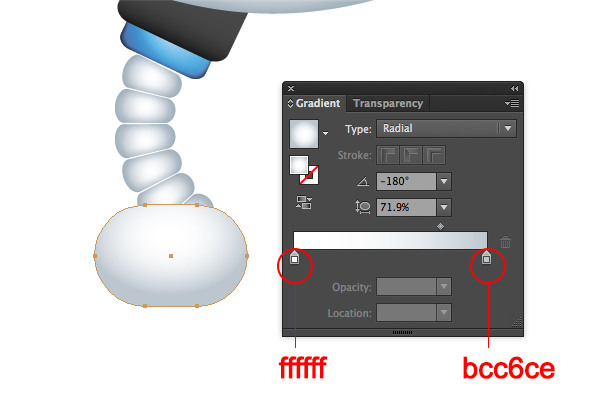
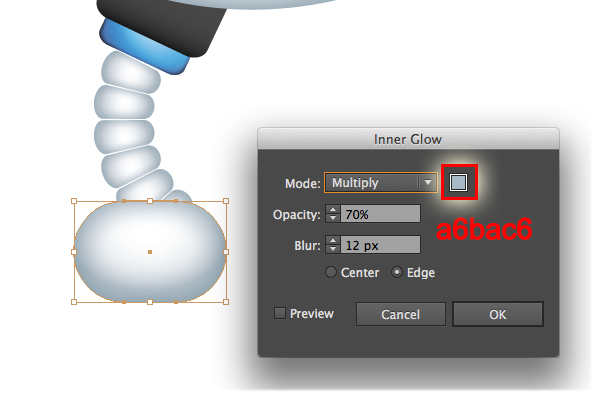
And apply Inner Glow.
Use the Rounded Rectangle tool to create one more shape and place it behind, then apply the gradient for this shape.
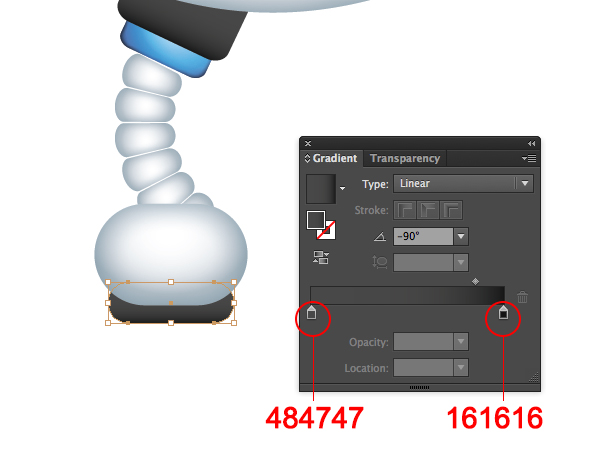
Now you should have a result like this image below.

Now group (Cmd + G) all the feet shapes and duplicate (Ctrl / Cmd + C, Ctrl / Cmd + V), then place the feet copy as in this image. Here is my result.

Step 11
In this step, we will create shadows for the legs of the robot. Use the Ellipse tool (L) to create an ellipse and fill it with color #bbc5cd.
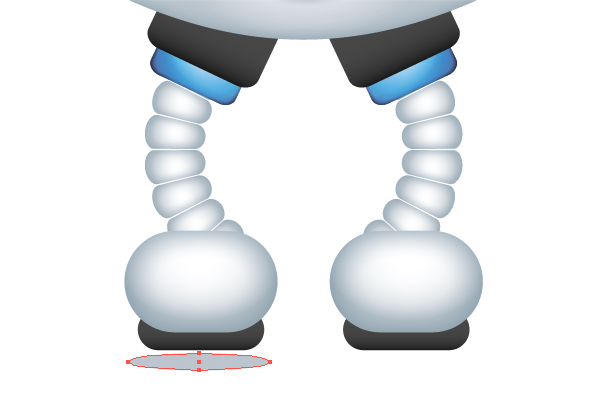
With the shape still selected, go to Effect > Blur > Gaussian blur and set the values. Then apply Multiply Blending Mode to this shape.
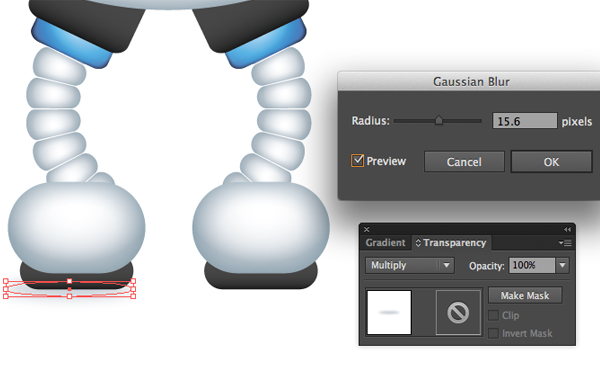
Duplicate (Ctrl / Cmd + C, Ctrl / Cmd + F) that blur shape two more times. Now we have this result.
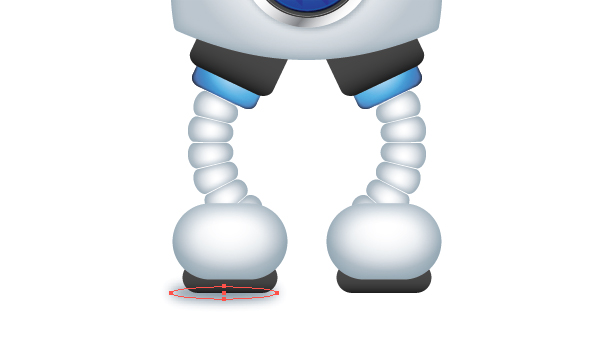
In the same way create a shadow for the second leg.

Step 12
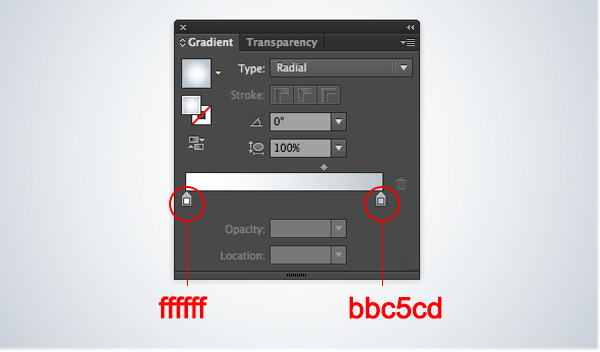
Create the background. Take the Rectangle Tool (M) and draw a rectangle and fill it with this gradient.
And We’re Done!
