This tutorial is designed to help you create cool neon text in Illustrator. Here you will learn some clever techniques to enhance your skills.
Final Image
As always, this is the final image that we’ll be creating:

Tutorial Details
- Program: Adobe Illustrator CS6
- Estimated Completion Time: 60 minutes
- Difficulty: Beginner-Intermediate
Resources
Step 1
Create a new document first. Make sure to set the dimensions to Width = 600px , Height = 600px and the Color Mode to CMYK.
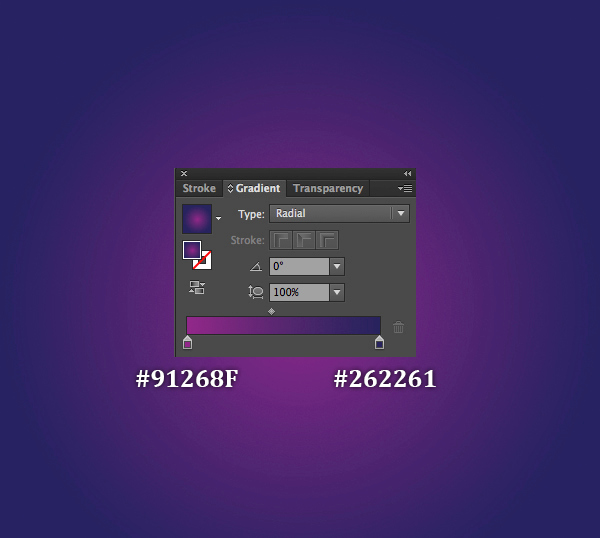
And create a rectangle with the Rectangle tool (M). Fill it with the gradient shown below.
Step 2
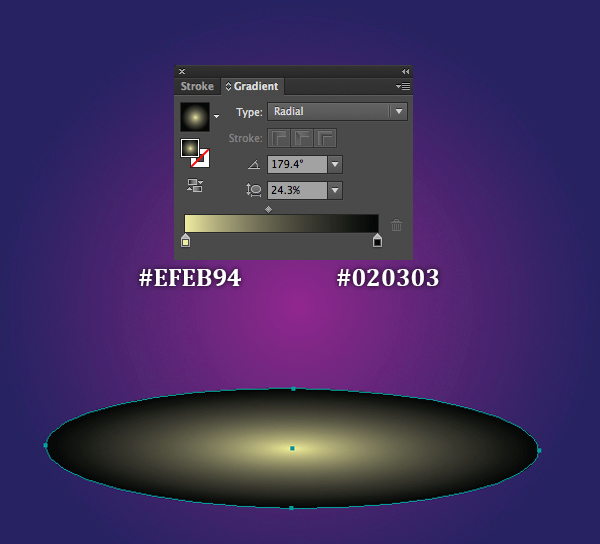
Use the Ellipse Tool (L) to create an ellipse as shown below and set this gradient.
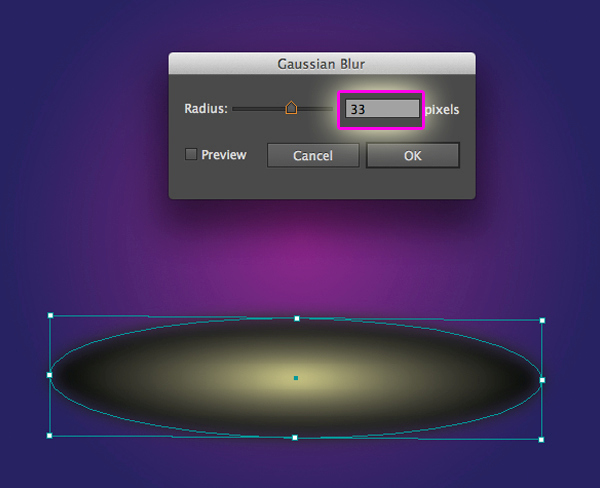
Select the ellipse we have created and go to Effect > Blur > Gaussian blur and set the values.
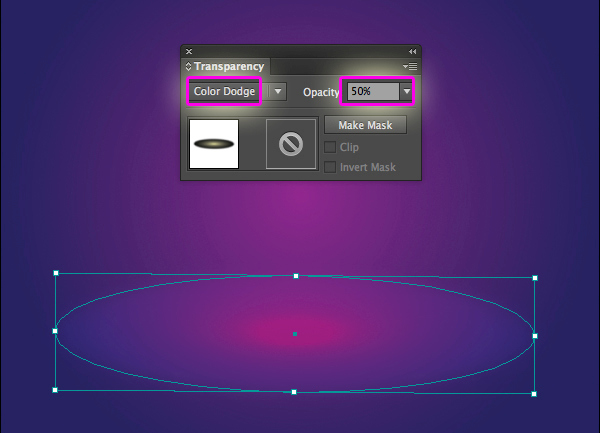
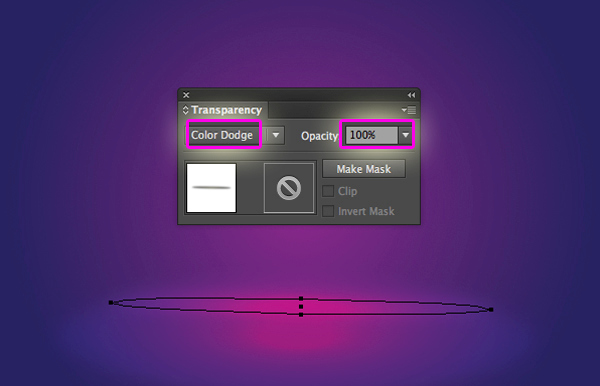
With the ellipse still selected, apply Color Dodge and lower Opacity = 50%.
Now duplicate the ellipse and paste in front (Ctrl / Cmd + C, Ctrl / Cmd + F) , modify the ellipse as shown below and set the Opacity = 100%.
Step 3
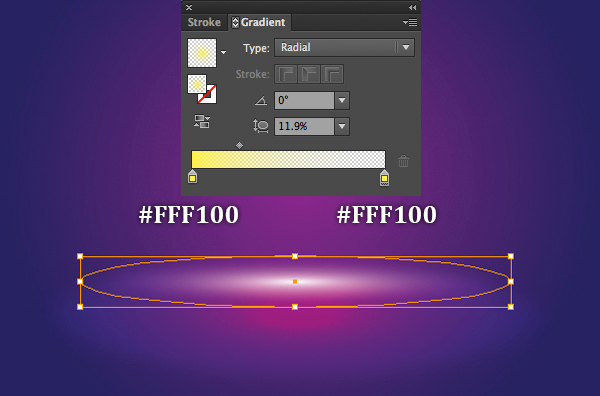
Use the Ellipse Tool (L) to create another ellipse and set the gradient as shown below.
Now duplicate (Ctrl / Cmd + C, Ctrl / Cmd + V) the new ellipse we have created and place a copy of the shape off to the side of the artboard, which we will use later.
Step 4
Select the Type Tool (T), click on your artboard and add your text. I’ve used the Dynalight font, then re-select the entire text and go to Object > Expand. This will turn your text into a group of shapes.

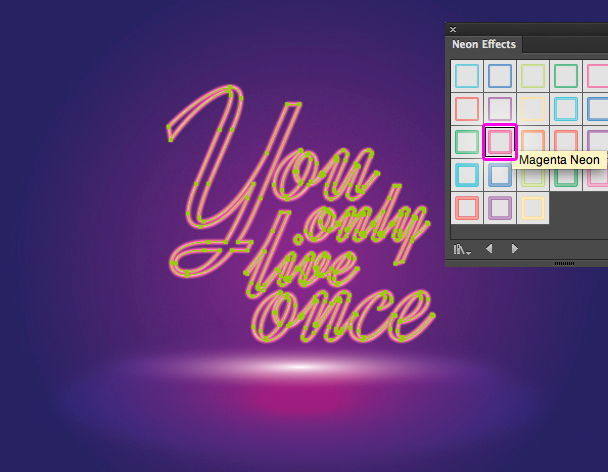
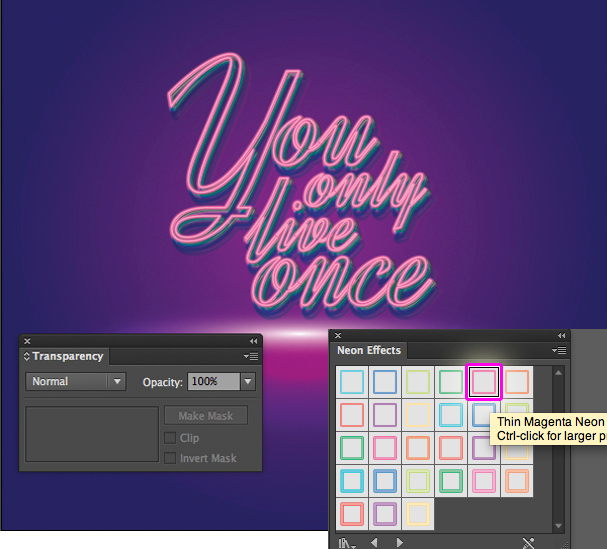
Go to Window > Graphic Styles and Open Graphic Styles Library > Neon Effects then select Magenta Neon
Step 5
Now duplicate the shape and paste in front (Ctrl / Cmd + C, Ctrl / Cmd + F), move it to the right side a little bit. With the shape copy selected, select the Violet Neon in Neon Effect.
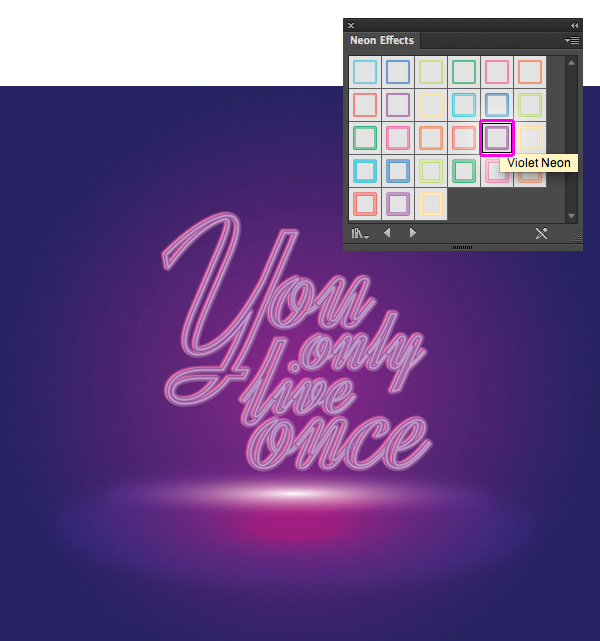
I want the line look thinner, so go to Window > Appearance. Change the values as shown below.
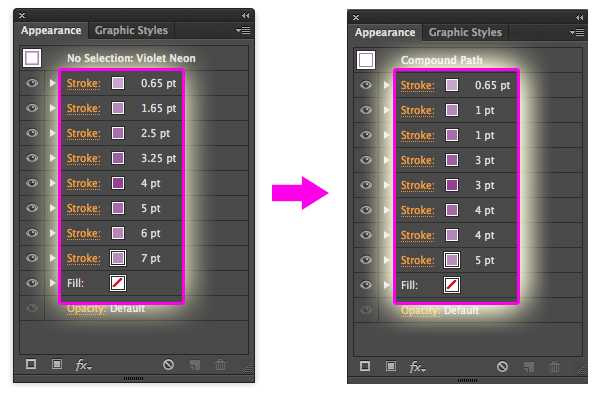
Now you should get a result like this.

Step 6
Next, duplicate the shapes and paste in front (Ctrl / Cmd + C, Ctrl / Cmd + F) again. With the shapes copy selected, select the Red Neon in Neon Effect.
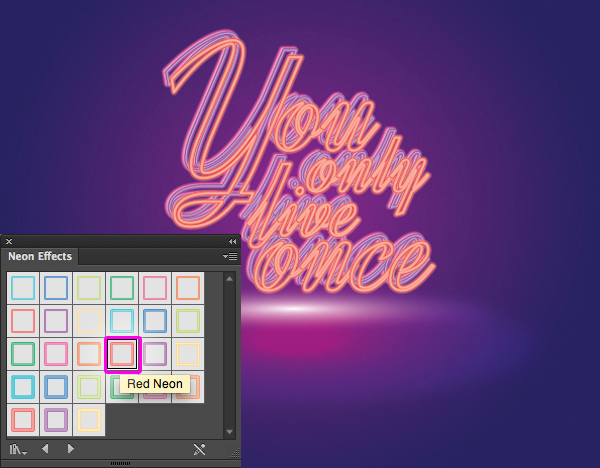
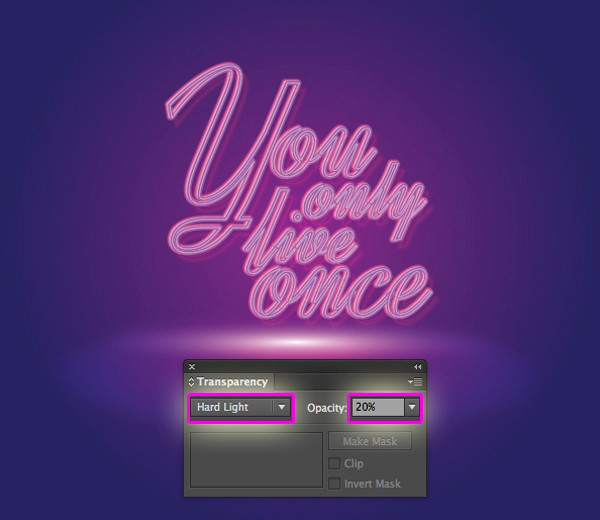
Now apply Hard Light mode and lower Opacity = 20% for our second text copy.
Step 7
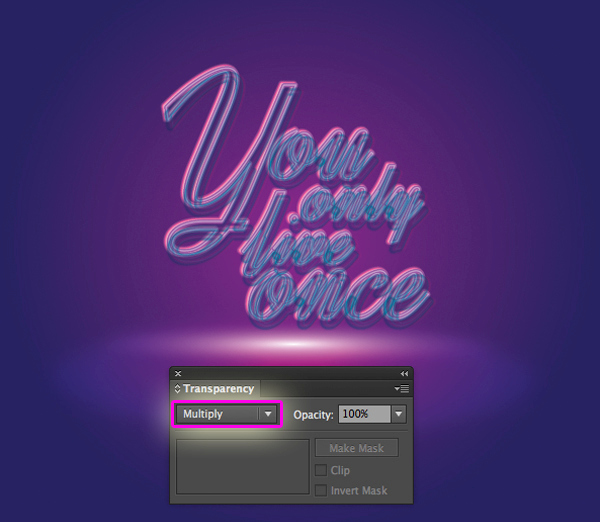
Duplicate the second shapes copy and paste in front (Ctrl / Cmd + C, Ctrl / Cmd + F). With the third shapes copy selected, select the Thick Aqua Neon in Neon Effect.
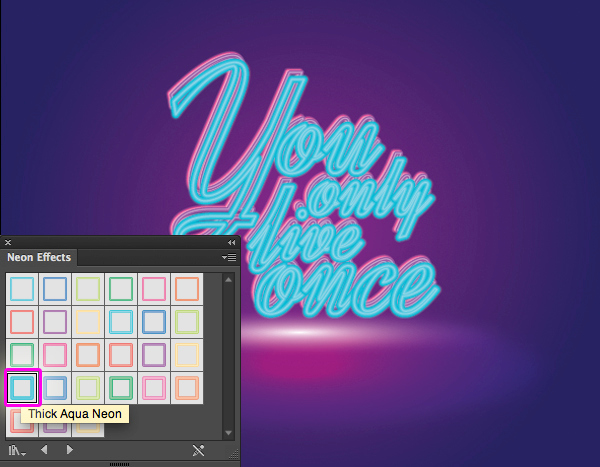
Apply the Multiply mode for our third shapes copy.
Step 8
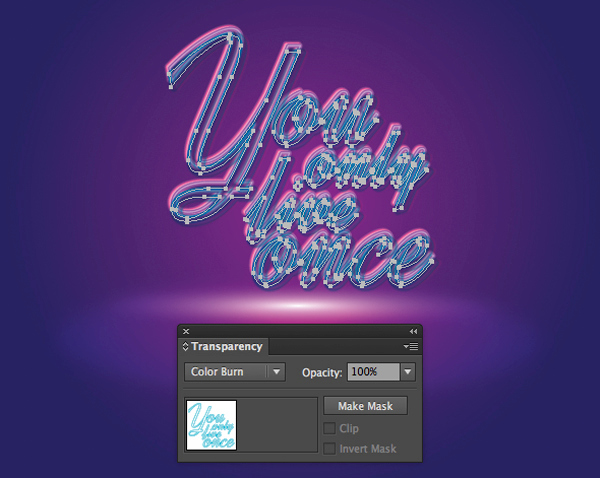
Next, duplicate the third shapes copy and paste in front (Ctrl / Cmd + C, Ctrl / Cmd + F). With the fourth shapes copy selected, select the Thin Aqua Neon in Neon Effect.
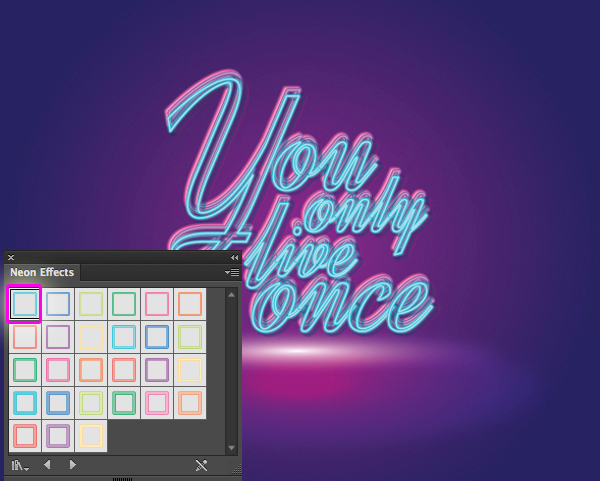
Apply the Color Burn mode for the fourth shapes copy.
Step 9
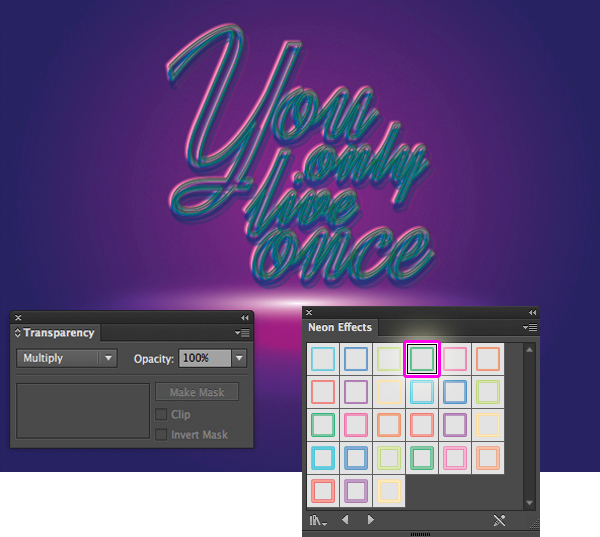
Now that you understand how to work with graphic style. Next, duplicate the fourth shapes copy and paste in front (Ctrl / Cmd + C, Ctrl / Cmd + F). Select Thin Green Neon in Neon Effect and apply Multiply mode for our fifth shapes copy.
Step 10
Next, for the last shapes copy, repeat the previous step and apply Thin Magenta Neon in Neon Effect for the sixth shapes copy.
Step 10
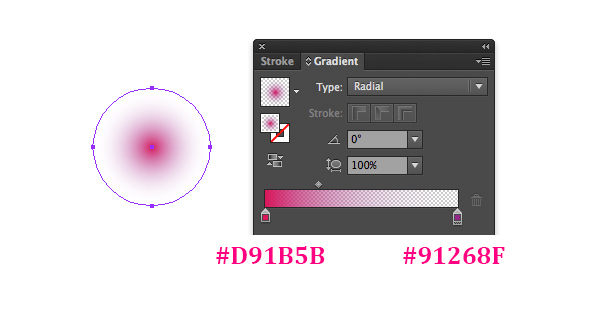
In this step, we will create glitter for the background. First, use the Ellipse Tool (L) to create an ellipse and set this gradient.
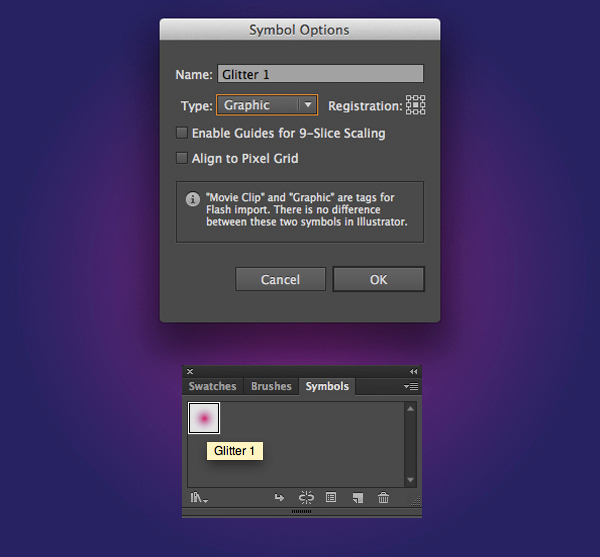
Go to Window > Symbol, drag the new ellipse we have created to Symbol palette as shown in the image below.
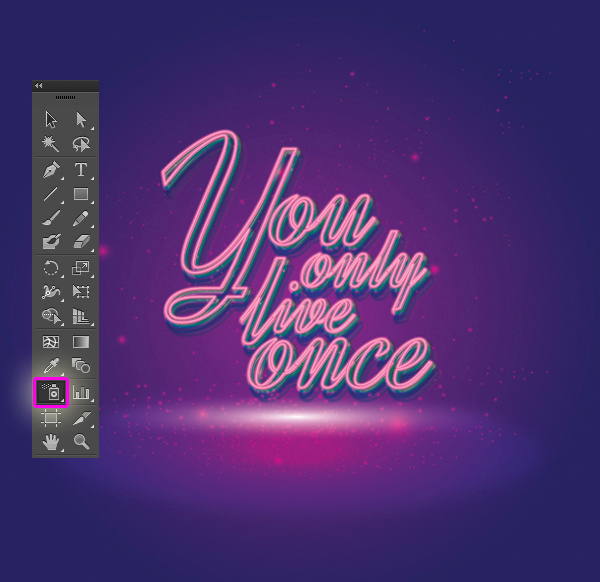
Use Symbol Sprayer Tool (Shift + S) to spray the symbol Glitter 1 on the background as shown below. Select all the glitters symbol, then go to Object > Expand. You can resize the glitters to different sizes.
Step 11
We are going to create another glitter for the background. Use the Ellipse Tool (L) to create an ellipse and set this gradient.
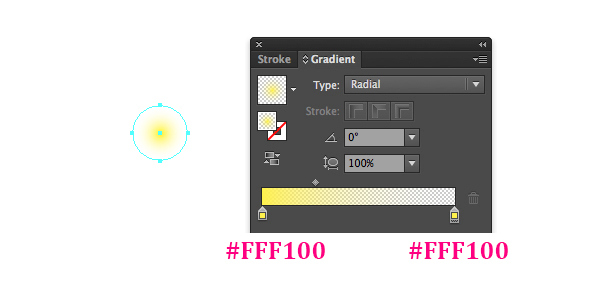
Now you understand how to work with symbol. Repeat the previous step and name our new symbol as ” Glitter 2 “. Place the Glitter 2 as shown below and apply the Overlay blending mode.
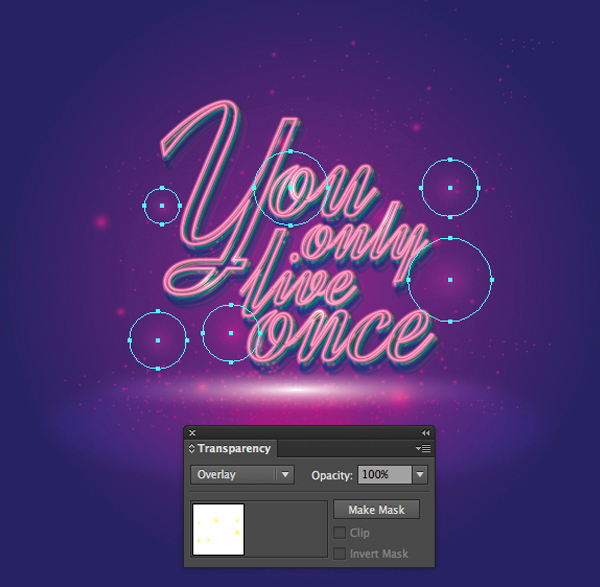
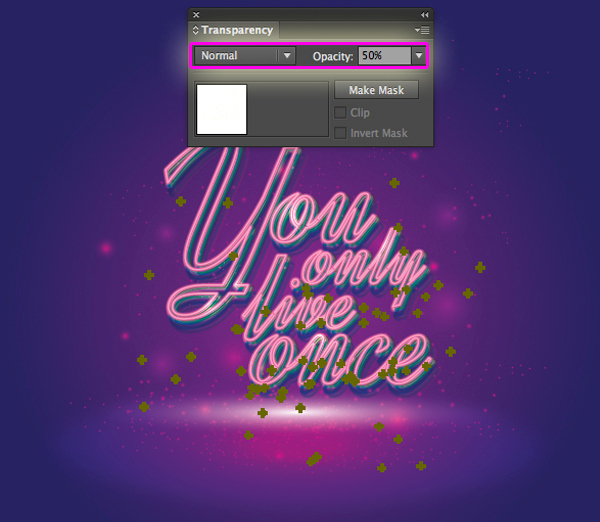
Place the Glitter 2 symbols one more time and resize them smaller, then lower Opacity = 50% as in the image below.
It’s time to place the light bulb on the letters. Continue to place Glitter 2 and apply the Screen blending mode as shown below.
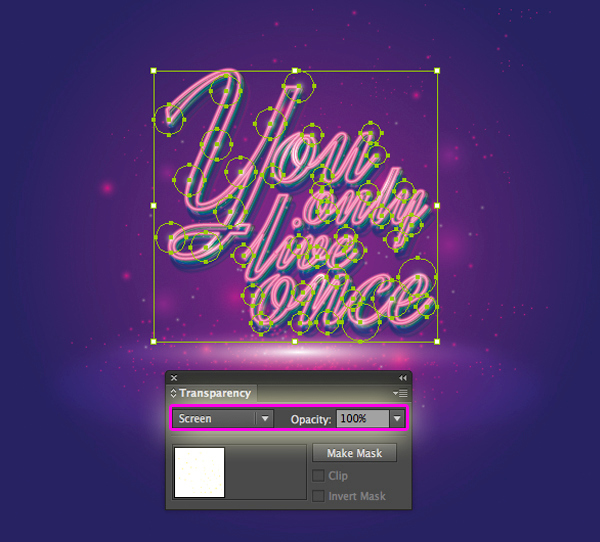
Now you should have a result like this image below.

Step 12
Back in Step 3, I mentioned placing a copy of the ellipse shape we had created to the side of the artboard. Go ahead and grab that shape now.
With the ellipse shape still selected, go to Object > Transform and set the values as shown below. Don’t forget to press Copy button.
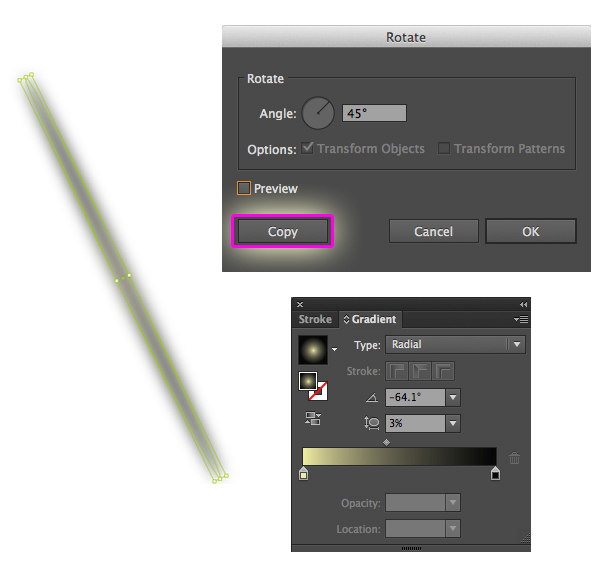
Press Ctrl / Cmd + D four times and you should get the result shown in the image below. Select all the ellipse shapes and group them (Ctrl/Cmd + G).
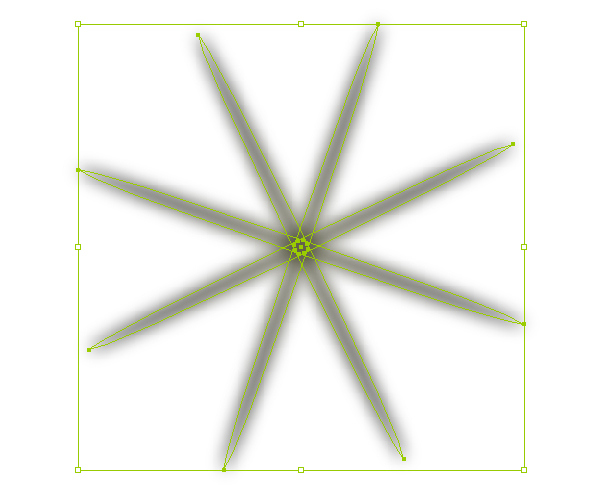
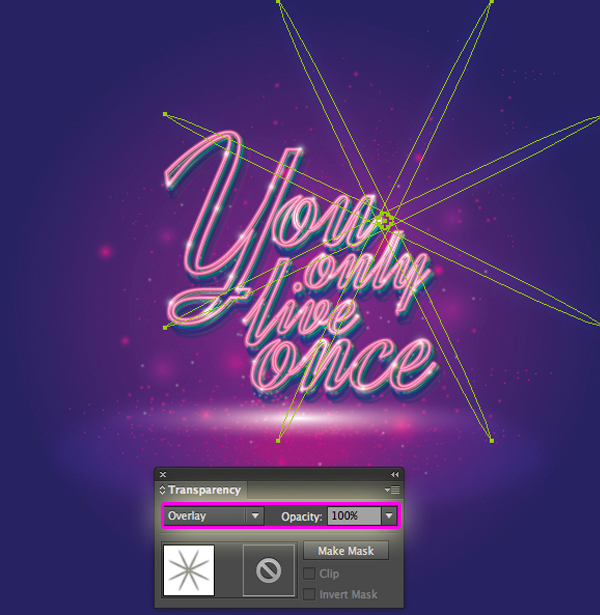
Now we apply Overlay blending mode to it.
Step 13
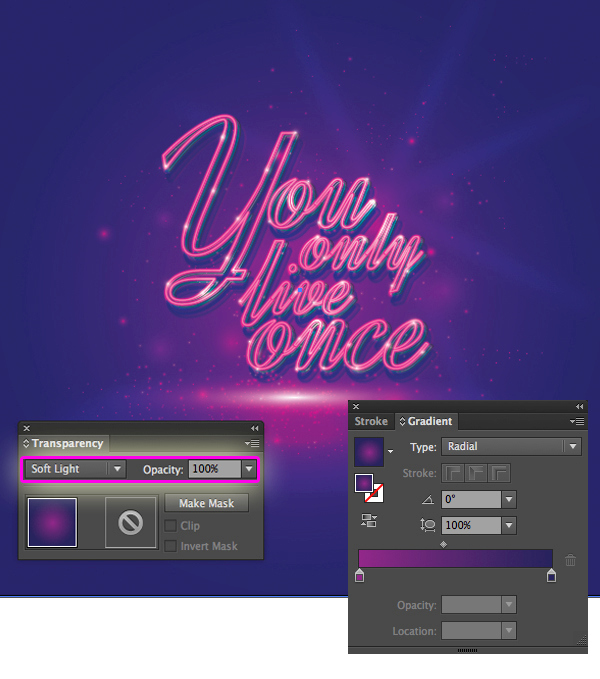
Now you notice that our design color is not really eye – catching. In this step, duplicate the background and paste in front (Ctrl / Cmd + C, Ctrl / Cmd + F), then apply Soft Light blending mode to the copy.
Step 14
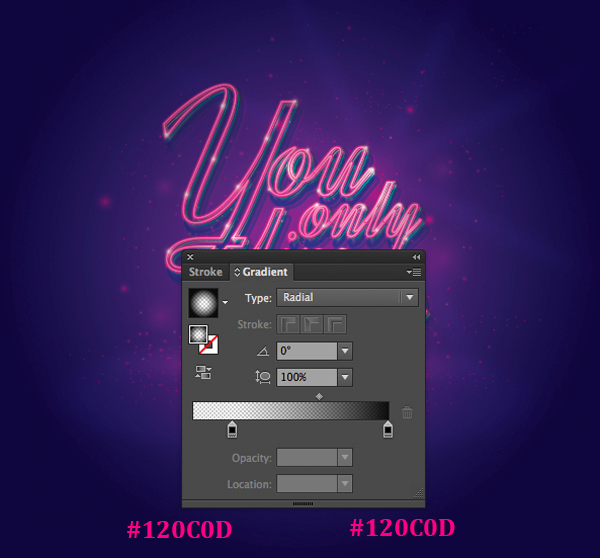
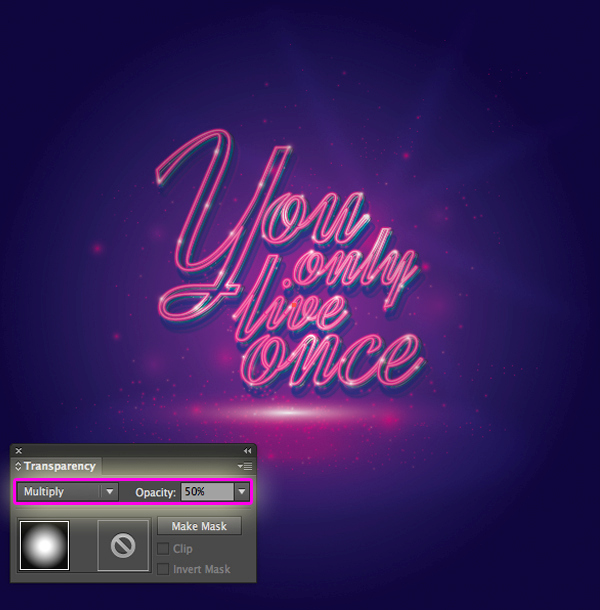
Next, grab the Rectangle tool (M) and create a rectangle with the dimensions of Width = 600px , Height = 600px. Fill it with the gradient as below. Then apply Multiply blending mode and lower Opacity = 50% to it.
Step 15
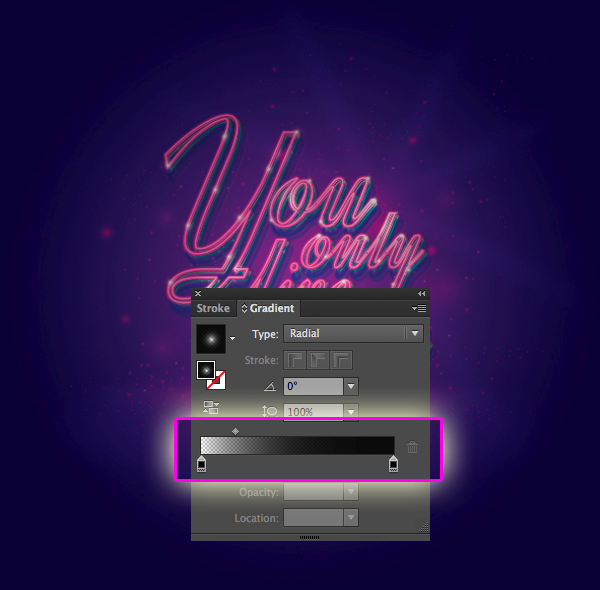
Duplicate (Ctrl / Cmd + C, Ctrl / Cmd + F) the rectangle we have created and paste in front, then modify the gradient as in the image below.
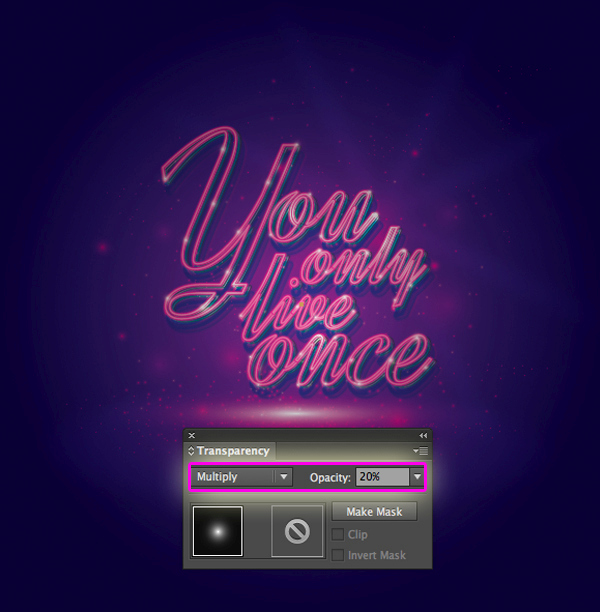
Lower Opacity = 20% as shown in the image below.
And We’re Done!
Here is how it should look. I hope you’ve enjoyed this tutorial and can apply these techniques in your future projects.
