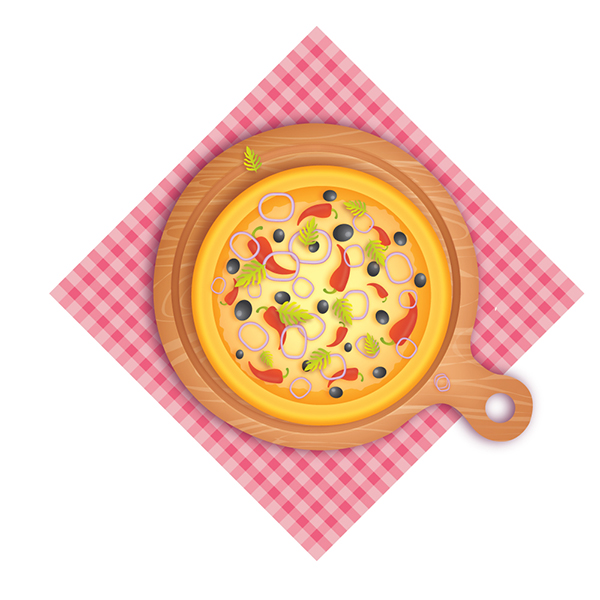
In this Illustrator tutorial, we will learn how to create a delicious pizza using very simple techniques.
We will use the effects along with some basic vector shapes to achieve the final outcome in a short time. Hopefully, you will learn some useful work tips.
Final Image
As always, this is the final image that we’ll be creating:

Tutorial Details
- Program: Adobe Illustrator CS6
- Estimated Completion Time: 45 minutes
- Difficulty: Beginner-Intermediate
Step 1
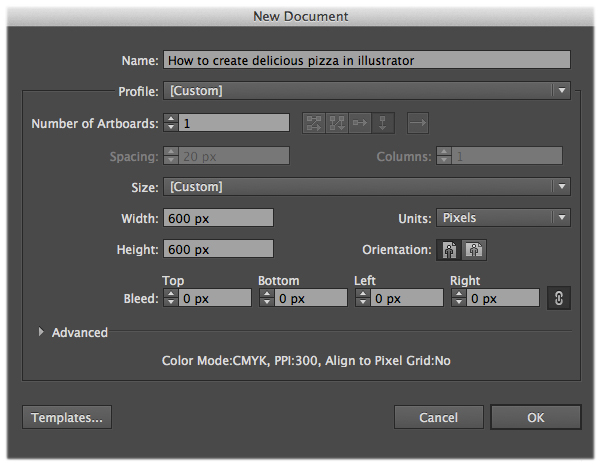
Let’s create a new document first. Make sure to set the dimensions to 600 x 600 pixels and the Color Mode to CMYK.
Step 2
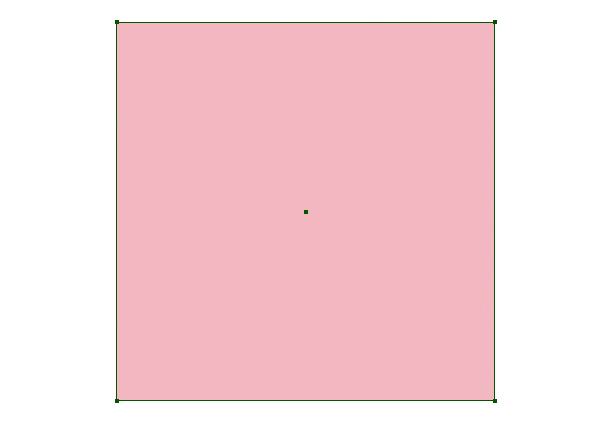
Now we use the Rectangle Tool (M) to draw a rectangle for the table cloth, fill it with #efb6bf.
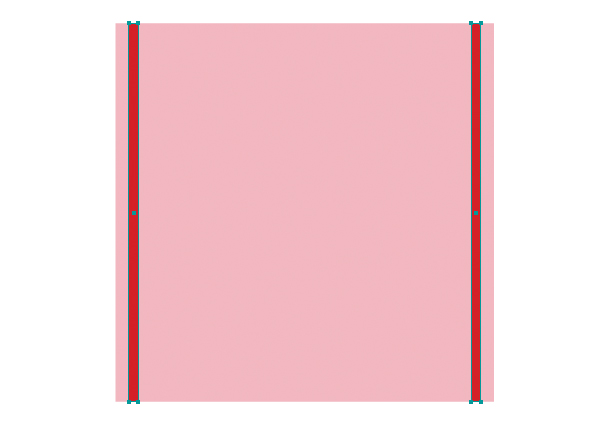
Next, we continue to use the Rectangle tool(M) to draw 2 shapes and fill with red #d21f26, then place them as shown in the image below.
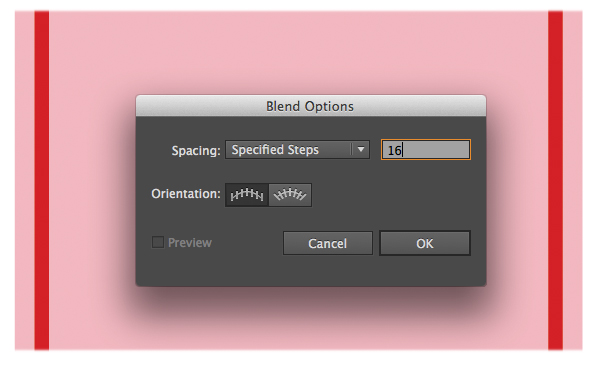
Select the 2 yellow shapes and go to Object > Blend > Make and set their values as shown below.
Make sure to expand them, go to Obkect > Expand Appearance.
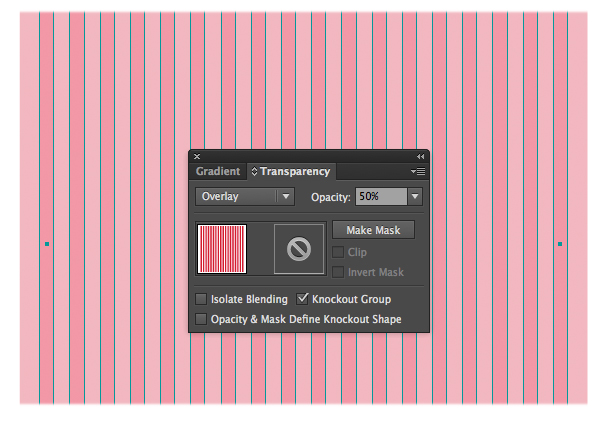
Apply Overlay blending mode to the stripes and lower the Opacity = 50%.
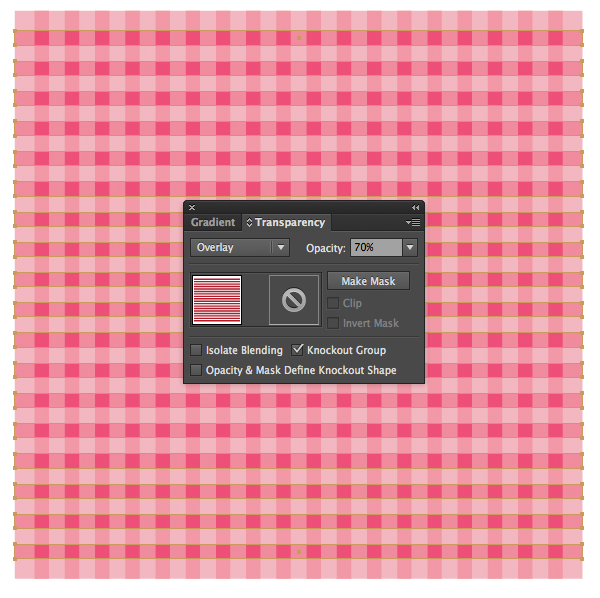
Duplicate (Ctrl / Cmd + C, Ctrl / Cmd + V) the stripes and go to Object > Transform > Rotate, set Angle = 90.
Then change Opacity = 70% for the copy. You should get a result as shown in the image below.
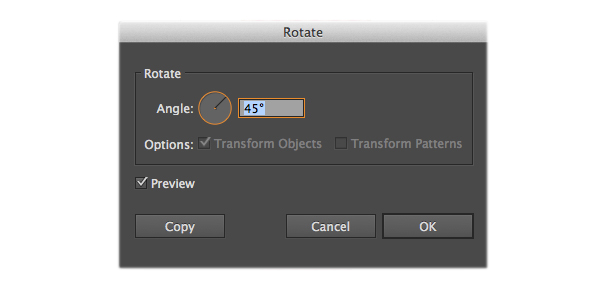
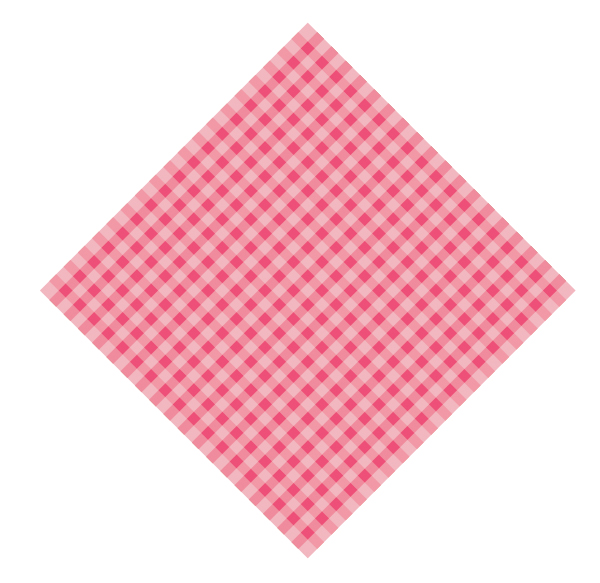
We group ( Ctrl + G ) the elements together and go to Object > Transform > Rotate, set Angle = 45.
You should get a result like this.
Step 3
In this step, we will create the cutting board. Use the Pen tool (P) to draw a shape like this.

Pick the Ellipse Tool (L) to create a small circle and place it as shown in the image below.
Select all elements we have created so far and under the Pathfinder Panel hit the Subtract from shape area button. Make sure to expand the shape.
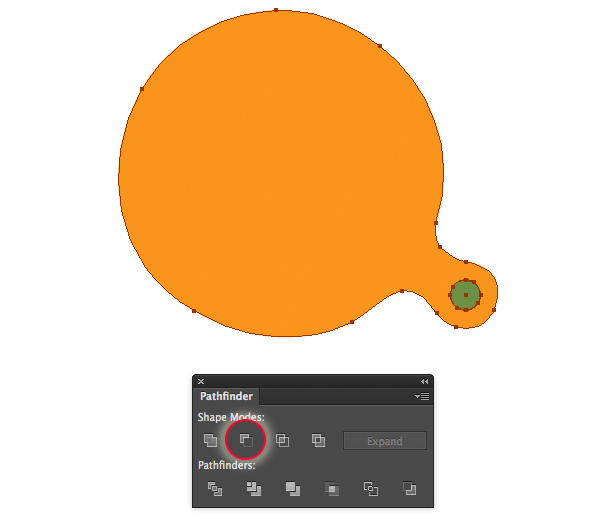
Here is the result. Then duplicate it and place a copy of the shape off to the side of the artboard, which we’ll use later.

Step 4
In this step, apply this gradient to the cutting board.
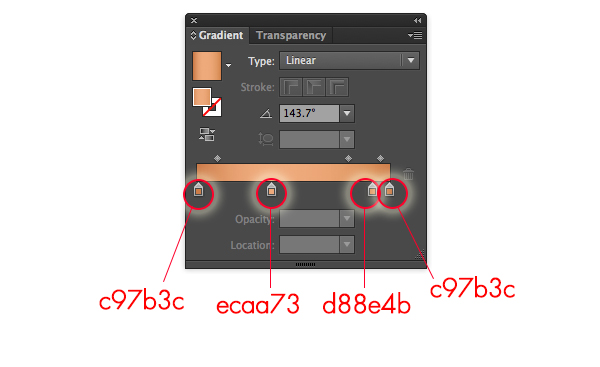
With the shape still selected, go to Effect > Stylize > Inner Glow and set the value.
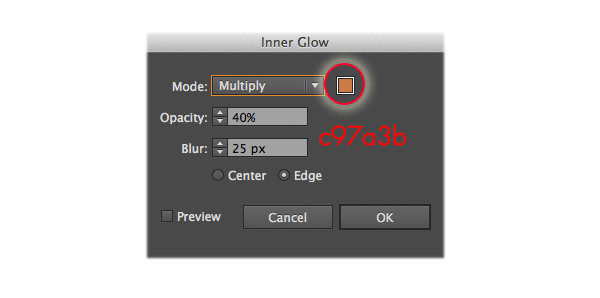
Then with the shape still selected, go to Effect > Stylize > Drop Shadow and set the value.
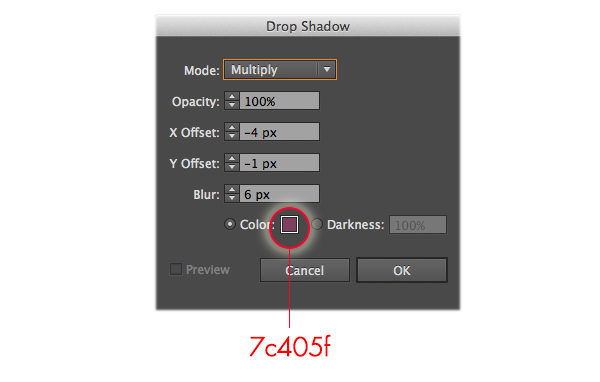
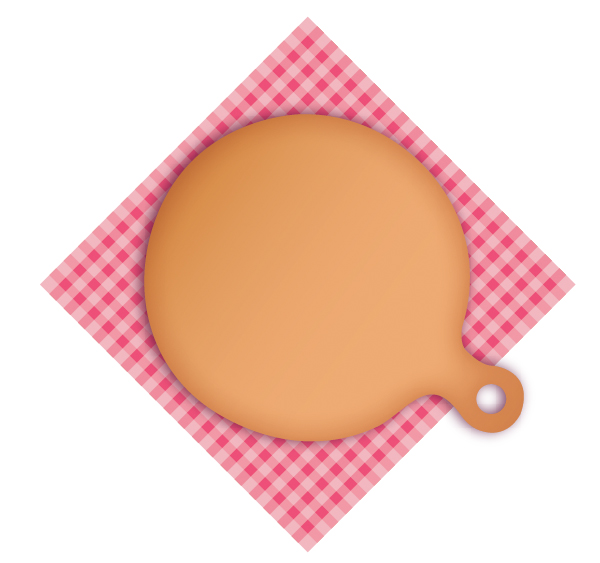
Here is the result.
Step 5
We are going to create the wooden texture for the cutting board.
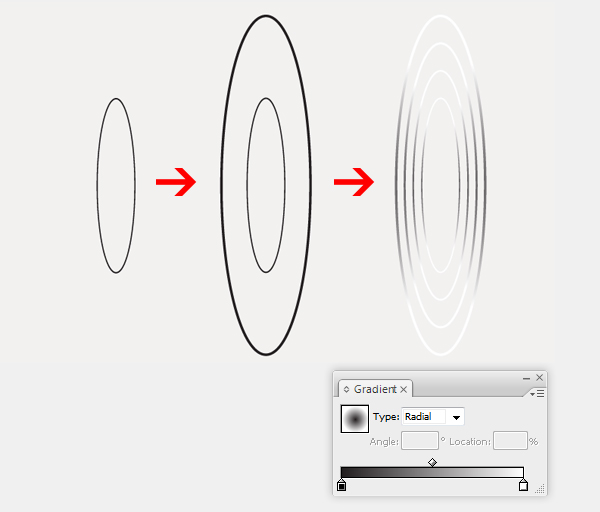
Create a new layer and name it “Wooden texture”. Select the Ellipse Tool (L), create a squeezed shape, fill it with no color but Stroke = 2px , then go to Object > Expand.
Duplicate the shape we have created and resize the copy as shown below. Then select both of these objects and go to Object > Blend > Blend option > Spacing: Specified step =2 > OK.
Make sure to expand the shape. Select Object > Expand.
Then apply a radial gradient to them with black in the middle and white on the edges.
Step 6
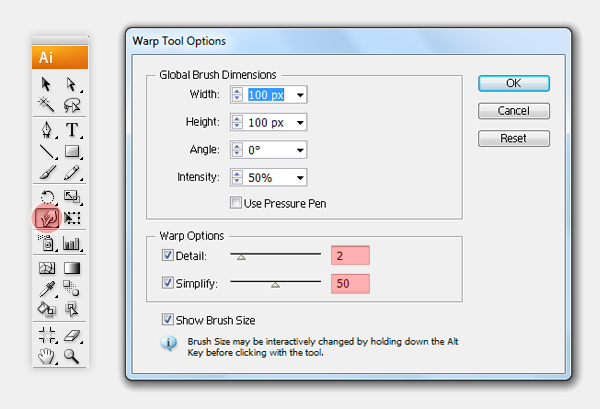
Double click on the Warp Tool (shift + R) in the Tools Panel to bring up the Warp Tools Options dialog. They are probably on the default settings, but if they are not, press the reset button on the right of the dialog. Change the settings as shown in the following image and click OK.
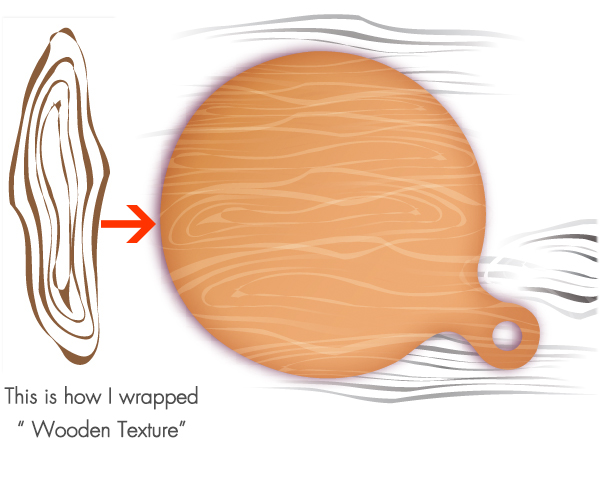
Now feel free to warp the ” Wooden texture “ the way you like. Then select the object that we have just warped, go to Object > Transform > Rotate : Angle = 90, change Blending mode to Soft light.
Duplicate the object, resize some bigger and scale some smaller as you want. Here is my example.
Step 7
Back in Step 3, I mentioned placing a copy of the cutting board shape outside the Artboard. Go ahead and grab a copy to work with. Place the shape as shown in the image below.
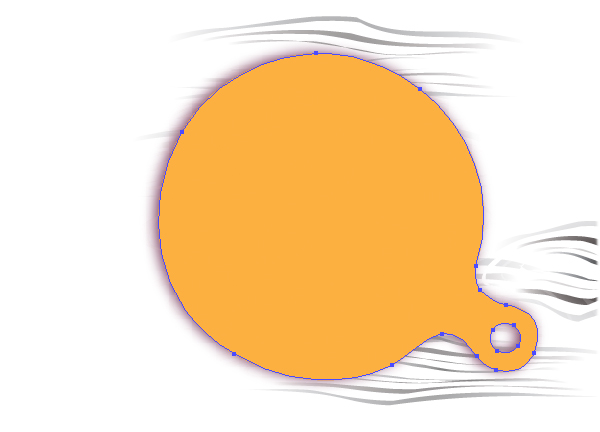
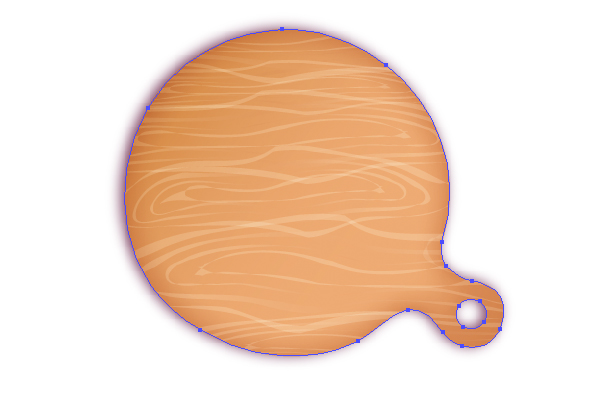
Select all elements and go to Object > Clipping Mask > Make.
Step 8
Select the Ellipse Tool (L), create a circle, fill it with no color but Stroke = 12px , then go to Object > Expand.
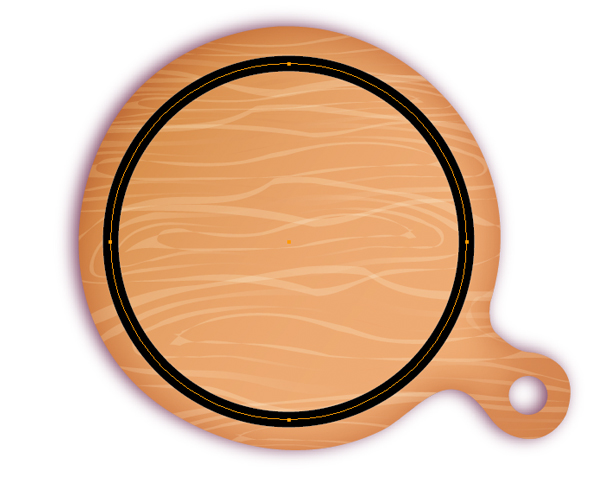
Then apply this gradient to the circle.

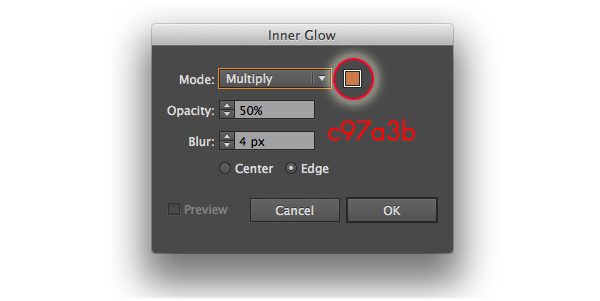
With the shape still selected, go to Effect > Stylize > Inner Glow.
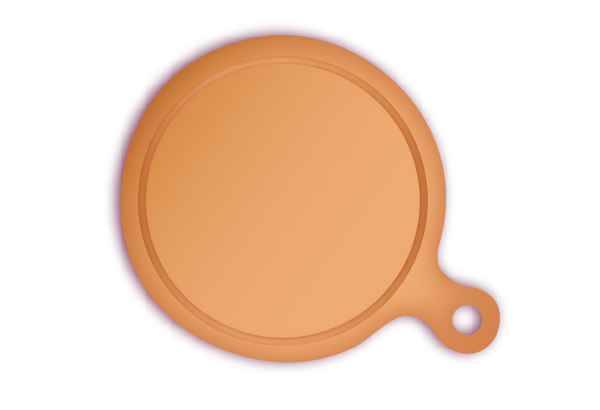
Here is the result.
Step 9
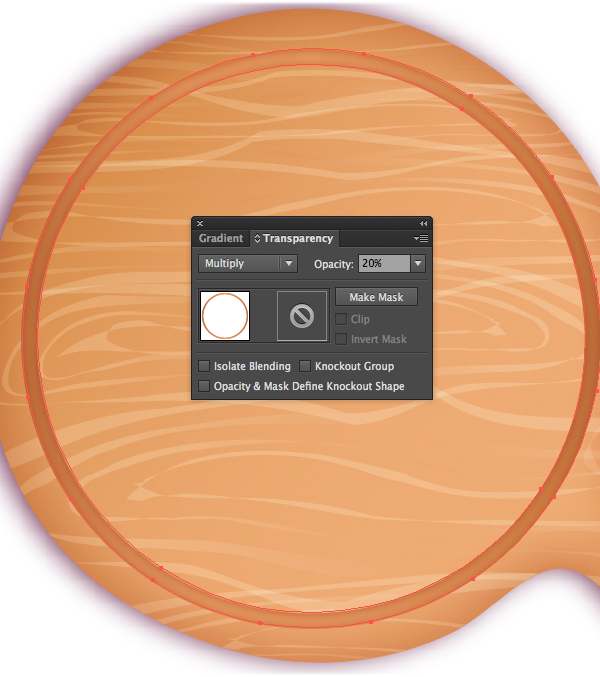
Duplicate (Ctrl / Cmd + C, Ctrl / Cmd + F) that shape and apply the Multiply blending mode to the shape with lower Opacity = 20%.
Move the copy shape up a little bit.
Step 10
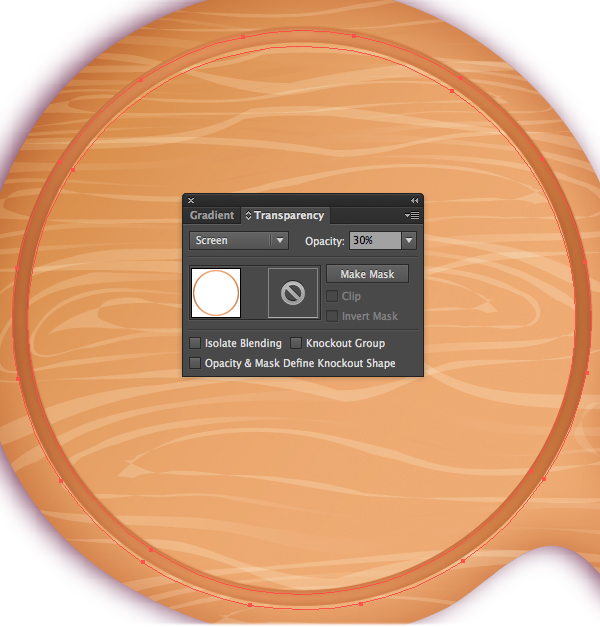
Duplicate (Ctrl / Cmd + C, Ctrl / Cmd + F) that shape again and apply the Screen blending mode to the shape with lower Opacity = 30%.
Move the copy shape down a little bit.
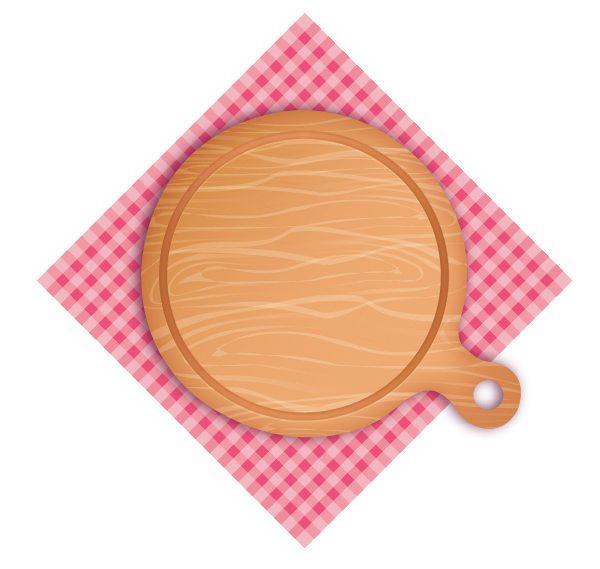
Now we are done with the cutting board. You should have a result like this.
Step 11
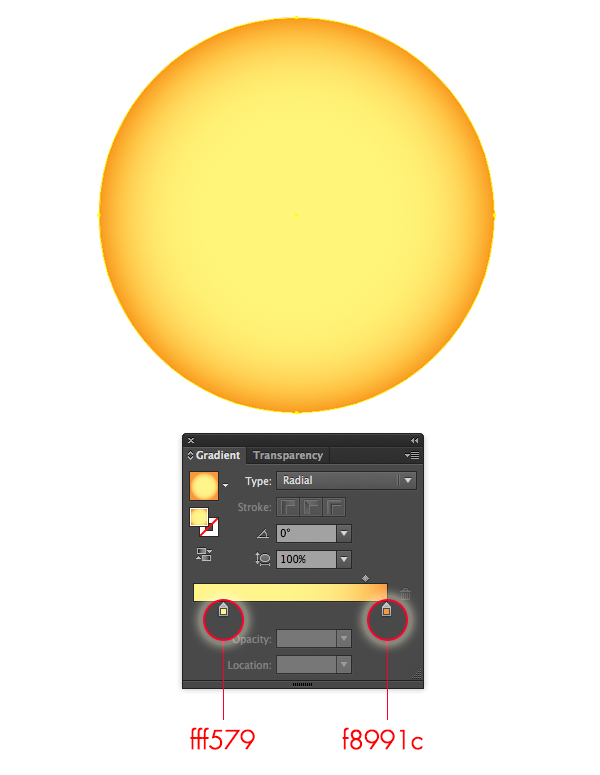
We are going to create the pizza. Select the Ellipse Tool (L), create a circle, fill it with this gradient.
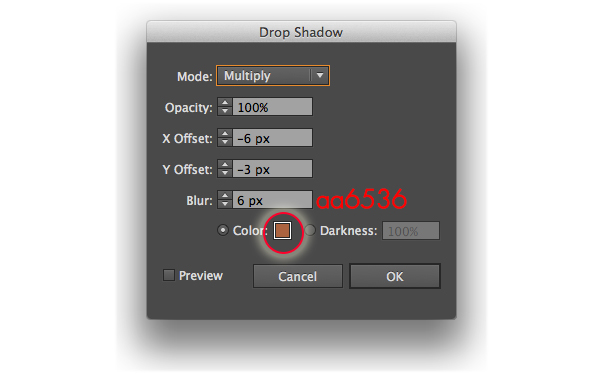
With the shape still selected, go to Effect > Stylize > Drop Shadow.
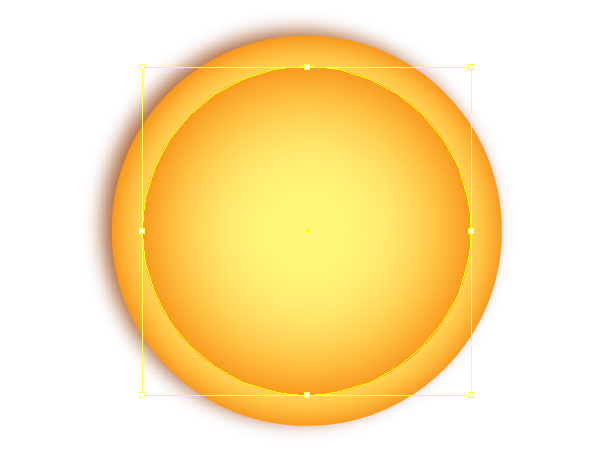
And you should get a result like this.

Step 12
Reselect the Ellipse Tool (L), create a smaller circle and place it as in the image below. We apply the same gradient as in Step 11 to this circle.
Step 13
Select the Ellipse Tool (L), create a circle, fill it with no color but Stroke = 4px , then go to Object > Expand.

With the shape still selected, go to Effect > Blur > Gaussian Blur.
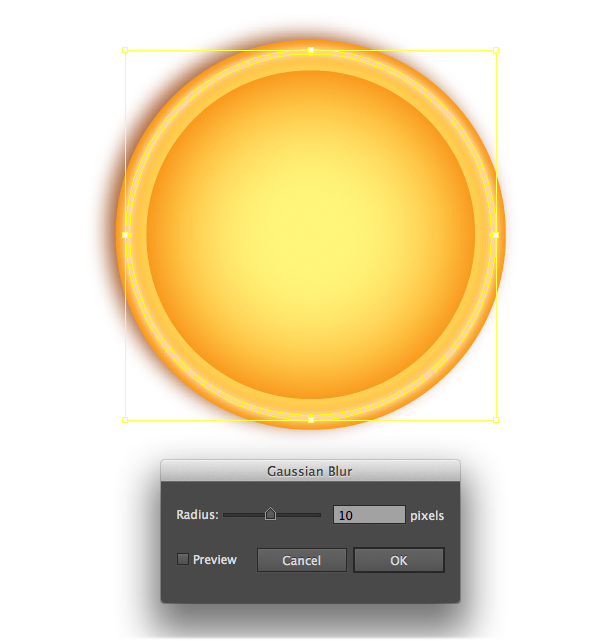
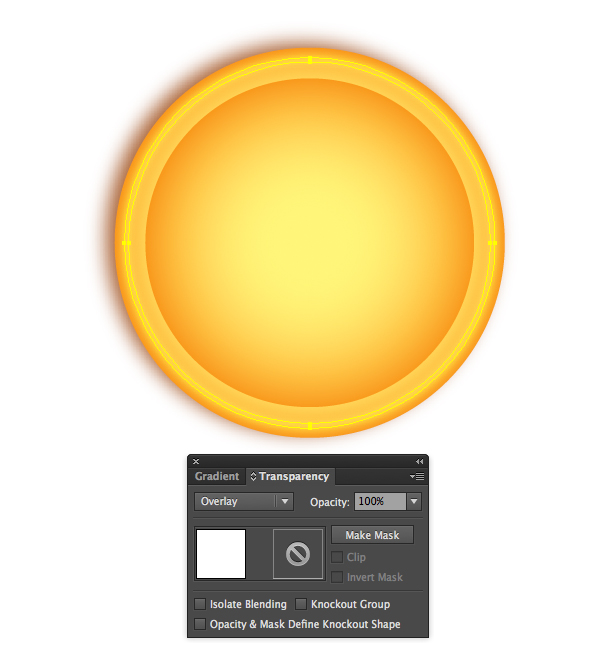
Then apply the Overlay blending mode to the shape and you should get a result like this.
Step 14
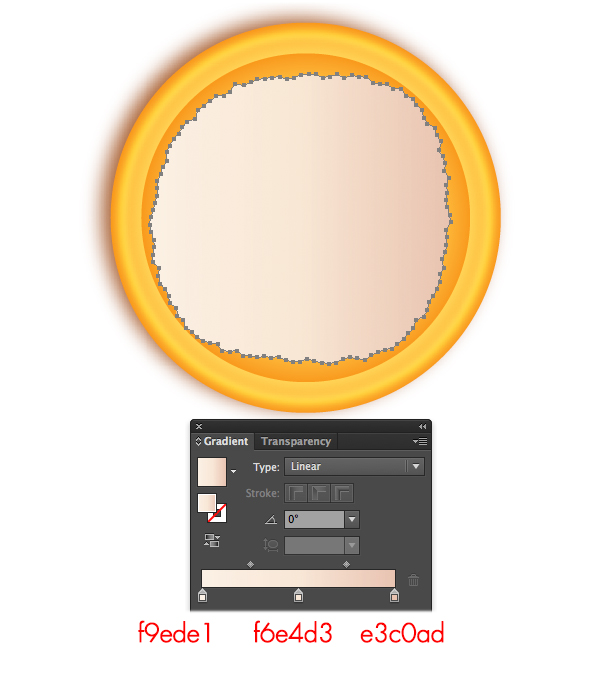
Pick the Pen tool (P) to create a shape like this.

Then we apply a gradient to this shape.
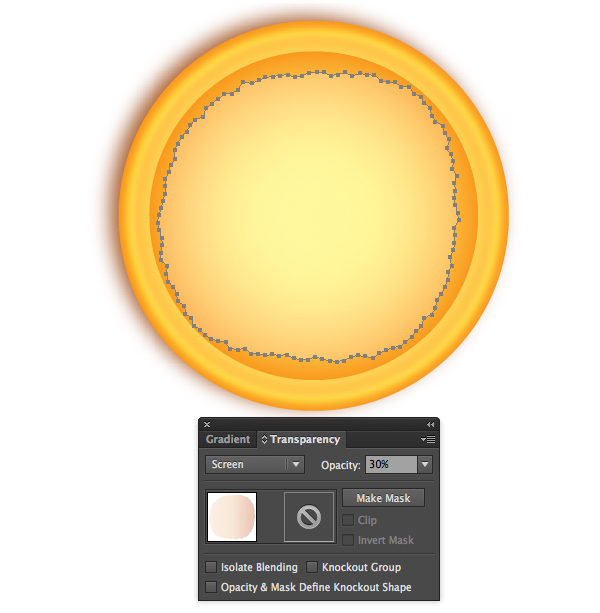
Then apply the Screen blending mode to the shape with lower Opacity = 30% and you should get a result like this.
Step 15
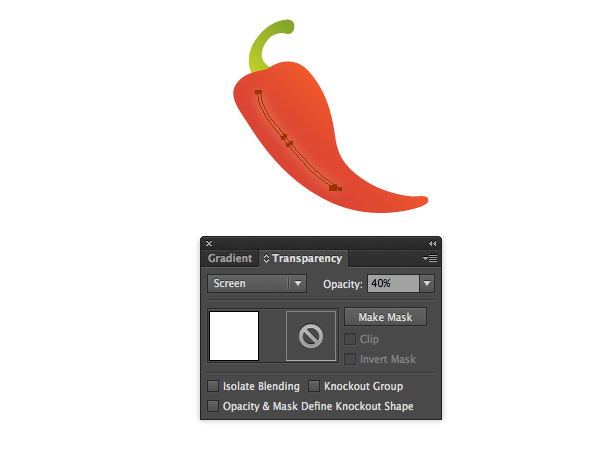
Pick the Pen tool (P) to draw a chilli shape as in the image below. Then apply a gradient to it.
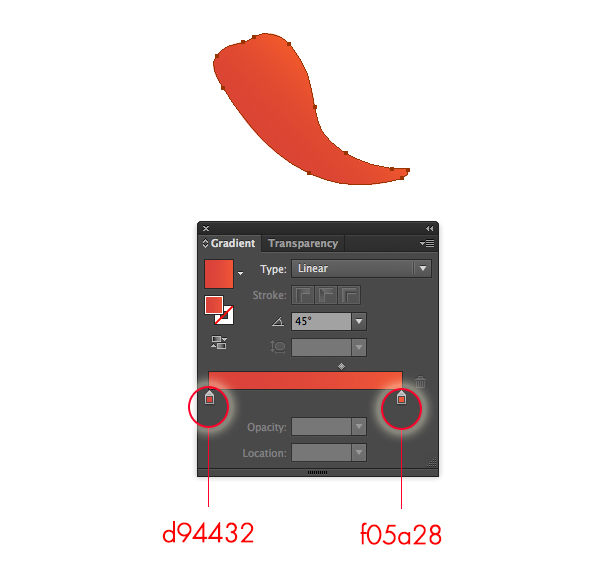
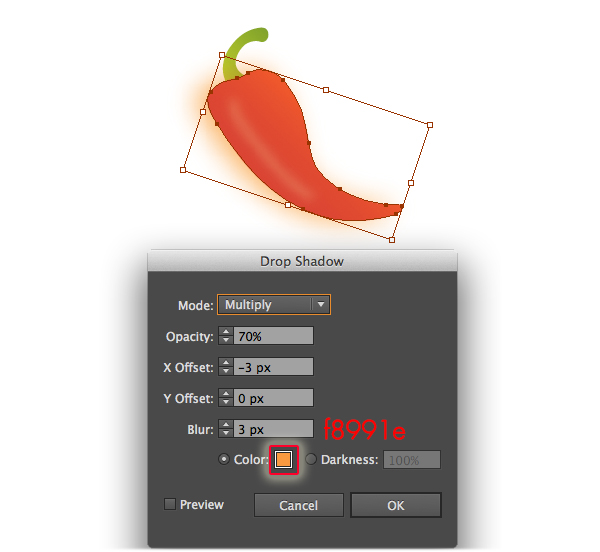
With the shape still selected, go to Effect > Stylize > Drop Shadow and set the value.
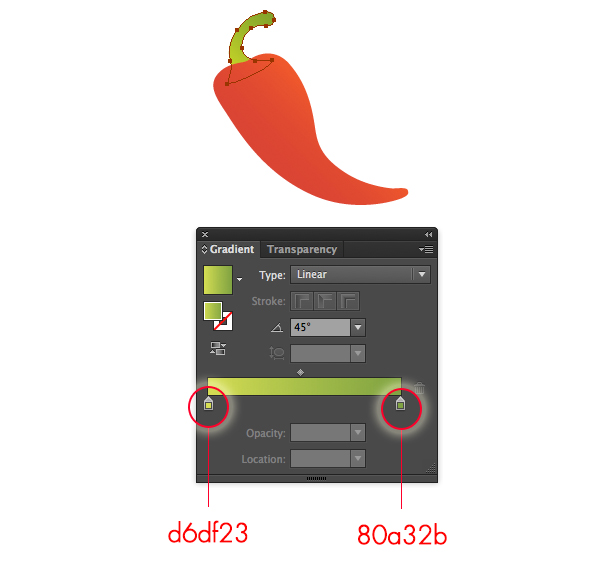
Pick the Pen tool (P) to draw a stem for the chilli. Then apply a gradient to it.
Pick the Pen tool (P) to draw a shape as in the image below. Fill it with white #ffffff.

With the shape still selected, go to Effect > Blur > Gaussian Blur and set the value.
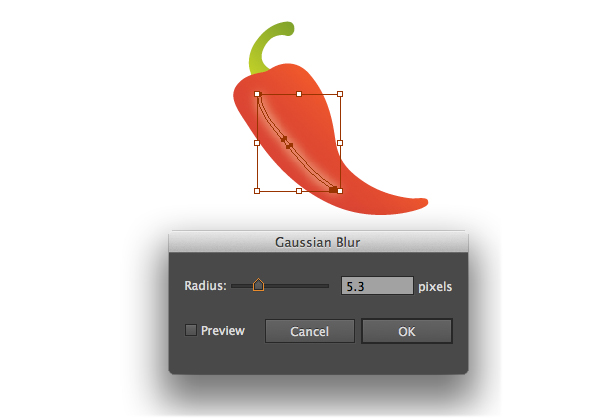
Then apply the Screen blending mode to the shape with lower Opacity = 40%
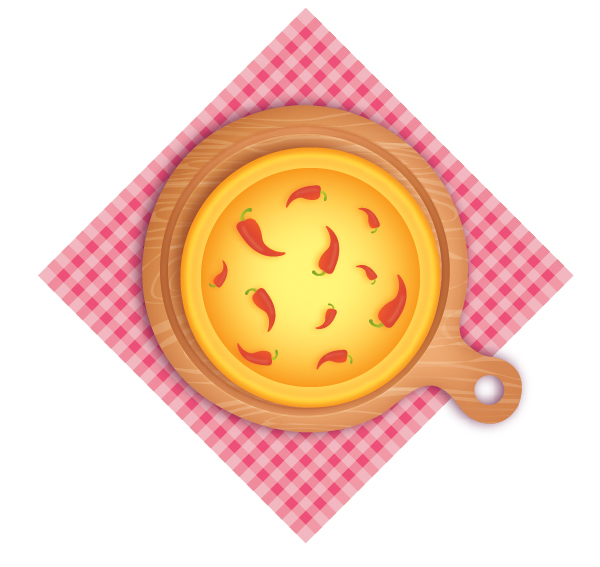
Duplicate (Ctrl / Cmd + C, Ctrl / Cmd + V) the chilli and resize them to different sizes, then place them as you like. Here is my result.
Step 16
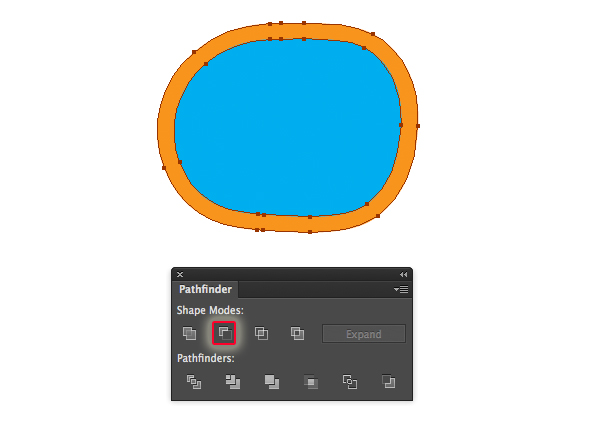
In this step, we will create an onion ring. Now we use Pen tool (P) to create 2 shapes as shown in the image below.
Select the shapes we have created so far and click the Minus – front from the Pathfinder panel.
Then go to Object > Expand Appearance to expand the shape.
Step 17
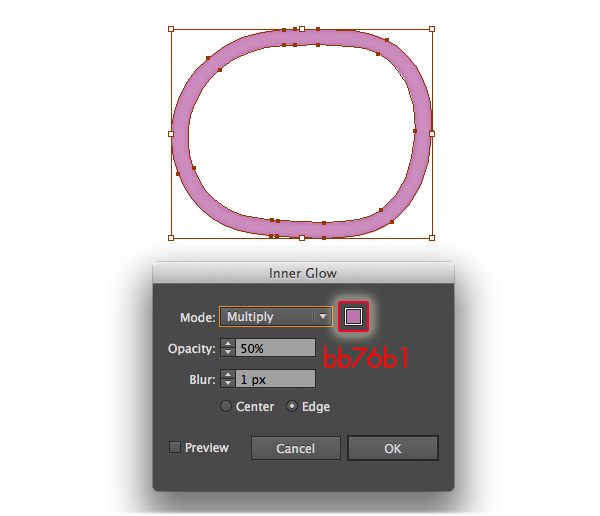
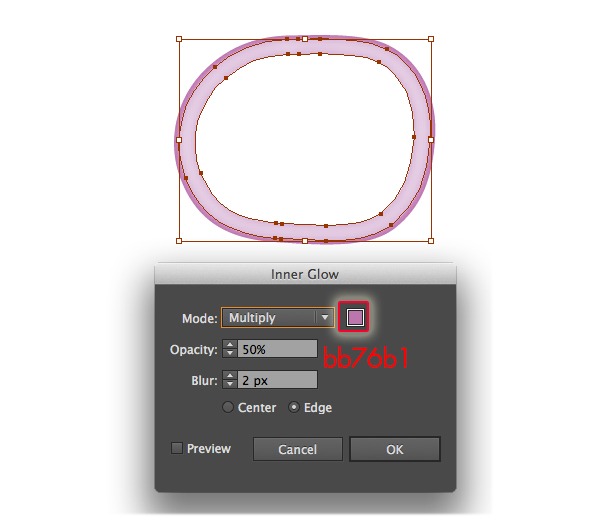
Fill the new shape with #cc8cbd. Then go to Effect > Stylize > Inner Glow and set the value.
Duplicate (Ctrl / Cmd + C, Ctrl / Cmd + F) the new shape we’ve created and scale it smaller.
Fill the copy with #ffffff. Then go to Effect > Stylize > Inner Glow and set the value.
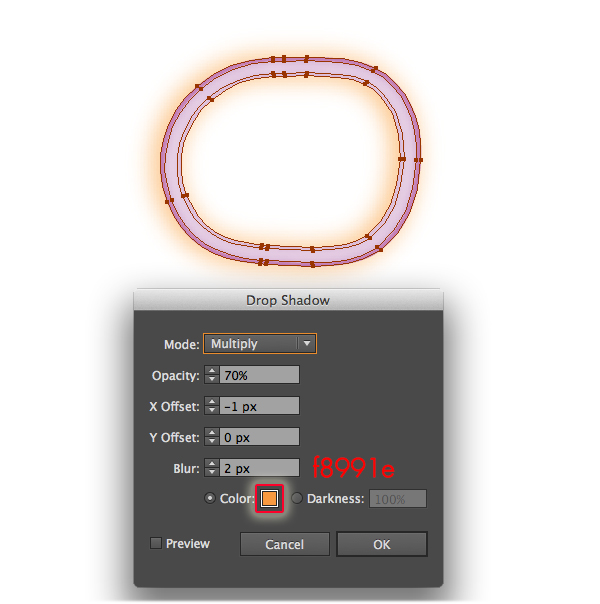
Group (Ctrl/ Cmd + G) all of the elements together. Then go to Effect > Stylize > Drop Shadow and set the value.
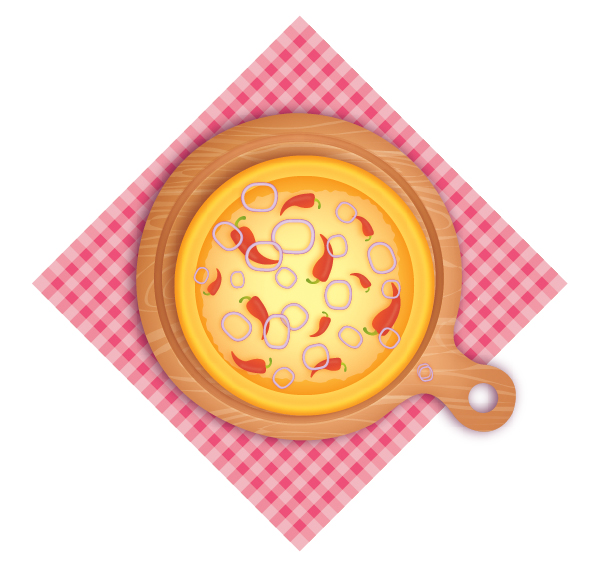
Duplicate (Ctrl / Cmd + C, Ctrl / Cmd + V) the onion rings and resize them to different sizes, then place them as you like. Here is my result.
Step 17
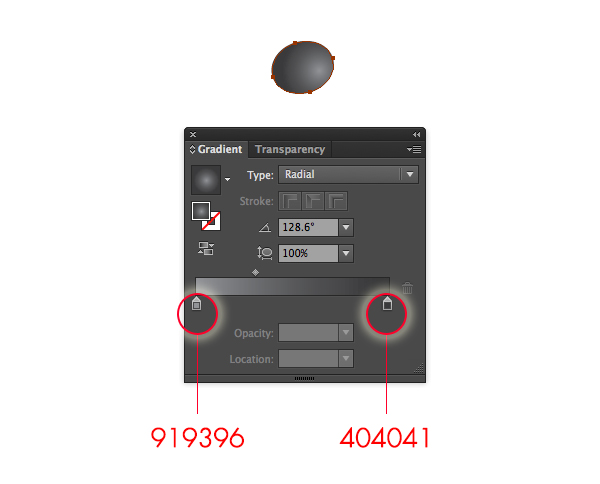
In this step, we will create an olive. Pick the Ellipse Tool (L) to create an ellipse shape then fill it with this gradient.
Use the Ellipse Tool (L) to create a small ellipse shape and place it as shown in the image below, then lower Opacity = 20%.
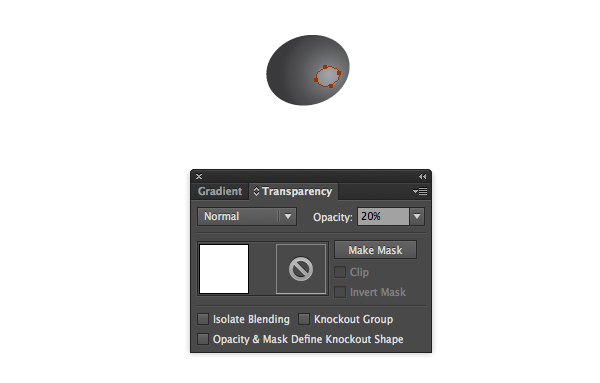
Group (Ctrl/ Cmd + G) all of the elements together. Then go to Effect > Stylize > Drop Shadow and set the value.
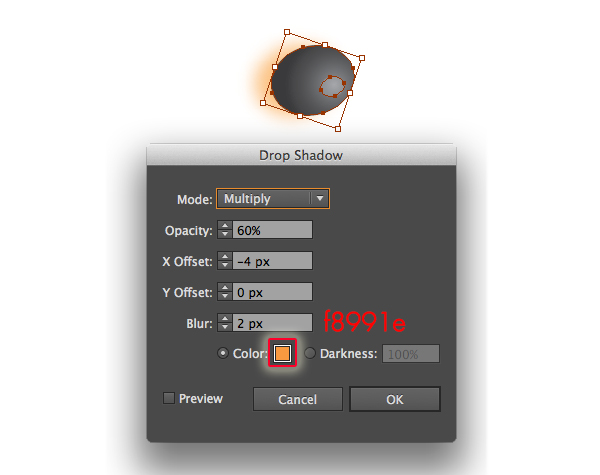
Duplicate (Ctrl / Cmd + C, Ctrl / Cmd + V) the olive and resize them to different sizes, then place them as you like. Here is my result.
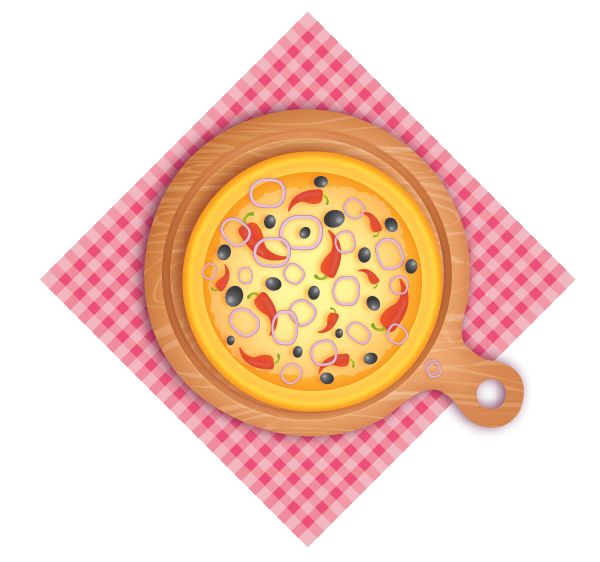
Step 18
Now it’s time to decorate our pizza with herbs.
In the Symbol palette go to Open Symbol Library > Flowers > Poppy. We select the poppy symbol and go to Object > Expand Appearance, then Ungroup (Shift + Ctrl + G), keep the leaf shape and remove the flower shape. This leaf will represent an herb on the pizza.
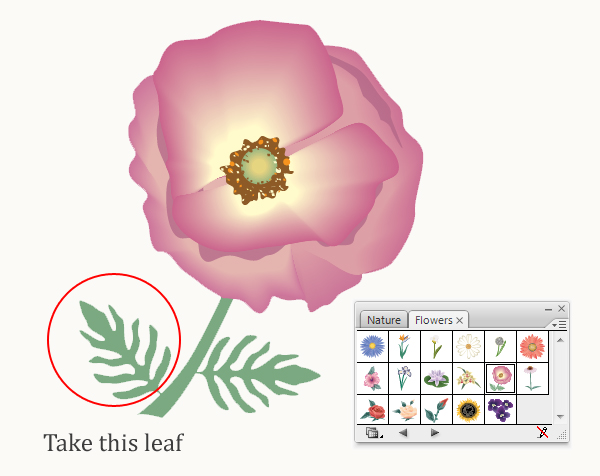
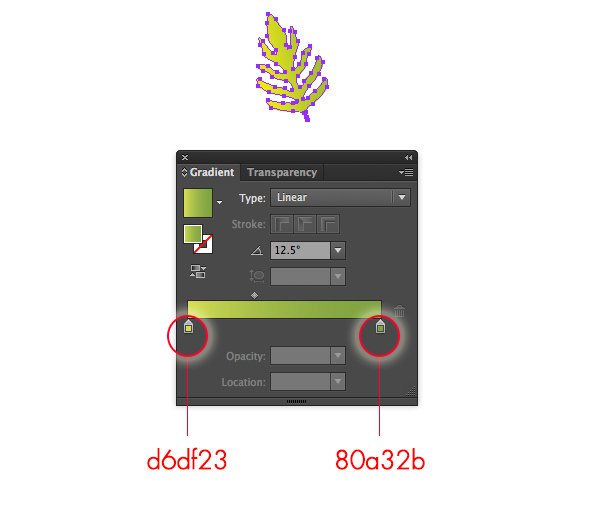
Then we fill it with this gradient.
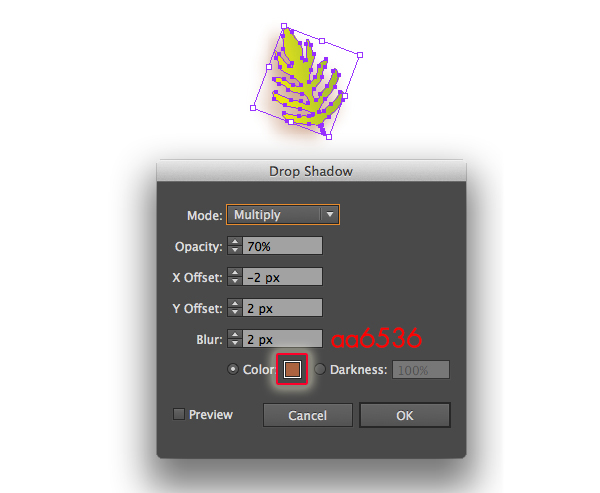
With the shape still selected, go to Effect > Stylize > Drop Shadow and set the value.
Duplicate (Ctrl / Cmd + C, Ctrl / Cmd + V) the herb and resize them to different sizes, then place them as you like. Here is my result.
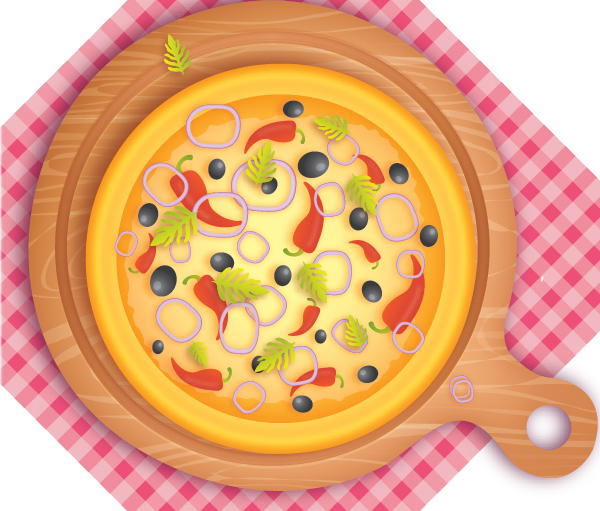
And We’re Done!
Here is how it should look. I hope you’ve enjoyed this tutorial and can apply these techniques in your future projects.
