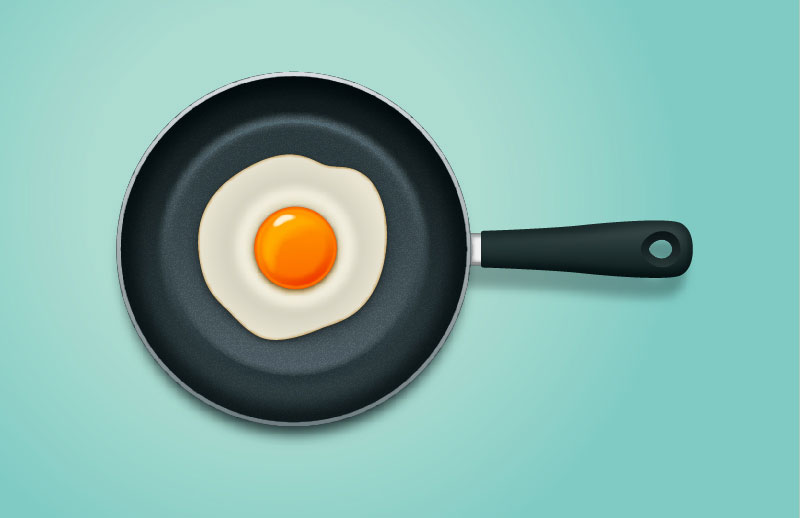
In this tutorial, you will learn how to create a frying pan in Adobe Illustrator.
For starters, you will learn how to create the main shape using several ellipses, basic vector shape building techniques and a bunch of gradients. Moving on, you will learn how to add subtle shading and highlights using basic tools and some simple effects. Finally, you’ll learn how to create a simple background. Let’s start!
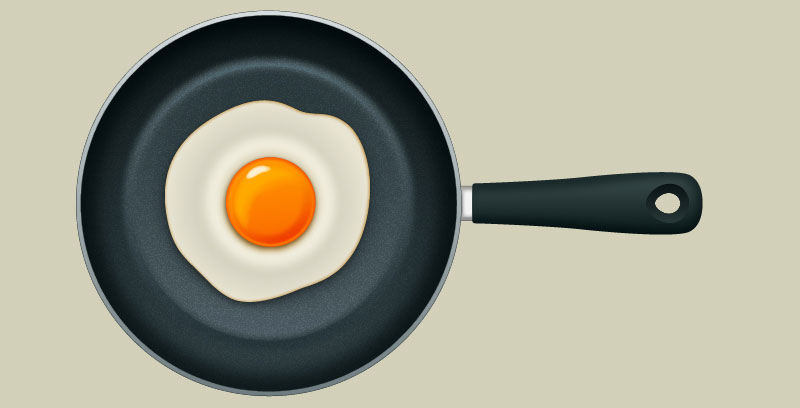
Final Image
As always, this is the final image that we’ll be creating:

Tutorial Details
- Program: Adobe Illustrator CS6
- Estimated Completion Time: 120 minutes
- Difficulty: Beginner-Intermediate
Step 1
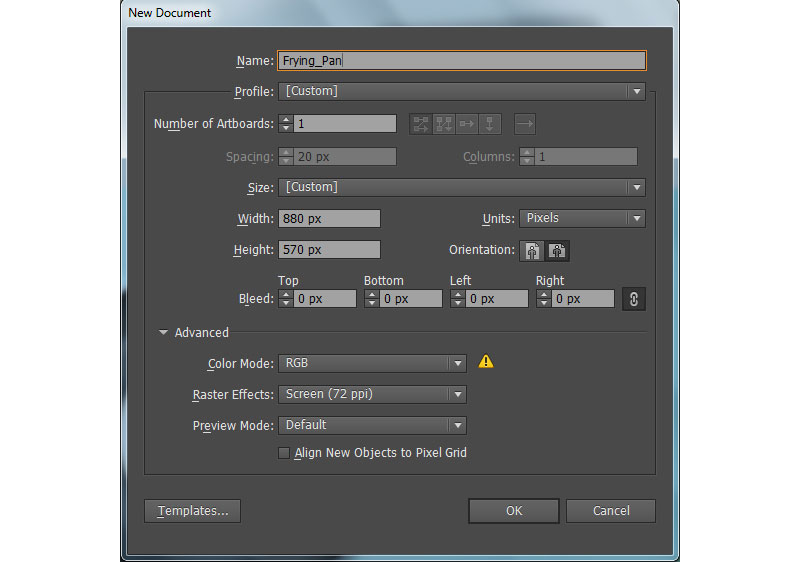
Launch Illustrator and then press (Ctrl + N) to create a New document. Select Pixels from the Units drop-down menu, enter 880 in the width box and 570 in the height box then click on the Advanced button. Select RGB, Screen (72ppi) and make sure that the Align New Objects to Pixel Grid box is unchecked before you click OK
Step 2
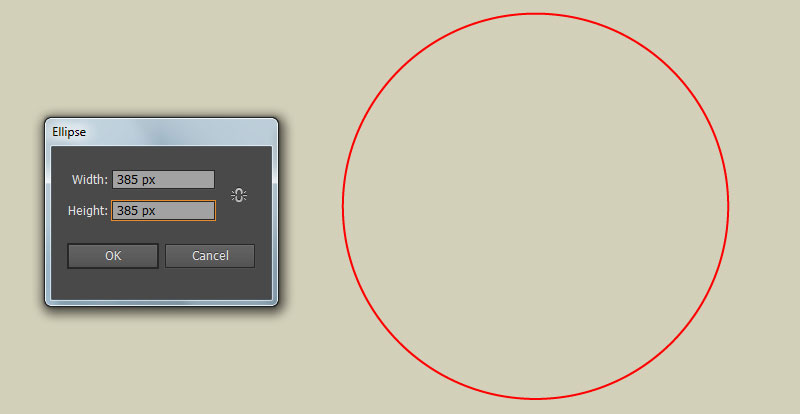
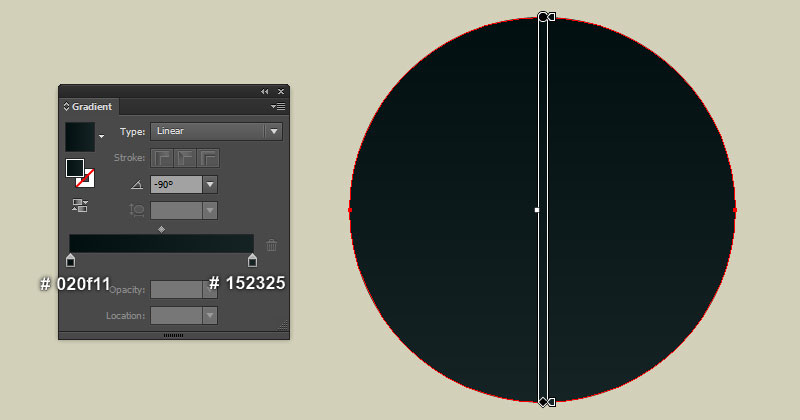
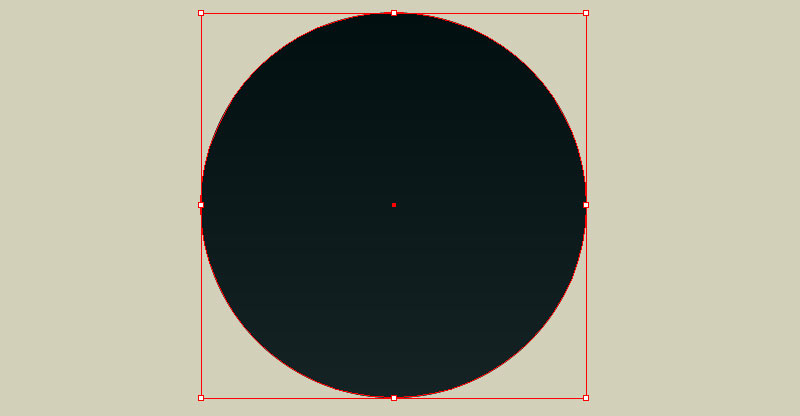
Pick the Ellipse Tool (L) and create a 385 by 385px red ellipse. Make a copy (Ctrl +C, Ctrl +F) of the newly created ellipse and then press (Ctrl +3) to hide the copy. Next, reselect the red original ellipse, remove its stroke and fill this object with the linear gradient like you see in the second image.
Step 3
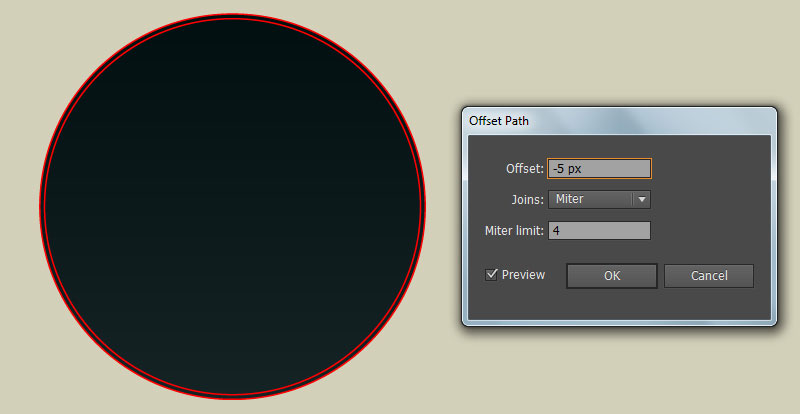
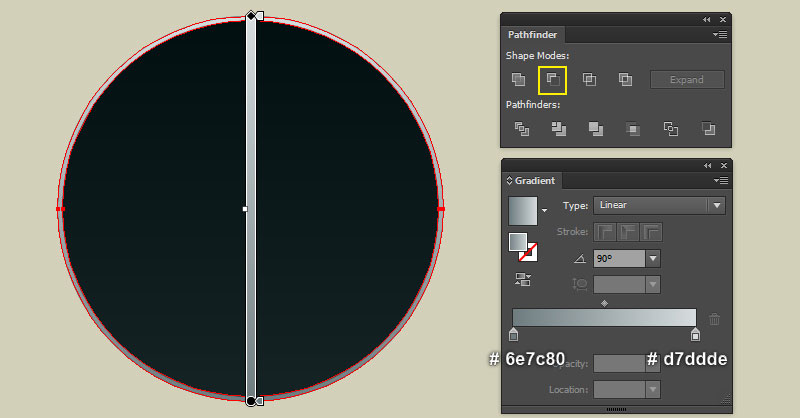
Before you continue, press (Ctrl +Alt +3) to show the red ellipse hidden in step 2. Keep this object selected and go to the Object > Path > Offset Path… Enter a -5px Offset and click OK. Now reselect two red ellipses, then open the Pathfinder panel (Window > Pathfinder) and click on the Minus Front button. Still having the resulting object selected, remove its stroke and fill this object with the linear gradient as shown in the second image.
Step 4
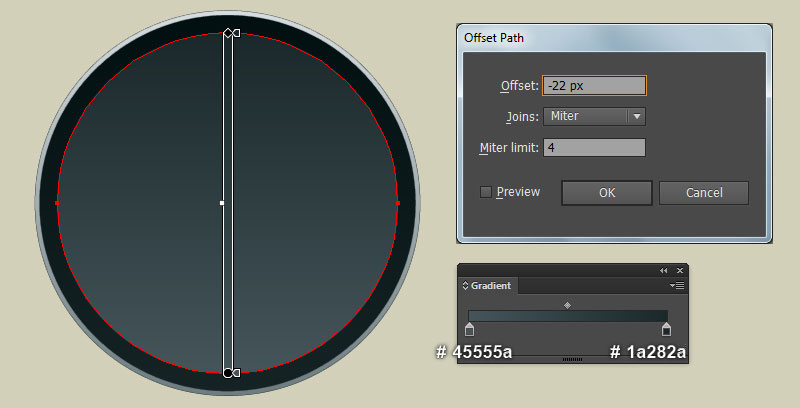
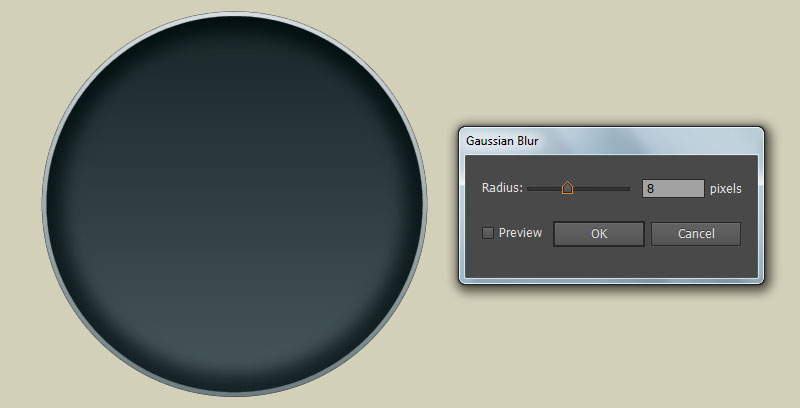
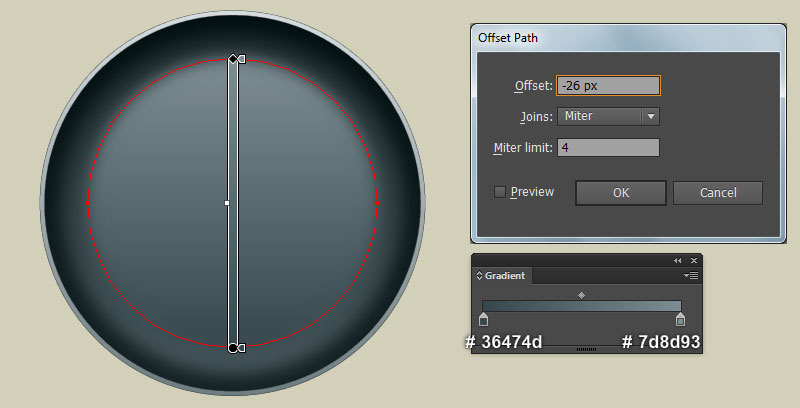
Select the ellipse created in the step 2 and go to the Object > Path > Offset Path… Enter a -22px Offset and click OK. Then replace the existing fill color of the newly created ellipse with new linear gradient as shown in the first image. Still having the resulting ellipse selected and go to the Effect > Blur > Gaussian Blur… Enter a 8px Radius and click OK.
Make sure that the resulting ellipse is still selected and open the Offset Path dialog box (Object > Path > Offset Path). Enter a -26px Radius and click OK. Then replace the existing fill color of the newly created ellipse with new linear gradient as shown in the third image.
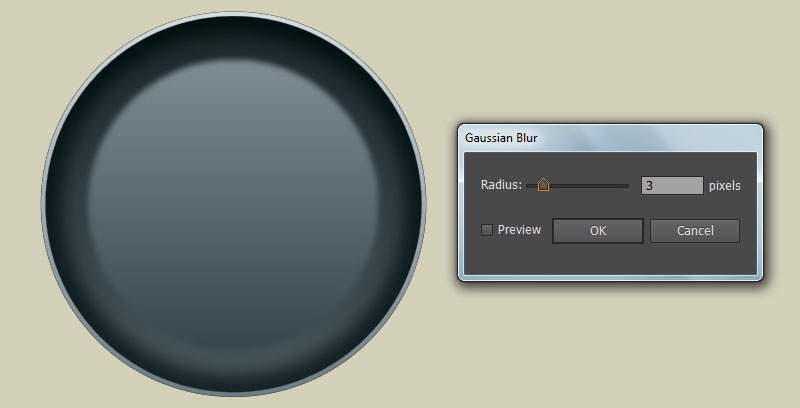
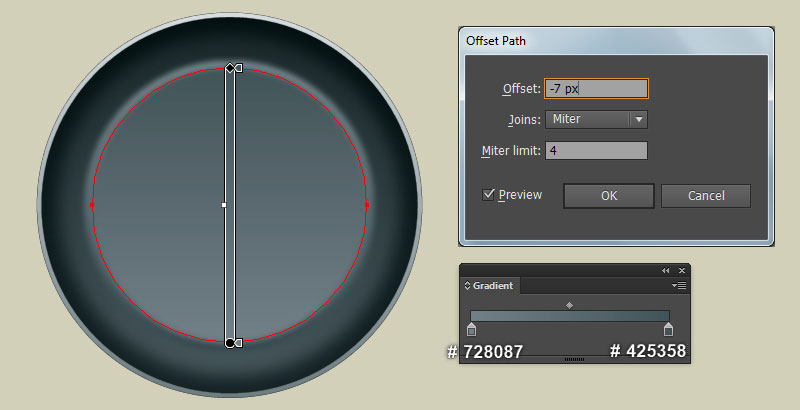
Keep the resulting ellipse selected, open the Appearance panel (Window > Appearance) and click on the Gaussian Blur section. In the Gaussian Blur dialog box, enter a 3px Radius and click OK. Still having the resulting ellipse selected and open the Offset Path dialog box again. Enter a -7px Radius and click OK. Then replace the existing fill color of the newly created ellipse with new linear gradient as shown in the next to last image.
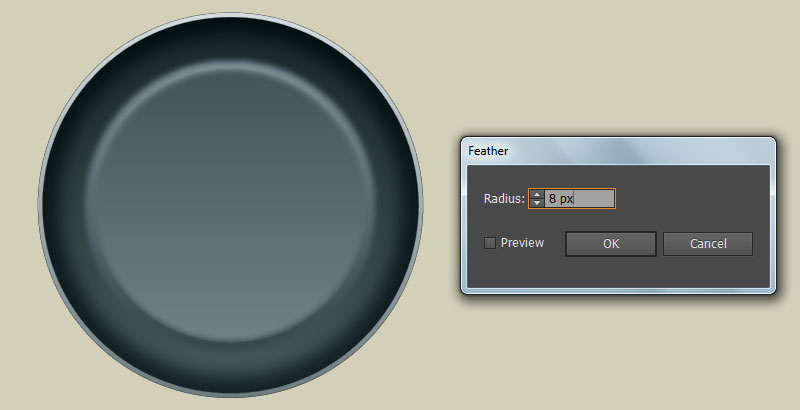
Keep the resulting ellipse selected, open the Appearance panel (Window > Appearance) and remove the Gaussian Blur section. Make sure that the resulting ellipse is still selected and go to the Effect > Stylize > Feather… Enter a 8px Radius and click OK.
Step 5
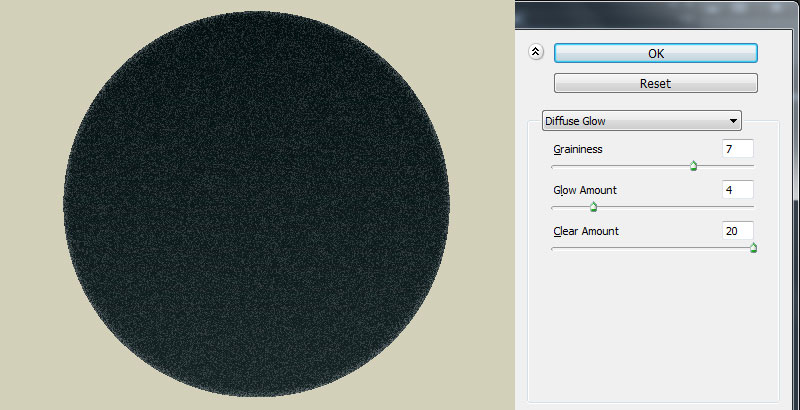
Select the ellipse created in step 2 and make a copy (Ctrl +C, Ctrl +F) of it, then bring the copy to front (Ctrl +Shift +Right Square Bracket). Still having the newly created ellipse selected and go to the Effect > Distort > Diffuse Glow… Follow the data like you see in the second image and click OK.
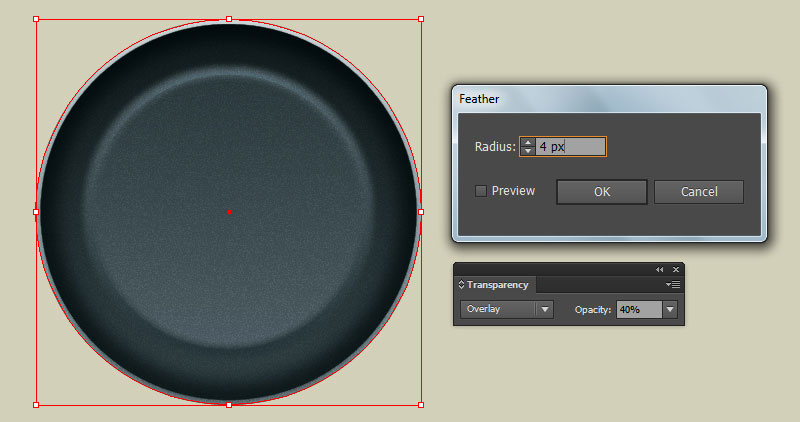
Apply a 4px Feather effect for the resulting ellipse, then change the Blending Mode to Overlay and reduce its Opacity to 40%. Finally, hide the resulting ellipse behind the compound path created in step 3.
Step 6
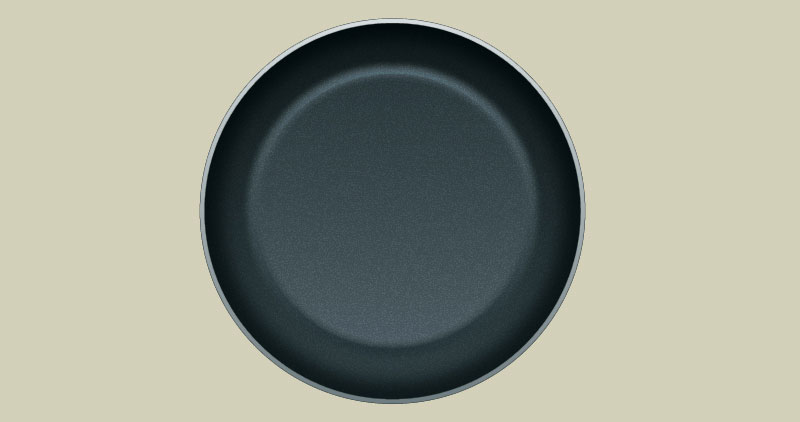
At this point your illustration should look like in the next image:
Step 7
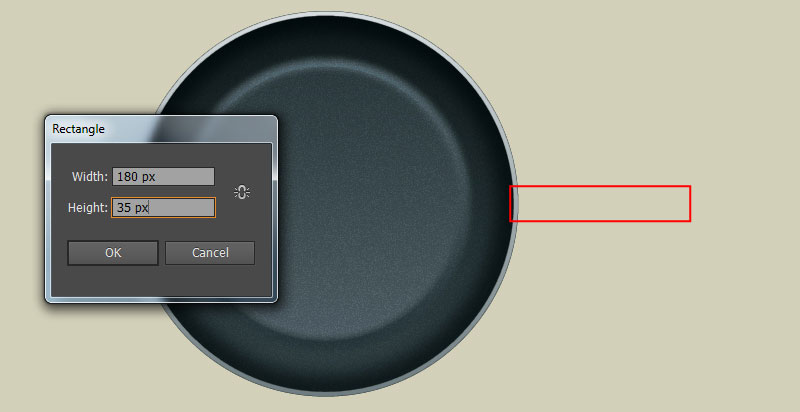
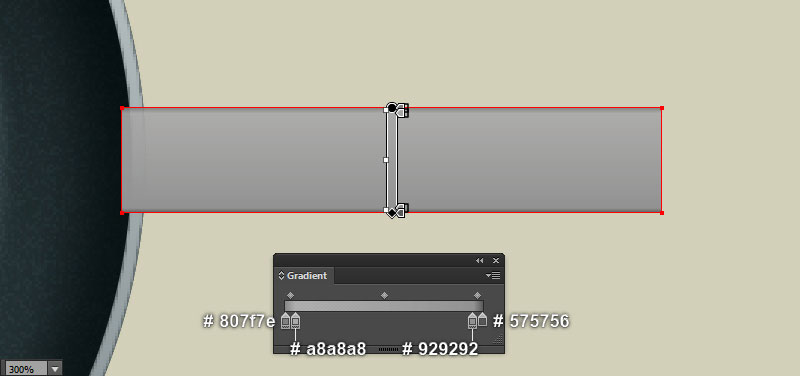
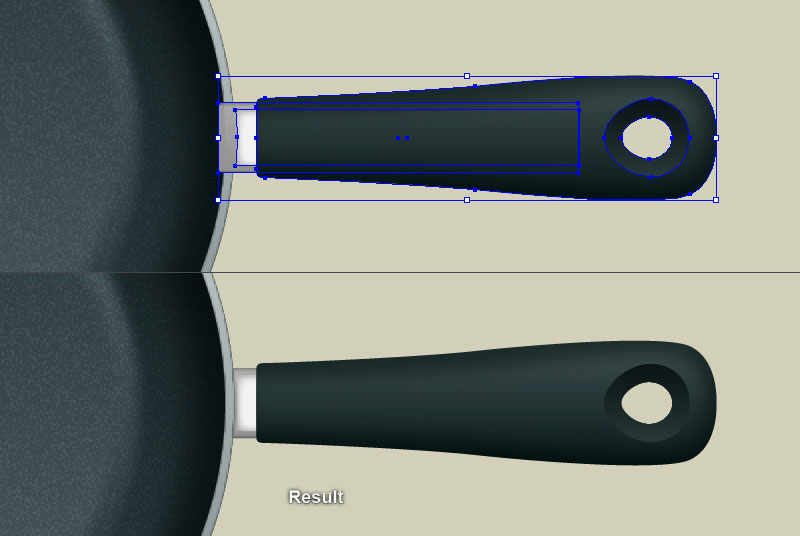
We will continue with the handle. Pick the Rectangle Tool (M) and create a 180 by 35px red rectangle, then place it in the position as shown in the first image. Next, remove the stroke of the newly created rectangle and fill this object with the linear gradient like you see in the second image.
Step 8
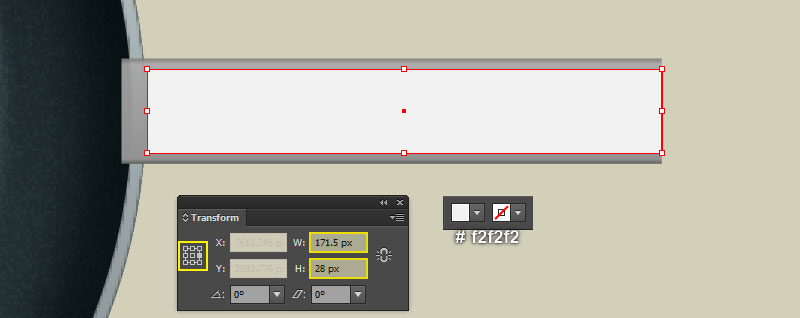
Select the rectangle created in step 7 and make a copy (Ctrl +C, Ctrl +F) of it, then replace the existing fill color of the copy with very light gray (# f2f2f2). Still having the newly created rectangle selected, open the Transform panel (Window > Transform) and set the transfer reference point to middle-right.
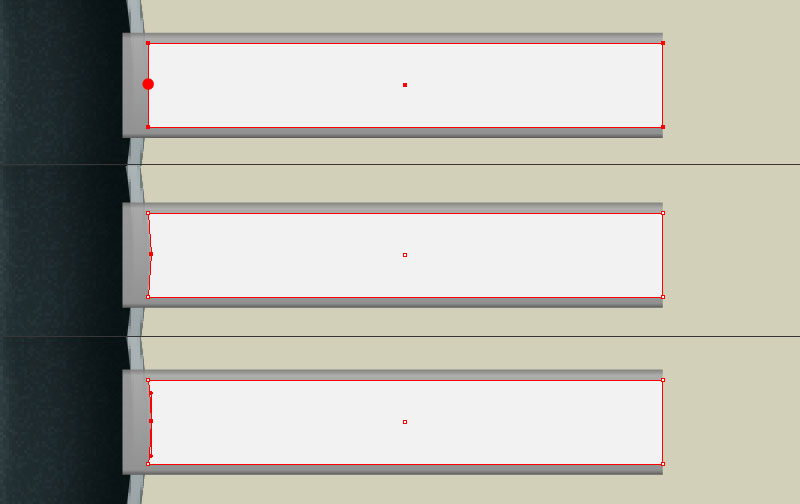
Then change W to 171.5px and H to 28px. Now focus on the second image, pick the Add Anchor Point Tool (+) and add an anchor point in the point highlighted with red. Make sure that the newly added anchor point selected, move it 1px to the right.
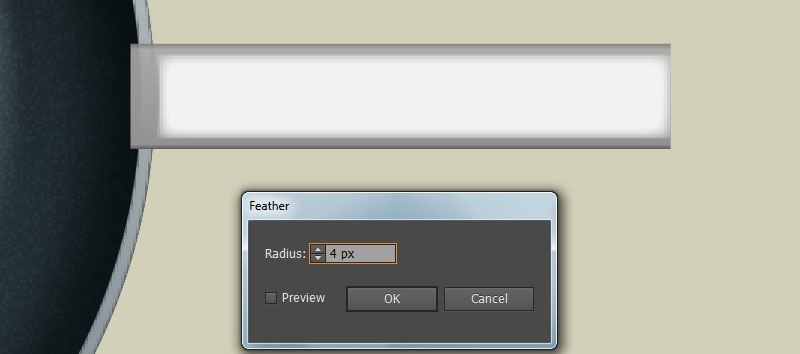
Next pick the Convert Anchor Point Tool (Shift +C), click on the anchor point you just moved, hold the mouse and drag it up while holding Shift. After you are done adjusting the shape of the very light gray rectangle, apply a 4px Feather effect for it.
Step 9
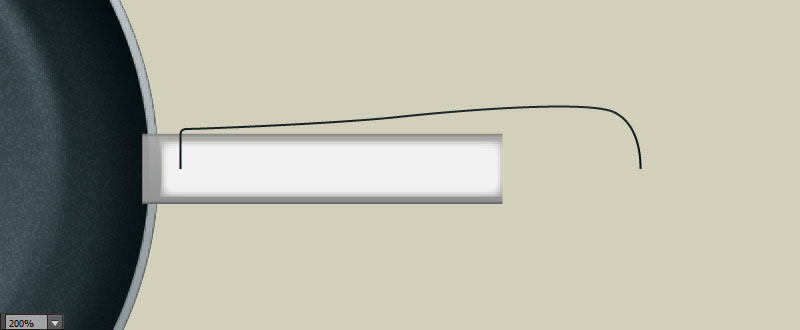
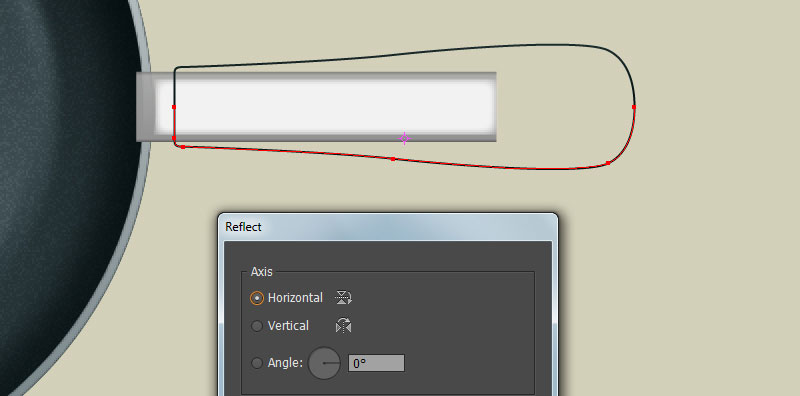
Pick the Pen Tool (P) and create a curved path like you see in the image below. Once your path is drawn, reselect it and go to the Object > Transform > Reflect… In the Reflect dialog box, check the Horizontal and click Copy.
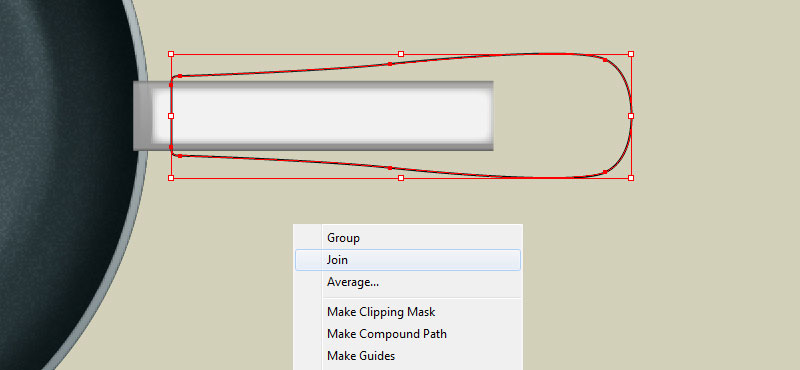
Then drag the newly created path down and place it as shown in the second image. Don’t forget to hold the Shift key on the keyboard for straight dragging. Now reselect the two curved paths created in this step, right click on the artboard and then select the Join section from the drop-down menu. Next right click on the artboard again, then select the Join section.
Step 10
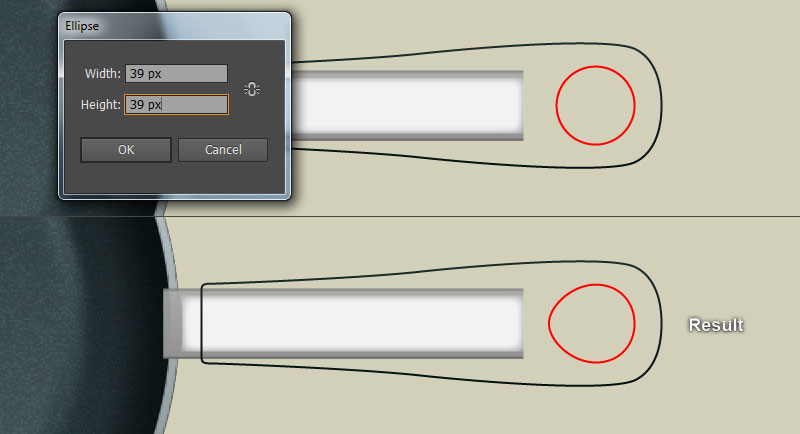
Pick the Ellipse Tool (L) and create a 39 by 39px red ellipse, then place it in the position like you see in the first image. With the help of the Direct Selection Tool (A), select the left anchor point of the newly created ellipse and move it 4px to the left.
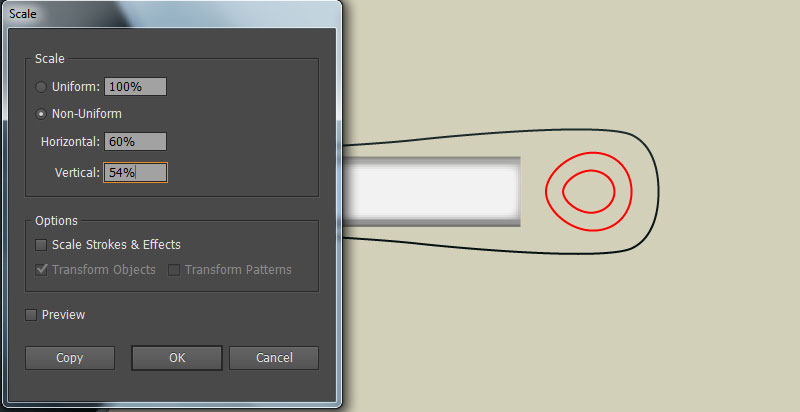
Next pick the Selection Tool (V), reselect the red ellipse and go to the Object > Transform > Scale… Check the Non-Uniform, enter a 60% in the Horizontal box and 54% in the Vertical box, then click Copy.
Step 11
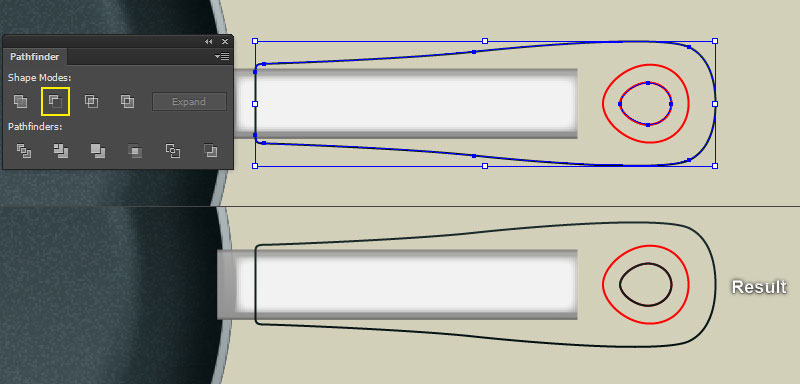
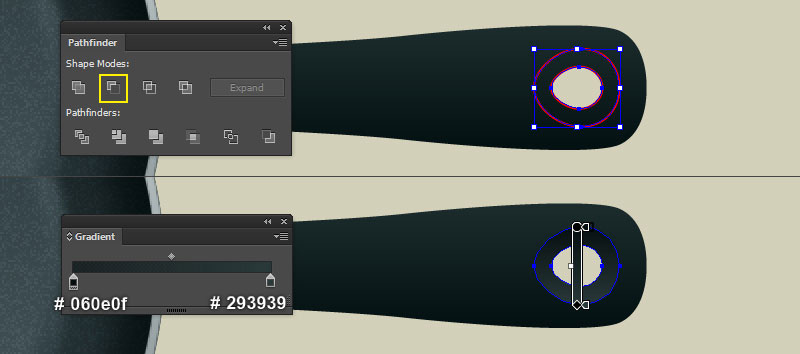
Before you continue, select the smaller red ellipse created in step 10 and make a copy (Ctrl +C, Ctrl +F) of it. Keep the copy selected, hold down the Shift and click on the black object created in step 9. Then open the Pathfinder panel (Window > Pathfinder) and click on the Minus Front button.
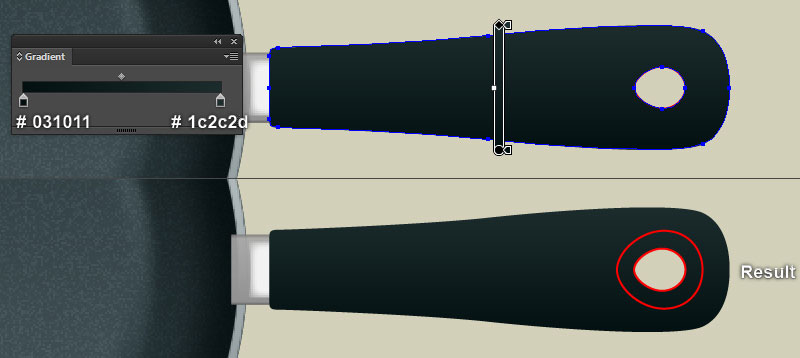
Remove the stroke of the resulting object and fill it with the linear gradient like you see in the third image. Then hide the resulting shape behind the two red ellipses. With the help of the Selection Tool (V) and the Shift, select the two red ellipses and click on the Minus Front button from the Pathfinder panel.
Next, remove the stroke of the resulting object and fill it with the linear gradient as shown in the last image.
Step 12
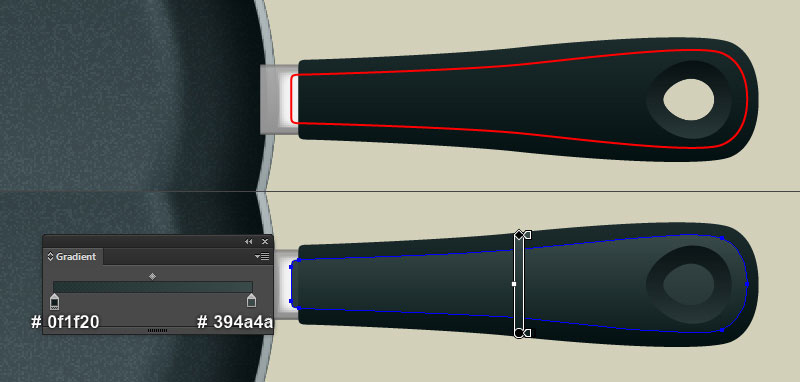
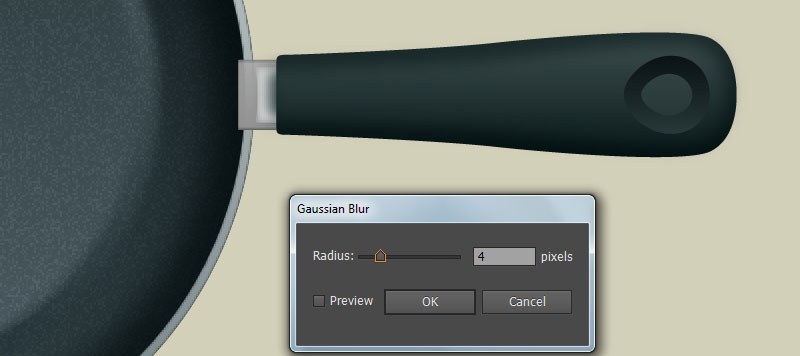
With the help of the Pen Tool (P) and the Gradient Tool (G), create a shape like you see in the first and the second image. Once your shape is drawn, reselect it and apply a 4px Gaussian Blur effect for this shape.
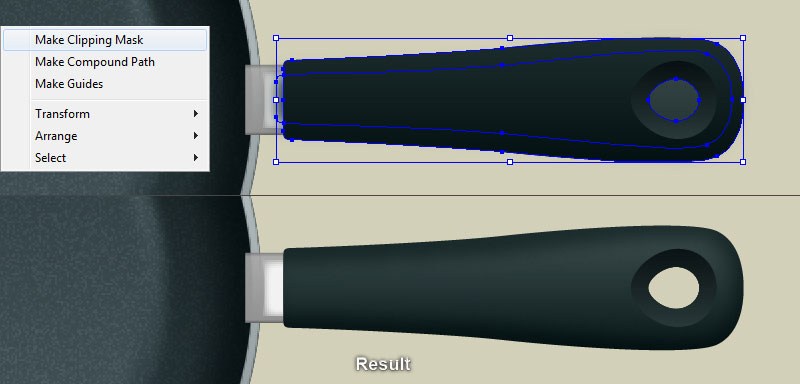
Now select the bigger compound path created in step 11 and make a copy (Ctrl +C, Ctrl +F) of it, then bring the copy to front (Ctrl +Shift +Right Square Bracket). Keep this copy selected, hold down the Shift and click on the shape with blur effect applied in this step.
Then right-click on the artboard and select the Make Clipping Mask section from the drop-down menu. Finally, hide the clipping set behind the smaller compound path created in step 11.
Step 13
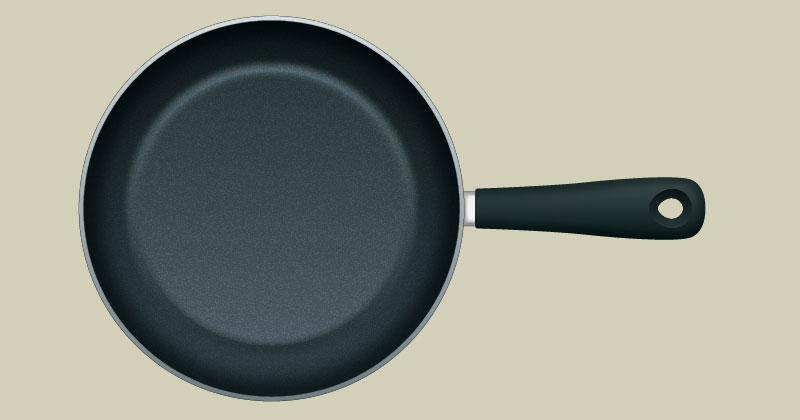
Select all objects of the handle and send them to back (Ctrl +Shift +Left Square Bracket). The frying pan is ready and looks like in the last image.
Step 14
We’re done with the frying pan. It’s time for the fried egg now. First of all, we’ll create the white.
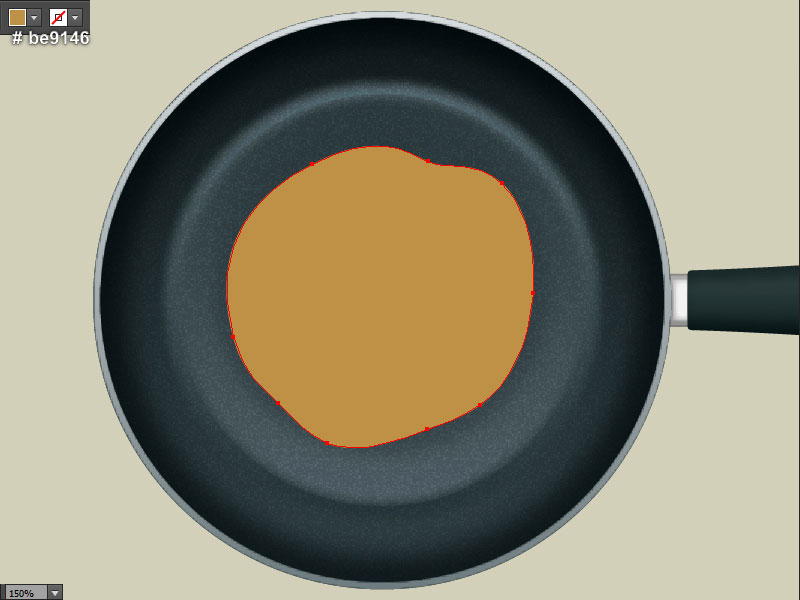
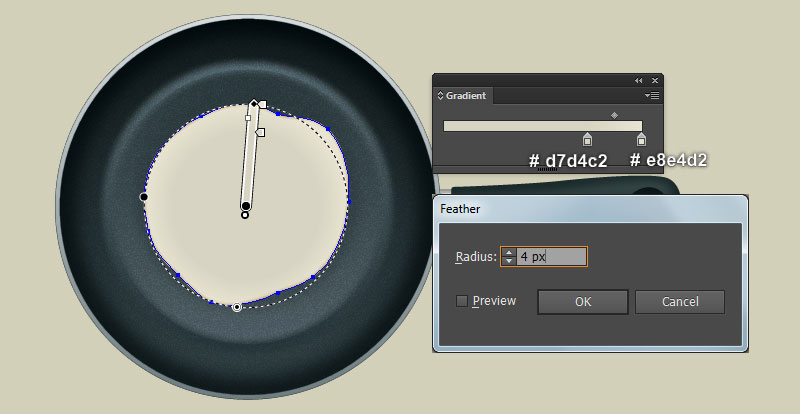
Pick the Pen Tool (P) and create an orange shape (#be9146) like you see in the first image. Make a copy (Ctrl +C, Ctrl +F) of the newly created shape, then replace the existing fill color of the copy with the radial gradient as shown in the second image.
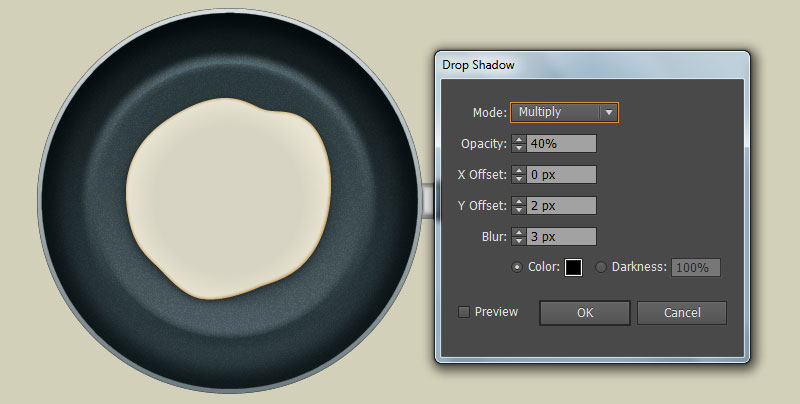
Keep the resulting shape selected and apply a 4px Feather effect for it. Now reselect the orange shape created in this step and go to the Effect > Stylize > Drop Shadow… Follow the data like you see in the last image and click OK.
Step 15
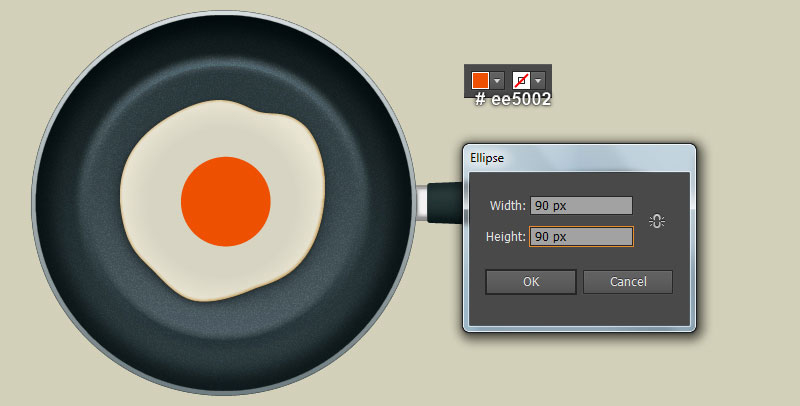
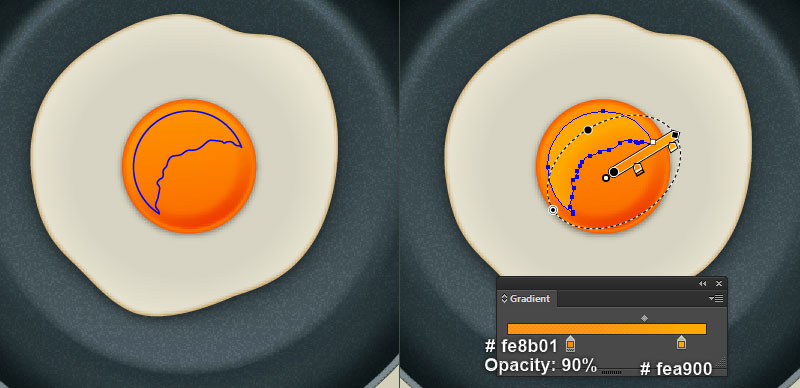
Next comes the yolk of the fried egg. With the Ellipse Tool (L), create a 90 by 90px vivid orange ellipse (#ee5002) and then place it in the position like you see in the first image.
Before you continue, select the vivid orange ellipse and make a copy (Ctrl +C, Ctrl +F) of it, then press (Ctrl +3) to hide the copy.
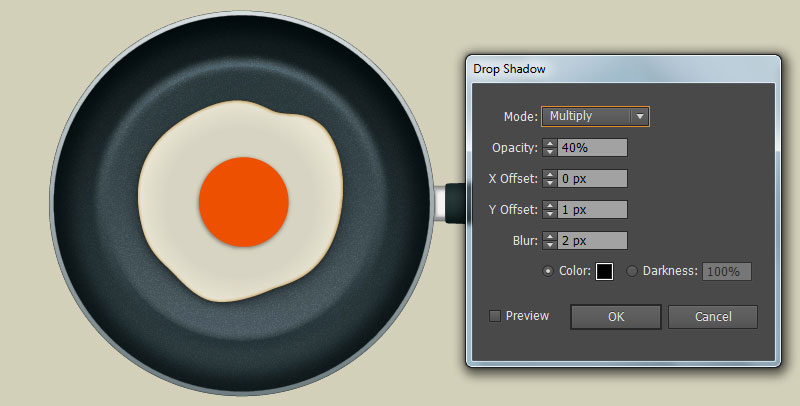
Now reselect the vivid orange original ellipse and go to the Effect > Stylize > Drop Shadow… Follow the data as shown in the second image and click OK. Next press (Ctrl +Alt +3) to show the vivid orange ellipse hidden in this step. Still having this ellipse selected and replace the existing fill color with pure orange (# ff7d00).
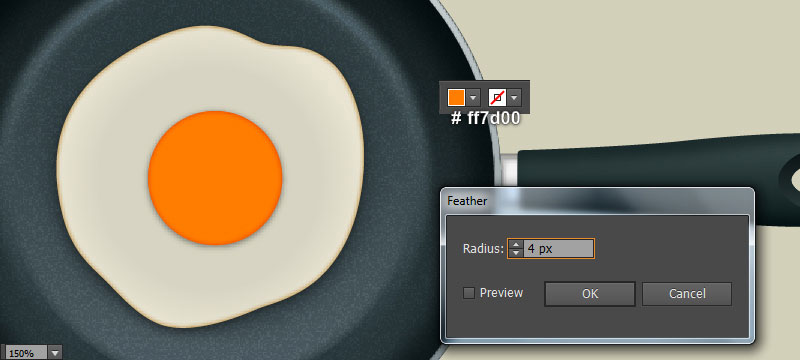
Then apply a 4px Feather effect for the resulting ellipse.
Step 16
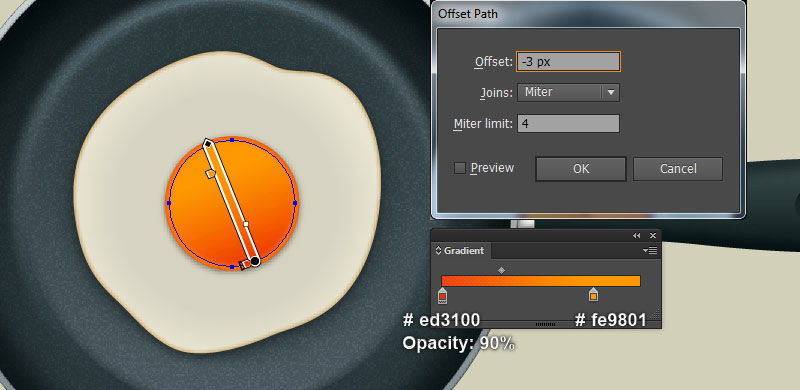
Select the ellipse with feather effect applied in step 15 and go to the Object > Path > Offset Path… Enter a -3px Offset and click OK. Then replace the existing fill color of the newly created ellipse with the linear gradient as shown in the first image.
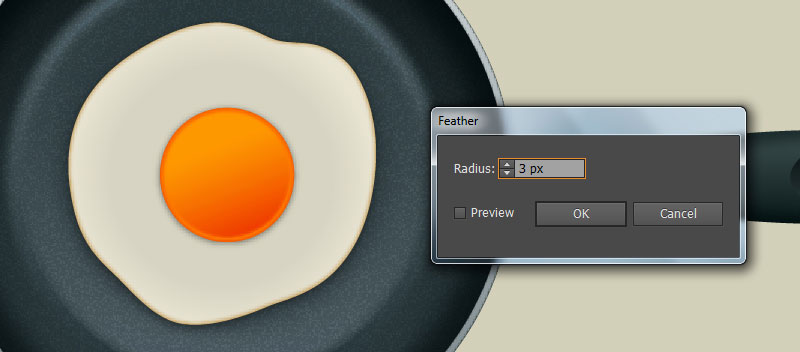
Still having the resulting ellipse selected, open the Appearance panel (Window > Appearance) and click on the Feather section. In the Feather dialog box, enter a 3px Radius and click OK.
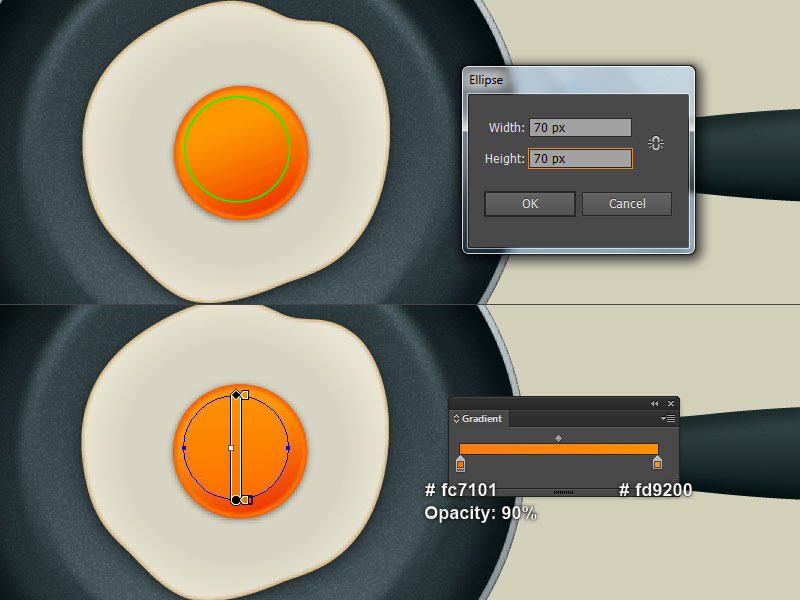
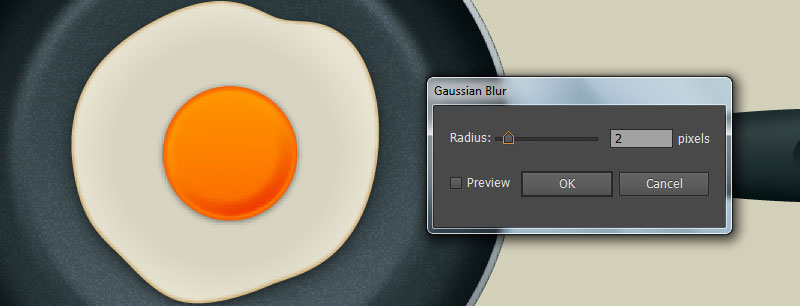
Now with the help of the Ellipse Tool (L), create a 70 by 70px green ellipse and place it in the position like you see in the third image. Remove the stroke of the newly created ellipse and then fill it with the linear gradient as shown in the next to last image. Finally, apply a 2px Gaussian Blur effect for the resulting ellipse.
Step 17
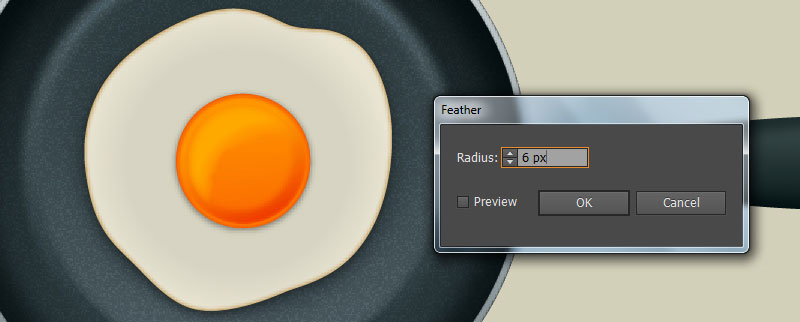
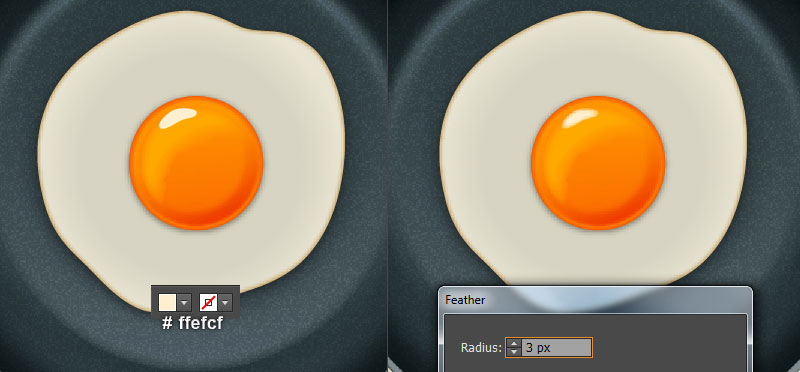
With the help of the Pen Tool (P) and the Gradient Tool (G), create a shape like you see in the first and the second image. Reselect the newly created shape and go to the Effect > Stylize > Feather… Enter a 6px Radius and click OK.
Continue with the Pen Tool (P), create a very pale orange shape (#ffefcf) as shown in the next to last image. Next, apply a 3px Feather effect for the newly created shape.
Step 18
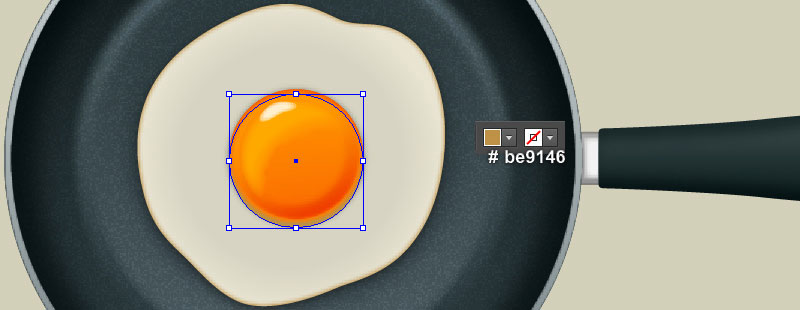
Select the vivid orange ellipse with shadow effect applied in step 15 and make a copy (Ctrl +C, Ctrl +F) of it. Replace the existing fill color of the newly created ellipse with moderate orange (# be9146) and then move it 3px down.
Keep the newly created ellipse selected, open the Appearance panel (Window > Appearance) and remove the Drop Shadow section. Still having the resulting ellipse selected, apply a 3px Gaussian Blur effect for it. Then hide the resulting ellipse behind the vivid orange ellipse with shadow effect applied in step 15.
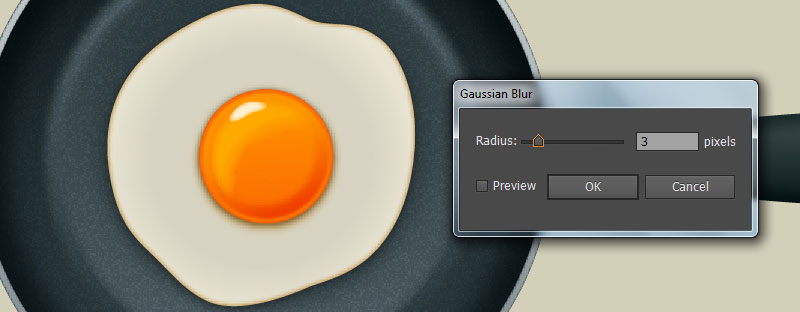
Step 19
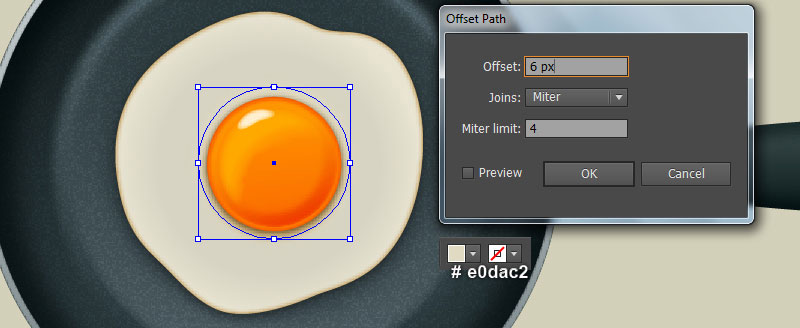
Select the ellipse with blur effect applied in step 18 and go to the Object > Path > Offset Path… Enter a 6px Offset and click OK. Replace the existing fill color of the newly created ellipse with light grayish yellow (# e0dac2) and move it 4px up.
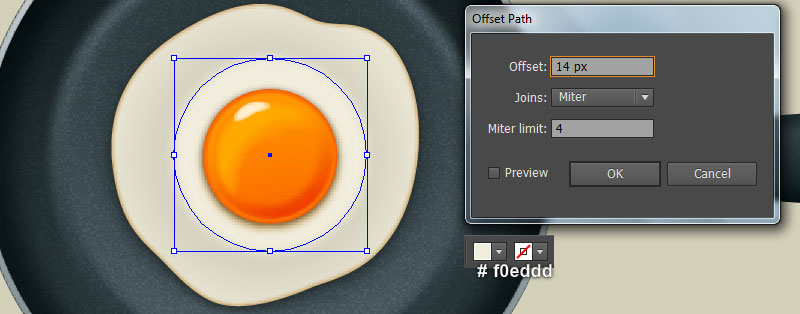
Then hide this ellipse behind the ellipse created in step 18. Make sure that the light grayish yellow ellipse is still selected and open the Offset Path dialog box (Object > Path > Offset Path…). Enter a 14px Radius and click OK.
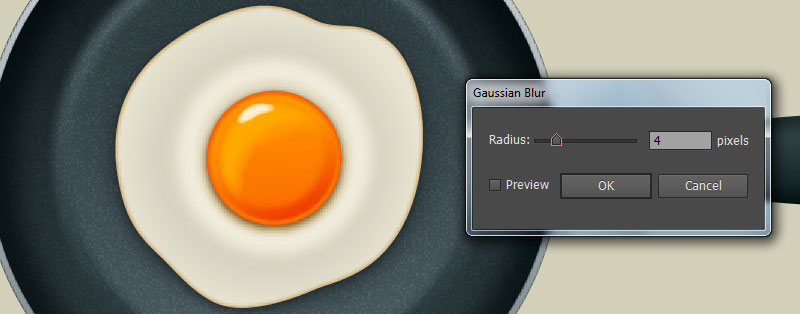
Replace the existing fill color of the newly created ellipse with light grayish yellow (#f0eddd). Keep the resulting ellipse selected, open the Appearance panel (Window > Appearance) and click on the Gaussian Blur section. In the Gaussian Blur dialog box, enter a 4px Radius and click OK.
Finally, hide the resulting ellipse behind the first ellipse created in this step.
Step 20
At this point your illustration should look like in the next image:
Step 21
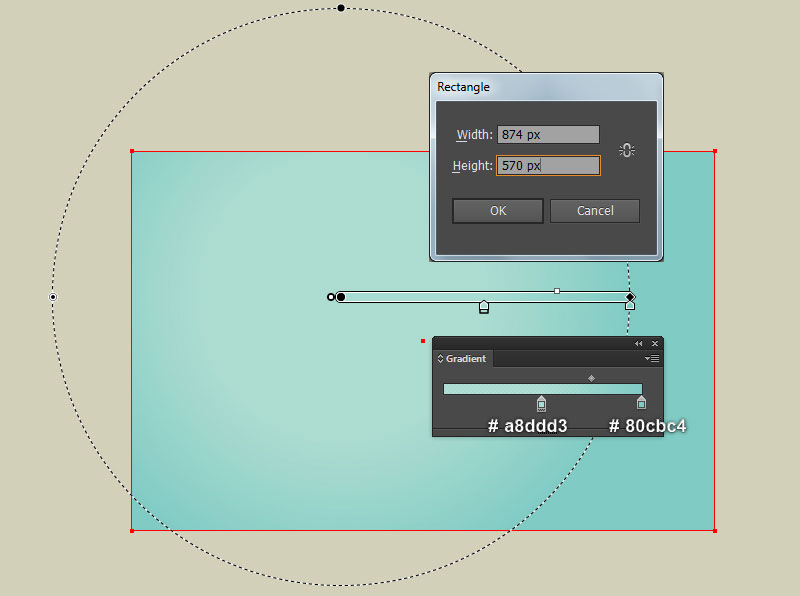
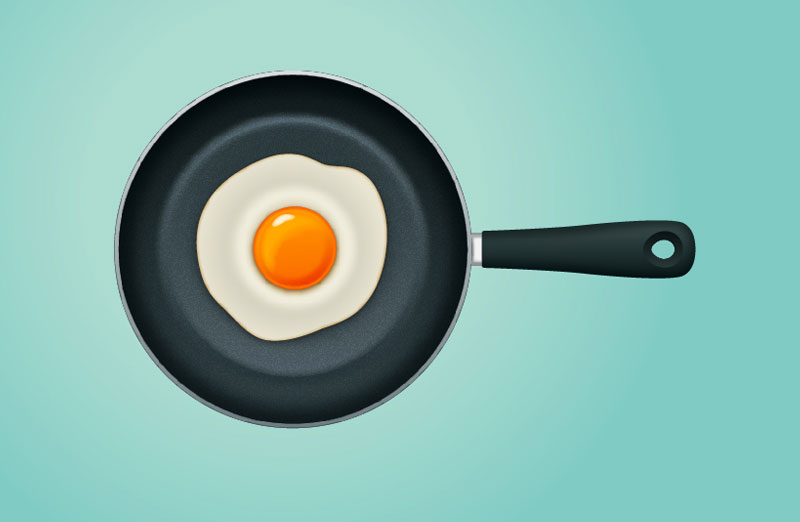
With the help of the Rectangle Tool (M) and the Gradient Tool (G), create a 874 by 570px very soft cyan rectangle like you see in the first image. Place the frying pan into the newly created background.
Step 22
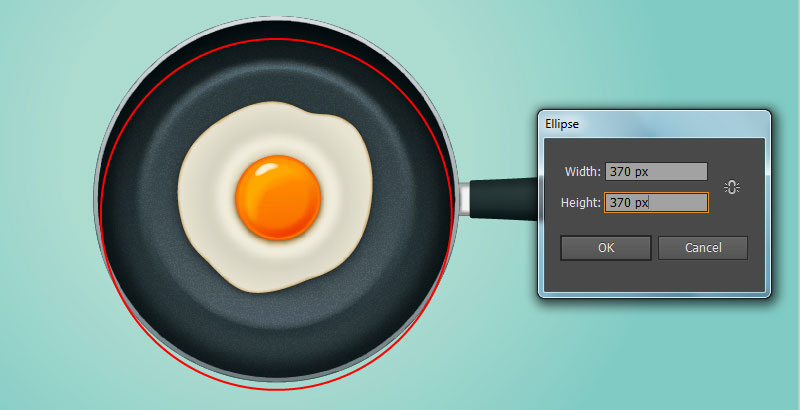
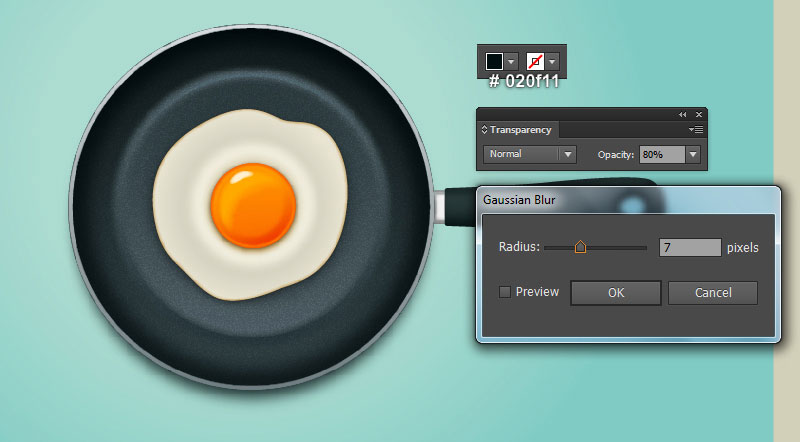
To give a more realistic look I’m going to be adding some shadows on some key places. Pick the Ellipse Tool (L) and create a 370 by 370px red ellipse, then place it to the position as shown in the first image. Remove the stroke of the newly created ellipse and then fill this object with very dark cyan (# 020f11). Apply a 7px Gaussian Blur effect for the resulting ellipse and reduce its Opacity to 80%. Hide the resulting ellipse behind the frying pan.
Step 23
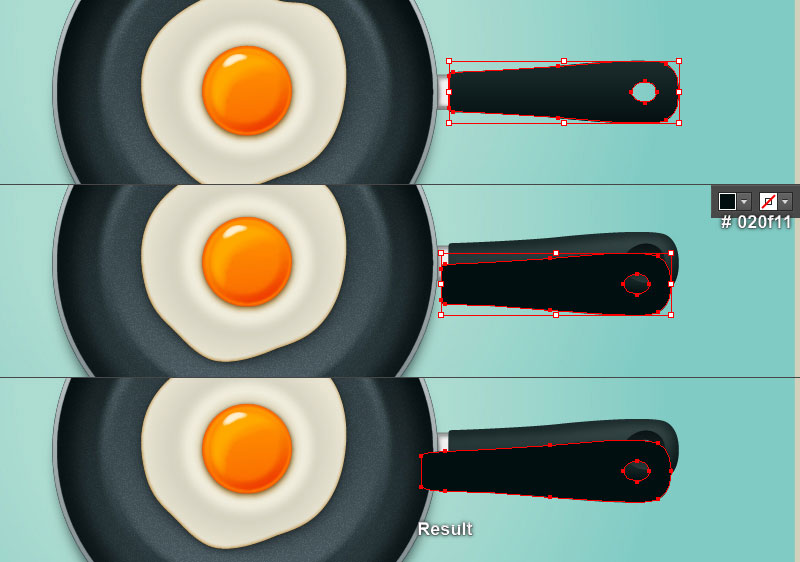
Select the bigger compound path created in step 11 and make a copy (Ctrl +C, Ctrl +F) of it, then bring the copy to front (Ctrl +Shift +Right Square Bracket). Replace the existing fill color of this copy with very dark cyan (#020f11), then move it 20px down and 8px to the left.
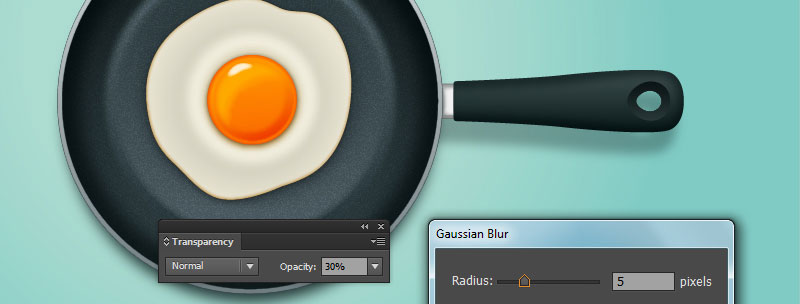
With the help of the Direct Selection Tool (A) and the Shift, select the two left anchor points of the newly created compound path and move them 20px to the left. Keep the resulting compound path selected, apply a 5px Gaussian Blur effect for this object and then reduce its Opacity to 30%.
Hide the resulting compound path behind the frying pan.
And We’re Done!
