In this Illustrator tutorial, we’re going to take a close look behind the process of creating a scary illustration using nothing more than a couple of basic geometric shapes that we will adjust here and there.
So, assuming you already have Illustrator up and running let’s jump straight into it!
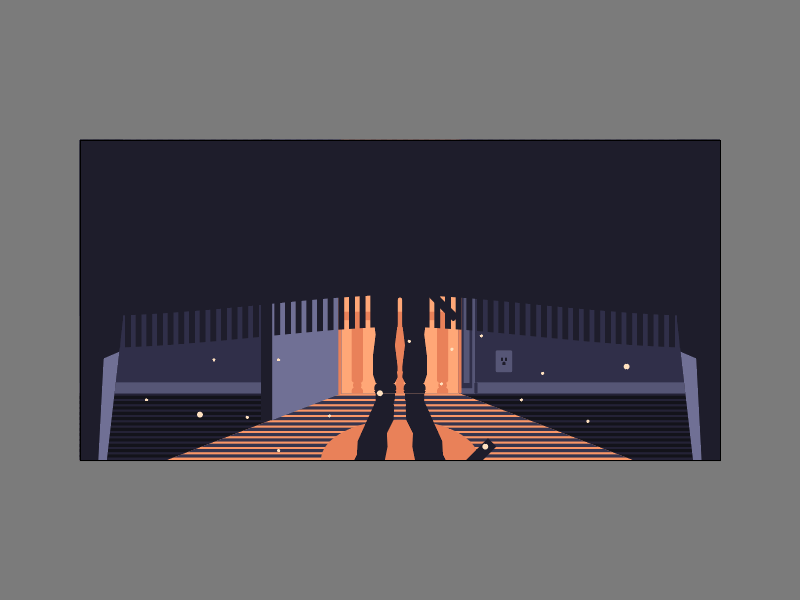
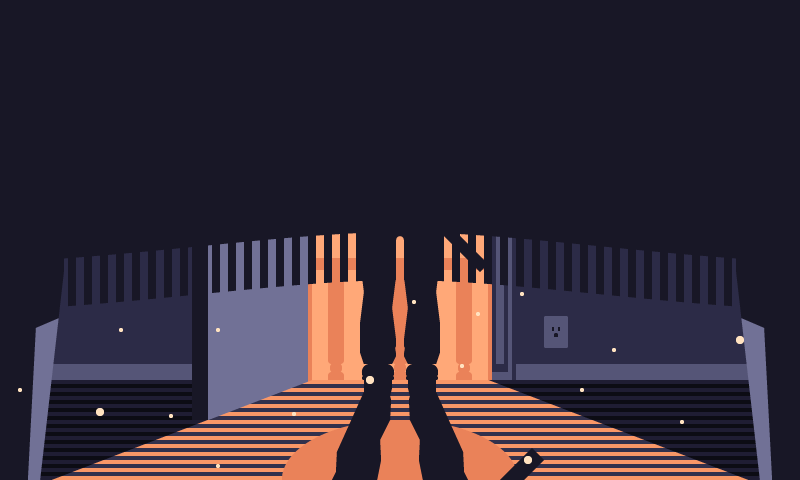
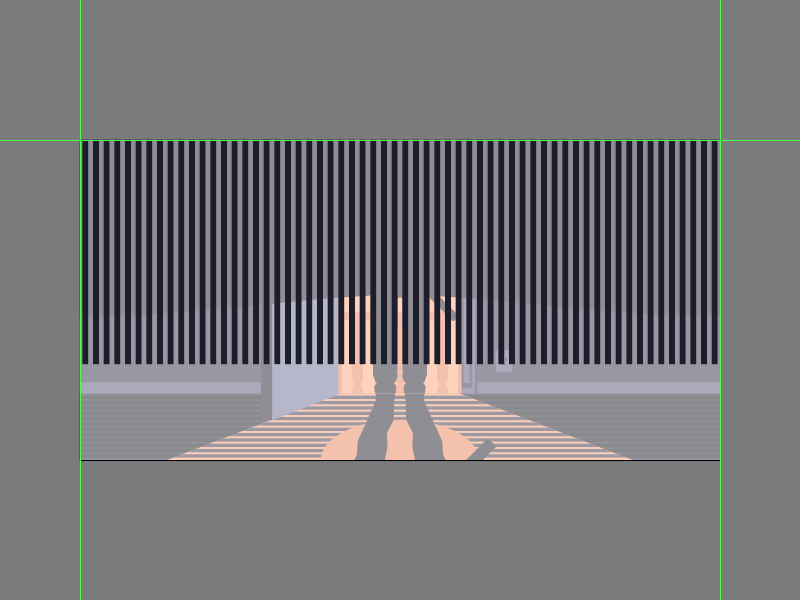
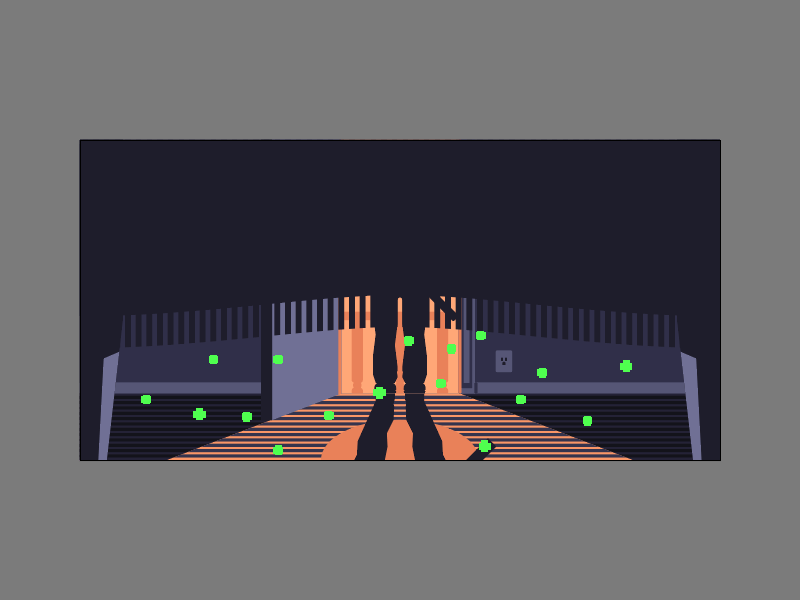
Final Image
As always, this is the final image that we’ll be creating:
Tutorial Details
- Program: Adobe Illustrator CC (2018)
- Estimated Completion Time: 45 minutes
- Difficulty: Beginner-Intermediate
Step 1
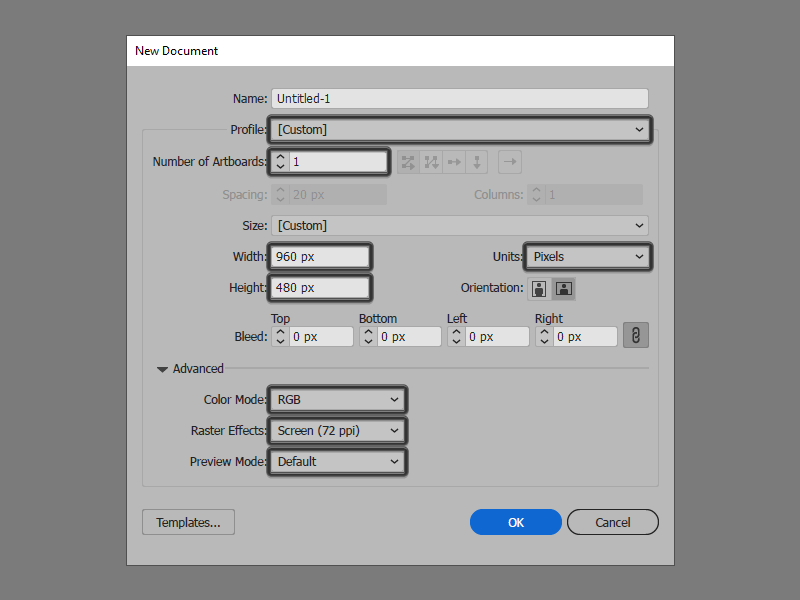
Let’s kick off the project by setting up a New Document by going to File > New or using the Control-N keyboard shortcut, which we will adjust as follows:
- Number of Artboards: 1
- Width: 960 px
- Height: 480 px
- Units: Pixels
And from the Advanced tab:
- Color Mode: RGB
- Raster Effects: Screen (72 ppi)
- Preview Mode: Default
Step 2
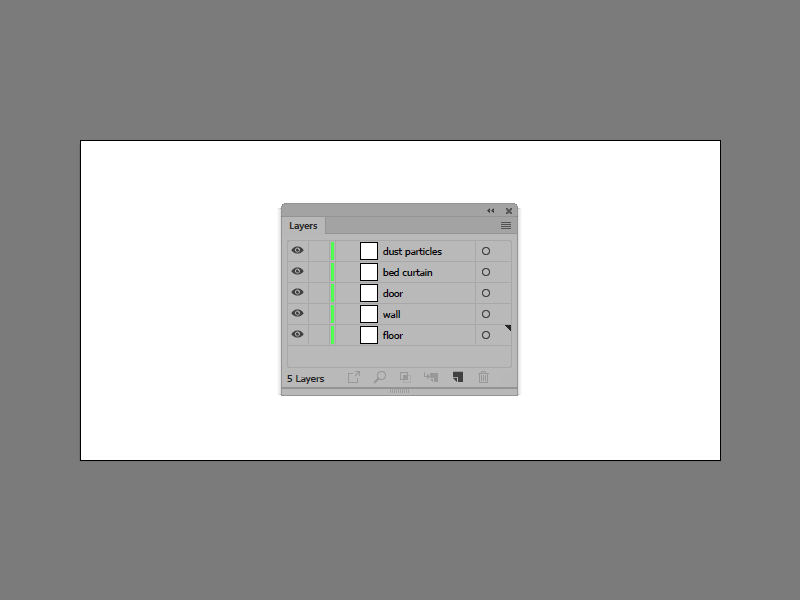
As soon as we’ve finished setting up our project file, we need take a couple of moments and structure our document, so open up the Layers panel and create a total of five layers, which we will rename as follows:
- layer 1: floor
- layer 2: wall
- layer 3: door
- layer 4: bed curtain
- layer 5: dust particles
Step 3
Make sure you’ve positioned yourself onto the bottom layer (that would be the one labeled “floor”), and let’s start working on the actual composition by creating a 960 x 100 px rectangle, which we will color using #1F1D33 and then center align to the Artboard’s bottom edge.
Step 4
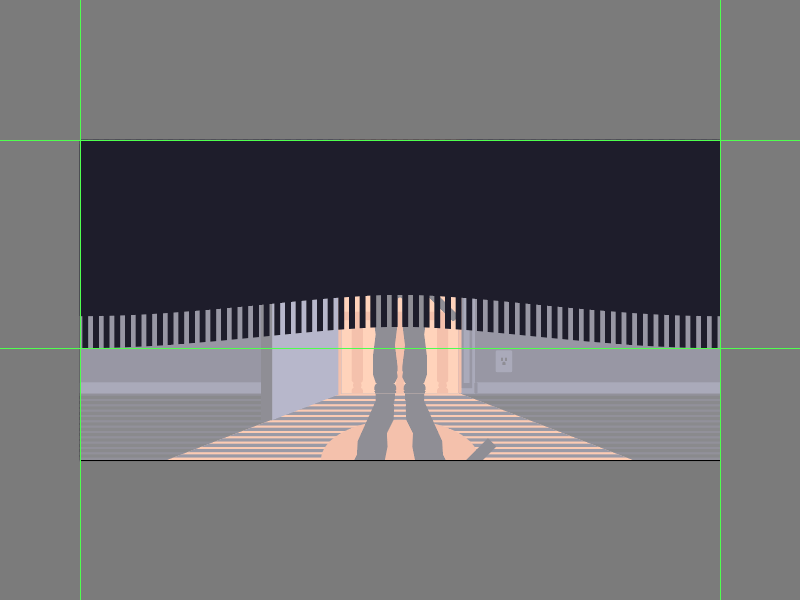
Add the vertical detail lines using twelve 960 x 4 px rectangles (#0C0C14) vertically stacked at 4 px from one another, which we will group using the Control-G keyboard shortcut, and then center align to the shape that we’ve just created a few moments ago. Once you’re done, lock the current layer for the moment and then let’s move on up to the next one and focus on the illustration’s next section.
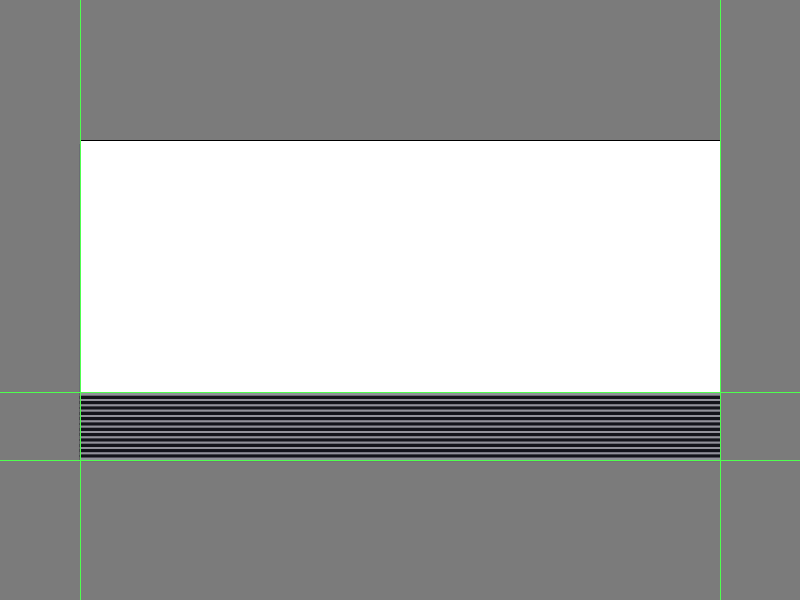
Quick tip: if you’re wondering why the attached image is different from what you’re seeing on your monitor, well that’s due to the fact that I’ve isolated the lines so that you can have a better view of them.
Step 5
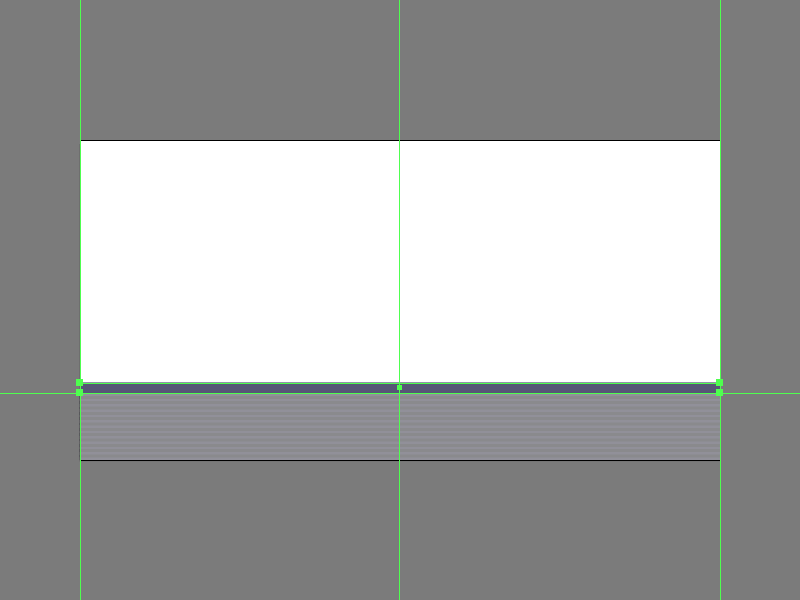
Start working on the wall by creating the socklar using a 960 x 16 px rectangle which we will color using #555577 and then position on top of the floor’s edge as seen in the reference image.
Step 6
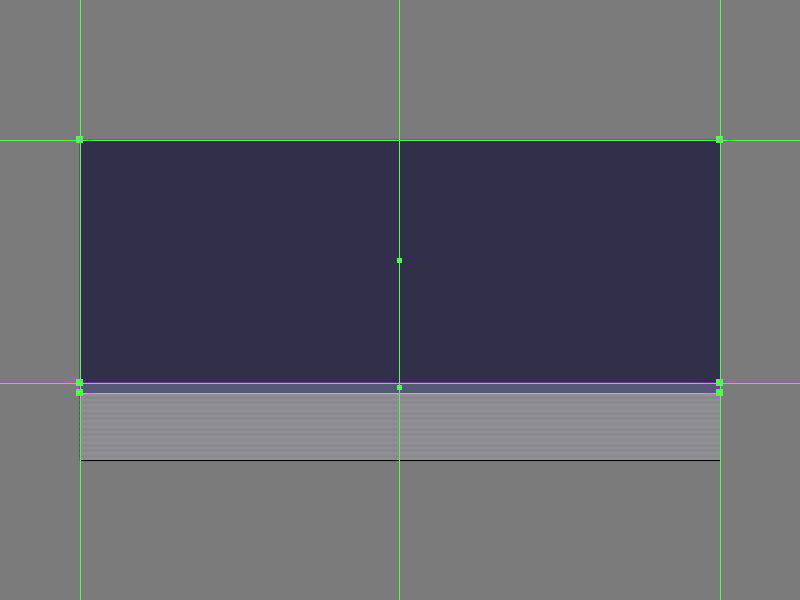
Add the wall using a 960 x 364 px rectangle which we will color using #2C2B47 and then center align to the Artboard’s top edge. Once you’re done, lock the current layer and then move on up to the next one (that would be the one labeled “door”) where we will start working on the door.
Step 7
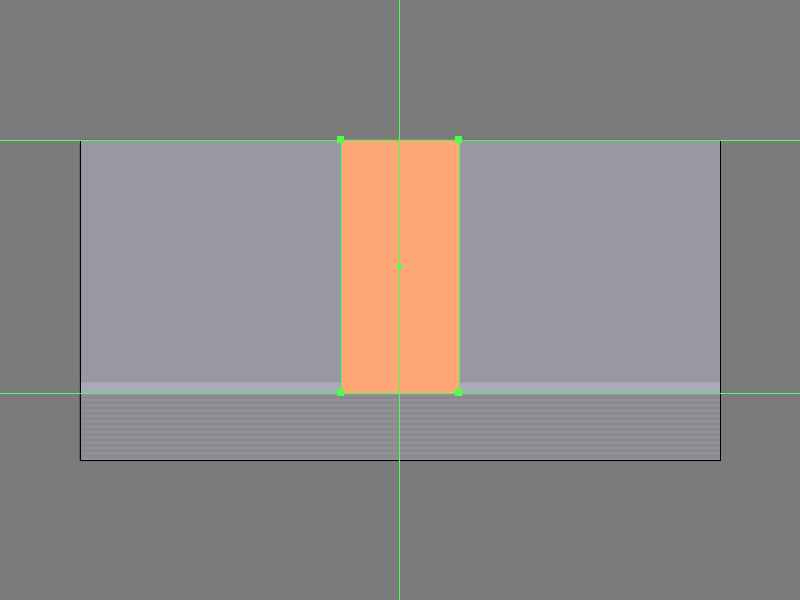
Create the main shape for the room’s entrance using a 176 x 380 px rectangle which we will color using #FFA878 and then center align to the Artboard’s top edge as we did with the wall.
Step 8
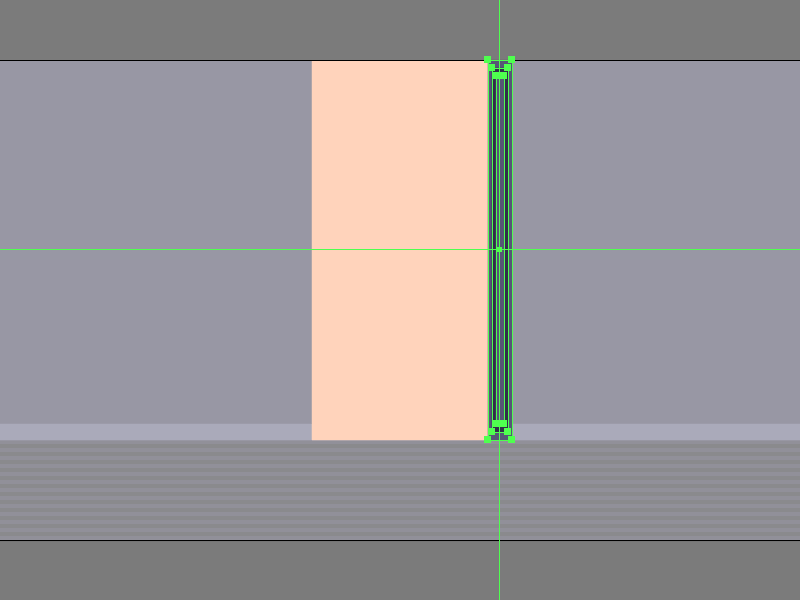
Add the main shape for the door frame’s right section using a 24 x 380 px rectangle which we will color using #555577, and then position onto the side of the entrance as seen in the reference image.

Step 9
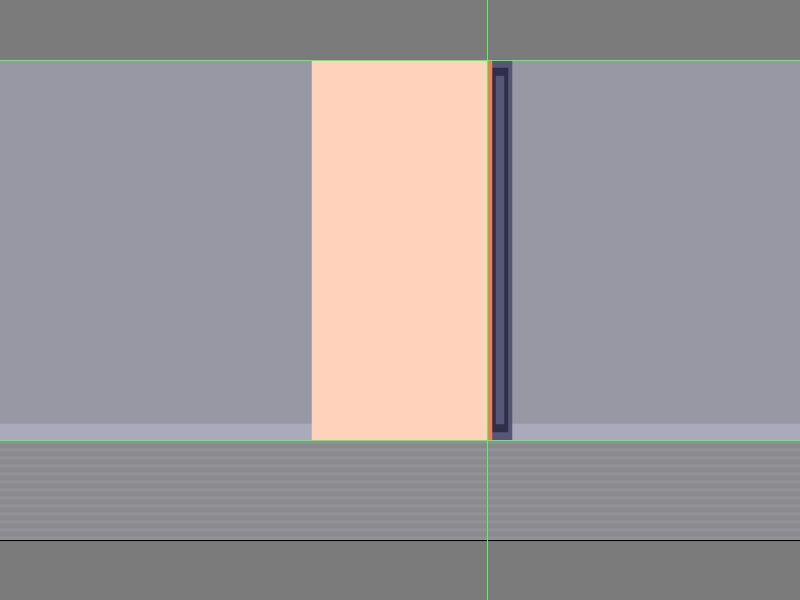
Zoom in on the shape that we’ve just created and add the inner cutout using a 16 x 364 px rectangle (#2C2B47) followed by a smaller 8 x 348 px one (#555577), which we will center align to the frame, making sure to select and group all three shapes together afterwards using the Control-G keyboard shortcut.
Step 10
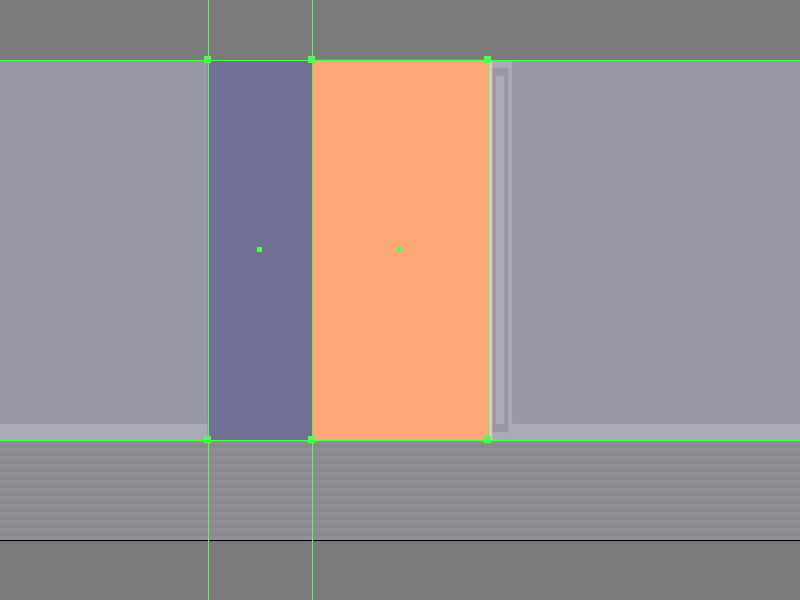
Create the subtle highlight using a 4 x 380 px rectangle which we will color using #EA8259 and then center align to the frame’s left edge.
Step 11
Start working on the door by creating its main shape using a 104 x 380 px rectangle which we will color using #717196 and then position onto the left side of the entrance.
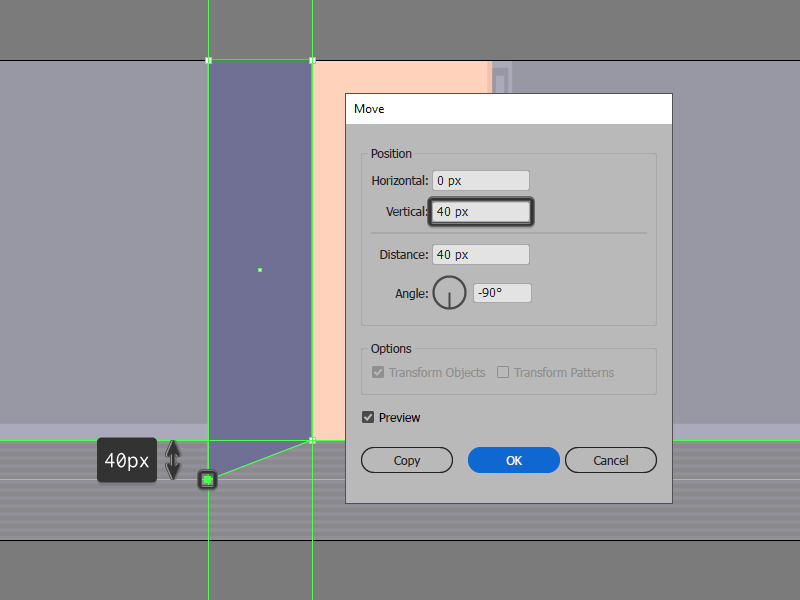
Step 12
Adjust the shape that we’ve just created by selecting its bottom-left anchor point using the Direct Selection Tool (A) and then pushing it to the outside by a distance of 40 px using the Move tool (right click > Transform > Move > Vertical > 40 px).
Step 13
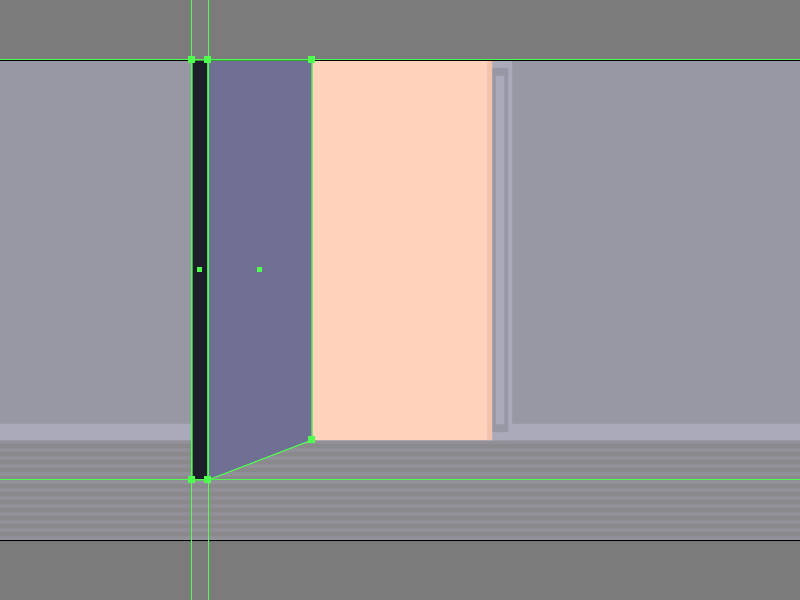
Give the resulting shape some thickness by creating a 16 x 420 px rectangle which we will color using #181726 and then position onto its left side as seen in the reference image.
Step 14
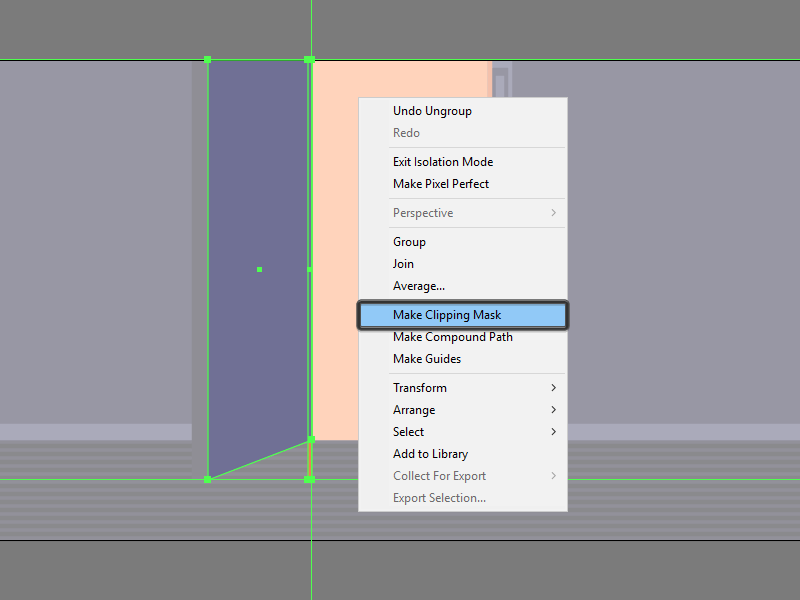
Add the subtle highlight using a 4 x 420 px rectangle (#EA8259) which we will align to the door’s right edge, making sure to mask it afterwards using a copy (Control-C) of the underlying shape, which we will paste in front (Control-F) and then with both shapes selected simply right click > Make Clipping Mask. Once you’re done, select and group (Control-G) all of the door’s composing shapes together before moving on to the next step.
Step 15
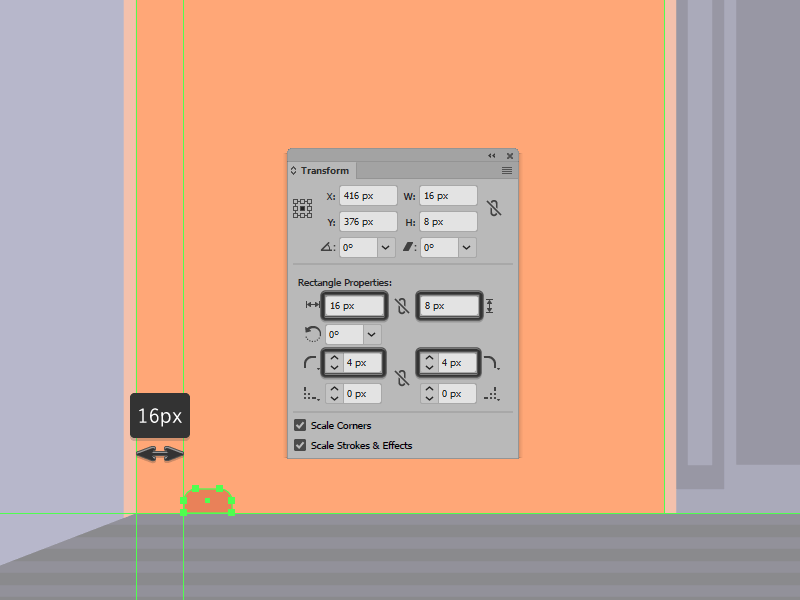
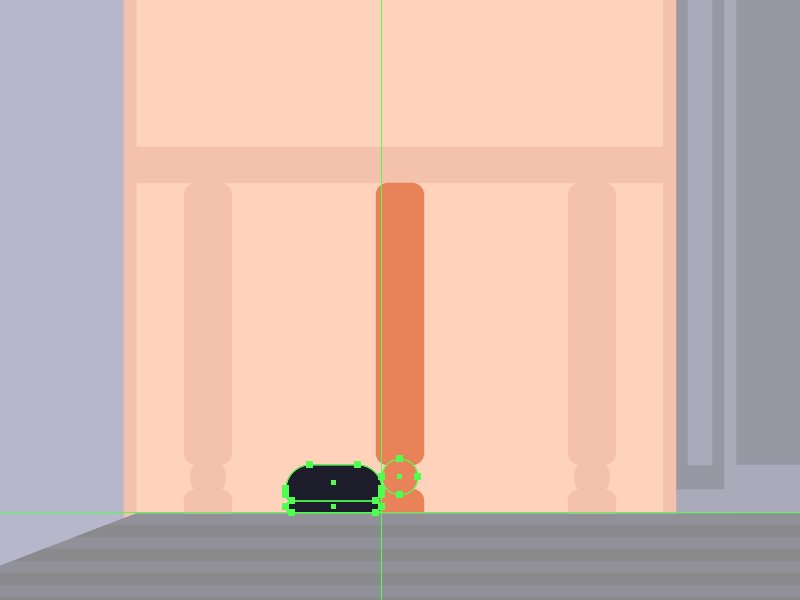
Start working on the wooden rail by creating the lower section of its first leg using an 16 x 8 px rectangle (#EA8259), which we will position at a distance of 16 px from the entrance’s bottom left corner, making sure to adjust it by setting the Radius of its top corners to 4 px from within the Transform panel’s Rectangle Properties.
Step 16
Add the leg’s remaining shapes using a 12 x 12 px circle (#EA8259), followed by a 16 x 94 px rounded rectangle (#EA8259) with a 4 px Corner Radius, which we will position as seen in the reference image, making sure to overlap them by a surface of 2 px. Once you’re done, don’t forget to select and group (Control-G) all three shapes together before moving on to the next step.
Step 17
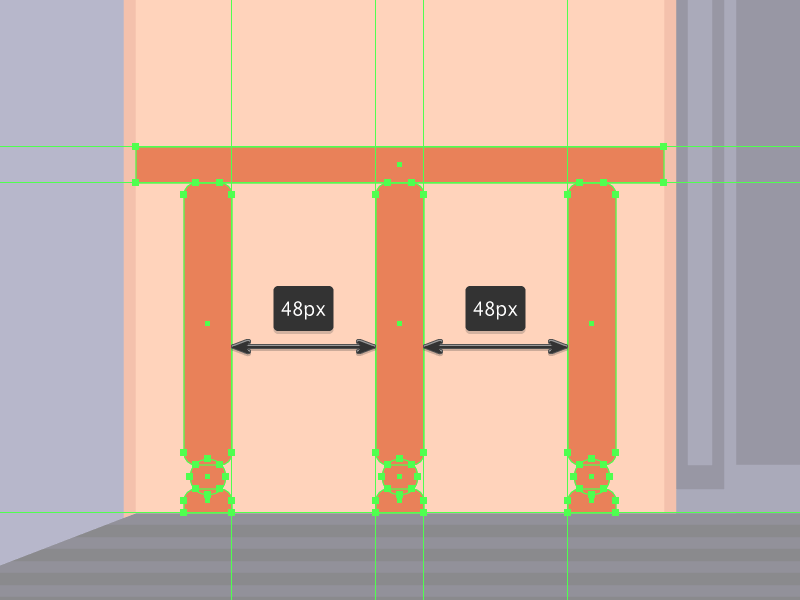
Finish off the rail by adding the remaining legs using two copies (Control-C > Control-F) of the one that we’ve just finished working on which we will horizontally distance at 48 px from one another, positioning a 176 x 12 px rectangle (#EA8259) on top of them afterwards. Take your time and once you’re done, make sure you select and group (Control-G) all of the rail’s composing shapes before moving on to the next step.
Step 18
Start working on the human silhouette by creating its left shoe using a 32 x 4 px rounded rectangle (#181726) with a 2 px Corner Radius, on top of which we’ll add a taller 32 x 12 px rectangle (#181726) with a 2 px bottom corner Radius and an 8 px top one, which we will group (Control-G) and then position onto the left side of the rail’s middle leg.

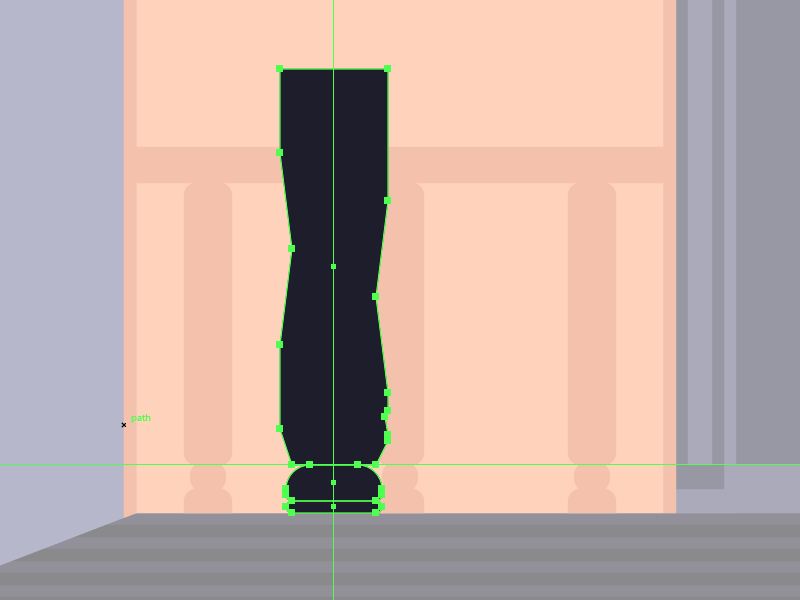
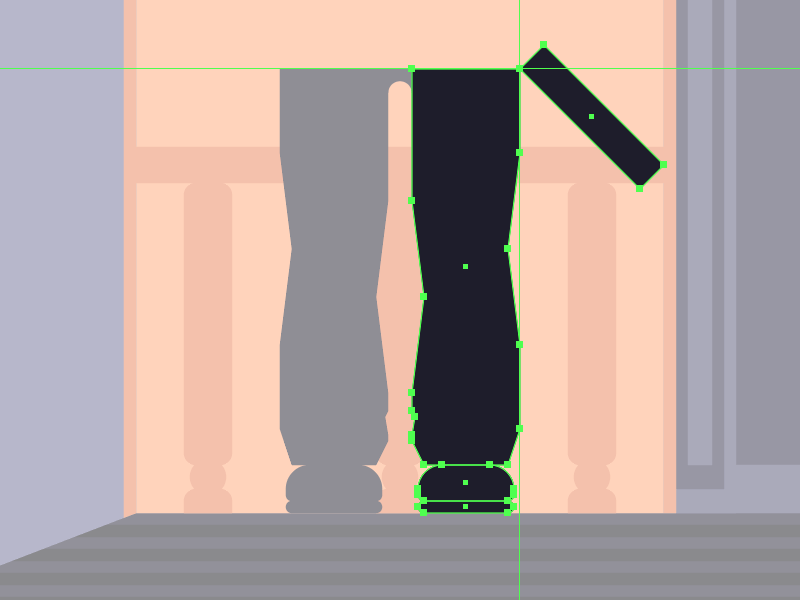
Step 19
Create the main shape for the actual leg using a 36 x 132 px rectangle (#181726), which we will position on top of the shoe. Then take a couple of moments and adjust it by adding a couple of anchor points using the Add Anchor Point Tool (+) and then re positioning them using the reference image as your main guide.
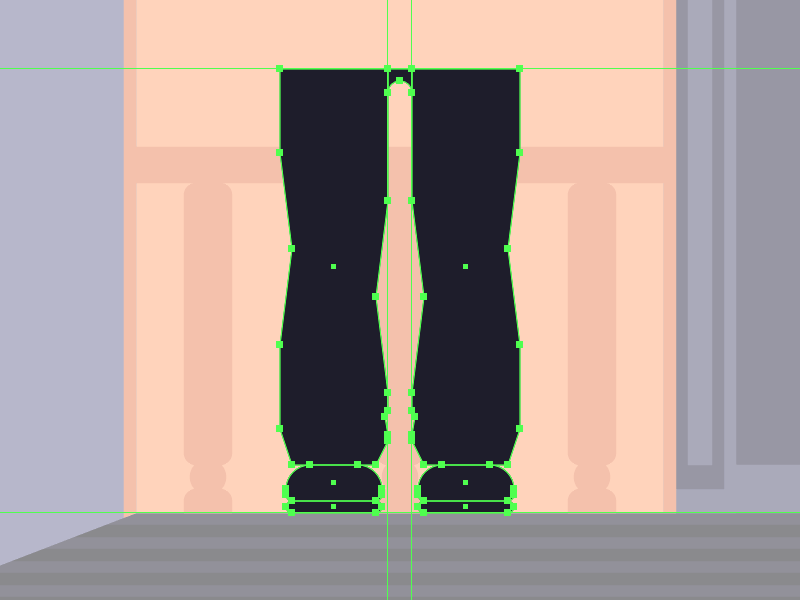
Step 20
Add the right leg using a copy (Control-C > Control-F) of the one that we’ve just finished working on, which we will vertically reflect (right click > Transform > Reflect > Vertical) and then position onto the opposite side, at a distance of just 8 px, making sure to add the visible section of the crotch using an 8 x 8 px square (#181726) which we will adjust by cutting out an 8 x 8 px circle from its bottom half.
Step 21
Create the gun barrel using a 12 x 56 px rectangle (#181726), which we will rotate to the left using a 45º angle (right click > Transform > Reflect > 45), and then position onto the edge of the right leg as seen in the reference image. Once you’re done, select and group all of the silhouette’s composing shapes using the Control-G keyboard shortcut.
Step 22
Once you’re done working on the silhouette quickly separate the door frame from the socklar using a 4 x 16 px rectangle which we will color using #2C2B47.
Step 23
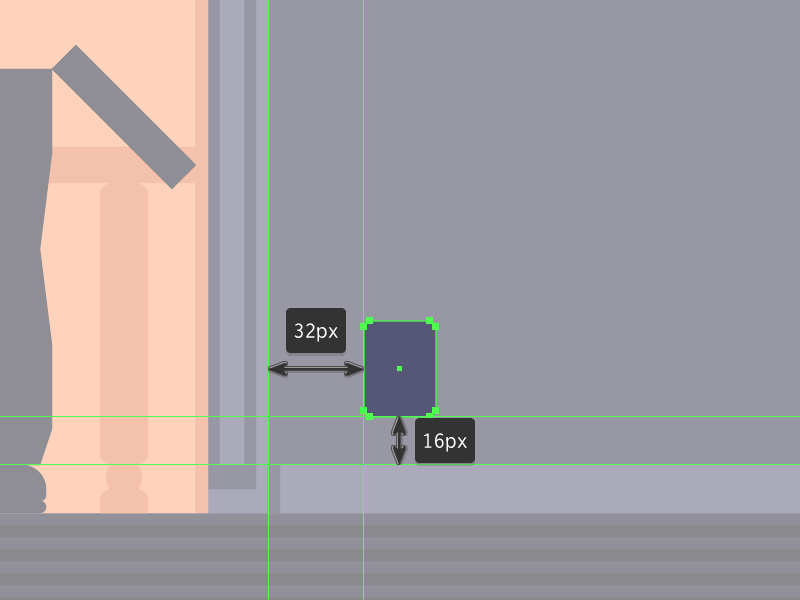
Move a few pixels towards the right side of the composition, and start working on the wall socket using a 24 x 32 px rounded rectangle (#555577) with a 2 px Corner Radius, which we will position at a distance of 32 px from the frame and 16 px from the socklar.
Step 24
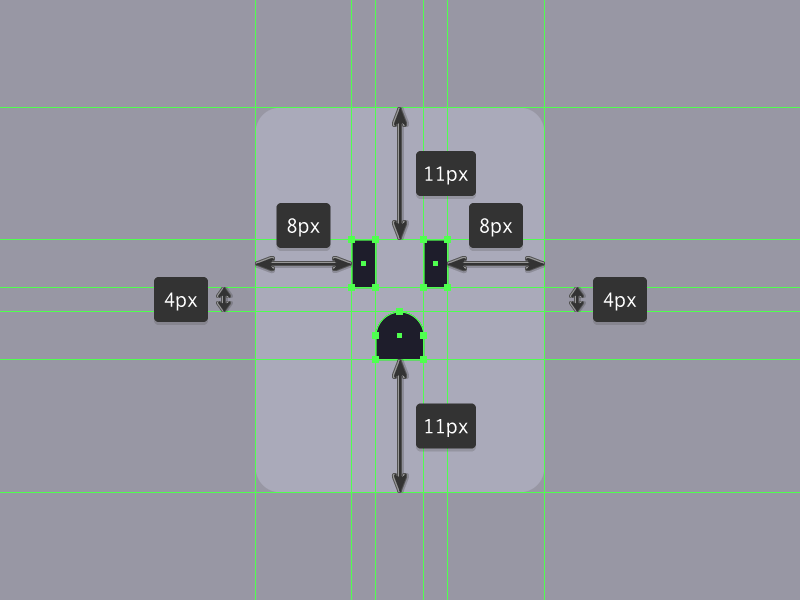
Create the socket’s “eyes” using two 2 x 4 px rectangles (#181726) horizontally distanced at 4 px from one another, followed by the mouth using a 4 x 4 px square (#181726) with a 2 px top corner Radius, which we will position onto the larger shape as seen in the reference image. Once you’re done, select and group (Control-G) all its composing shapes making sure to lock the current layer before moving on to the next section of the composition.
Step 25
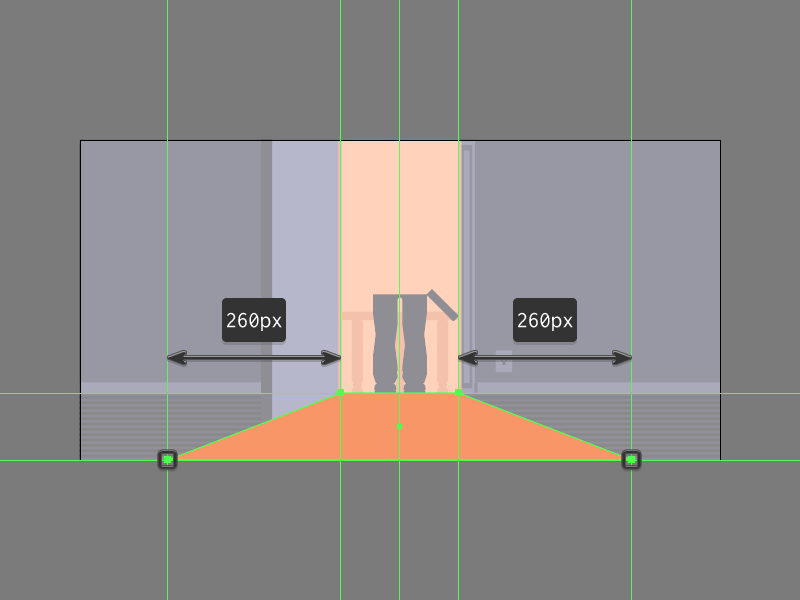
Position yourself back onto the first layer (that would be the one labeled “floor”), and let’s start working on the casted light and shadows by creating the main shape for the highlighted floor using a 176 x 100 px rectangle (#F99767). Adjust the shape by individually selecting and pushing its bottom anchor points to the outside by a distance of 260 px using the Move tool (right click > Transform > Move > Horizontal > + / – 260 px depending on which side you start with) center aligning the resulting shape to the bottom edge of the entrance.
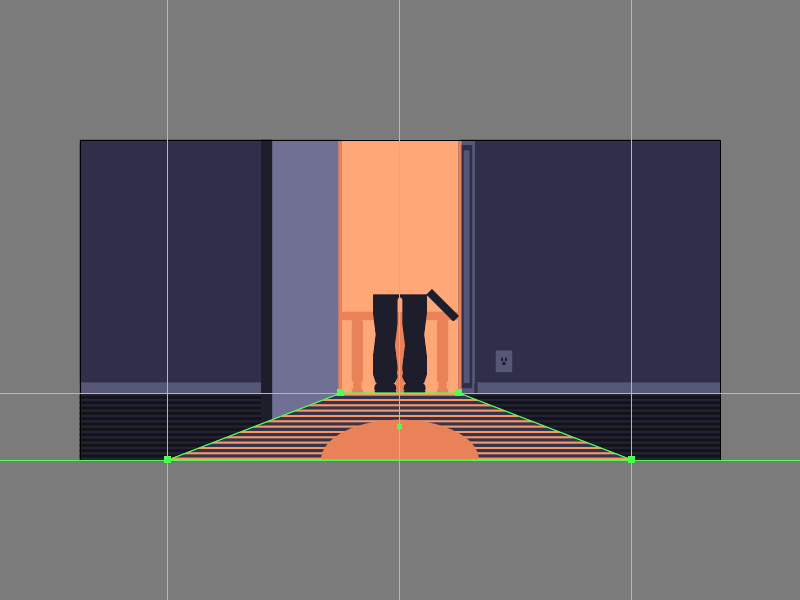
Step 26
Add the horizontal detail lines using a copy (Control-C) of the ones from underneath, which we will paste in front (Control-F) and then adjust by changing their color to #32314C. Add the circular carpet using a 236 x 120 px ellipse (#EA8259), making sure to mask both it and the lines afterwards as seen in the reference image.
Step 27
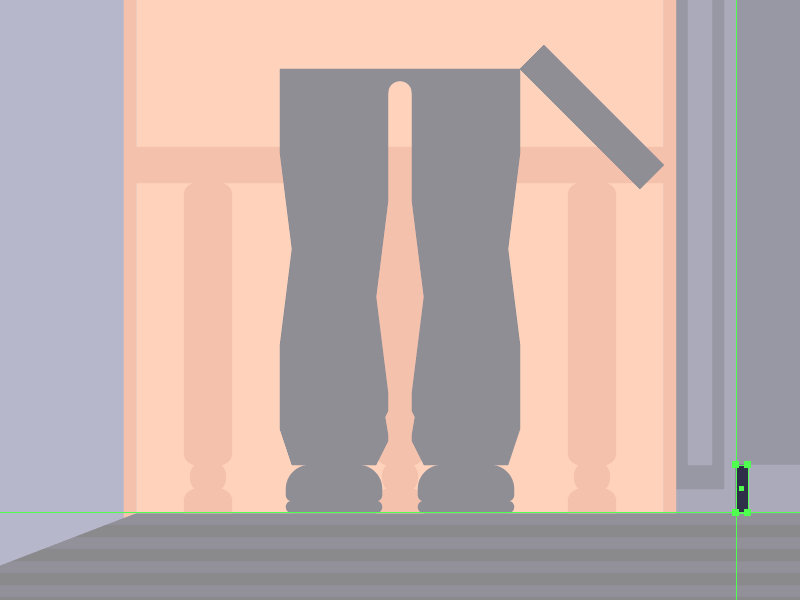
Add the shadow casted by the human silhouette, using a copy of the shapes that we’ve created a few steps ago, which we will adjust by vertically flipping and re positioning some of their anchors in order to distance the legs as seen in the reference image. Take your time and once you’re done, select and group (Control-G) all of the current section’s composing shapes before locking the layer again.

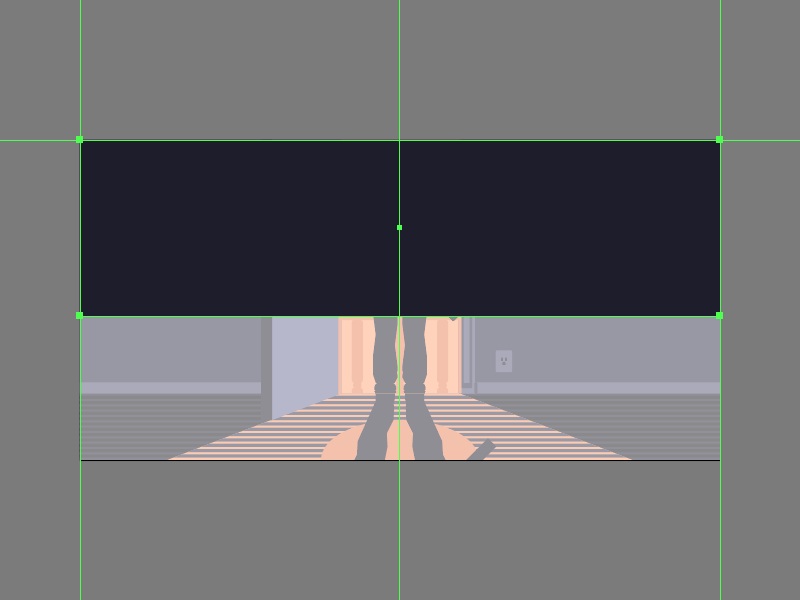
Step 28
Position yourself onto the fourth layer (that would be the one labeled “bed curtain”), and let’s start working on the curtain by creating a 960 x 264 px rectangle, which we will color using #181726, and then center align to the Artboard’s top edge.
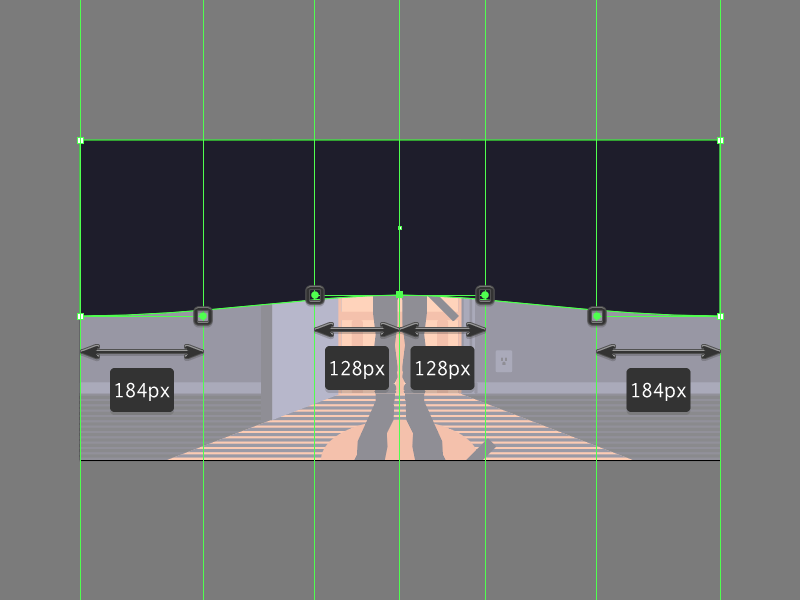
Step 29
Adjust the shape that we’ve just created by adding a new anchor point to the center of its bottom edge using the Add Anchor Point Tool (+), which we will push to the inside by a distance of 32 px (right click > Transform > Move > Vertical > – 32 px). Then convert both it and the side bottom anchors to smooth using the Convert selected anchor points to smooth tool, adjusting the curvature of the transitions by re positioning their handles.
Step 30
Add the vertical segments using sixty 8 x 336 px rectangles (#181726) horizontally distanced at 8 px from one another, which we will group (Control-G) and then center align to the Artboard’s top edge.
Step 31
Mask the shapes that we’ve just created using a copy (Control-C > Control-F) of the curtain, which we will adjust by lengthening its height from 264 px to 312 px (bottom anchor points selected > right click > Transform > Move > Vertical > 48 px).
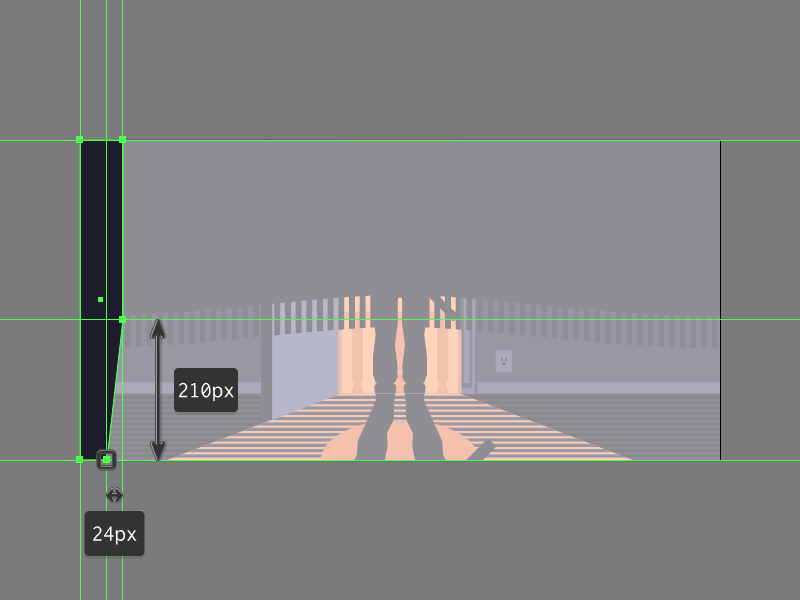
Step 32
Start working on the bed’s legs, by creating the main shape for the left one using a 64 x 480 px rectangle (#181726), which we will adjust by adding a new anchor point at a distance of 210 px from its bottom-right corner, selecting and then pushing its bottom anchor to the inside by a distance of 24 px (right click > Transform > Move > Horizontal > -24 px). Once you’re done, center align the resulting shape to the Artboard’s left edge.
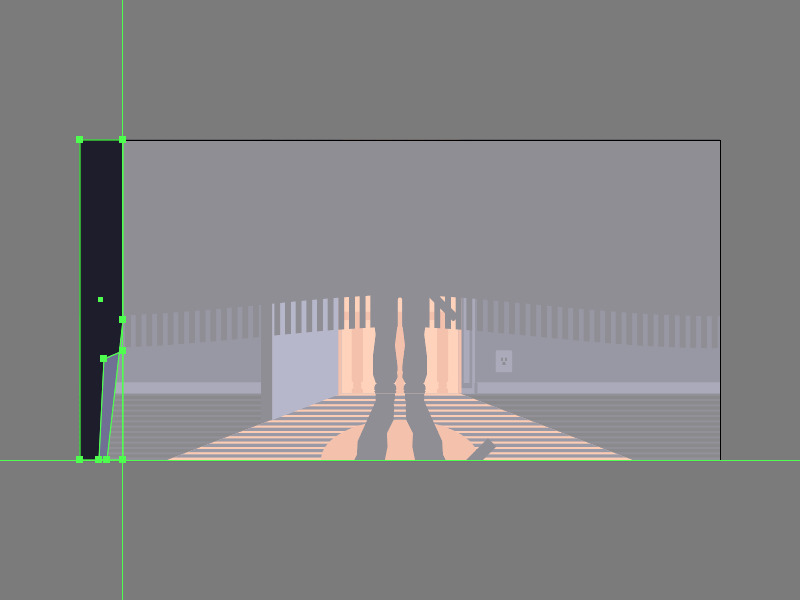
Step 33
Using the Pen Tool (P) quickly draw the hard highlight, coloring the resulting shape using #717196 and then making sure to mask it (right click > Make Clipping Mask) using a copy (Control-C > Control-F) of the underlying leg. Once you’re done, select and group the two shapes together using the Control-G keyboard shortcut.
Step 34
Add the right leg using a copy (Control-C > Control-F) of the one that we’ve just finished working on, which we will position onto the opposite edge of the Artboard making sure to vertically reflect it (right click > Transform > Reflect > Vertical). Once you’re done, select and group (Control-G) all of the current layer’s composing shapes, locking it afterwards so that we can move on to the final section of our composition.
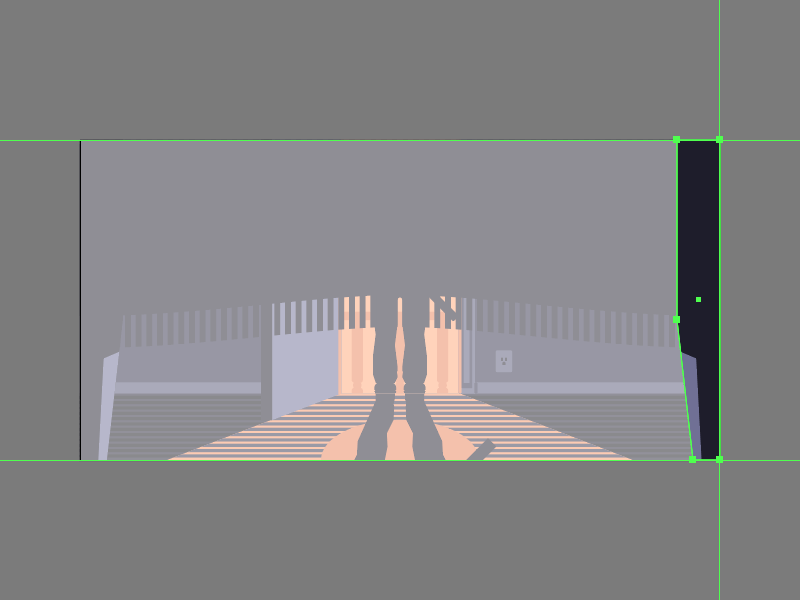
Step 35
Position yourself onto the top layer (that would be the one labeled “dust particles”) and let’s finish off the project by adding the little dust particles using a couple of #FFE2C0 colored circles. Take your time and once you’re done make sure you select and group (Control-G) all the resulting shapes together before hitting that save button.
Great Job!
As always I hope you had fun working on this little project, and if you have any questions feel free to post them within the comments section and I’ll get back to you as soon as I can!