In today’s Illustrator tutorial we’re going to take a close look behind the process of creating a cleaning themed icon set.
See how to gradually build each and every item using nothing more than some basic geometric shapes that we are going to adjust here and there.
So, assuming you already have Illustrator up and running let’s jump straight into it!
Final Image
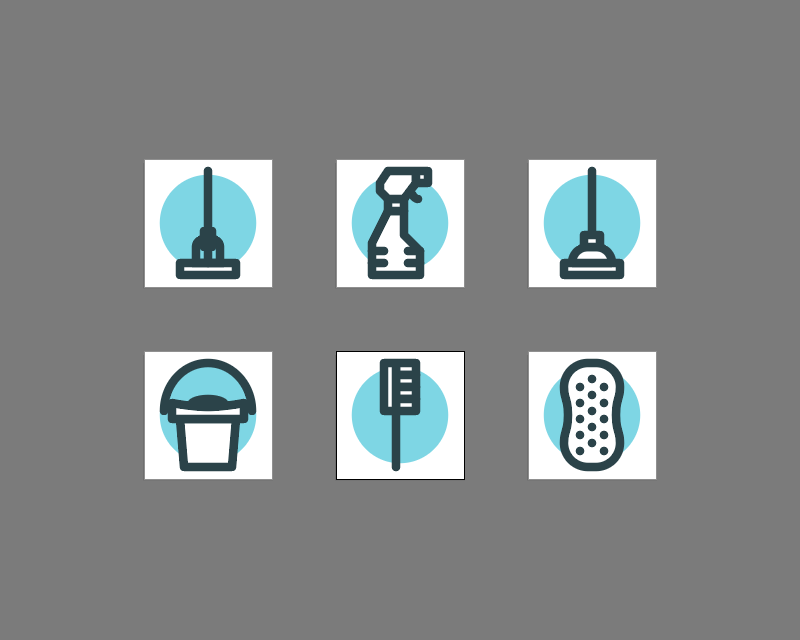
As always, this is the final image that we’ll be creating:
![]()
Tutorial Details
- Program: Adobe Illustrator CC (2018)
- Estimated Completion Time: 60 minutes
- Difficulty: Beginner-Intermediate
Step 1
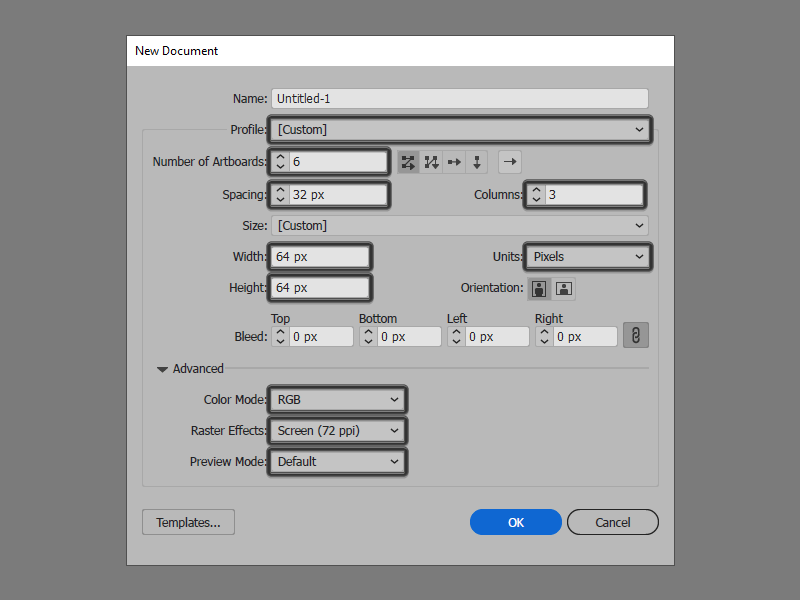
Let’s kick off the project by setting up a New Document by going to File > New or by using the Control-N keyboard shortcut, which we will adjust as follows:
- Number of Artboards: 6
- Grid by: Row
- Spacing: 32 px
- Rows: 3
- Width: 64 px
- Height: 64 px
- Units: Pixels
And from the Advanced tab:
- Color Mode: RGB
- Raster Effects: Screen (72 ppi)
- Preview Mode: Default
Step 2
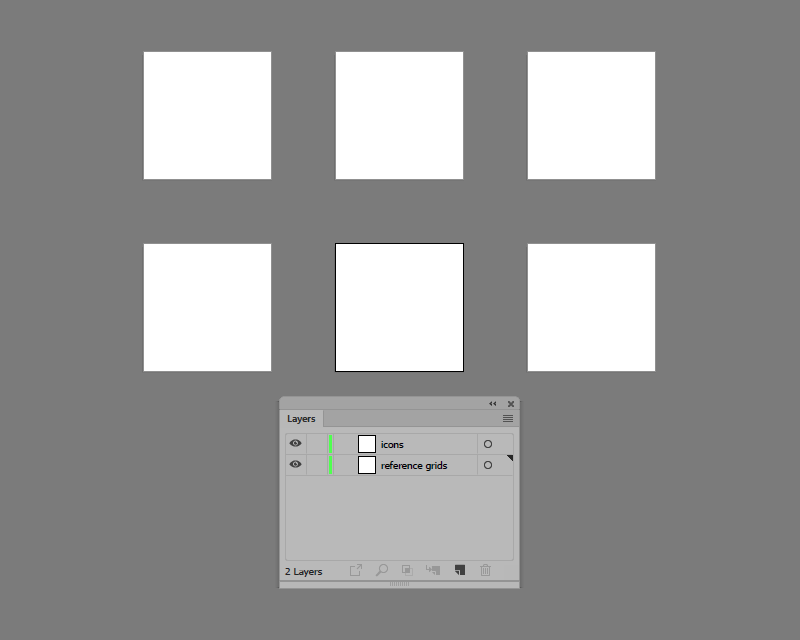
As soon as we’ve created our project file, we should take a couple of moments and structure our document, so open up the Layers panel and create a total of two layers, which we will rename as follows:
- layer 1: reference grids
- layer 2: icons
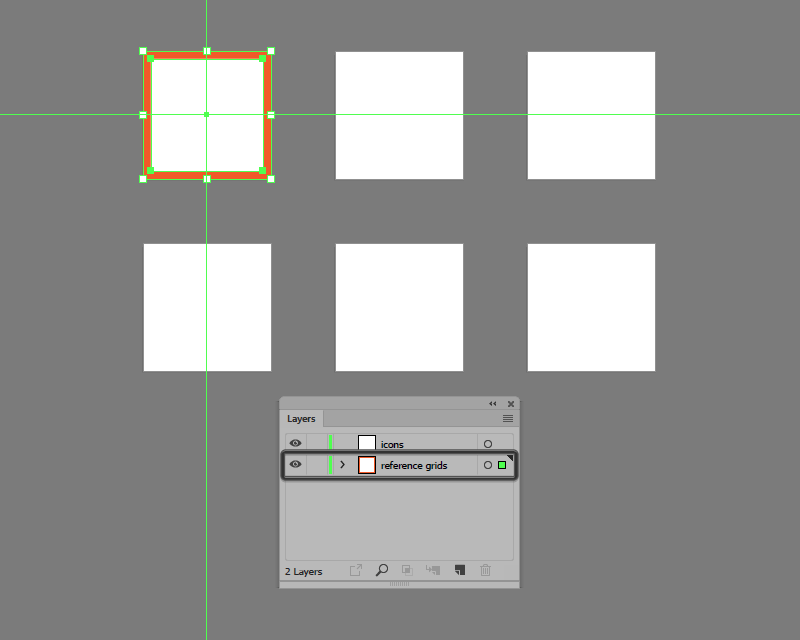
Step 3
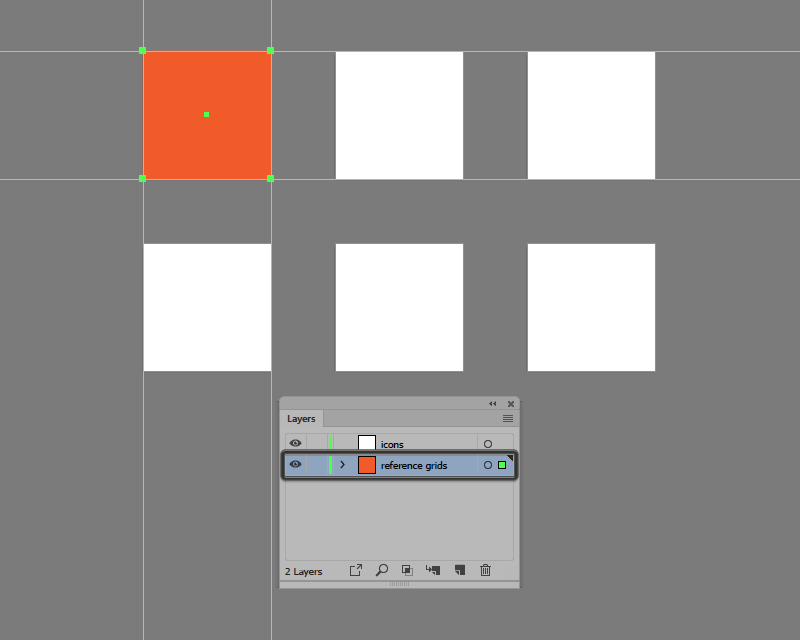
Next we need to create the reference grids, which are a set of precisely delimited surfaces, that allow us to give our icons a small protective padding.
Start by positioning yourself onto bottom layer, and using the Rectangle Tool (M) create a 64 x 64 px square which we will color using #F15A24, and then center align to the first Artboard.
Step 4
Add the active drawing area using a smaller 56 x 56 px square (#FFFFFF), making sure to select and group the two together afterwards using the Control-G keyboard shortcut.
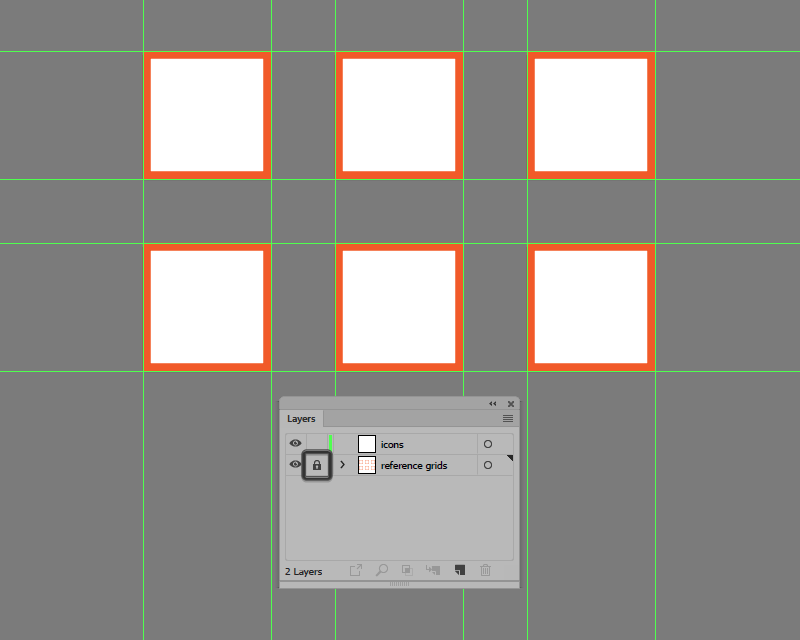
Step 5
Populate the remaining Artboards using five copies (Control-C > Control-F) of the reference grid that we’ve just finished working on, making sure to lock the current layer before moving on to the next step.
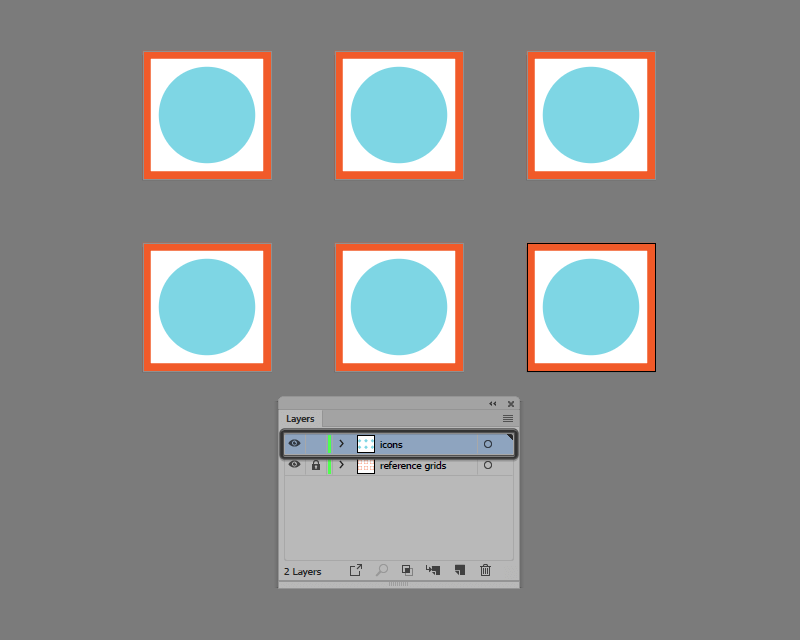
Step 6
With the reference grids in place, we can now start working on the actual icons, and we will do so by creating the colored backgrounds using six 48 x 48 px circles (#7FD7E5), which we will position to the center of each of the underlying Artboards as seen in the reference image.
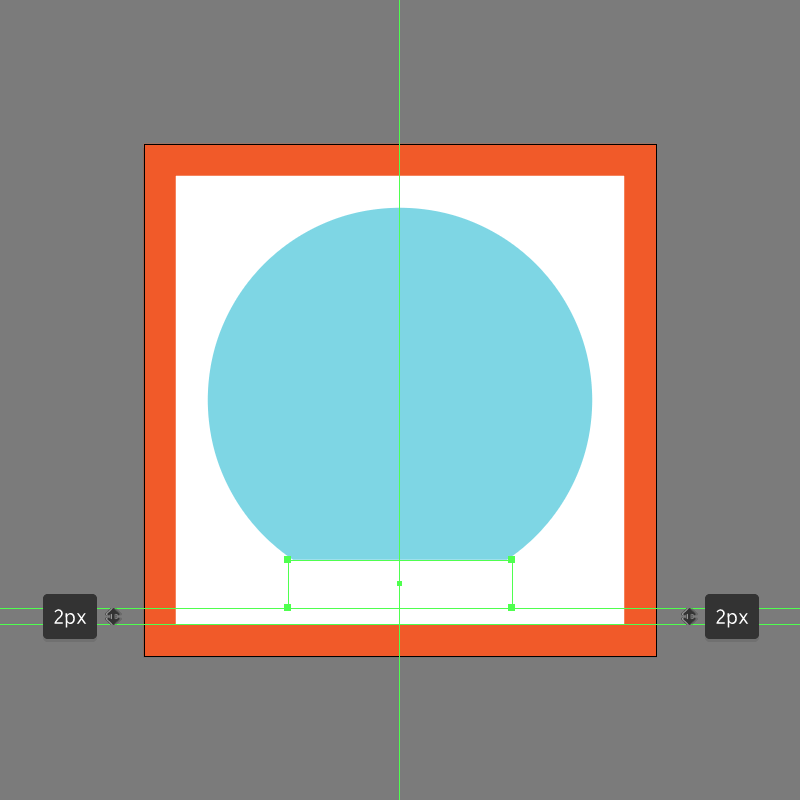
Step 7
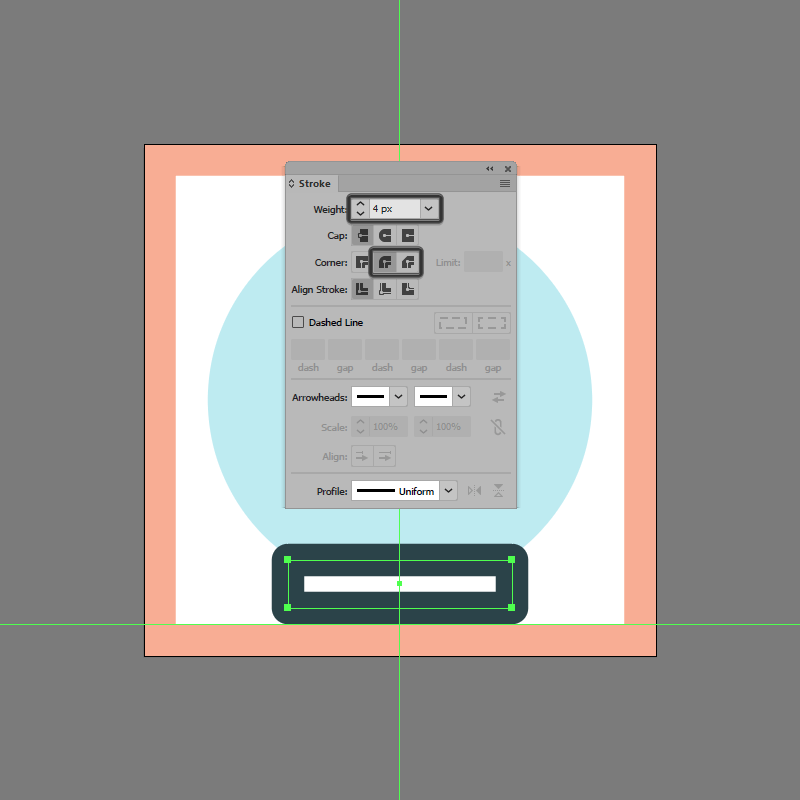
Once you have the backgrounds in place, zoom in onto the first Artboard and create the main shape for the mop’s lower body using a 28 x 6 px rectangle which we will color using white (#FFFFFF), and then center align to the underlying Artboard, positioning it at a distance of 2 px from the active drawing area’s bottom edge.
Step 8
Give the shape that we’ve just created an outline using the Stroke method, by creating a copy of it (Control-C) which we will paste in front (Control-V) and then adjust by first changing its color to #264147 making sure to set its Width to 4 px and its Join to Round. Once you’re done, select and group the two shapes together using the Control-G keyboard shortcut.
Step 9
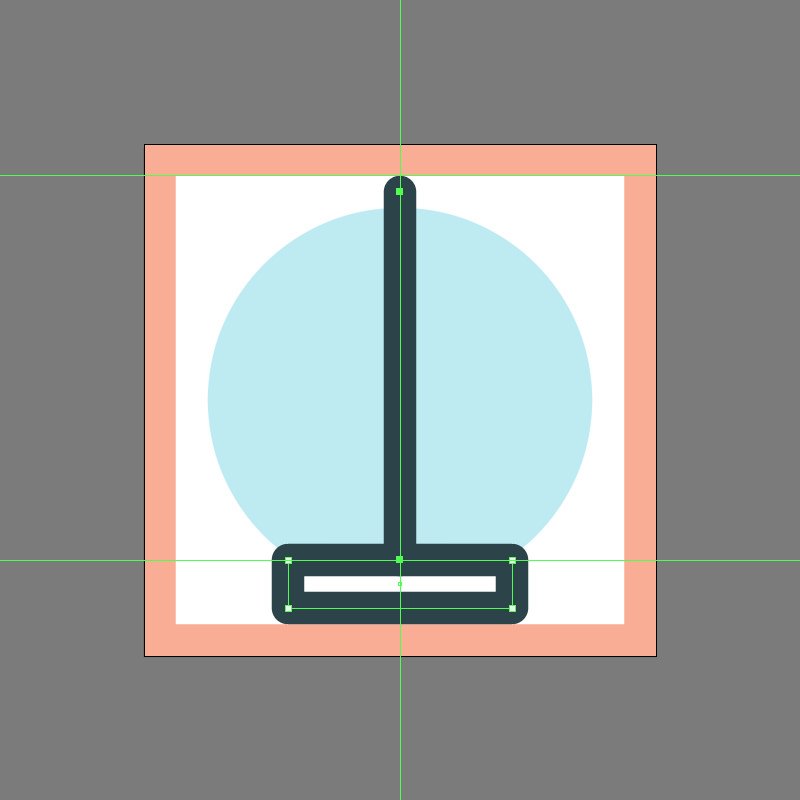
Add the vertical handle using a 46 px tall 4 px thick Stroke line (#264147) with a Round Cap, which we will position to the center of the lower body’s top edge so that the paths overlap as seen in the reference image.
Step 10
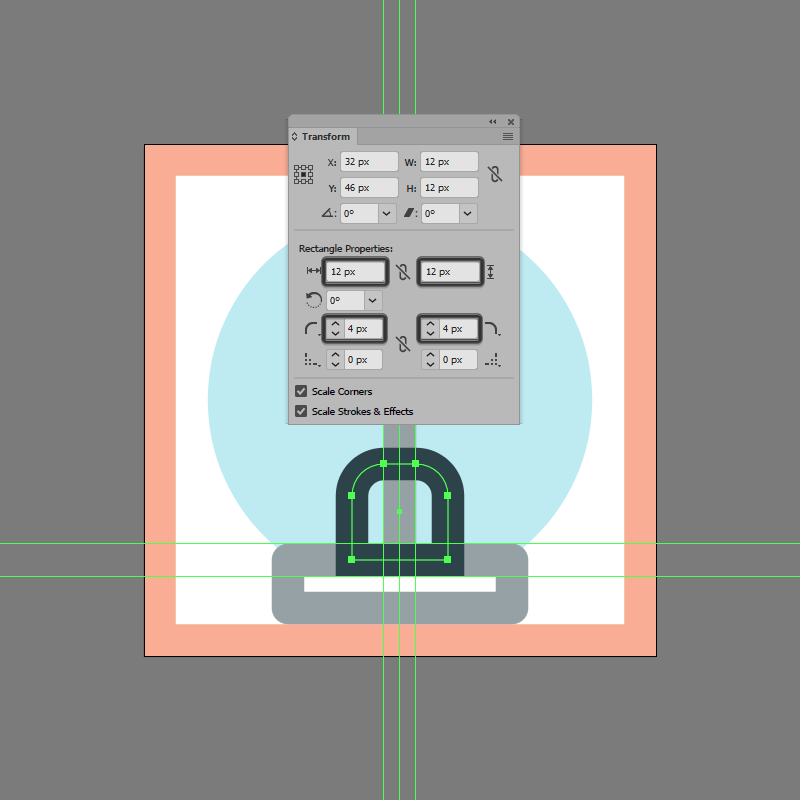
Create the main shape for the squeezing press using a 12 x 12 px square with a 4 px thick Stroke (#264147), which we will adjust by setting the Radius of its top corners to 4 px from within the Transform panel’s Rectangle Properties. Take your time and once you’re done, position the resulting shape onto the upper edge of the mop’s lower body.
Step 11
Finish off the current icon, by positioning an 8 x 12 px rounded rectangle (#264147) with a 2 px Corner Radius on top of the press, making sure to select and group (Control-G) all of the mop’s composing shapes, doing the same for it and the background afterwards.
![]()
Step 12
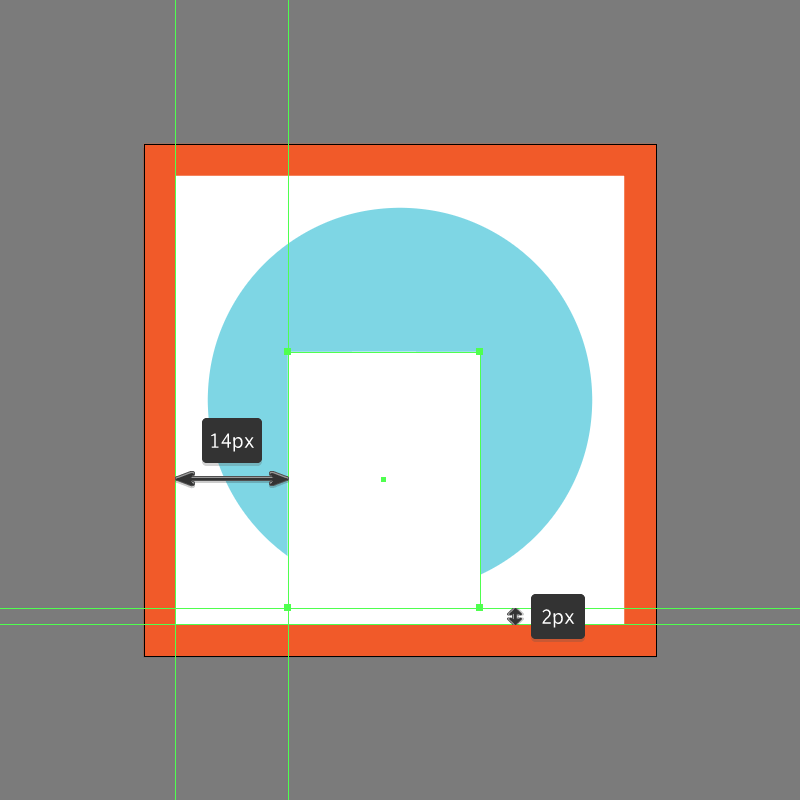
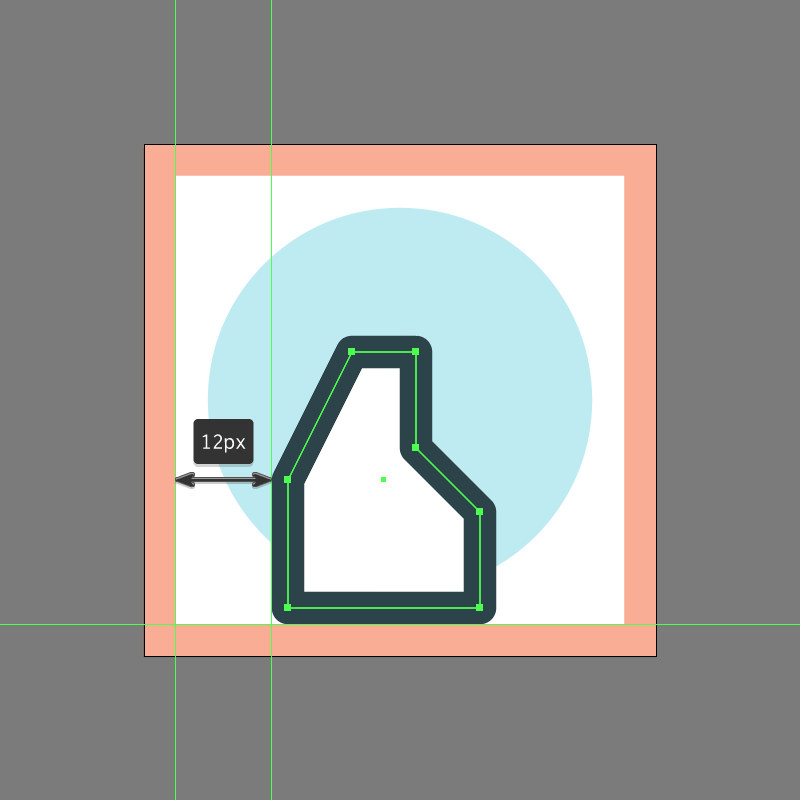
Once you’re done working on the first icon, position yourself onto the neighbouring Artboard, where we will create the main shape for the cleaning bottle using a 24 x 32 px rectangle (#FFFFFF), which we will position at a distance of 14 px from the active drawing area left edge, and 2 px from its bottom one.
Step 13
Adjust the shape of the rectangle that we’ve just created, by adding a couple of new anchor points using the Add Anchor Point Tool (+), and then re positioning them as seen in the reference image. Take your time, and once you’re done move on to the next step.

Step 14
Give the resulting shape a 4 px thick outline (#264147) with a Round Join, making sure to select and group the two together afterwards using the Control-G keyboard shortcut.
Step 15
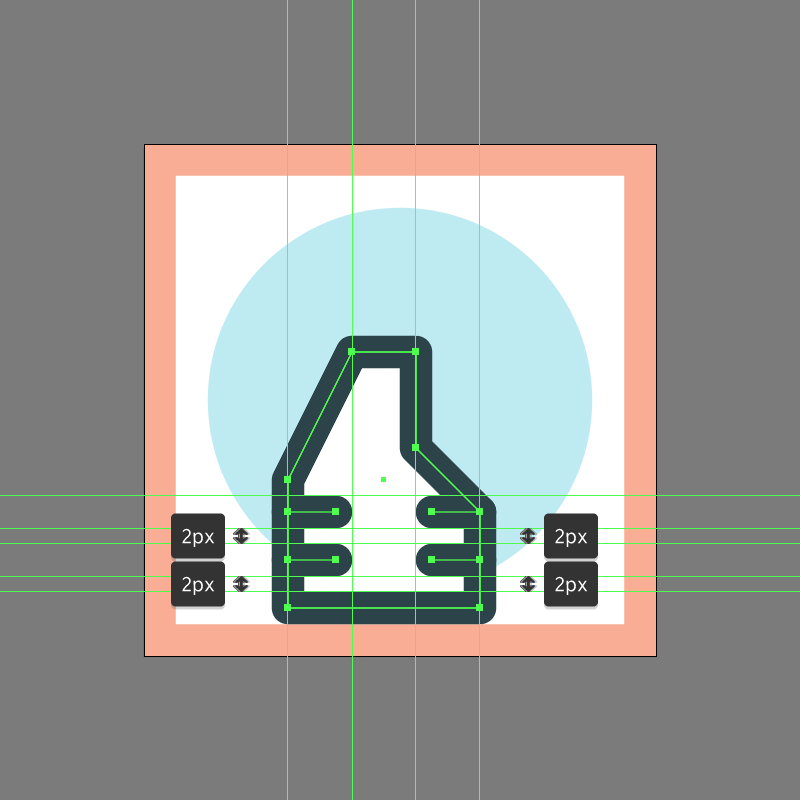
Add the horizontal detail lines using two groups (Control-G) of two 6 px wide 4 px thick Stroke lines (#264147) with a Round Cap, vertically stacked at a distance of 2 px from one another, which we will position onto the sides of the bottle as seen in the reference image.
Step 16
Create the neck section using an 8 x 6 px rectangle (#FFFFFF) with a 4 px thick outline (#264147), which we will group (Control-G) and then position on top of the bottle’s body, so that their paths overlap.

Step 17
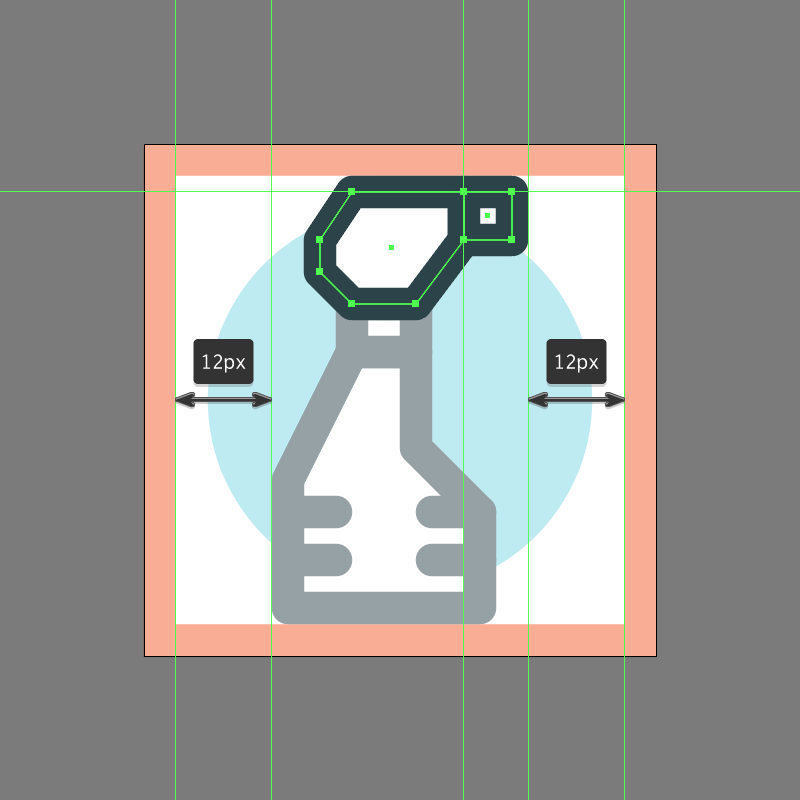
Add the main shape for the spraying mechanism using an 18 x 14 px rectangle (#FFFFFF), which we will adjust as we did with the larger body by adding a couple of new anchor points which we will re position as seen in the reference image. Take your time, and once you’re done move on to the next step.

Step 18
Give the resulting shape a 4 px thick outline (#264147) with a Round Join, making sure to select and group the two together using the Control-G keyboard shortcut.
Step 19
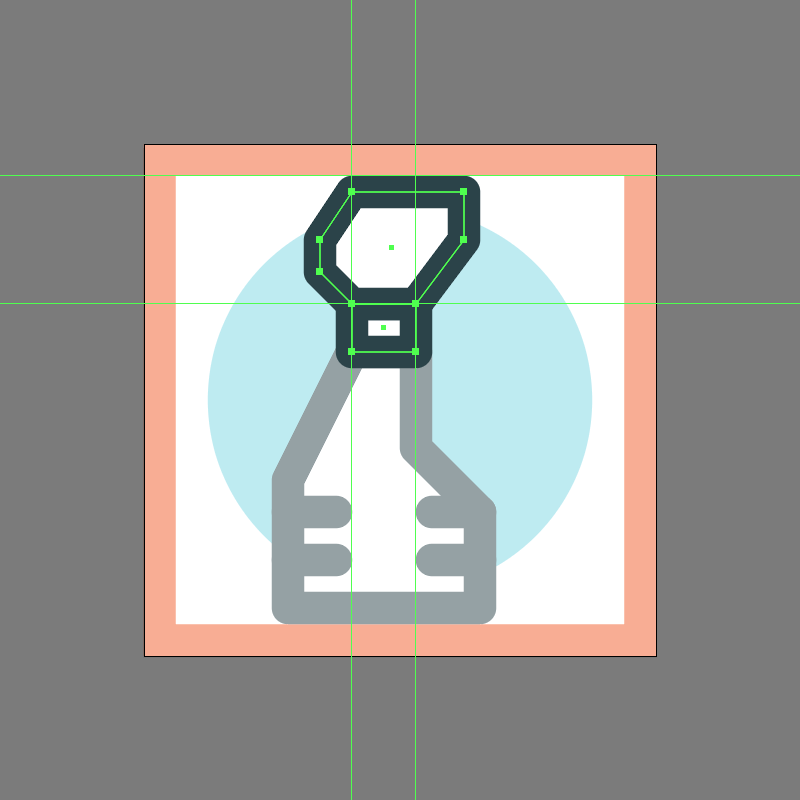
Add the nozzle using a 6 x 6 px square (#FFFFFF) with a 4 px thick outline (#264147) with a Round Join, grouping (Control-G) and then positioning the two onto the spraying mechanism so that their paths overlap.
Step 20
Finish off the icon by adding the little trigger using a 4 px thick Stroke (#264147) with a Round Cap, which we will position onto the lower-left side of the spraying mechanism so that their paths overlap. Take your time and once you’re done, don’t forget to select and group (Control-G) all of the bottle’s composing shapes, doing the same for it and the background afterwards.
![]()
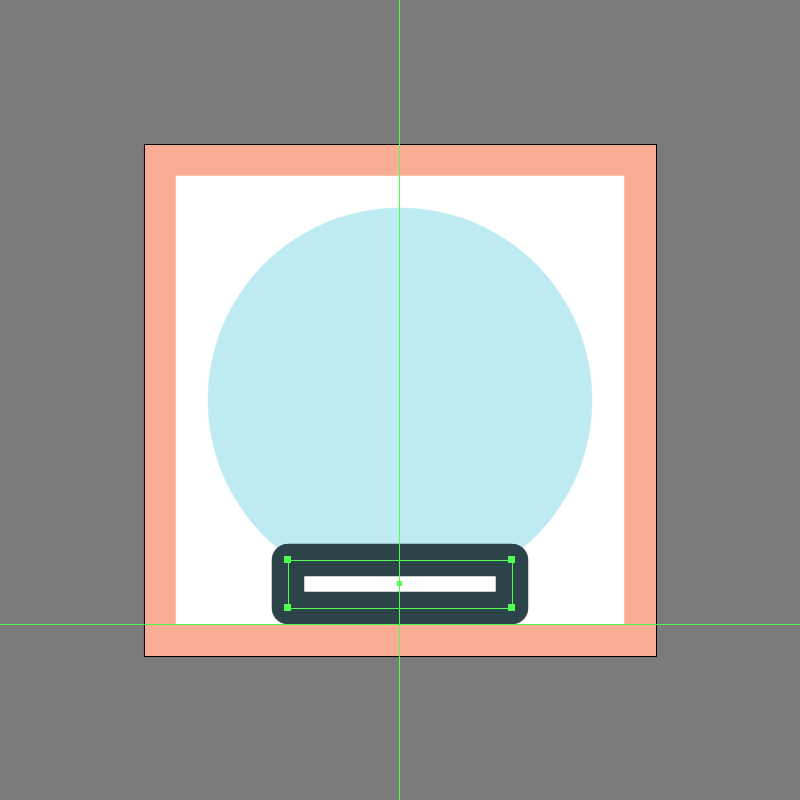
Step 21
Position yourself onto the next Artboard, and let’s start working on our third icon by creating the main shapes for its lower body using a 28 x 6 px rectangle (#FFFFFF) with a 4 px thick outline (#264147) with a Round Join, which we will group (Control-G) and then position to the center of the active drawing area’s bottom edge.
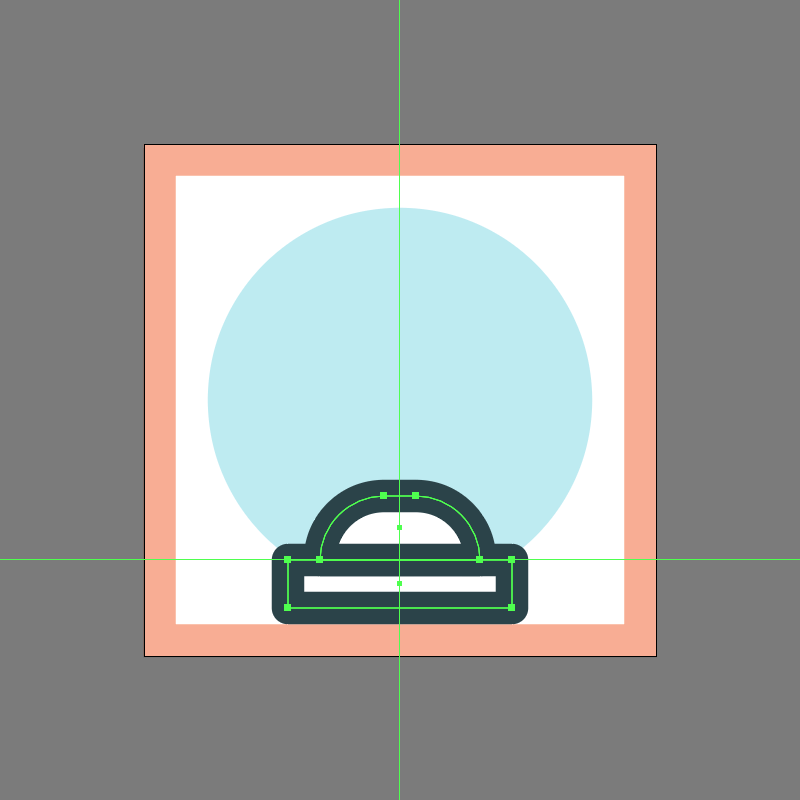
Step 22
Add the circular section of the plunger’s head using a 20 x 8 px rectangle (#FFFFFF), which we will adjust by setting the Radius of its top corners to 8 px from within the Transform panel’s Rectangle Properties. Give the resulting shape a 4 px thick outline (#264147), grouping (Control-G) and then positioning the two as seen in the reference image.
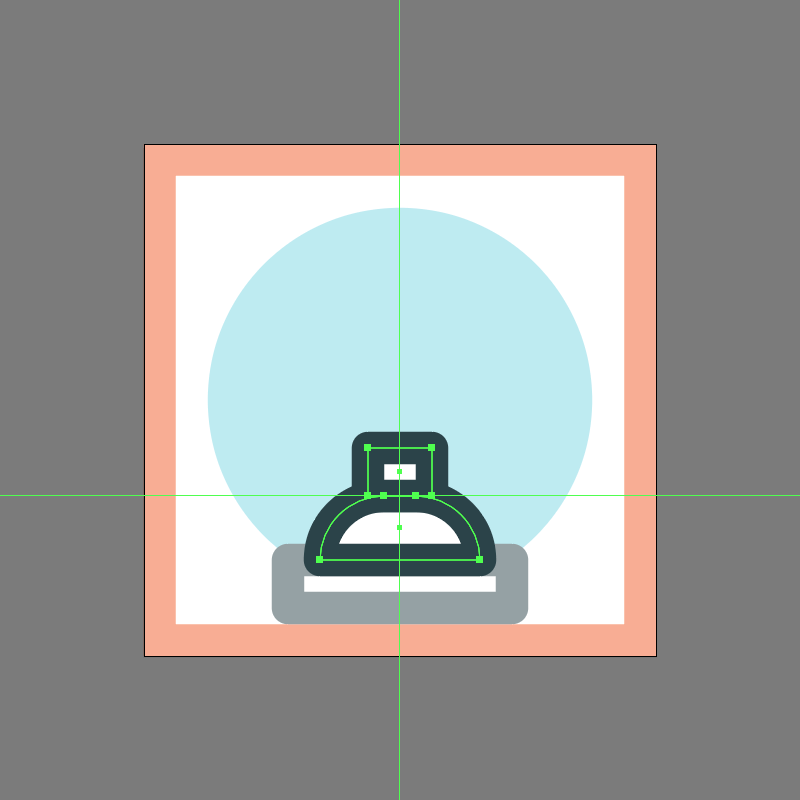
Step 23
Create the smaller connector segment using an 8 x 6 px rectangle (#FFFFFF) with a 4 px thick outline (#264147) with a Round Join, which we will group (Control-G) and then position on top of the previous shapes.
Step 24
Finish off the current icon by adding the handle using a 32 px tall 4 px thick Stroke (#264147) with a Round Cap, which we will position as seen in the reference image. Take your time and once you’re done, don’t forget to select and group (Control-G) all of the plunger’s composing shapes doing the same for the entire icon afterwards.
![]()
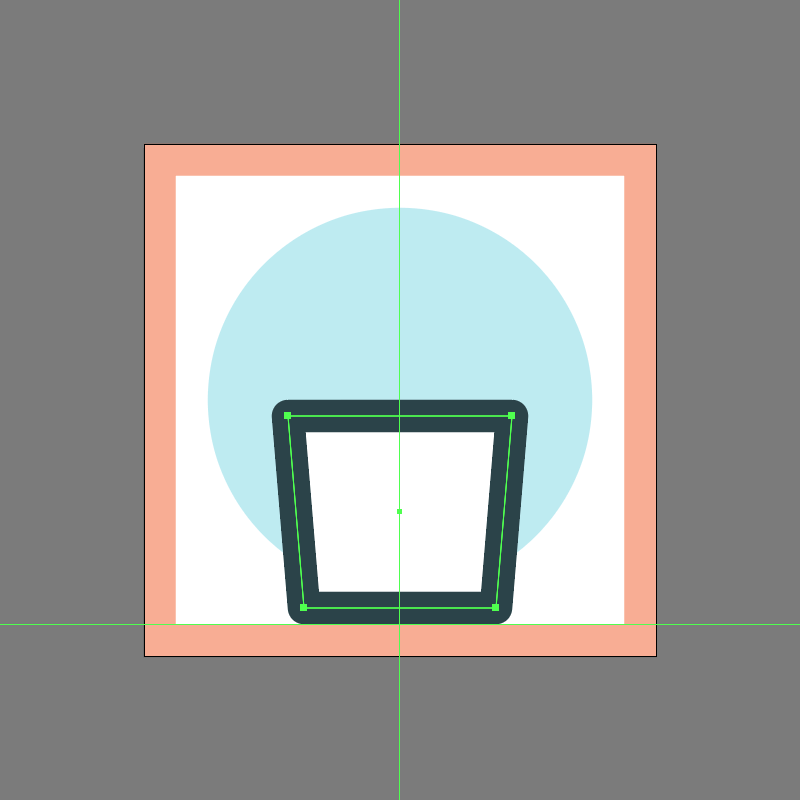
Step 25
Once you’ve finished working on the plunger, you can move on down to the second row of Artboards, where we will start working on the little bucket. Create the main shapes for its larger body using a 28 x 24 px rectangle (#FFFFFF), which we will adjust by individually selecting its bottom anchor points using the Direct Selection Tool (A) and then pushing them to the inside by a distance of 2 px using the Move tool (right click > Transform > Move > Horizontal > + / – 2 px depending on which side you start with).
Once you’re done, give the resulting shape a 4 px thick outline (#264147) with a Round Join, grouping (Control-G) and then positioning the two to the center of the underlying active drawing area’s bottom edge.
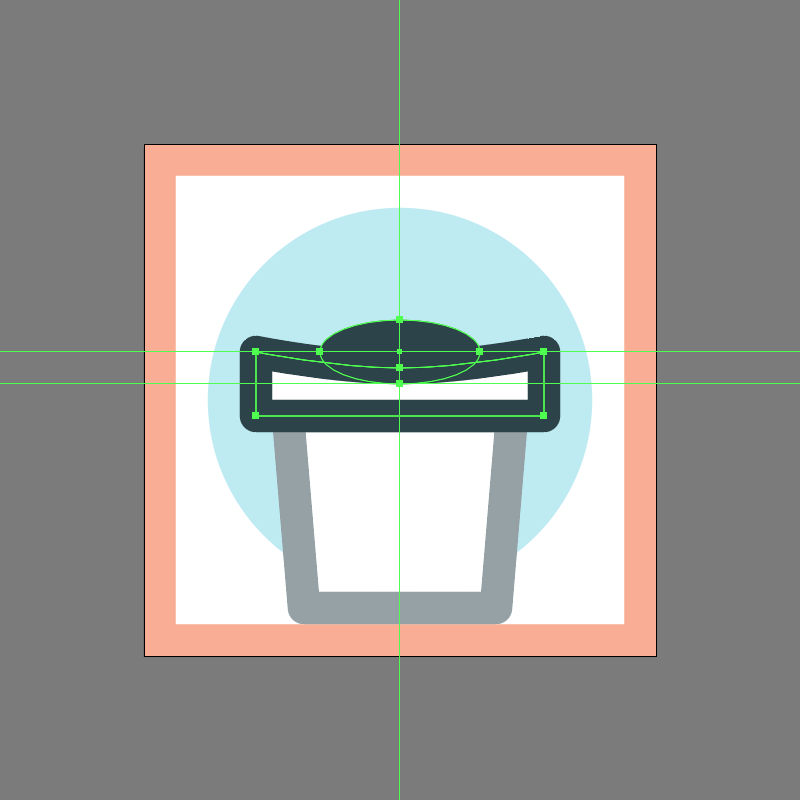
Step 26
Add the upper lip using a 36 x 8 px rectangle (#FFFFFF), which we will adjust by adding a new anchor point to the center of its top edge using the Add Anchor Point Tool (+), which we will push to the bottom by a distance of 2 px using the directional arrow keys.

Step 27
Adjust the curvature of the lip by converting the newly created anchor to smooth using the Convert selected anchor points to smooth tool, and then re positioning its handles’ endpoints. Give the resulting shape the usual 4 px thick outline (#264147) with a Round Join, selecting and grouping the two afterwards using the Control-G keyboard shortcut.

Step 28
Add the circular detail using a 20 x 8 px ellipse which we will color using #264147, and then position on top of the lip as seen in the reference image.
Step 29
Finish off the icon by adding the handle using a 44 x 48 px ellipse with a 4 px thick Stroke (#264147), which we will cut in half by selecting its bottom anchor point using the Direct Selection Tool (A) and then immediately pressing Delete. Set the resulting path’s Cap to Round, center aligning it to the active drawing area’s top edge.
Once you’re done, don’t forget to select and group (Control-G) all of the bucket’s composing shapes together, doing the same for the entire icon afterwards.
![]()
Step 30
Move on to the neighbouring Artboard, where we will create our fifth icon, the little brush. Start by creating its back section using 6 x 24 px rectangle (#FFFFFF) with a 4 px thick outline (#264147) with a Round Join, which we will group (Control-G) and then position as seen in the reference image.

Step 31
Add the hair segments using four 10 x 6 px rectangles (#FFFFFF) with a 4 px thick outline (#264147) with a Round Join, which we will individually group (Control-G) and then vertically stack onto the right side of the previous section.
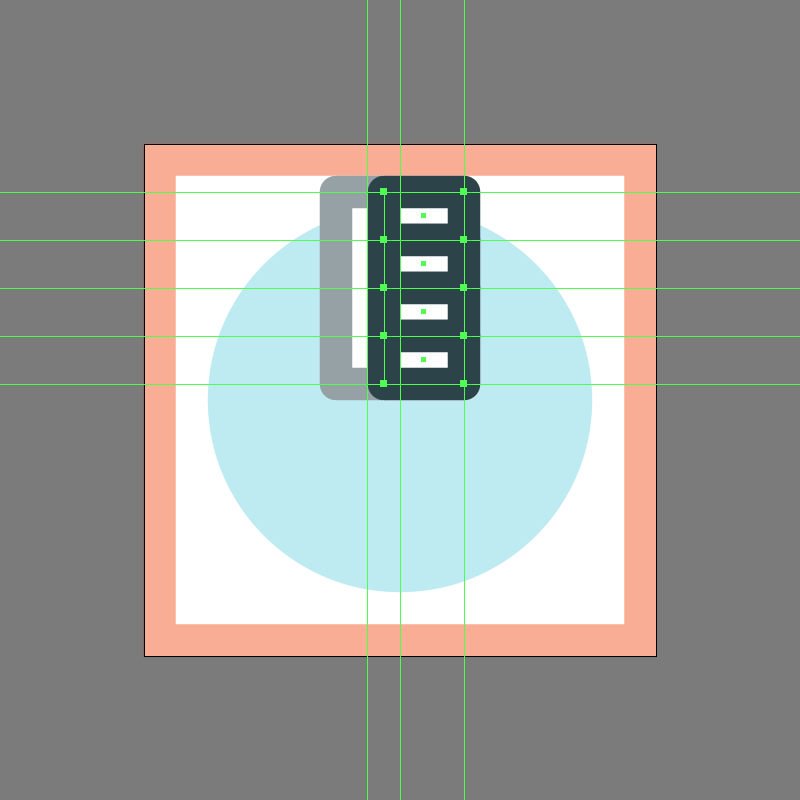
Step 32
Finish off the current icon by adding the handle using a 28 px tall 4 px thick Stroke line (#264147) with a Round Cap, which we will position as seen in the reference image. Take your time and once you’re done, make sure you select and group (Control-G) all of the brush’s composing shapes doing the same for the entire icon afterwards.
![]()
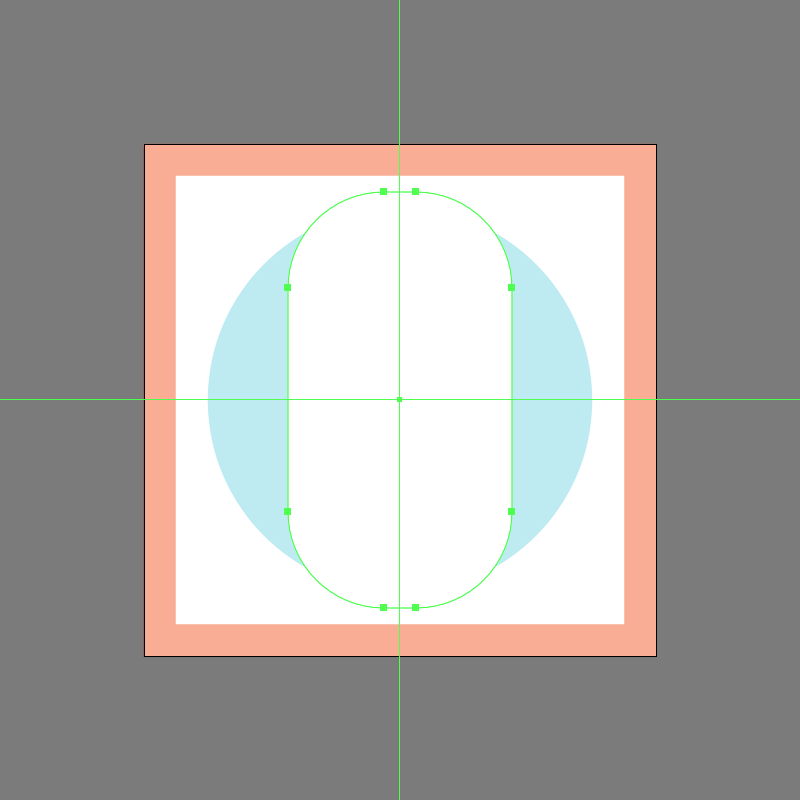
Step 33
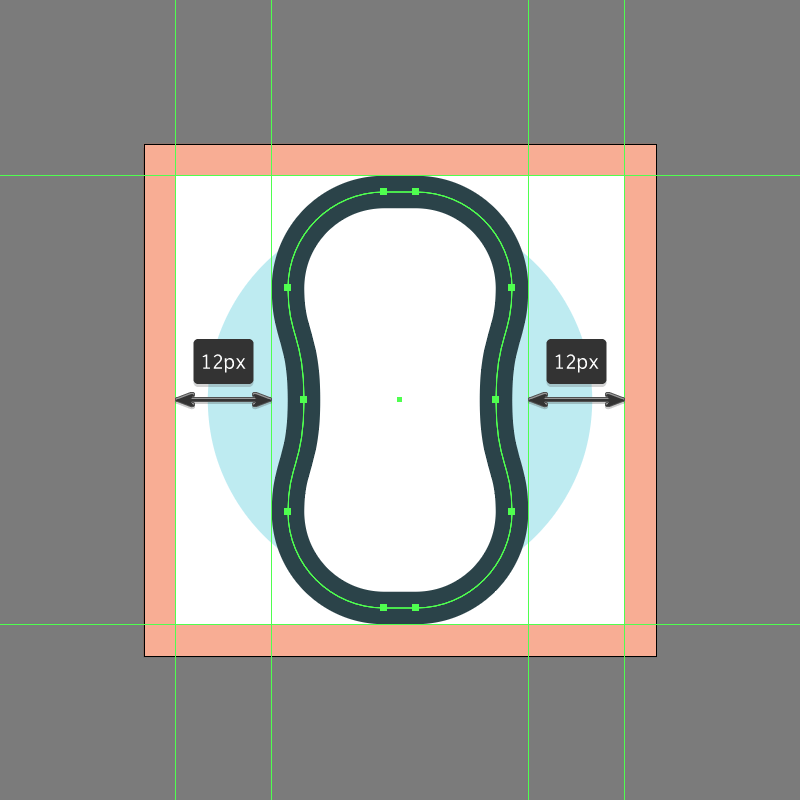
We are now down to our last icon, so without wasting any more time, let’s wrap things up! Start by creating the main shape for the sponge’s body using a 28 x 52 px rounded rectangle (#FFFFFF) with a 12 px Corner Radius, which we will center align to the empty Artboard.
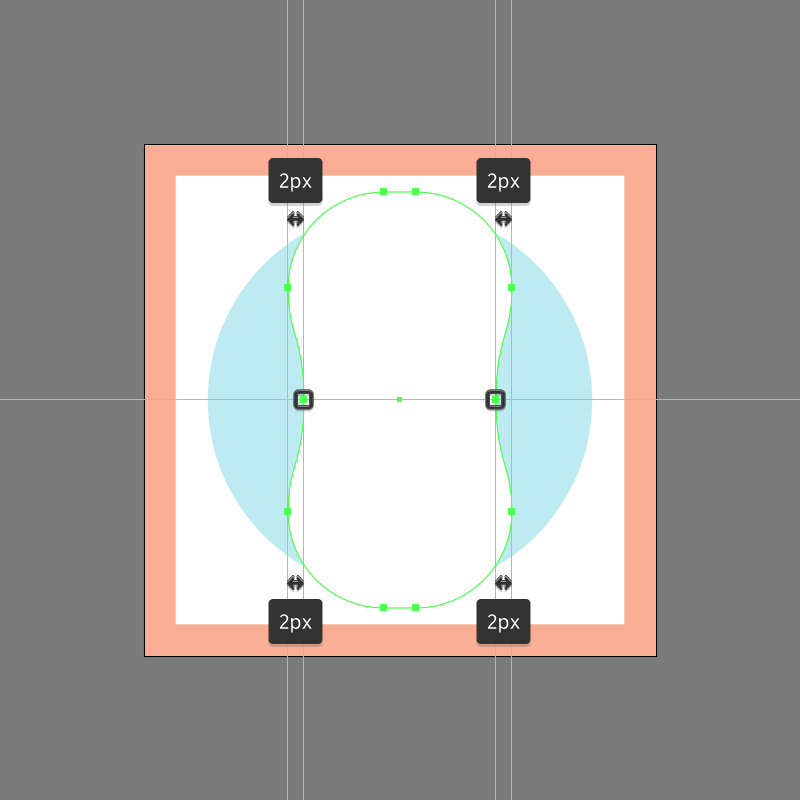
Step 34
Adjust the shape that we’ve just created, by adding a new anchor point to the center of each of its side edges, individually selecting and then pushing them to the inside by a distance of 2 px using the directional arrow keys. Once you’re done, smoothen out the transitions by converting the anchor points to smooth and then re positioning their anchors’ end points.
Step 35
Give the resulting shape a 4 px thick outline (#264147), making sure to select and group the two together afterwards using the Control-G keyboard shortcut.
Step 36
Finish off the icon and with it the project itself, by adding the dotted pattern using fifteen 4 x 4 px circles (#264147), positioned as seen in the reference image. Take your time and once you’re done select and group (Control-G) all of them together, doing the same for the sponge and the entire icon afterwards.
![]()
Great Job!
As always I hope you had fun working on this little project, and managed to learn something new and useful during the process.
That being said, if you have any questions feel free to post them within the comments section and I’ll get back to you as soon as I can!