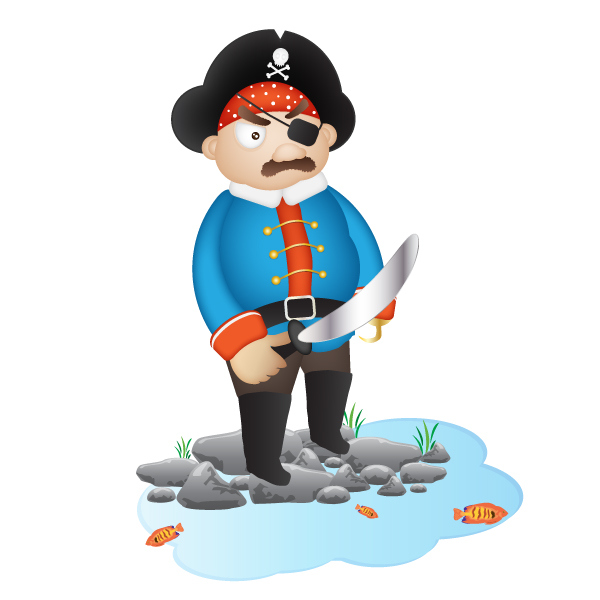
Character design might be one of the most fun things that you can do in Illustrator. In this tutorial, I decided to create a vector pirate cartoon character.
Final Image
As always, this is the final image that we’ll be creating:

Tutorial Details
- Program: Adobe Illustrator CS3
- Estimated Completion Time: 45 minutes
- Difficulty: Beginner-Intermediate
Step 1
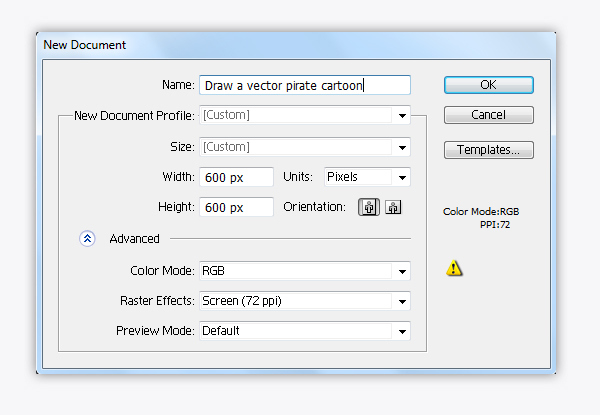
Let’s create a new document first. Make sure to set the dimensions to Width=600px, Height= 600px and the Color Mode to RGB.
Step 2
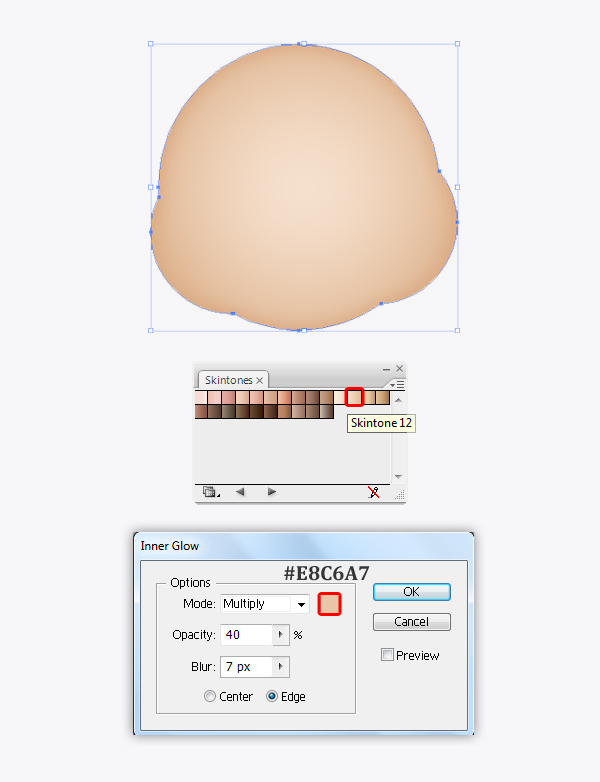
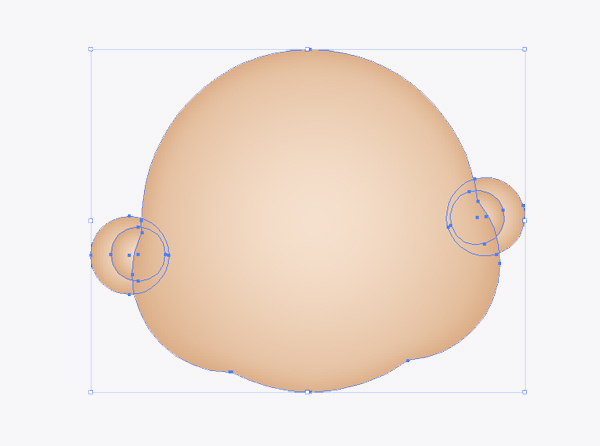
Let’s start with the face. Using the Pen Tool (P) to create pirate’s face shape as shown in the image below.
In the Swatches palette, go to Open Swatches Library > Gradients > Skintones. We select Skintone 12 for the face shape. With the shape still selected, go to Effect > Stylize > Inner Glow and set the values.
Using the Ellipse Tool (L) draw a circle and apply the gradient Skintone 12, then go to Effect > Stylize > Inner Glow and set the values.
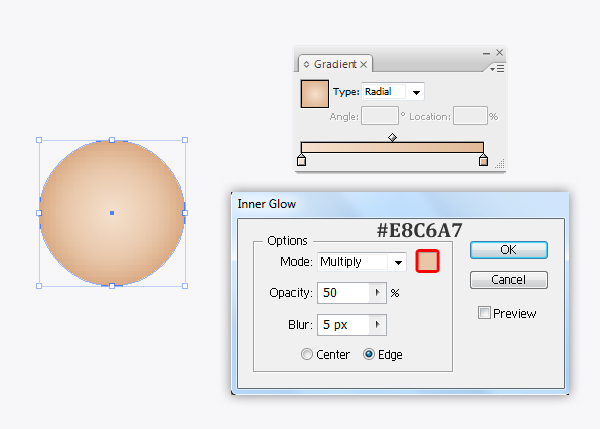
Duplicate (Ctrl / Cmd + C, Ctrl / Cmd + F) the circle, resize it a little smaller and place it as shown in the image below.
Group (Ctrl + G) these circle together. This shape represents the pirate’s ears. Place the ears behind the pirate’s face.
Step 3
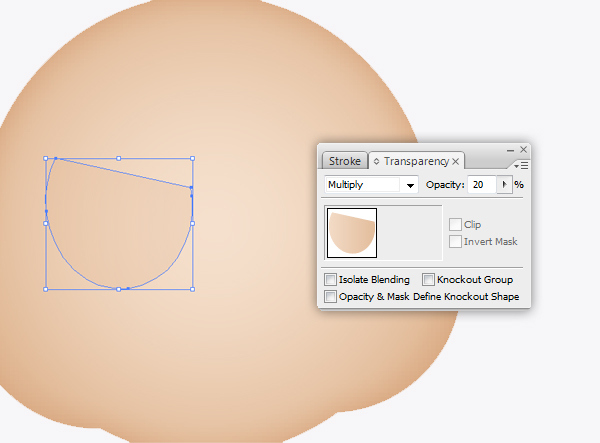
For the eyes, using the Pen Tool (P) to create a shape as shown in the image below and apply the gradient Skintone 12. Then change Blending mode to Multiply and lower Opacity = 20%.
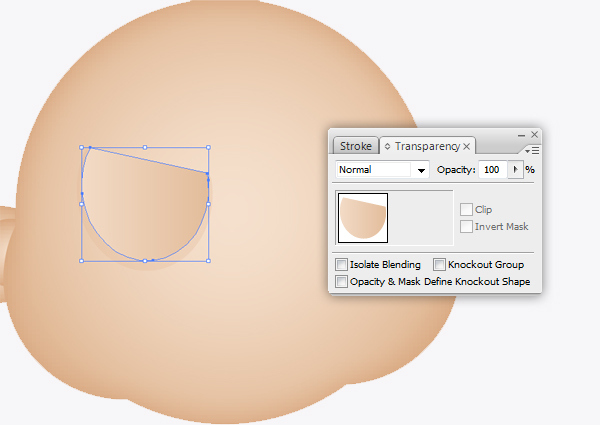
Duplicate (Ctrl / Cmd + C, Ctrl / Cmd + F) the shape we have created and paste in front, resize it a little smaller. Then change the Blending mode to Normal with Opacity = 100%.
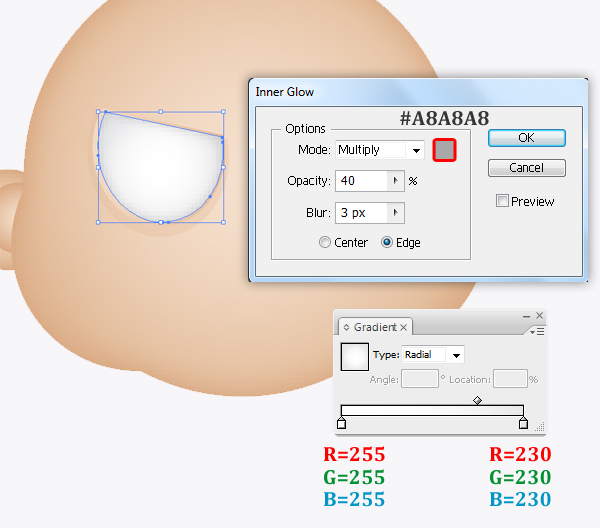
Duplicate (Ctrl / Cmd + C, Ctrl / Cmd + F) the copy shape and paste in front, resize it a little smaller. Fill it with the gradient shown in the image below, then go to Effect > Stylize > Inner Glow and set the values.
Grab the Ellipse Tool (L) and draw a small circle for the pupil. Then fill it with the gradient indicated.
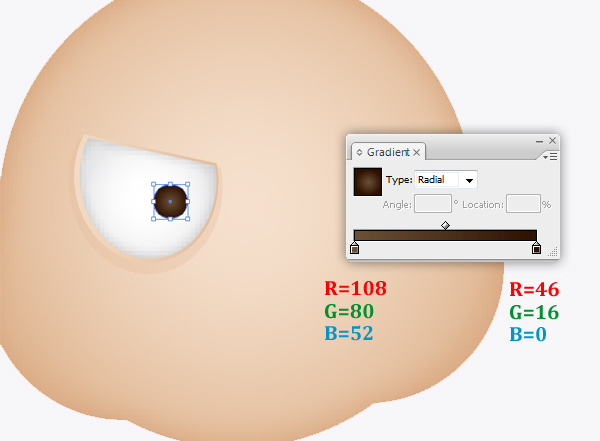
Add two more white circles to represent the sparkle in the eyes. Now we have a result like this.

Step 4
For the nose I’ve used the Pen Tool (P) to create the shape shown in the image below and applied the gradient Skintone 12. Then change the Blending mode to Multiply and lower Opacity = 80%.
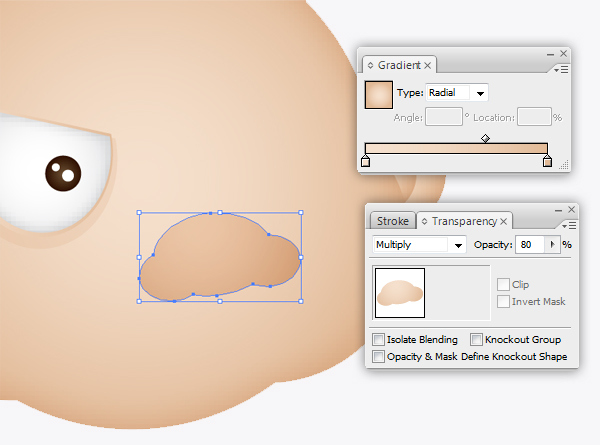
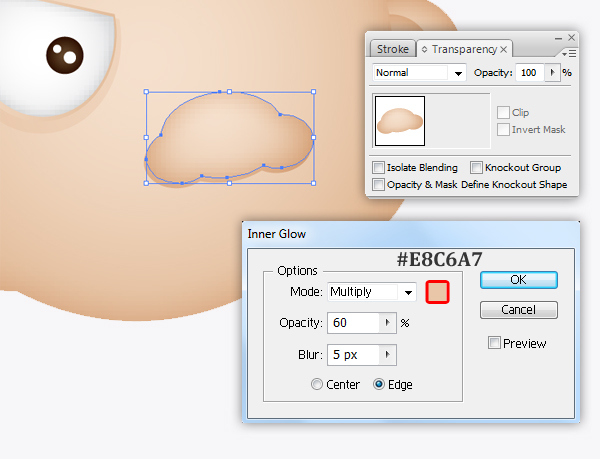
With the nose shape still selected, duplicate (Ctrl / Cmd + C, Ctrl / Cmd + F) it and paste in front, move it up a little bit and change the Blending mode to Normal with Opacity = 100%. Then go to Effect > Stylize > Inner Glow and set the values.
Step 5
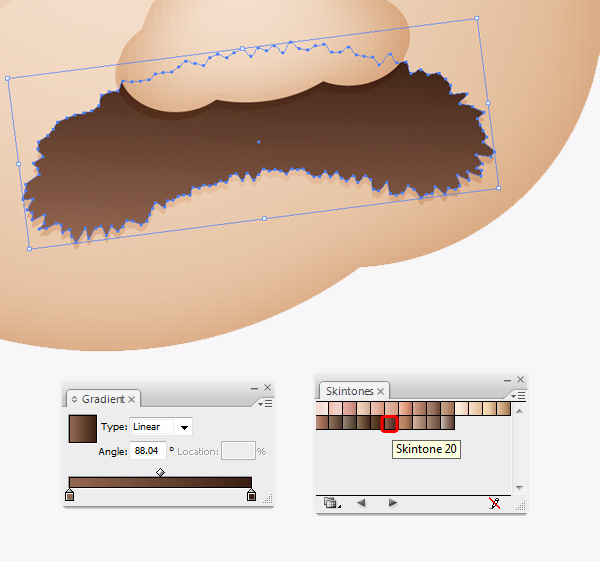
Now we create the pirate’s mustache. Pick the Pen tool (P) and draw a shape as shown in the image below. Then add the gradient Skintone 12 and change the Blending mode to Multiply and lower Opacity = 50%.
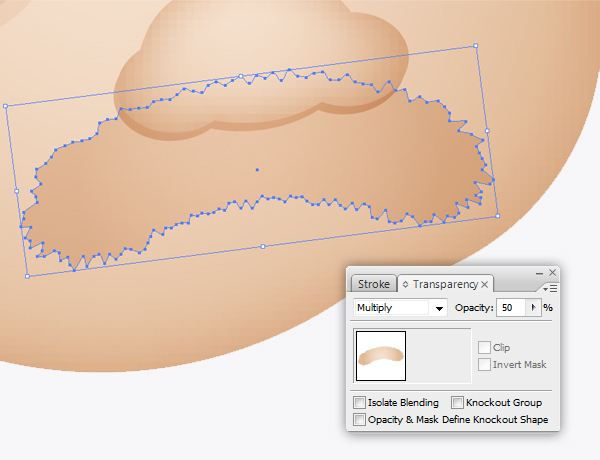
Duplicate (Ctrl / Cmd + C, Ctrl / Cmd + F) the mustache shape we have created and paste in front, move it up a little bit, apply the gradient Skintone 20. Then change the Blending mode to Normal with Opacity = 100%.
Step 6
Pick the Pen tool (P) to create the pirate’s eyebrow as shown in the image below then repeat step 5 and you will get the result like this.
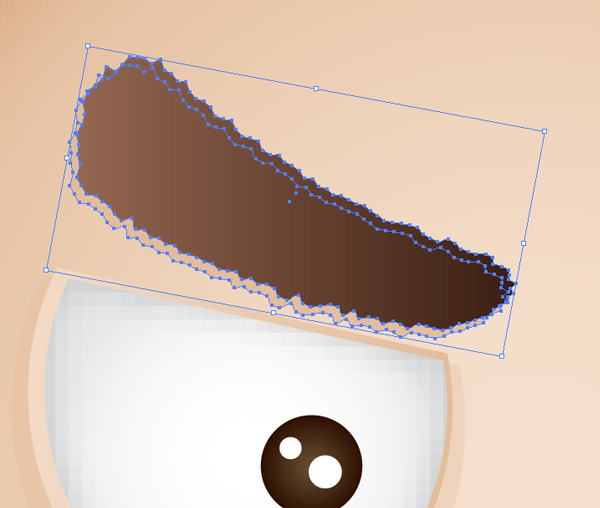
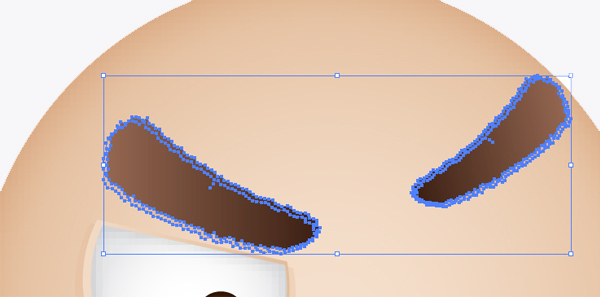
Duplicate (Ctrl / Cmd + C, Ctrl / Cmd + F) the eyebrow shape, scale it a little smaller and pick Reflect Tool (O) to reflect the copy shape.
Step 7
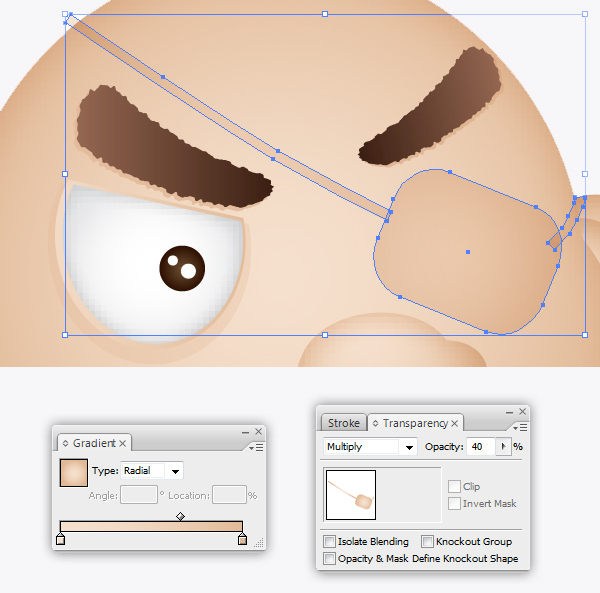
In this step, we will create the eye patch for our pirate. Use the Rounded Rectangle Tool to create the main shape of eye patch, then use the Pen Tool (P) to create the strings.
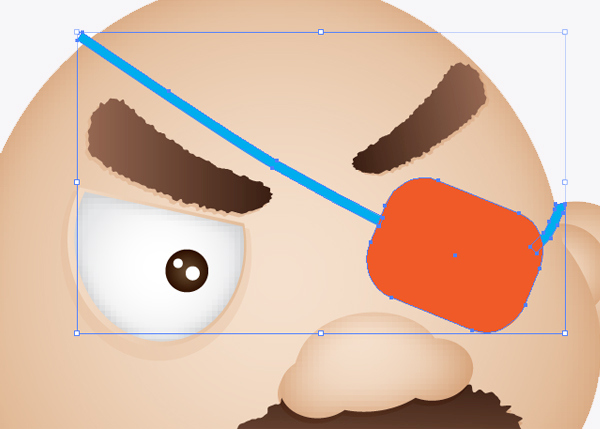
Apply the gradient Skintone 12 to the eye patch, then apply the Blending mode Multiply with lower Opacity = 40%.
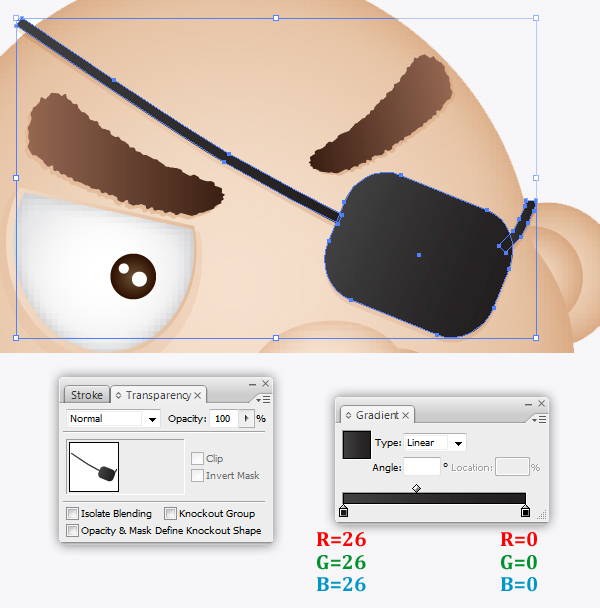
Duplicate (Ctrl / Cmd + C, Ctrl / Cmd + F) the eye patch shape we have created and paste in front, move it up a little bit, apply the gradient Skintone 20. Then change the Blending mode to Normal with Opacity = 100%.
Step 8
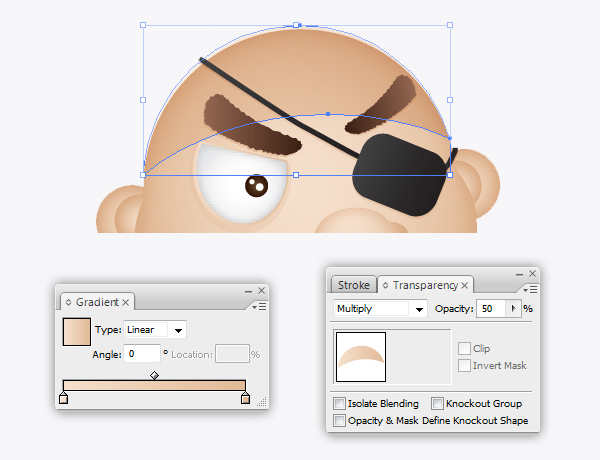
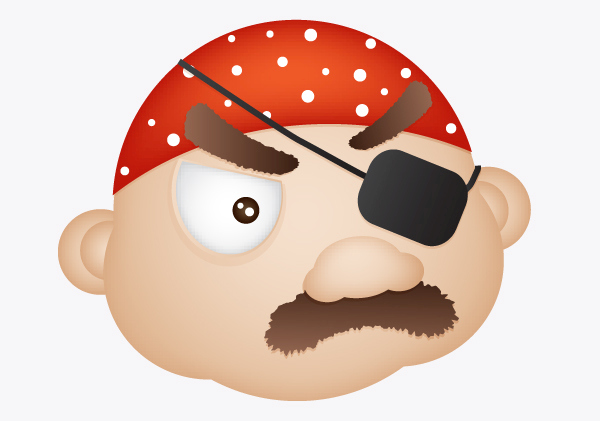
Let’s have fun with the bandana, pick the Pen tool (P) to create a shape as shown in the image below. Fill it with the gradient Skintone 12, apply the Blending mode Multiply and lower Opacity = 50%.
Duplicate (Ctrl / Cmd + C, Ctrl / Cmd + F) the bandana shape we have created and paste in front, move it up a little bit, apply the color #F05A28. Then change the Blending mode to Normal with Opacity = 100%. Go to Effect > Stylize > Inner Glow and set the values.
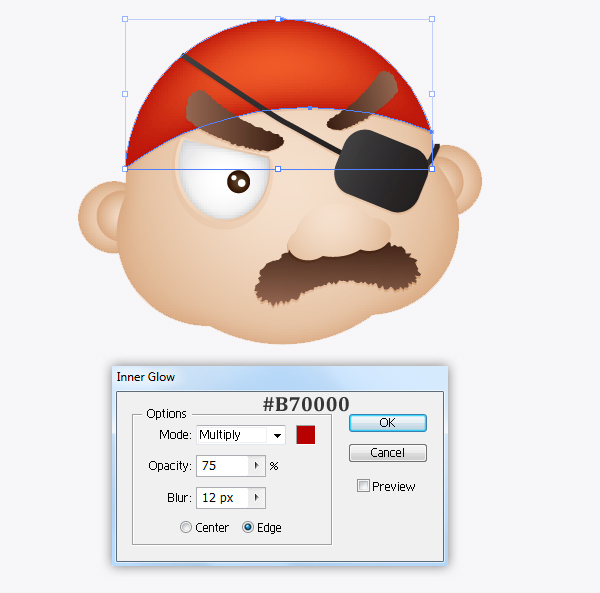
Let’s add some white dots to the pirate’s bandana, just use the Ellipse tool (L). Now you get a result like this.
Step 9
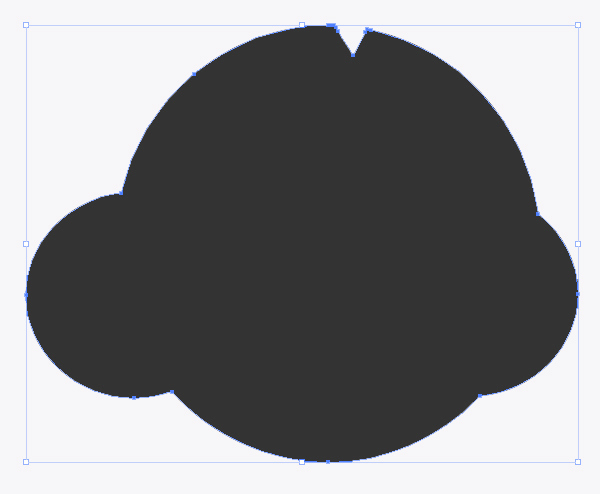
Ok, It’s time to add a cool three-cornered hat to our character. Pick the Pen tool (P) to create a shape as shown in the image below and fill it with #333333.
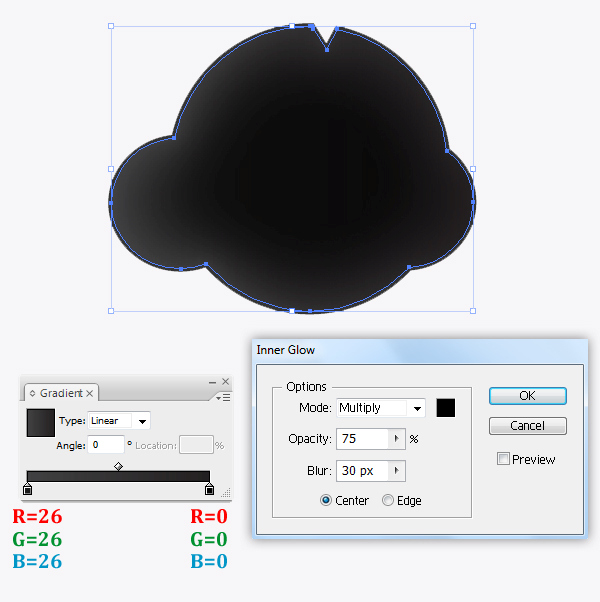
Duplicate (Ctrl / Cmd + C, Ctrl / Cmd + F) the copy shape and paste in front, resize it a little smaller. Fill it with the gradient shown in the image below, then go to Effect > Stylize > Inner Glow and set the values.
Once the hat is complete, we are going to add the skull head symbol. Just pick the Pen tool (P) to draw a shape as shown in the image below, then use the Ellipse tool (L) to create his eye.

Apply the gradient indicated for the crossed bones.
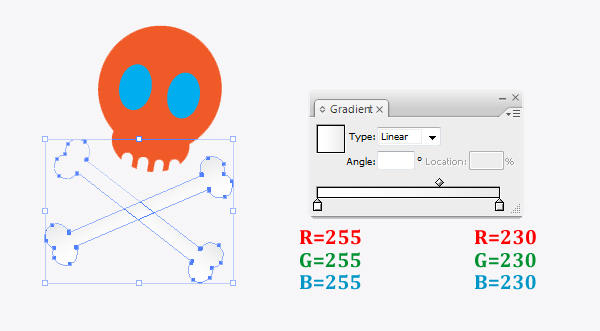
We continue to apply the same gradient for the skull and eyes, just change the Gradient angle to Radial.
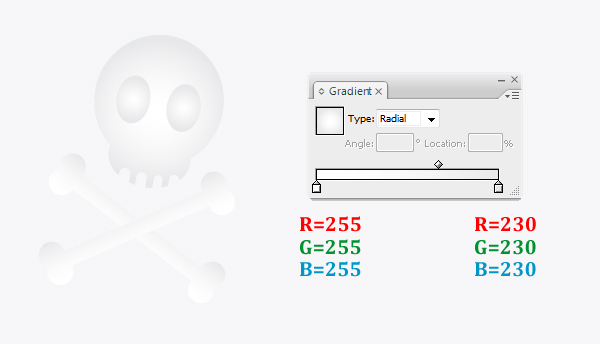
Now you should get the result shown in the image below.
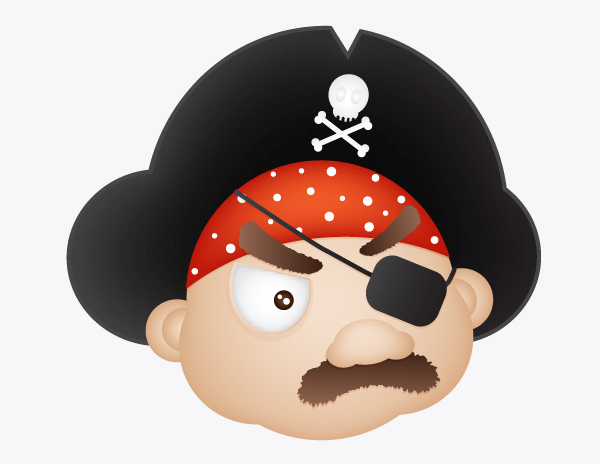
Step 10
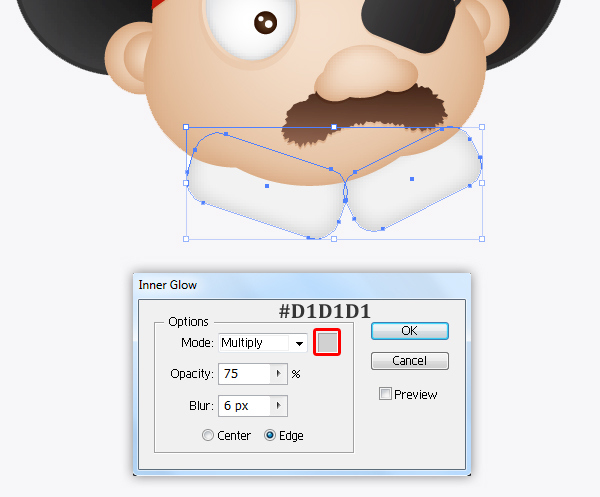
We’re going to draw the costume for our pirate. To start, the collar of the shirt is two rounded rectangles. Fill them with color #F2F2F2, then go to Effect > Stylize > Inner Glow and set the values.
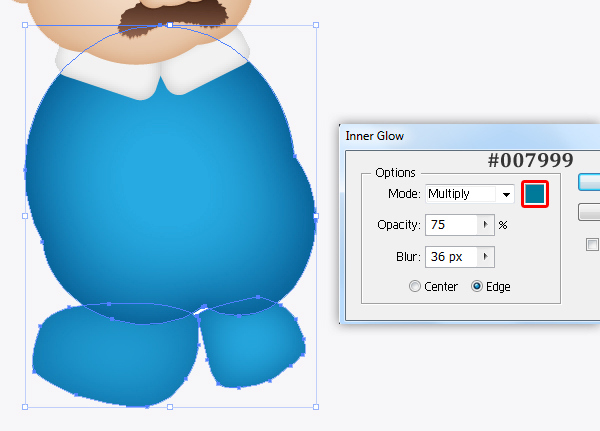
We continue with the waistcoat, pick the Pen Tool (P) to create the shapes shown in the image below and fill them with color #26A9E0, , then go to Effect > Stylize > Inner Glow and set the values.
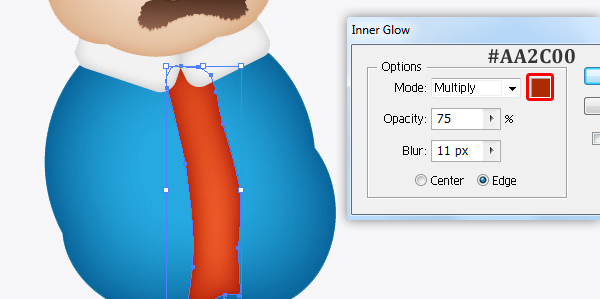
Grab the Pen Tool (P) to create a shape as shown in the image below and fill it with color #F05A28, then go to Effect > Stylize > Inner Glow and set the values.
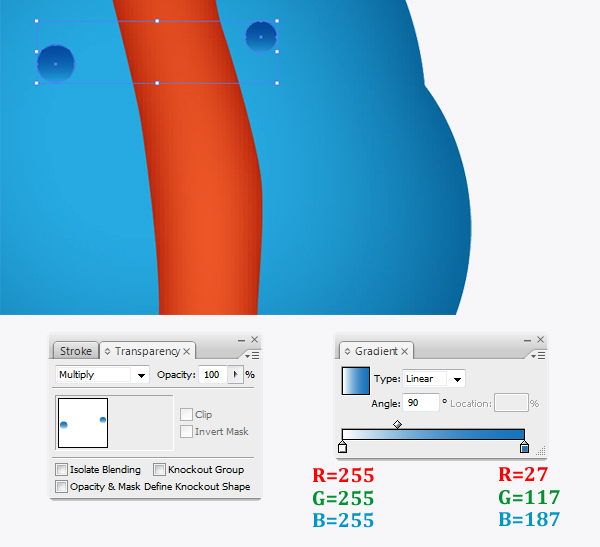
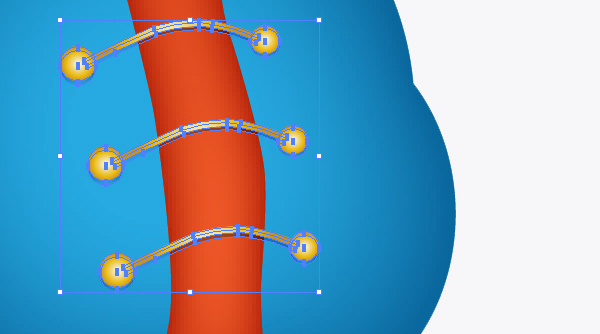
We’re going to create the fancy buttons for the waistcoat. Just use the Ellipse Tool (L) to create 2 circles as shown below, fill them with the gradient indicated then change the Blending mode to Multiply.
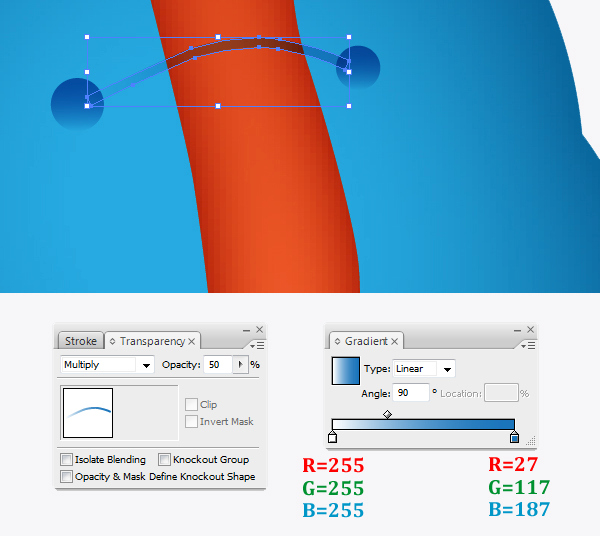
We continue to use the Pick Tool (P) to create a line as shown, fill it with the same gradient, then change the Blending mode to Multiply with lower Opacity = 50%.
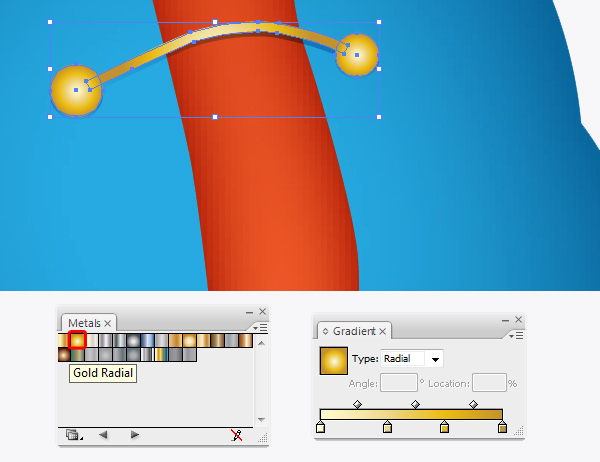
Duplicate (Ctrl / Cmd + C, Ctrl / Cmd + F) the fancy buttons shape we have created and paste in front, move it up a little bit. In the Swatches palette, go to Open Swatches Library > Gradients > Metals. Select Gold Radial for the buttons.Then change the Blending mode to Normal with Opacity = 100%.
Group (Ctrl+ G ) all the fancy buttons elements together. Then duplicate it 2 more times and place them as shown in the image below.
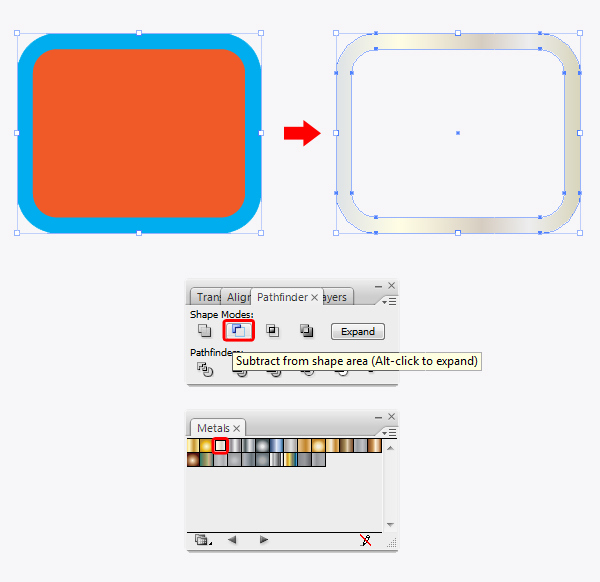
For the belt, use the Rounded Rectangle Tool (M) to draw two large rounded rectangles to create the buckle. Place as shown in the image below, and under the Pathfinder Panel hit the Subtract from shape area button. Make sure to expand the shape.
Select Object > Expand Appearance. It will turn the object into an editable shape. This shape represents the highlight on the plate. In the Swatches palette, go to Open Swatches Library > Gradients > Metals> White Gold.
Pick the Pen Tool (P) to create the belt shape. Apply the gradient indicated for the belt.
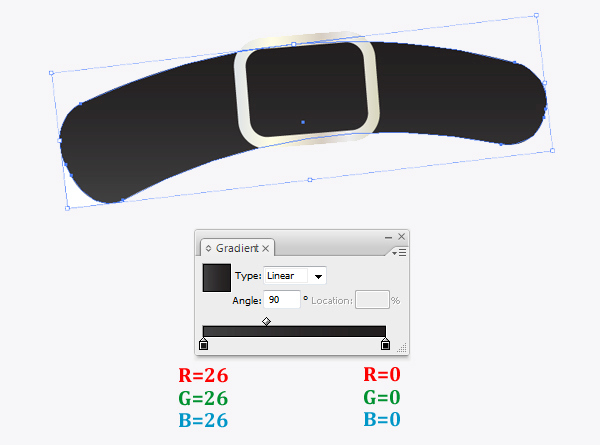
Place the belt as shown in the image below.

Now we create the sleeves, pick the Pen Tool (P) to draw a shape as shown in the image below, and fill it with color #26A9E0. Then go to Effect > Stylize > Inner Glow and set the values.
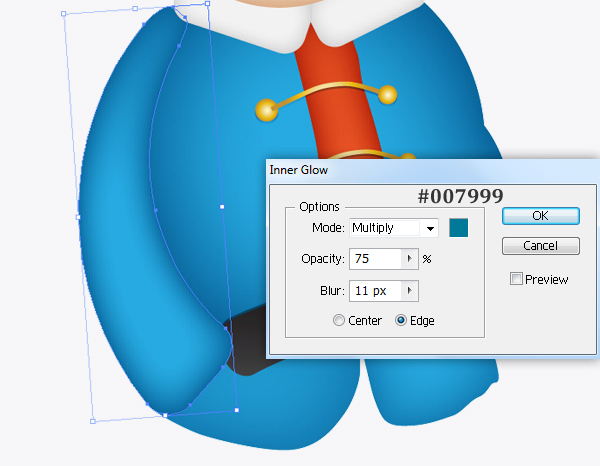
Continue working on the sleeves, pick the Pen Tool (P) to draw a new shape as shown in the image below, and fill it with color #F05A28. Then go to Effect > Stylize > Inner Glow and set the values.
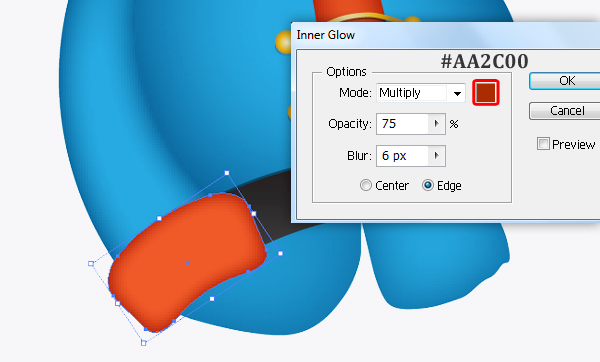
Use the Pen Tool (P) to draw a stripe as shown in the image below, fill it with color #F2F2F2.
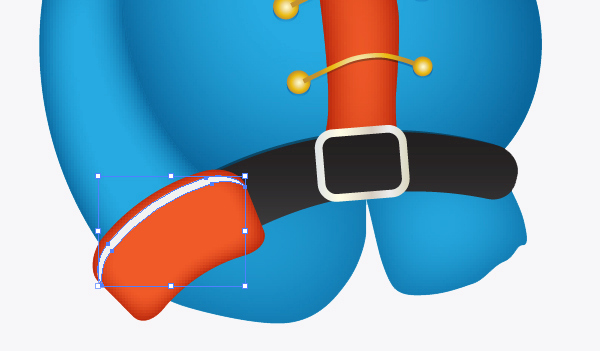
Now we duplicate the sleeves and pick th Reflect Tool (O) to reflect the copy shape.
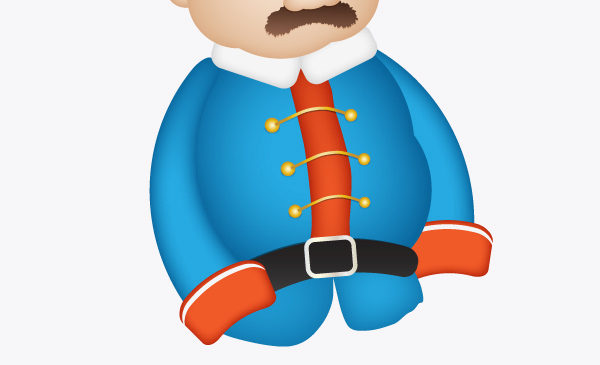
Step 11
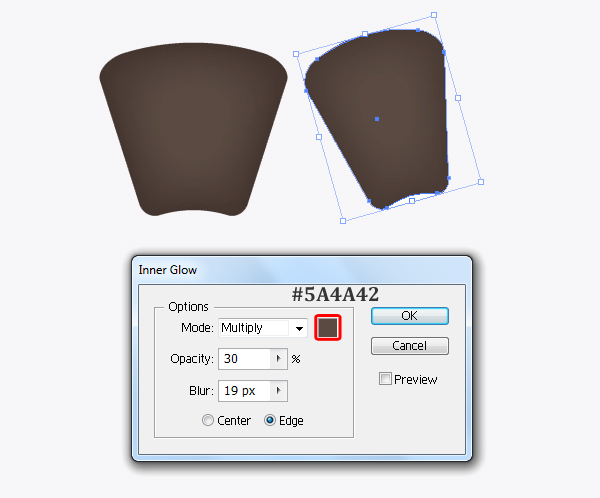
In this step, we’re going to draw the trousers, just pick the Pen Tool (P) to create two shapes as shown in the image below. Fill them with color #5A4A42. Then go to Effect > Stylize > Inner Glow and set the values.
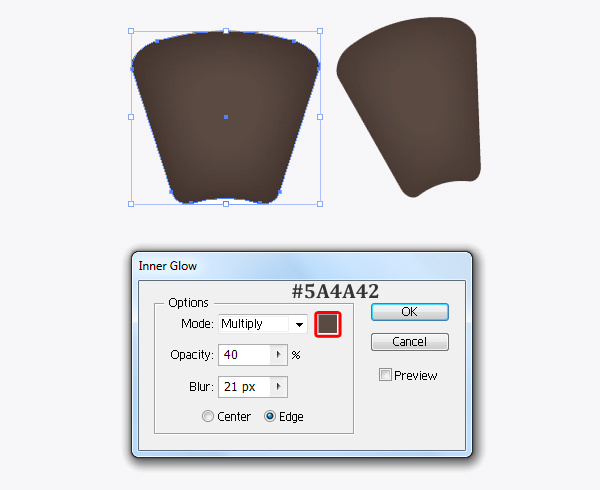
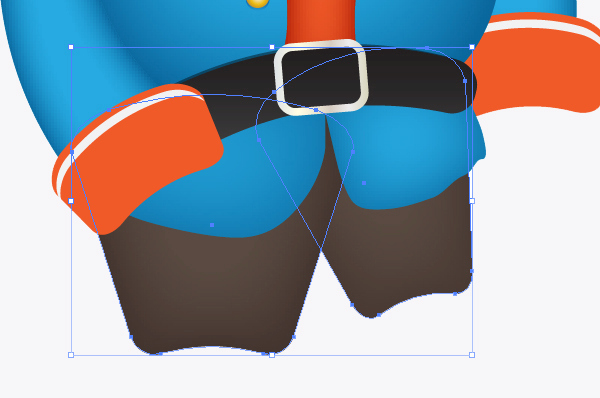
Now we place these shapes like this.
Step 12
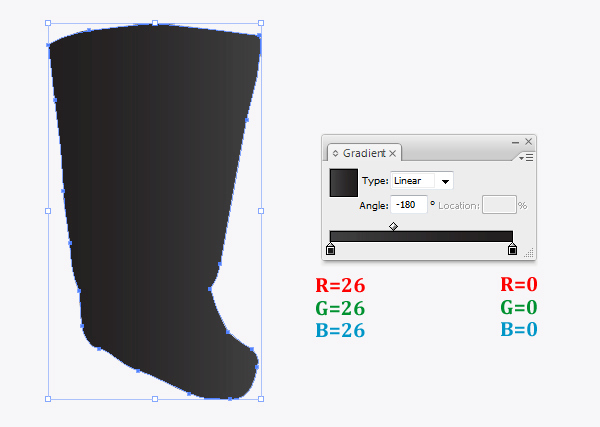
For the boots, we continue with the Pen Tool (P) to create the shape shown in the image below. Fill it with the gradient indicated.
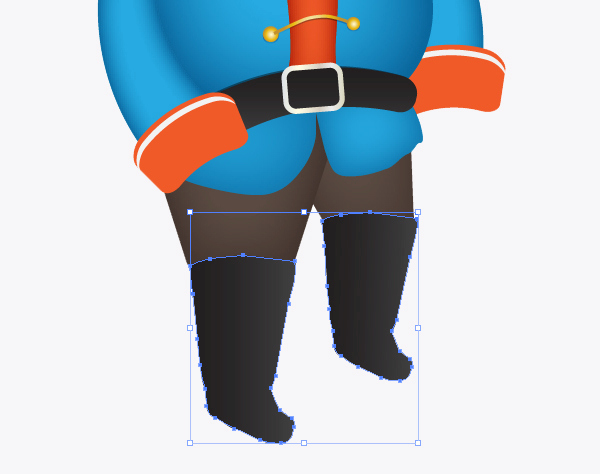
Duplicate (Ctrl / Cmd + C, Ctrl / Cmd + V) the boot shape we have created and place them like this.
Step 13
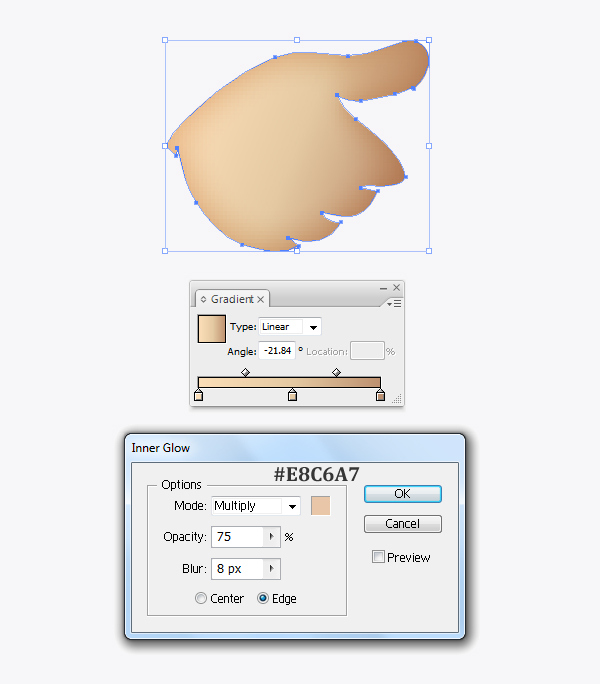
In this step, we’re going to create the pirate’s hand. Pick the Pen Tool (P) to create the hand shape and fill it with gradient Skintone 13. Then go to Effect > Stylize > Inner Glow and set the values.
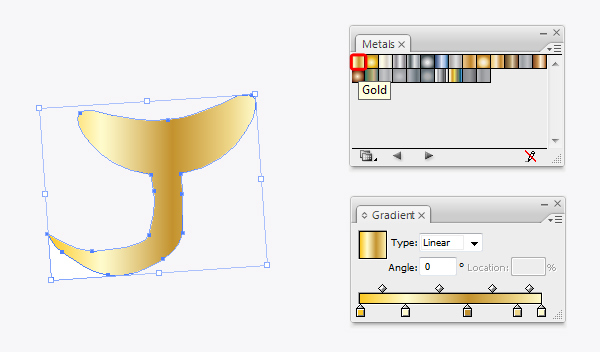
Pick the Pen Tool (P) to draw a hook for our pirate character. In the Swatches palette, go to Open Swatches Library > Gradients > Metals. We select Gold for the hook.
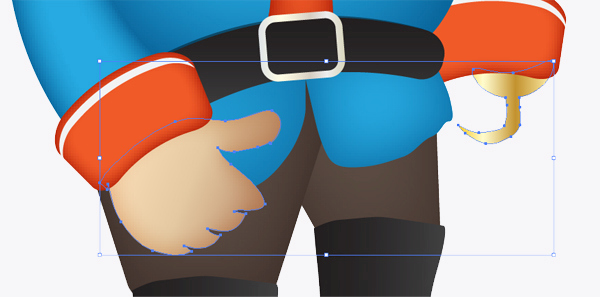
Now we place the hand and hook as in this image.
Step 14
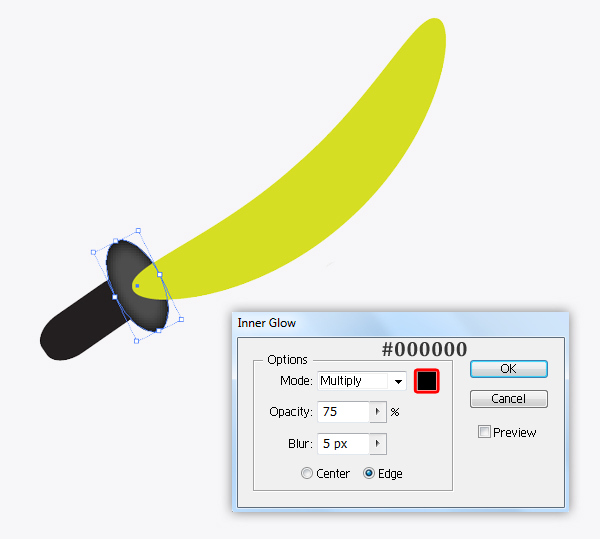
Now we’re going to create a sword for our pirate character. Grab the Pen Tool (P) to draw the outline as shown in the image below.

Fill with color #231F20 for the sword’s handle. And with the cross-guard selected, we fill it with color #4D4D4D, then go to Effect > Stylize > Inner Glow and set the values.
Apply the gradient Silver for sword’s blade.
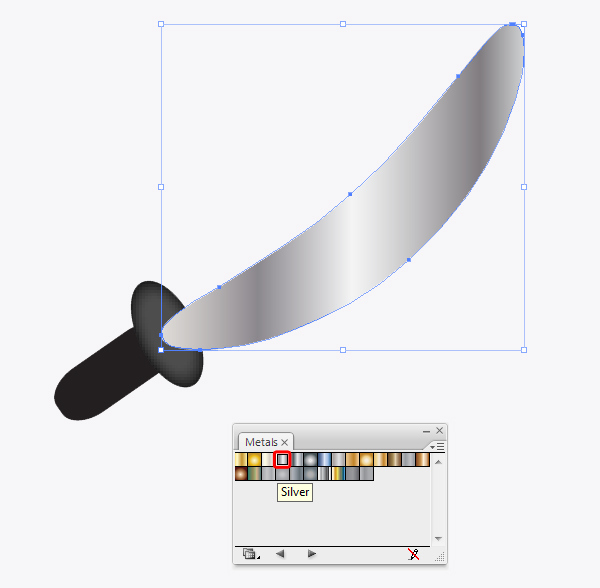
With the sword’s blade still selected, go to Object > Path > Offset Path.
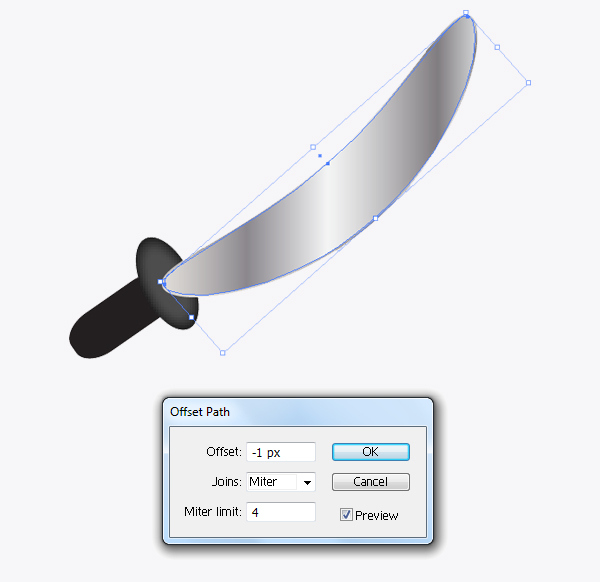
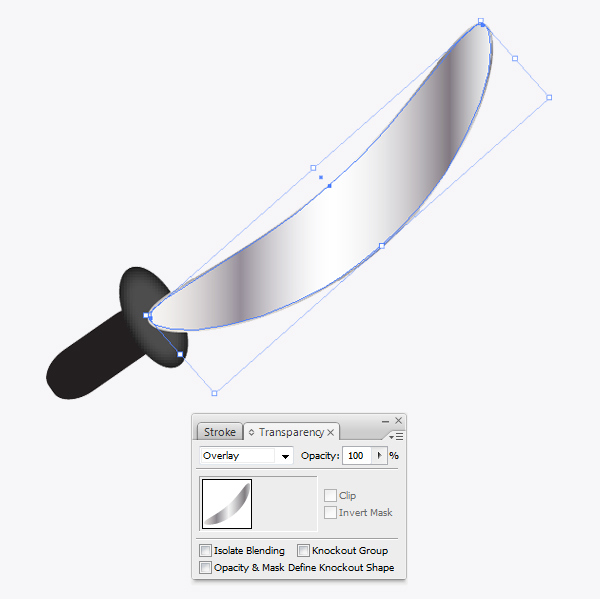
We want the sword’s blade color to be much lighter than it is so duplicate ( Ctrl / Cmd + C, Ctrl / Cmd + F) it and change Blending Mode to Overlay.
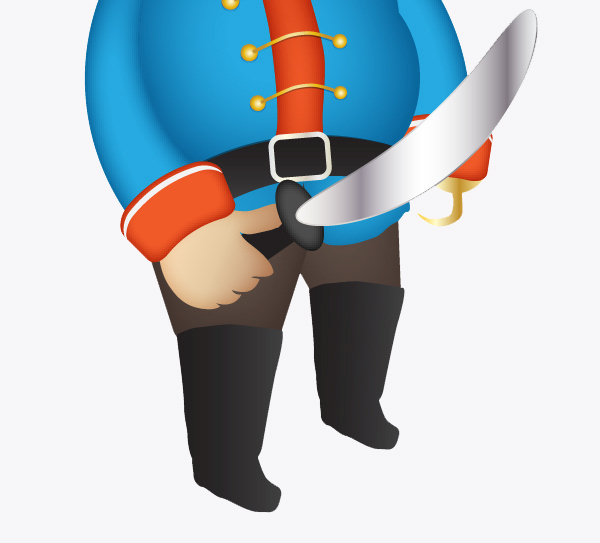
Now we place the sword as shown in the image below.
Step 15
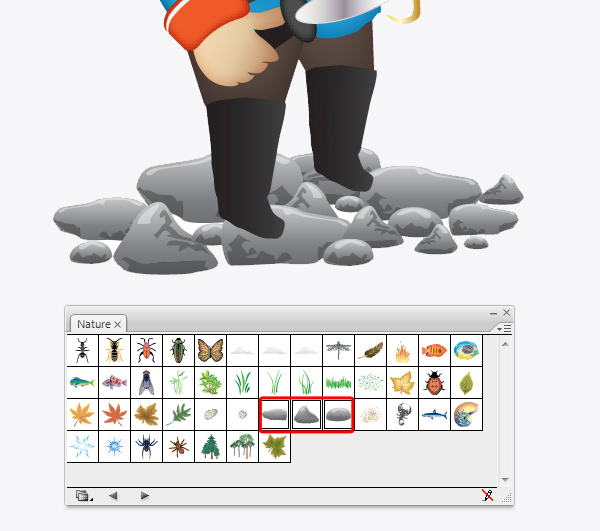
In the Symbol palette, go to Open Symbol Library >Nature . Pick the symbols Rock 3, Rock 4, Rock 5 and place them as shown below.
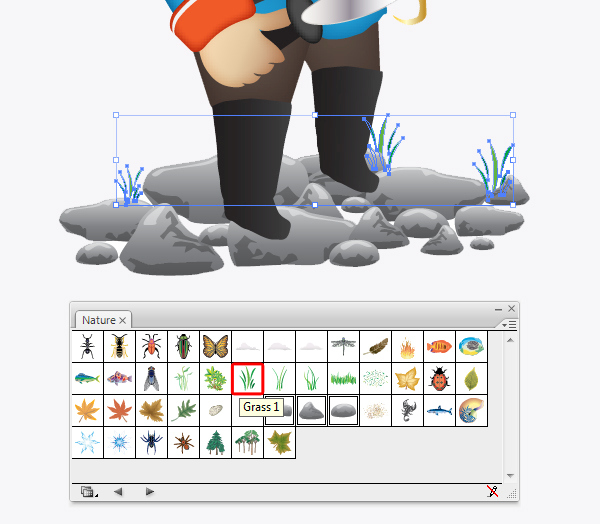
We continue working with the symbols, now we pick Grass 1 and place it like this.
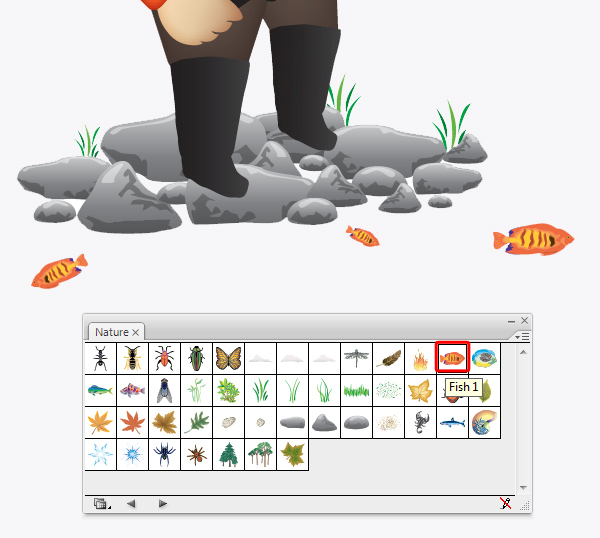
Now we pick the Fish 1 and place it like this.
I want to add some water and place it under the rocks. Pick the Pen Tool (P) and draw a shape as shown in the image below. In the Swatches palette, go to Open Swatches Library > Gradients > Pastels. We select the gradient Blue for the water.
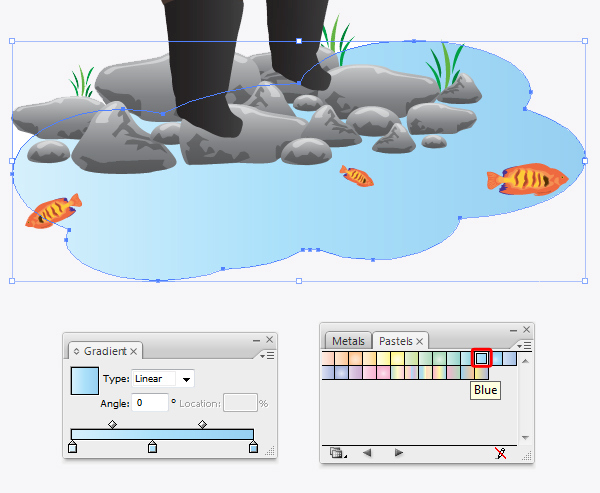
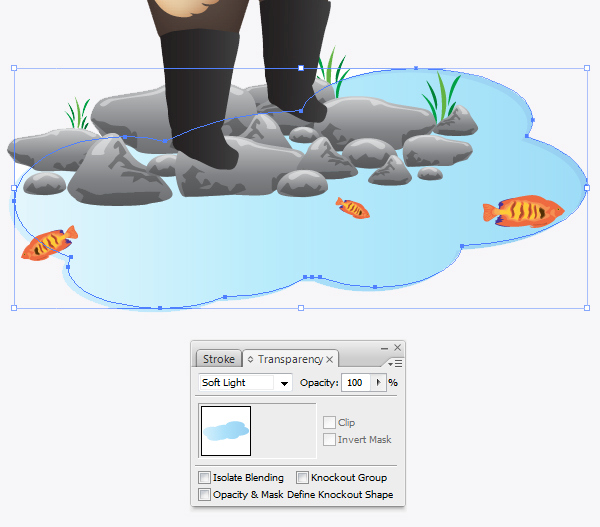
Duplicate (Ctrl / Cmd + C, Ctrl / Cmd + V) the water and paste it in front, move the copy to the right side a little bit. Then change the Blending mode to Softlight for the copy.
And We’re Done!
Here is how it should look. I hope you’ve enjoyed this tutorial and can apply these techniques in your future projects.
