In this Illustrator tutorial you will learn how to draw a pack of six sport icons.
Each icon is made up of two main parts, the court and the ball. During the process we will see how easy it is to use some basic shapes, the Align and the Pathfinder palette, Offset Path, Blend along with some other useful functions of Adobe Illustrator to create some great looking icons. That being said, open up Illustrator and let’s get started.
Final Image
As always, this is the final image that we’ll be creating:

Tutorial Details
- Program: Adobe Illustrator CS6
- Estimated Completion Time: 120 minutes
- Difficulty: Beginner-Intermediate
Step 1
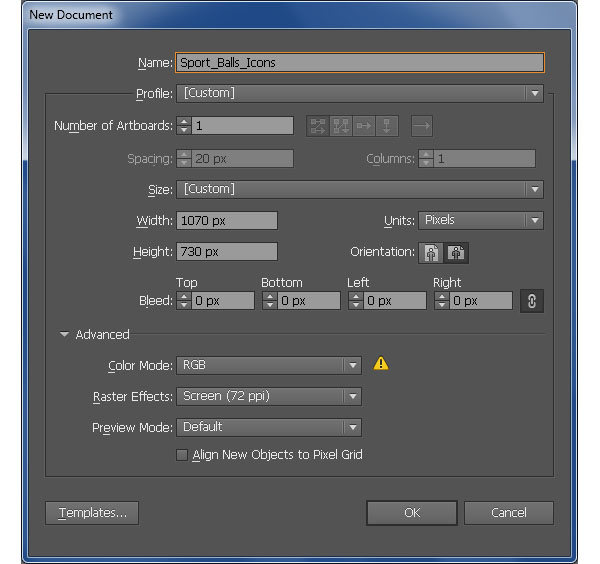
Launch Illustrator and then press (Ctrl + N) to create a New document. Select Pixels from the Units drop-down menu, enter 1070 in the width box and 730 in the height box then click on the Advanced button. Select RGB, Screen (72ppi) and make sure that the Align New Objects to Pixel Grid box is unchecked before you click OK.
Step 2
First of all, we’ll create the base of the icons.
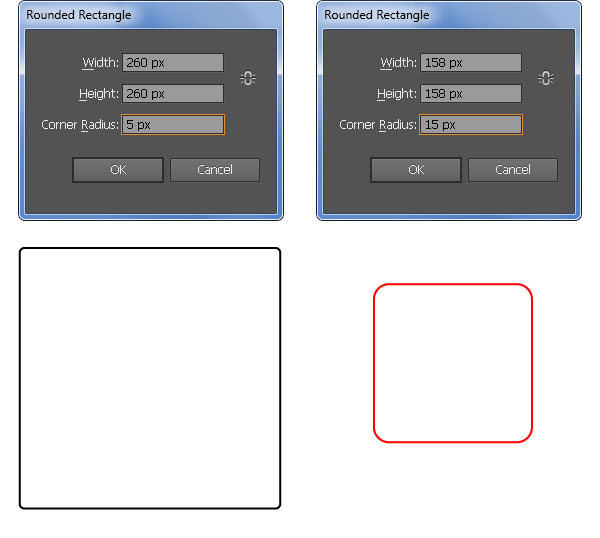
Pick the Rounded Rectangle Tool from the Tool palette, click on your artboard and enter the data as shown in the first image below, then click OK.
Keep working with the Rounded Rectangle Tool, create another rectangle as you see in the second image.
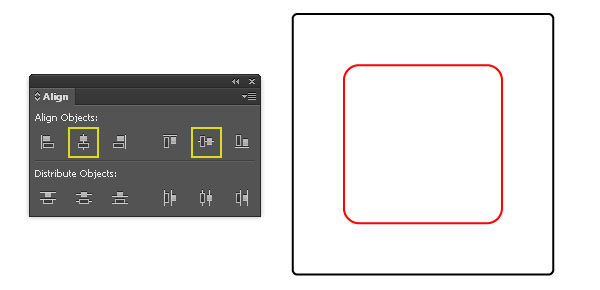
Now select the two newly created rectangles, open the Align palette (Window > Align) and click on the Horizontal Align Center button, then click on the Vertical Align Center button.
Step 3
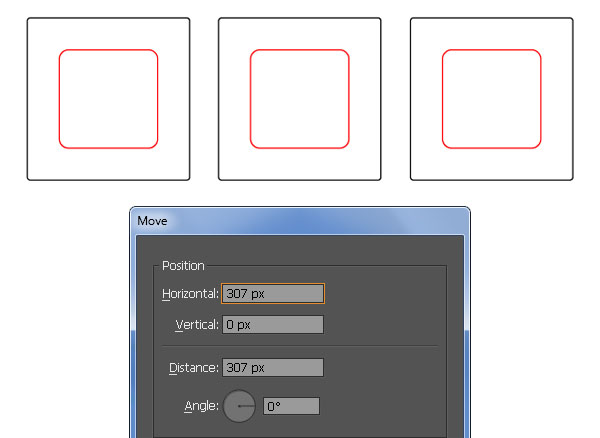
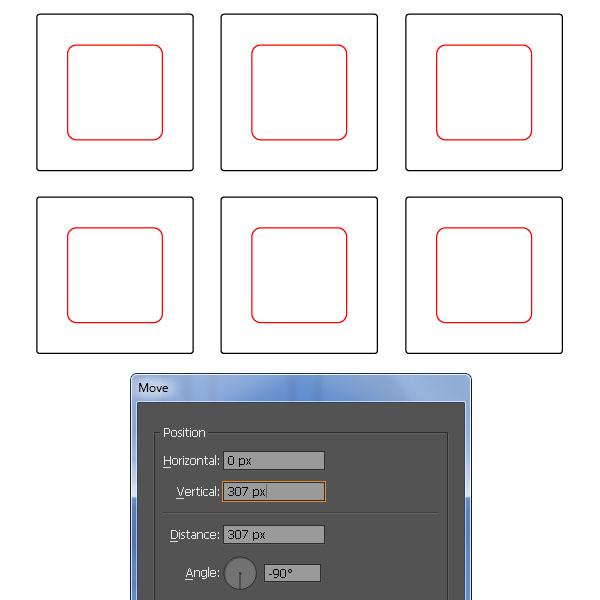
Select the two rectangles created in Step 2 and go to Object > Transform > Move… Enter 307 in the Horizontal box and click Copy, then press (Ctrl +D) once to get the result shown below.
Next select the six rectangles created from beginning of Step 2 and go to Object > Transform > Move… Enter 307 in the Vertical box and click Copy.
Step 4
We’re done with the base of the icons. Let’s start by creating the volleyball icon.
Pick the Rectangle Tool (M) and make an orange rectangle: 28 by 28px.
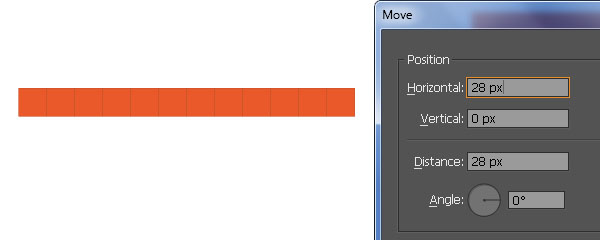
Reselect the newly created rectangle and go to Object > Transform > Move… Enter 28 in the Horizontal box and click Copy, then press (Ctrl +D) ten times to get the result shown in the second image below.
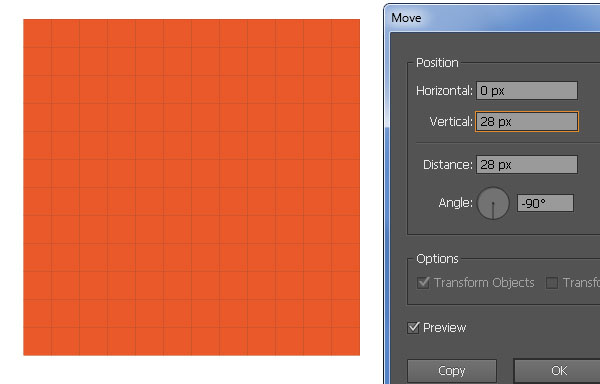
Next select all rectangles created in this step and go to Object > Transform > Move… Enter 28 in the Vertical box and click Copy, then press (Ctrl +D) ten times to get the result you see in the last image.
Finally select and group (Ctrl +G) all rectangles created in this step.

Step 5
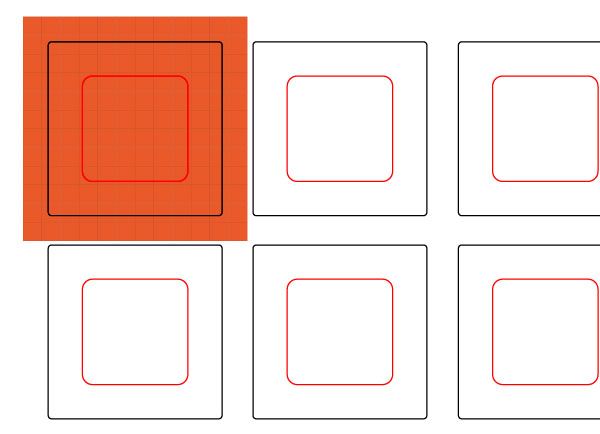
Place the group created in Step 4 in the position shown in the first image below.
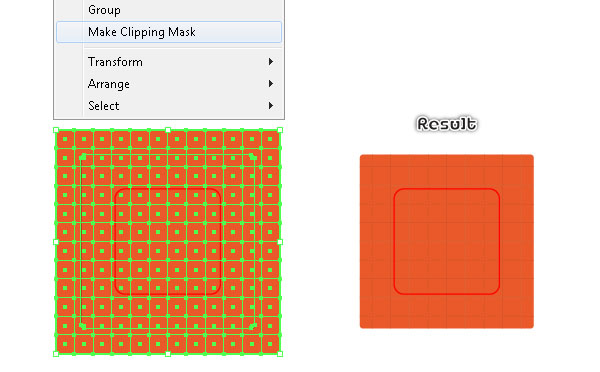
Make sure that this group is still selected, hold down the Shift key and click on the black rectangle, then go to Object > Clipping Mask > Make (Ctrl +7).
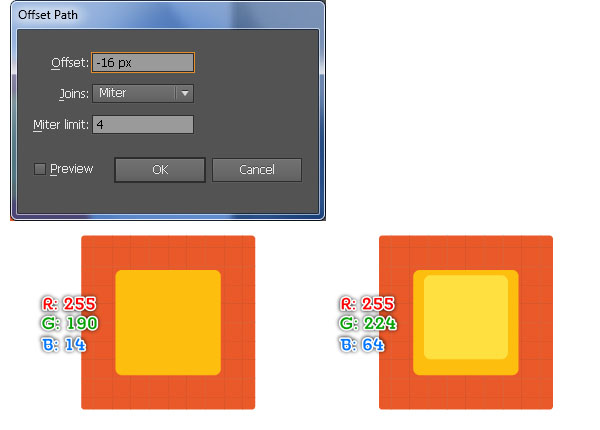
The resulting object should look like the third image below. Select the red rectangle and fill it with R=255, G=190, B=14, then remove the stroke of the resulting rectangle.
Still having the yellow rectangle selected and go to Object > Path > Offset Path… Enter a -16px Offset and click OK.
Then replace the existing color of the newly created rectangle with R=255, G=224, B=64 and move it 8px up.
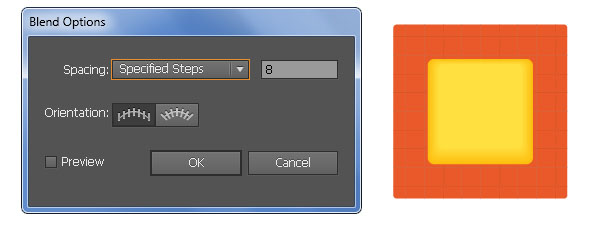
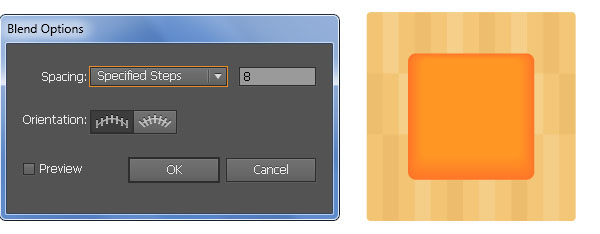
Now reselect the two yellow rectangles created in this step and go to Object > Blend > Blend Options… Follow the data shown in the last image and click OK, then go to Object > Blend > Make (Ctrl +Alt +B).
Step 6
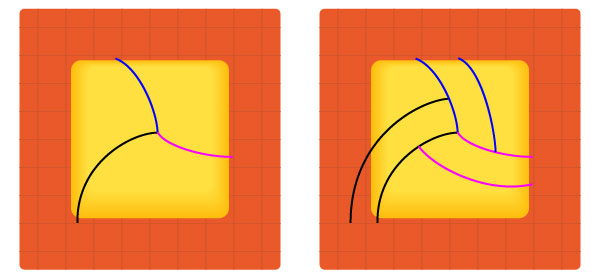
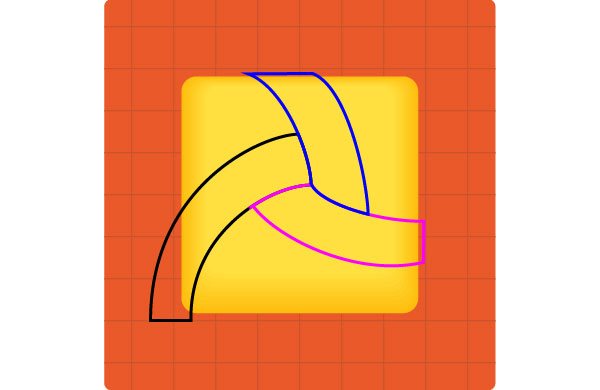
With the help of the Pen Tool (P) create six curved paths as shown in the first and the second image. Once your paths are drawn, reselect the two black paths.
Right-click on the artboard and then select the Join section from the drop-down menu.
Next right-click on the artboard again, then select the Join section.
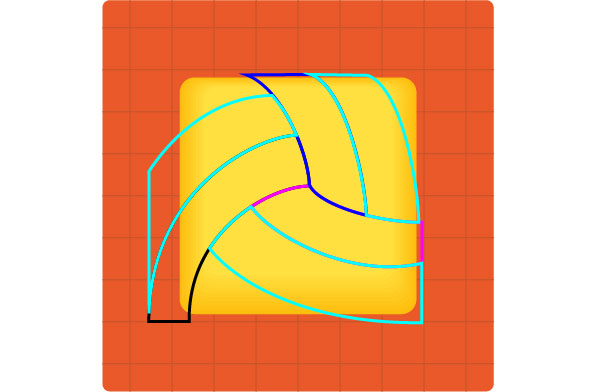
Repeat the same techniques for the remaining four curved paths. You should end up with something like the third image.
Continue with the Pen Tool (P) create three turquoise objects as you see in the fourth image.
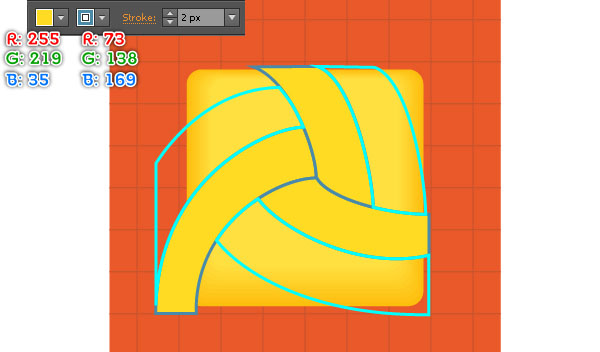
Now select the black, the blue and the magenta object created in this step and fill them with R=255, G=219, B=35, then add a 2px stroke (R=73, G=138, B=169) to the resulting shapes.
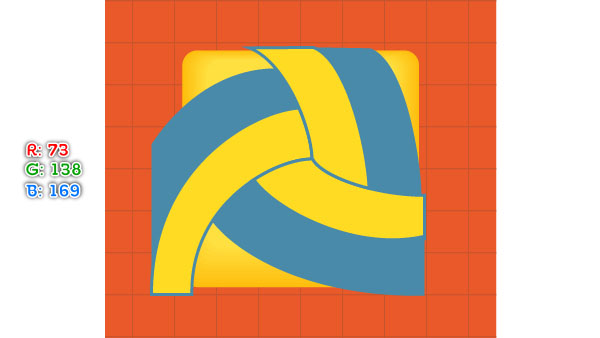
Next select the three turquoise objects and fill them with R=73, G=138, B=169, then remove their strokes.
Finally select and group (Ctrl +G) all six shapes created in this step.
Step 7
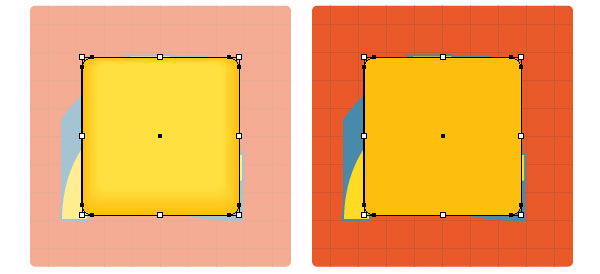
Pick the Selection Tool (V) and double-click on the blended object created in Step 5. Select the bigger yellow rectangle and press (Ctrl +C) to copy it. Double-click anywhere outside of the blended object.
Next select the group created in Step 6 and then press (Ctrl +F) to paste the copy in front of this group.
Keep this yellow rectangle selected and make a copy (Ctrl +C, Ctrl +F) of it, then press (Ctrl +3) to hide this copy.
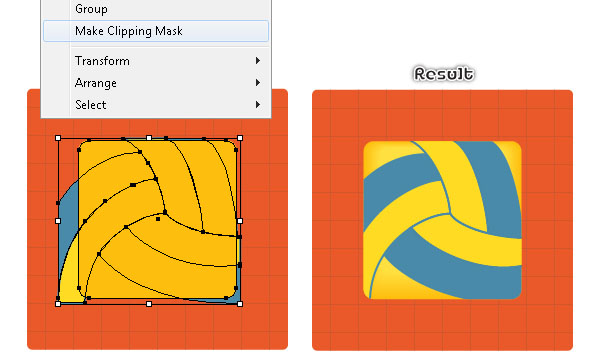
Reselect the original yellow rectangle and the group created in Step 6 again, then go to Object > Clipping Mask > Make (Ctrl +7).
The resulting object should look like the fourth image below. Before you continue, press (Ctrl +Alt +3) to show the yellow rectangle hidden in this step.
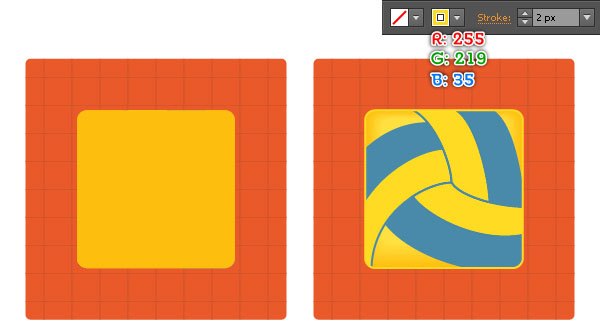
Keep this rectangle selected and add a 2px stroke (R=255, G=219, B=35), then remove the fill color.
Step 8
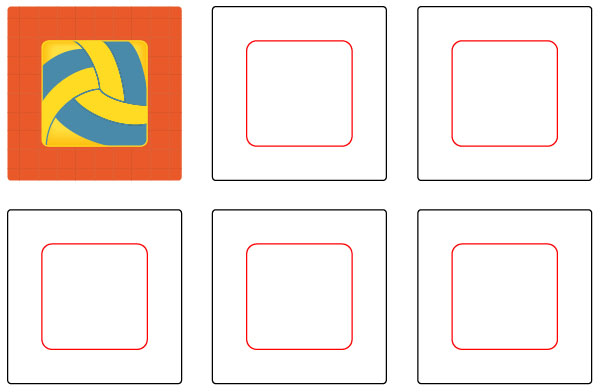
The volleyball icon is ready and looks like this:
Step 9
Next comes the American football icon. Pick the Rectangle Tool (M) and make a green rectangle: 53 by 393px.
Reselect the newly created rectangle and go to Object > Transform > Move… Enter 53 in the Horizontal box and click Copy, then press (Ctrl +D) five times to get the result shown in the second image below.
Next select the three rectangles as shown in the third image and replace the existing fill color of them with R=0, G=146, B=63.
Finally pick the Line Segment Tool (\) and created some vertical white lines as you see in the last image.
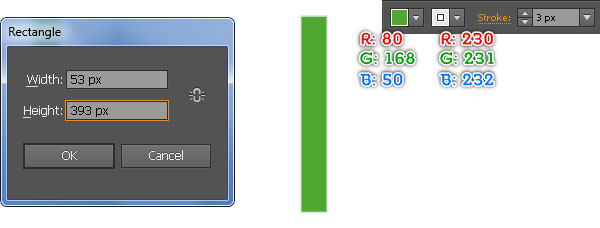
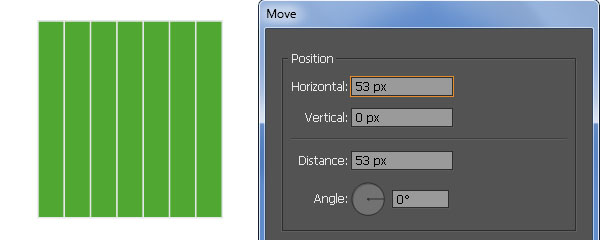
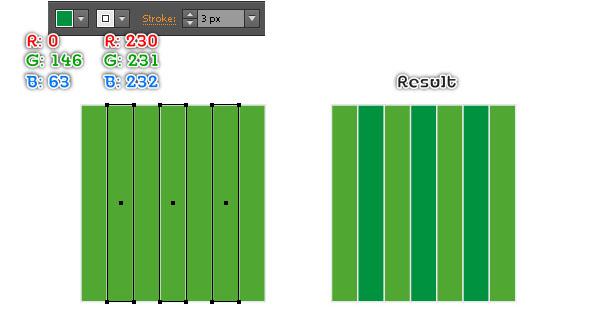
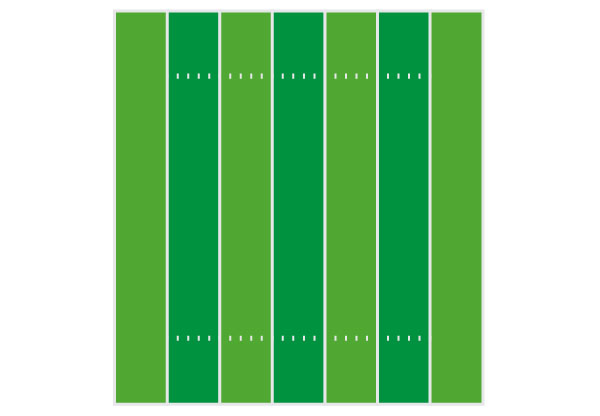
Step 10
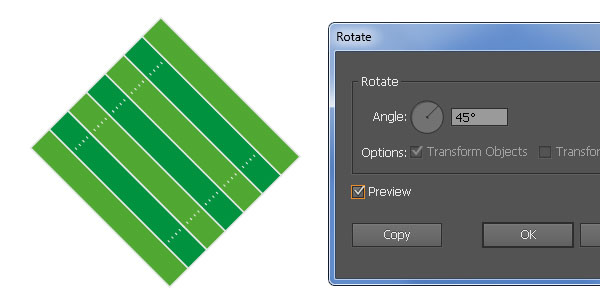
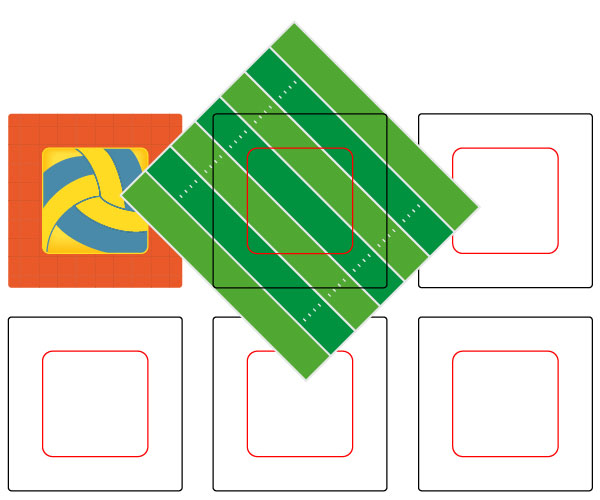
Select and group (Ctrl +G) all objects created in Step 9, then go to Object > Transform > Rotate… Enter a 45 degrees Angle and click OK, then place this group in the position shown in the second image.
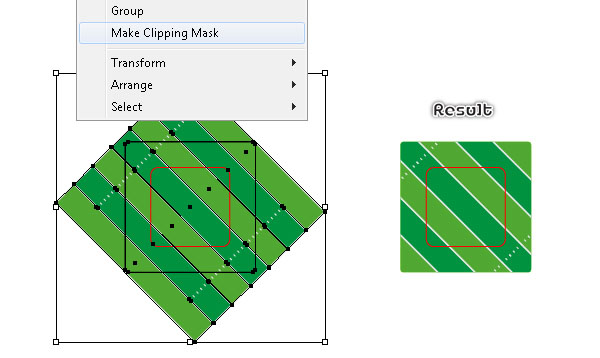
Make sure that the newly created group is still selected, hold down the Shift key and click on the black rectangle, then go to Object > Clipping Mask > Make (Ctrl +7).
The resulting object should look like the last image below.
Step 11
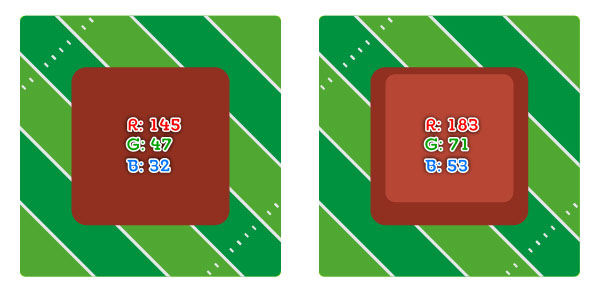
Select the red rectangle and fill it with R=145, G=47, B=32, then remove the stroke.
Keep the resulting rectangle selected and go to Object > Path > Offset Path… Enter a -16px Offset and click OK.
Then replace the existing color of the newly created rectangle with R=183, G=71, B=53 and move it 8px up.
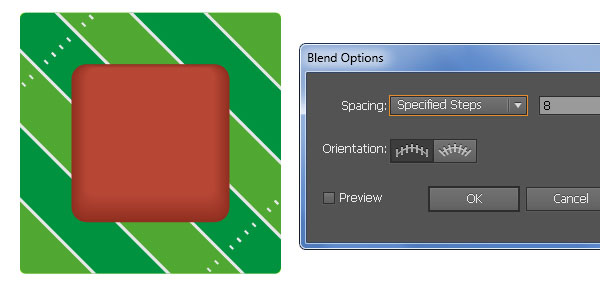
Now reselect the two rectangles just filled in this step and go to Object > Blend > Blend Options… Follow the data shown in the last image and click OK, then go to the Object > Blend > Make (Ctrl +Alt +B).
Step 12
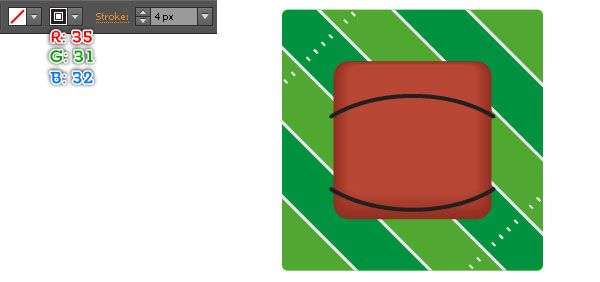
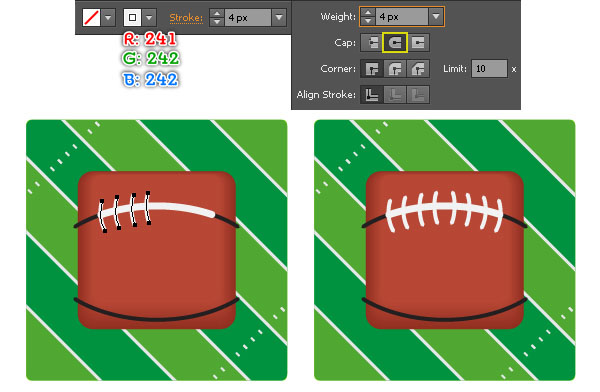
Draw two curved paths with the Pen Tool (P) and give them a 4px black Stroke for the moment.
Reselect the upper path and make a copy (Ctrl +C, Ctrl +F).
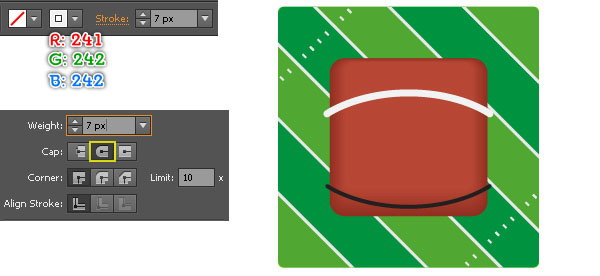
Replace the existing stroke color of the copy with white and change the stroke weight to 7px.
Keep this white curved path selected, open the Stroke palette (Window > Stroke) and click on the Round Cap button.
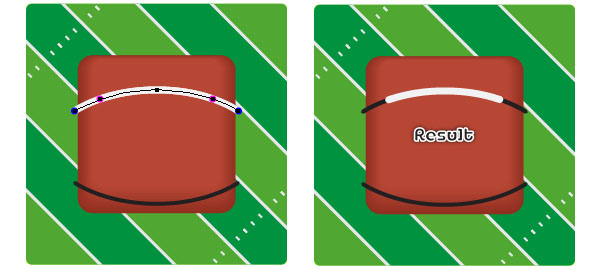
Focus on the third image, with the help of the Add Anchor Point Tool (+), add two anchor points at the points highlighted with magenta.
Next select and remove the two anchor points highlighted with black.
The resulting path should look like the fourth image below.
Continue with the Pen Tool (P) to create four white curved paths as you see in the fifth image.
Once your paths are drawn, reselect them and make a copy (Ctrl +C, Ctrl +F) of these paths.
Make sure that the copies are still selected, reflect them vertically, then move them to the right.
Finally select and group (Ctrl +G) all curved paths created in this step.
Step 13
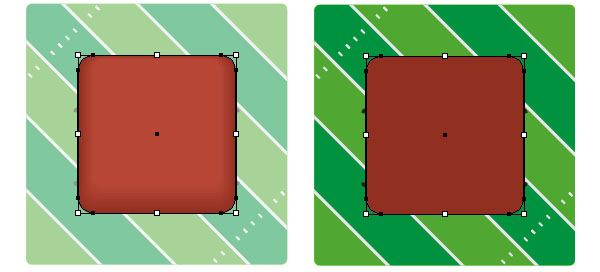
Pick the Selection Tool (V) and double-click on the blended object created in Step 11.
Select the bigger rectangle and press (Ctrl +C) to copy it, then double-click anywhere outside of the blended object.
Next select the group created in Step 12 and press (Ctrl +F) to paste the copy in front of this group.
Keep this dark red rectangle selected and make a copy (Ctrl +C, Ctrl +F) of it, then press (Ctrl +3) to hide the copy.
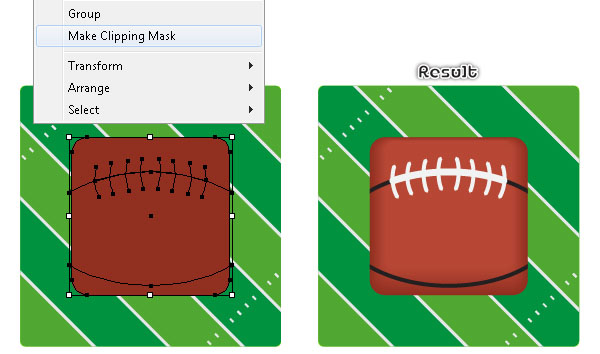
Reselect the original dark red rectangle and the group created in Step 11 again, then go to Object > Clipping Mask > Make (Ctrl +7).
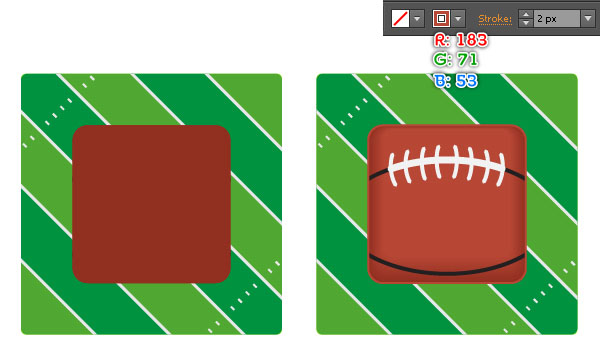
The resulting object should look like the fourth image below. Before you continue, press (Ctrl +Alt +3) to show the dark red rectangle hidden in this step.
Keep this rectangle selected and add a 2px stroke (R=183, G=71, B=53), then remove the fill color.
Step 14
The American football icon is ready and looks like this:
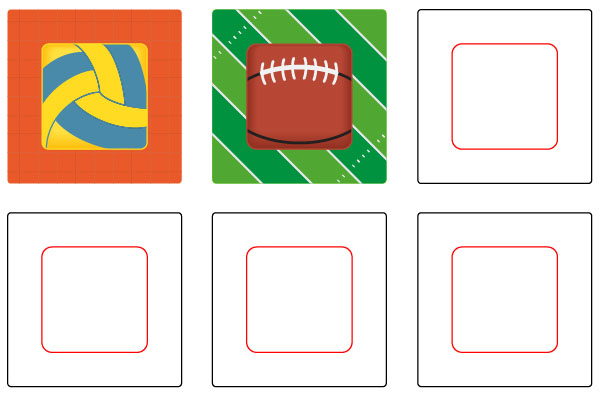
Step 15
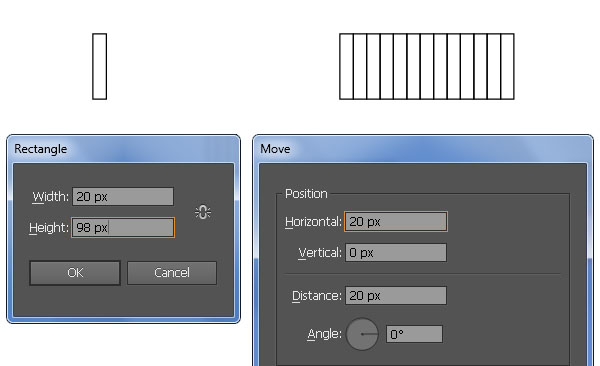
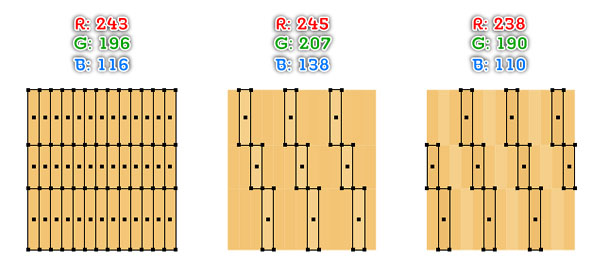
We will continue with the basketball icon. Pick the Rectangle Tool (M) and create a 20 by 98px rectangle.
Reselect the newly created rectangle and go to Object > Transform > Move… Enter 20 in the Horizontal box and click Copy, then press (Ctrl +D) eleven times to get the result shown in the second image.
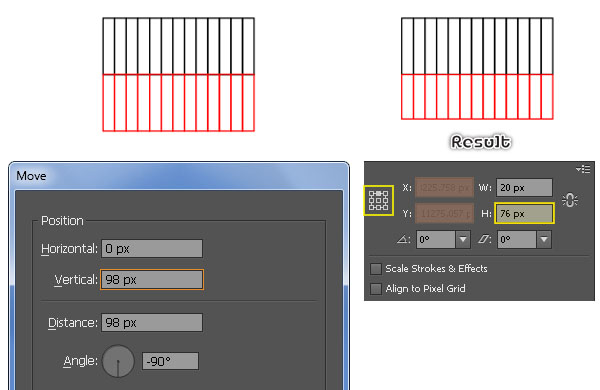
Select all black rectangles created in this step and go to Object > Transform > Move… Enter 98 in the Vertical box and click Copy, then replace the existing stroke color of the copies with red.
Keep these red rectangles selected, open the Transform palette (Window > Transform) and set the transfer reference point to top-center, then change H to 76px.
The resulting rectangles should look like the fourth image below.
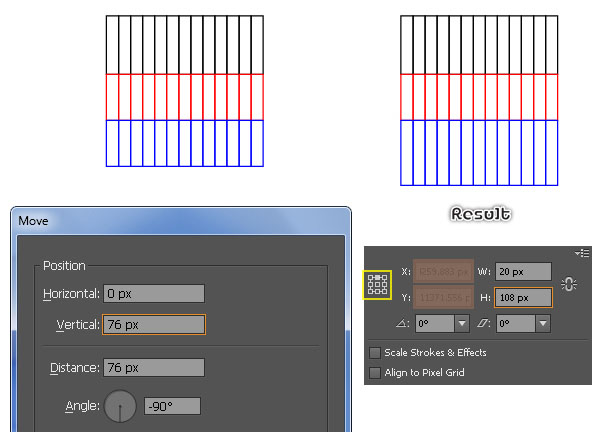
Now reselect all red rectangles created in this step and go to Object > Transform > Move… Enter 76 in the Vertical box and click Copy, then replace the existing stroke color of the copies with blue.
Keep these blue rectangles selected, open the Transform palette (Window > Transform) and set the transfer reference point to top-center, then change H to 108px.
Step 16
Select all rectangles created in Step 15 and fill them with R=243, G=196, B=116, then remove the stroke of these rectangles.
Select nine rectangles as shown in the second image and replace the existing color of them with R=245, G=207, B=138.
Next select ten rectangles as shown in the third image and replace the existing color of them with R=238, G=190, B=110.
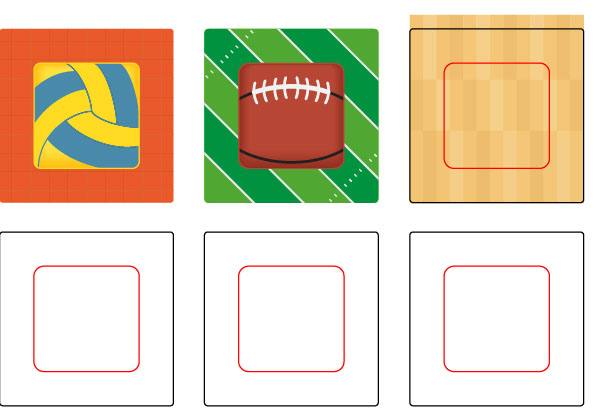
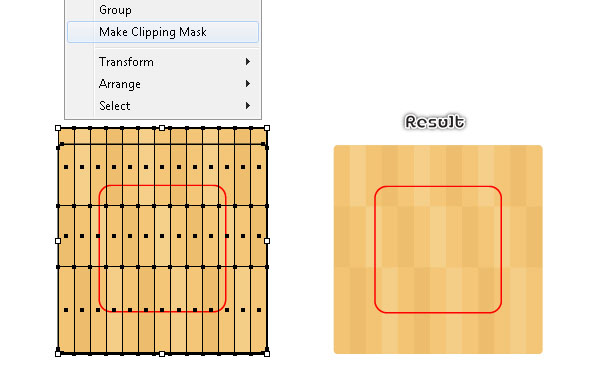
Now select and group (Ctrl +G) all rectangles created from the beginning of Step 15, then place this group om the position shown in the fourth image below.
Make sure that the newly created group is still selected, hold down the Shift key and click on the black rectangle, then go to Object > Clipping Mask > Make (Ctrl +7).
The resulting object should look like the last image below.
Step 17
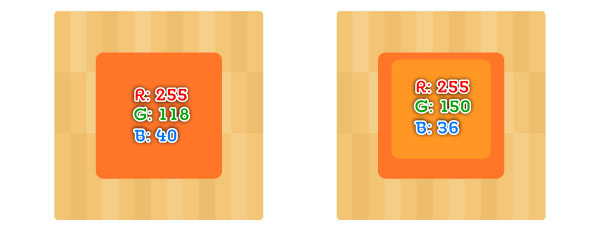
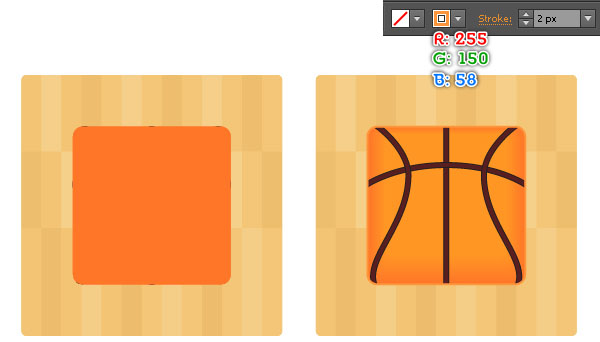
Select the red rectangle and fill it with R=255, G=118, B=40, then remove the stroke.
Keep this orange rectangle selected and go to Object > Path > Offset Path… Enter a -16px Offset and click OK.
Then replace the existing color of the newly created rectangle with R=255, G=150, B=36 and move it 8px up.
Finally reselect the two rectangles just filled in this step and create a blend between them.
Step 18
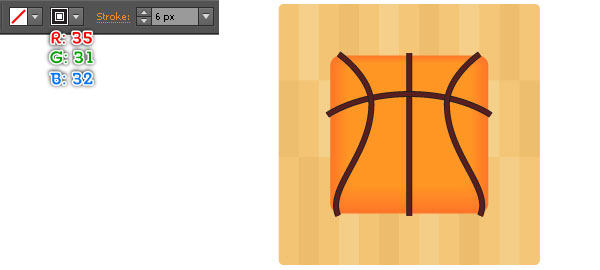
With the help of the Pen Tool (P) create three paths as you see in the first and the second images.
Once your paths are drawn, reselect the green curved path and make a copy (Ctrl +C, Ctrl +F) of it.
Reflect this copy vertically and move it to the right.
Finally select all paths created in this step and add a 6px black stroke to them, then group (Ctrl +G) these paths.

Step 19
Pick the Selection Tool (V) and double-click on the blended object created in Step 17.
Select the bigger orange rectangle and press (Ctrl +C) to copy it. Double-click anywhere outside of the blended object.
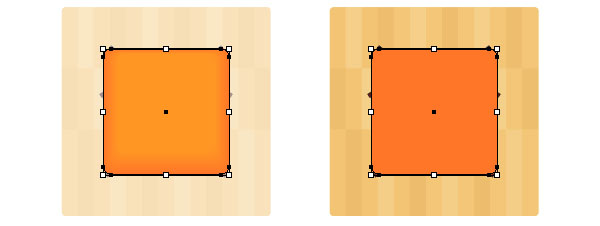
Next select the group created in Step 18 and press (Ctrl +F) to paste the copy in front of this group.
Keep this orange rectangle selected and make a copy (Ctrl +C, Ctrl +F) of it, then press (Ctrl +3) to hide this copy.
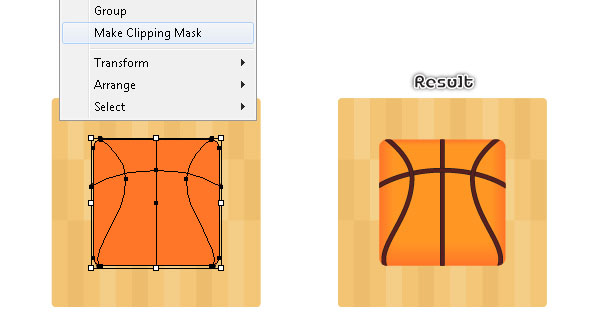
Reselect the original orange rectangle and the group created in Step 17 again, then go to Object > Clipping Mask > Make (Ctrl +7).
The resulting object should look like the fourth image below. Before you continue, press (Ctrl +Alt +3) to show the orange rectangle hidden in this step.
Keep this rectangle selected and add a 2px stroke (R=255, G=150, B=58), then remove the fill color.
Step 20
The basketball icon is ready and looks like this:
Step 21
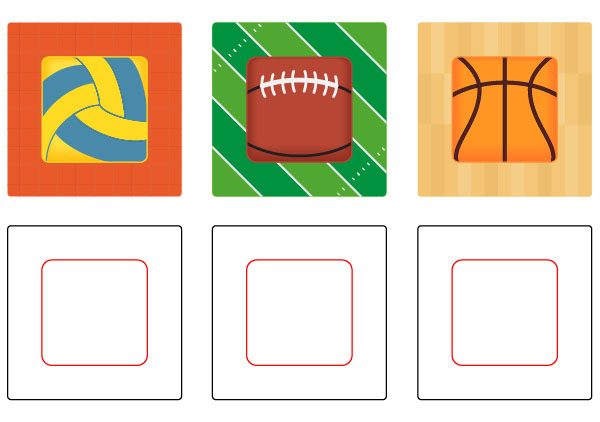
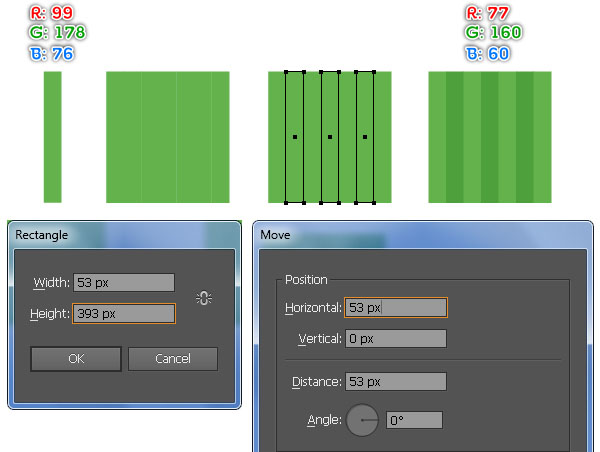
It’s time to draw the baseball icon. Pick the Rectangle Tool (M) and make a green rectangle: 53 by 393px.
Reselect the newly created rectangle and go to Object > Transform > Move… Enter 53 in the Horizontal box and click Copy, then press (Ctrl +D) five times to get the result shown in the second image below.
Next select three rectangles as shown in the third image and replace the existing fill color of them with R=77, G=160, B=60.
Finally select and group (Ctrl +G) all rectangles created in this step.
Step 22
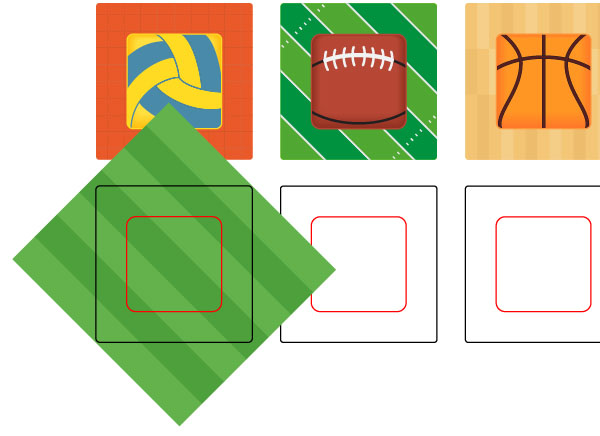
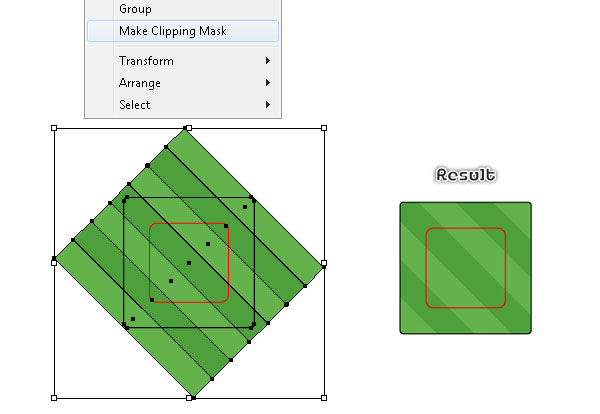
Rotate the group created in Step 21 to an angle of about 45 degrees and then place it in the position shown below.
Before you continue, select the black rectangle of the baseball icon and make a copy (Ctrl +C, Ctrl +F) of it.
Make sure that the copy is still selected, hold down the Shift key and click on the group created in Step 21.
Next go to Object > Clipping Mask > Make (Ctrl +7) and then send this clipping set to back (Ctrl +Shift +Left Square Bracket).
Step 23
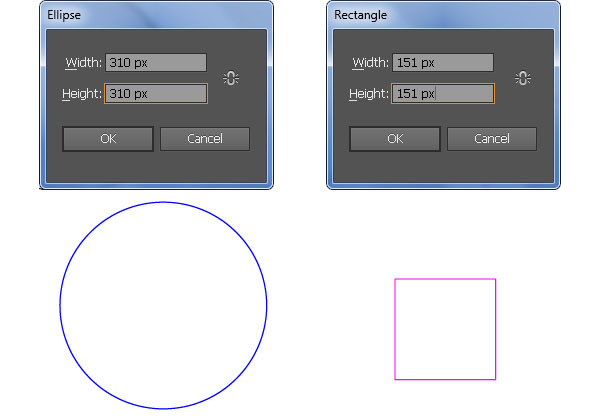
With the help of the Ellipse Tool (L) and the Rectangle Tool (M) create a 310 by 310px ellipse and a 151 by 151px rectangle.
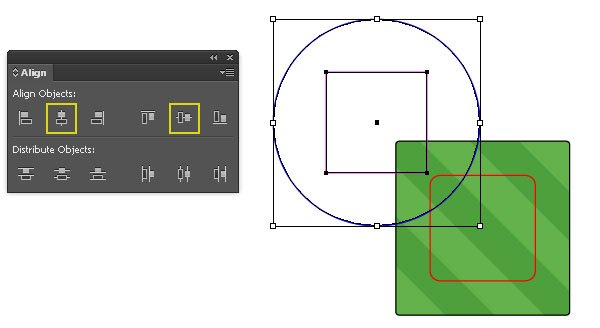
Select the two newly created objects, open the Align palette (Window > Align) and click on the Horizontal Align Center button, then click on the Vertical Align Center button.
Keep these two objects selected and place them in the correct positions as you see in the third image.
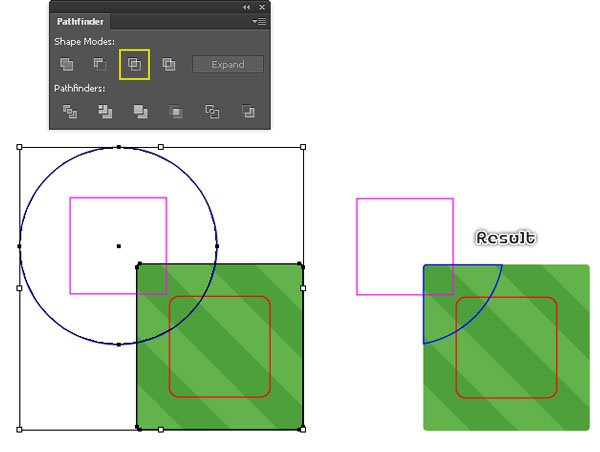
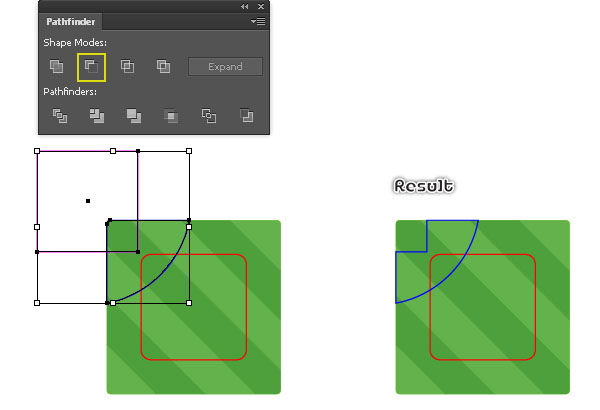
Now focus on the fourth image, select the blue ellipse and the black rectangle, then open the Pathfinder palette (Window > Pathfinder) and click on the Intersect button.
Keep the resulting object selected, hold down the Shift key and click on the pink rectangle, then click on the Minus Front button.
In the end your new object should look like the last image shown.
Step 24
Select the blue object created in Step 23 and make a copy (Ctrl +C, Ctrl +F) of it, then replace the existing stroke color of the copy with green.
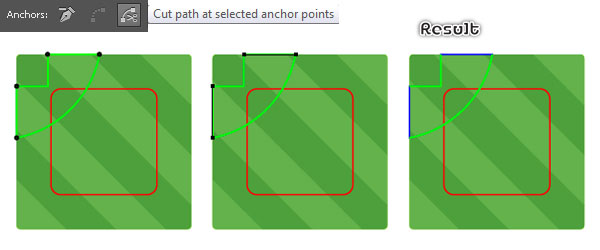
With the help of the Direct Selection Tool (A) along with the Shift key, select the four anchor points highlighted with black and click on the "Cut path at selected anchor points" button from the Properties bar. This makes the green object become four paths.
Select two paths as shown in the second image and remove them.
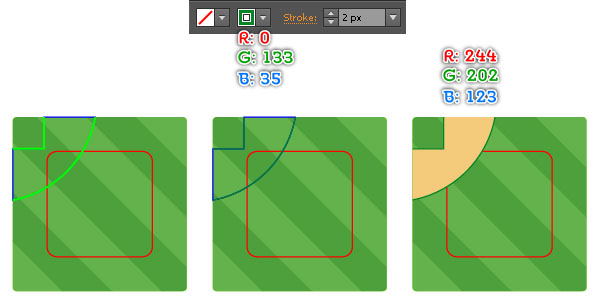
Select the two remaining paths and replace the existing stroke color with R=0, G=133, B=35, then change the stroke weight of them to 2px.
Finally select the blue object created in Step 23 and fill it with R=244, G=202, B=123, then remove its stroke.
Step 25
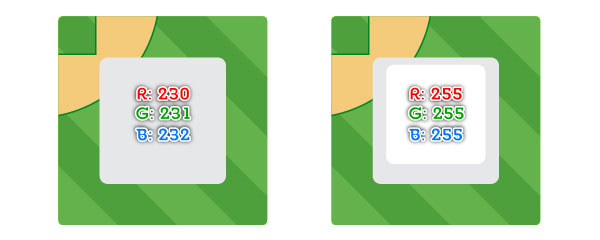
Select the red rectangle of the baseball icon and bring it to front (Ctrl +Shift +Right Square Bracket). Fill this rectangle with R=230, G=231, B=232 and remove its stroke.
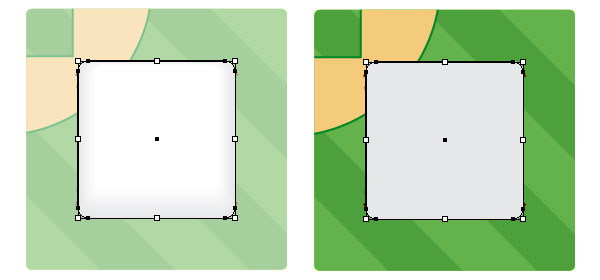
Keep this white rectangle selected and go to Object > Path > Offset Path… Enter a -16px Offset and click OK.
Then replace the existing color of the newly created rectangle with R=255, G=255, B=255 and move it 8px up.
Finally reselect the two rectangles just filled in this step and create a blend between them.
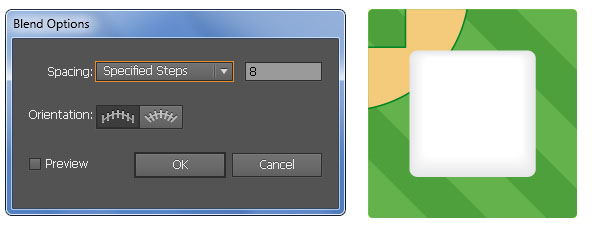
Step 26
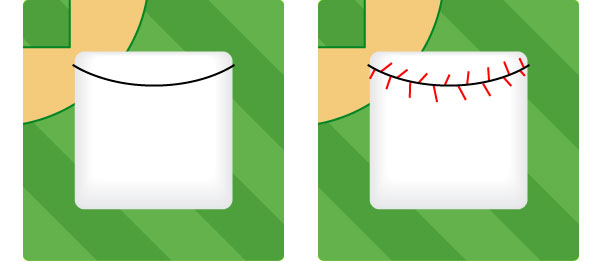
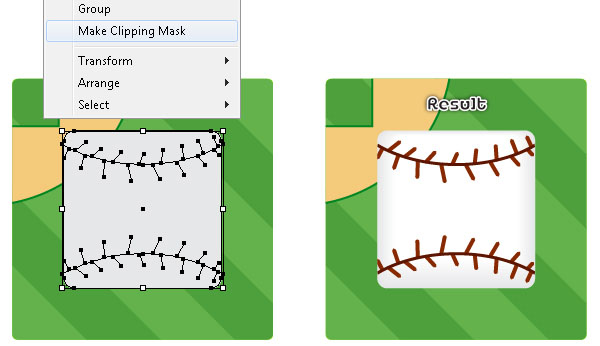
With the Pen Tool (P) create some paths as you see in the first and the second images.
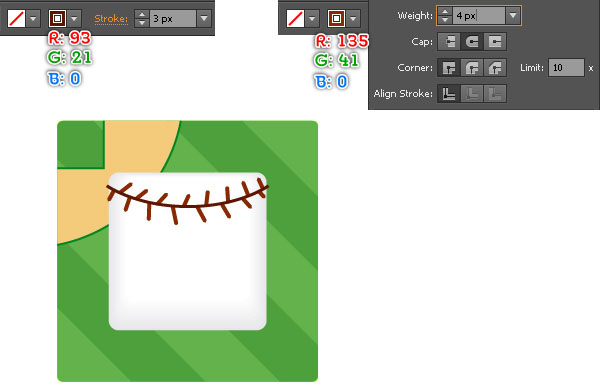
Once your paths are drawn, reselect the black curved path and replace the existing stroke color with R=93, G=21, B=0, then change the stroke weight of it to 3px.
Next select all red paths created in this step and replace the existing stroke color with R=135, G=41, B=0, then change the stroke weight of them to 4px.
Keep the resulting paths selected, open the Stroke palette (Window > Stroke) and click on the Round Cap button.
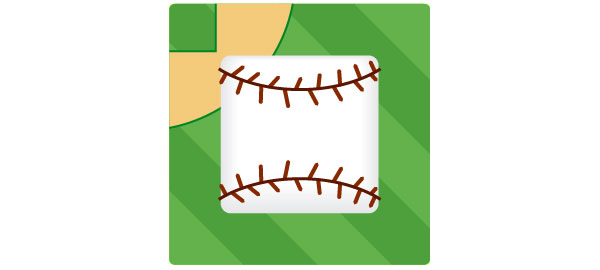
Now select and group (Ctrl +G) all paths created in this step, then make a copy (Ctrl +C, Ctrl +F) of this group.
Reflect the newly created group horizontally, drag it down and place it as shown in the last image.
Finally select and group (Ctrl +G) the two groups created in this step.
Step 27
Pick the Selection Tool (V) and double-click on the blended object created in Step 25.
Select the bigger white rectangle and press (Ctrl +C) to copy it. Double-click anywhere outside of the blended object.
Next select the group created in Step 26 and press (Ctrl +F) to paste the copy in front of this group.
Keep this white rectangle selected and make a copy (Ctrl +C, Ctrl +F) of it, then press (Ctrl +3) to hide this copy.
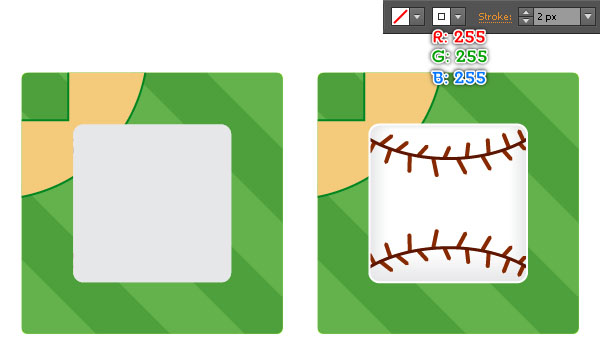
Reselect the original white rectangle and the group created in Step 25 again, then go to Object > Clipping Mask > Make (Ctrl +7).
The resulting object should look like the fourth image below.
Before you continue, press (Ctrl +Alt +3) to show the white rectangle hidden in this step. Keep this rectangle selected and add a 2px stroke (R=255, G=255, B=255), then remove the fill color.
Step 28
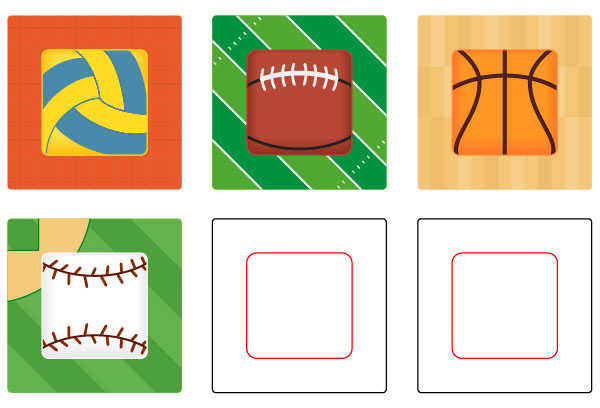
The baseball icon is ready and looks like this:
Step 29
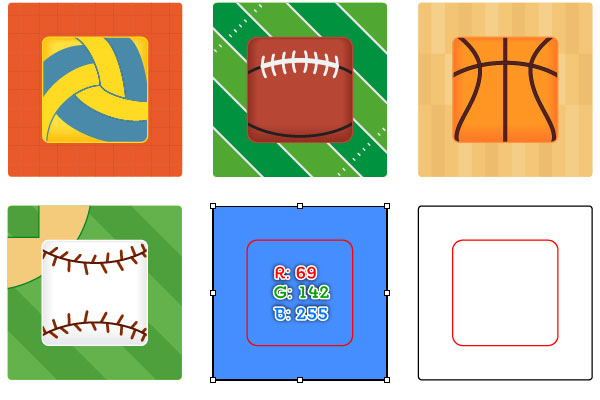
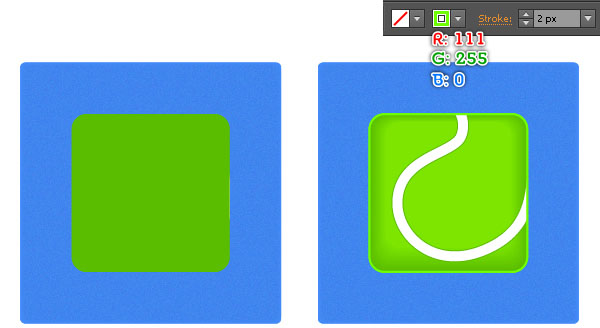
Next comes the tennis icon. Create a black rectangle as shown below and fill it with R=69, G=142, B=255, then remove its stroke.
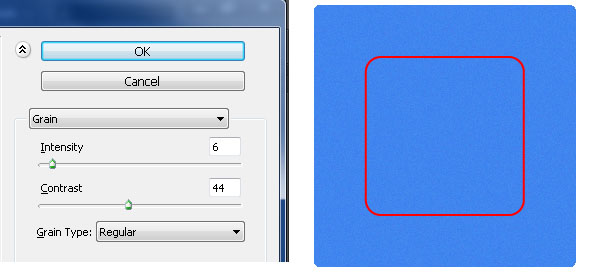
Keep this blue rectangle selected and make a copy of it, then go to Effect > Texture > Grain… Follow the data shown in the second image and click OK.
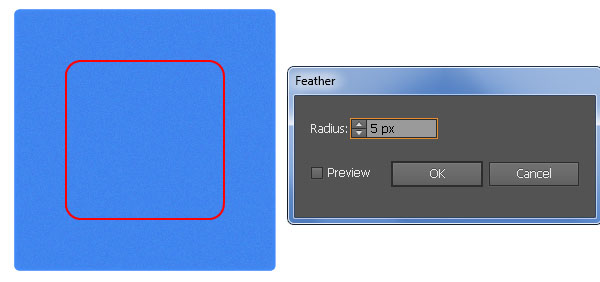
Go to Effect > Stylize > Feather… Enter a 5px Radius and click OK.
Step 30
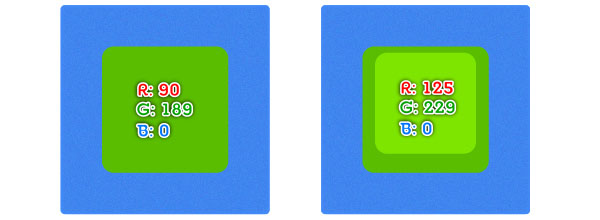
Select the red rectangle and fill it with R=90, G=189, B=0, then remove the stroke.
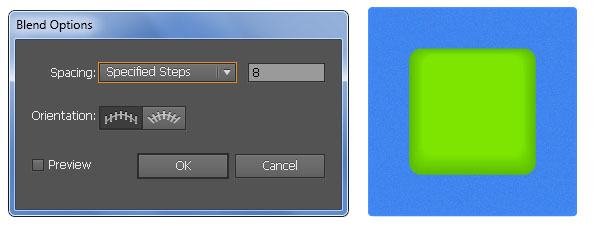
Keep this green rectangle selected and go to Object > Path > Offset Path… Enter a -16px Offset and click OK.
Then replace the existing color of the newly created rectangle with R=125, G=229, B=0 and move it 8px up.
Finally reselect the two rectangles just filled in this step and create a blend between them.
Step 31
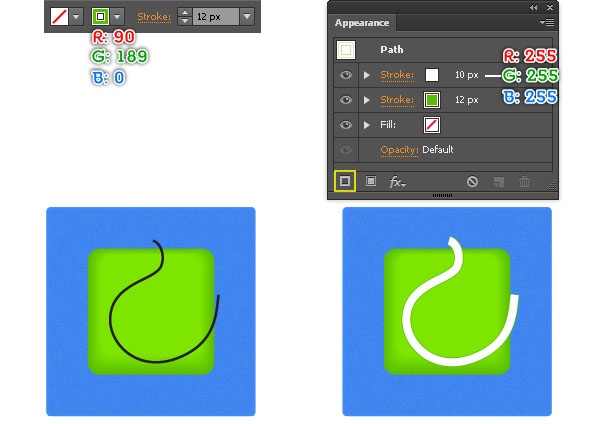
Pick the Pen Tool (P) and create a curved path as you see in the first image.
Once your path is drawn, reselect it and replace the existing stroke color with R=90, G=189, B=0, then change the stroke weight to 12px.
Keep this path selected, open the Appearance palette (Window > Appearance) and click on the Add New Stroke button (at the left-bottom corner of the Appearance palette). This will add a second stroke for your object. Fill it with R=255, G=255, B=255 and change the stroke weight to 10px.
Step 32
Pick the Selection Tool (V) and double-click on the blended object created in Step 30.
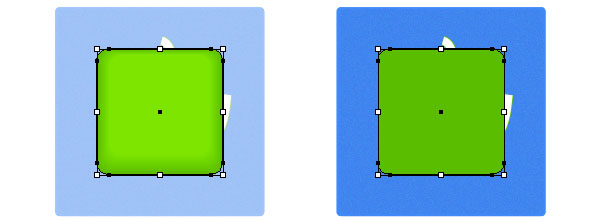
Select the bigger green rectangle and press (Ctrl +C) to copy it. Double-click anywhere outside of the blended object.
Next select the curved path created in Step 31 and press (Ctrl +F) to paste the copy in front of this path.
Keep this green rectangle selected and make a copy (Ctrl +C, Ctrl +F) of it, then press (Ctrl +3) to hide this copy.
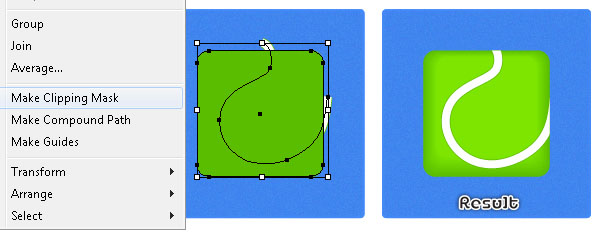
Reselect the original green rectangle and the curved path created in Step 31 again, then go to Object > Clipping Mask > Make (Ctrl +7).
The resulting object should look like the fourth image below.
Before you continue, press (Ctrl +Alt +3) to show the green rectangle hidden in this step. Keep this rectangle selected and add a 2px stroke (R=111, G=255, B=0), then remove the fill color.
Step 33
The tennis icon is ready and looks like this:

Step 34
Let’s make the final icon: soccer.
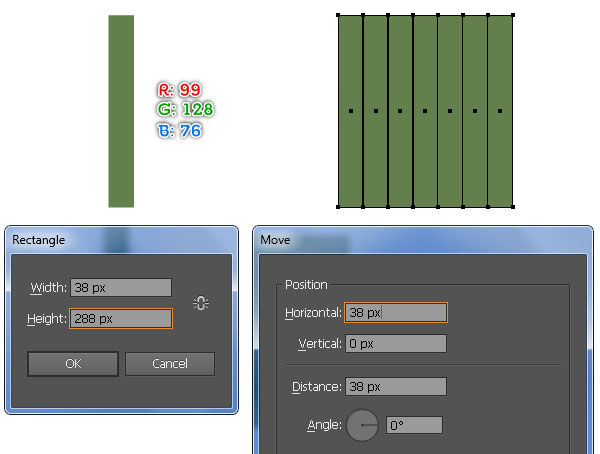
Pick the Rectangle Tool (M) and make a green rectangle: 38 by 288px.
Reselect the newly created rectangle and go to Object > Transform > Move… Enter 38 in the Horizontal box and click Copy, then press (Ctrl +D) five times to get the result shown in the second image below.
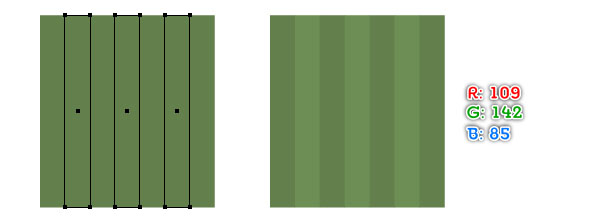
Next select three rectangles as shown in the third image and replace the existing fill color of them with R=109, G=142, B=85.
Finally select and group (Ctrl +G) all rectangles created in this step.
Step 35
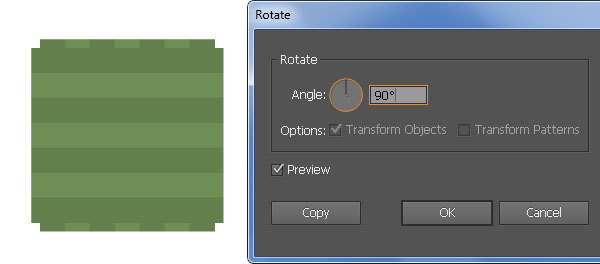
Select the group created in Step 35 and go to Object > Transform > Rotate… Enter a 90 degrees Angle and click Copy.
Next change the Blending Mode of the newly created group to Overlay.
Finally select and group (Ctrl +G) the two groups created from beginning of Step 34 to this time.
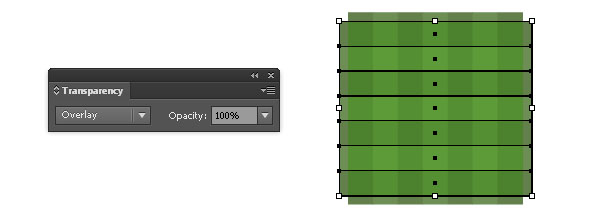
Step 36
Place the group created in Step 35 in the position shown below.
Make sure that this group is still selected, hold down the Shift key and click on the black rectangle of the soccer icon, then go to Object > Clipping Mask > Make (Ctrl +7).
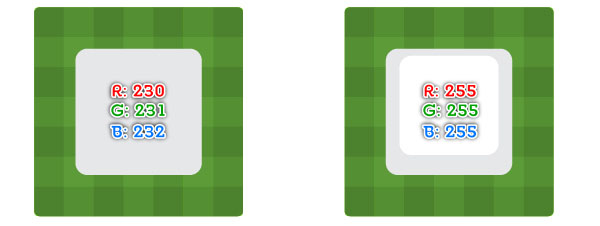
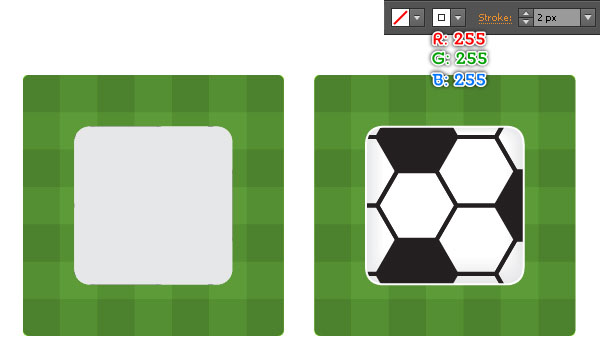
Now select the red rectangle and fill it with R=230, G=231, B=232, then remove the stroke.
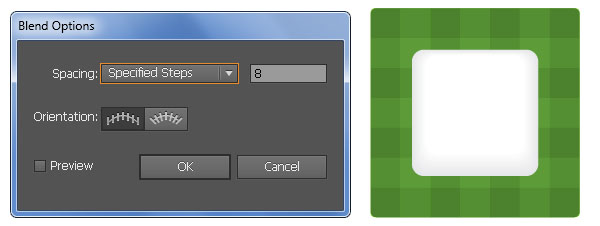
Keep this white rectangle selected and go to Object > Path > Offset Path… Enter a -16px Offset and click OK.
Then replace the existing color of the newly created rectangle with R=255, G=255, B=255 and move it 8px up.
Finally reselect the two rectangles just filled in this step and create a blend between them.
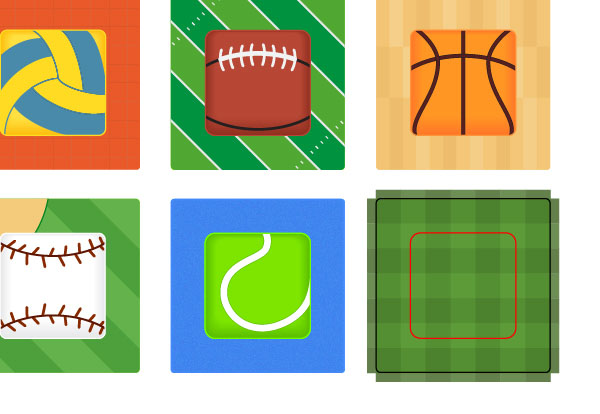
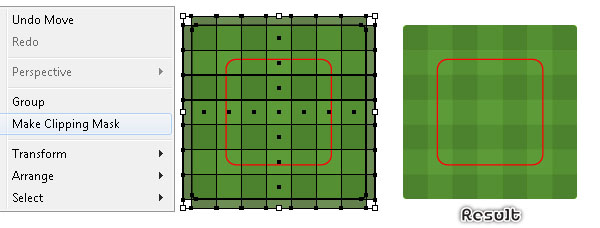
Step 37
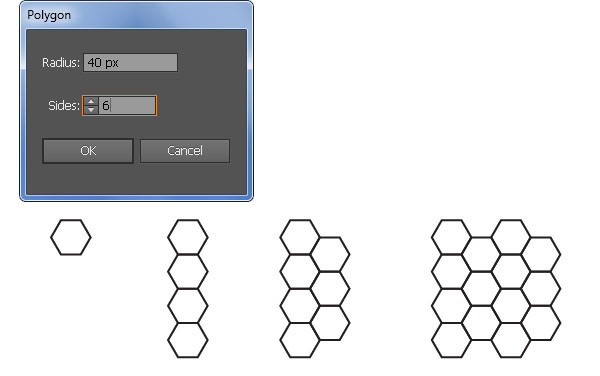
Pick the Polygon Tool, simply click on your artboard and enter the data shown below, then click OK.
Make some copies of the newly created polygon object and then place them in the correct positions as you see in the fourth image.
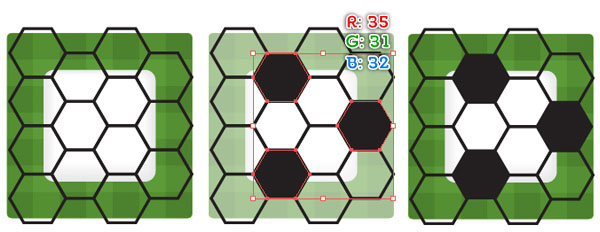
Select and group (Ctrl +G) all polygon objects created in this step, then place this group in the position shown in the fifth image.
With the Selection Tool (V), double-click on the newly created group. Select the three objects as shown in the sixth image and fill them with R=35, G=31, B=32.
Next double-click anywhere outside of the group just edited.
Step 38
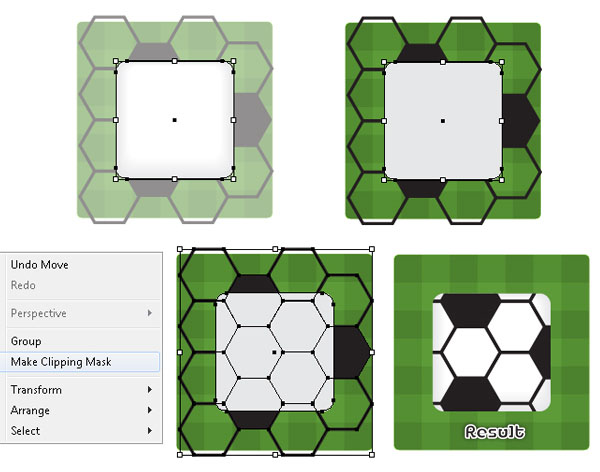
Pick the Selection Tool (V) and double-click on the blended object created in Step 36.
Select the bigger white rectangle and press (Ctrl +C) to copy it. Double-click anywhere outside of the blended object.
Next select the group created in Step 37 and press (Ctrl +F) to paste the copy in front of this group.
Keep this white rectangle selected and make a copy (Ctrl +C, Ctrl +F) of it, then press (Ctrl +3) to hide this copy.
Reselect the original white rectangle and the group created in Step 37 again, then go to Object > Clipping Mask > Make (Ctrl +7).
The resulting object should look like the fourth image below.
Before you continue, press (Ctrl +Alt +3) to show the white rectangle hidden in this step. Keep this rectangle selected and add a 2px stroke (R=255, G=255, B=255), then remove the fill color.
Step 39
The soccer icon is ready and looks like this:

Step 40
To give a more realistic look I’m going to be adding long shadows on the ball icons.
First of all, we’ll add a long shadow to the volleyball icon.
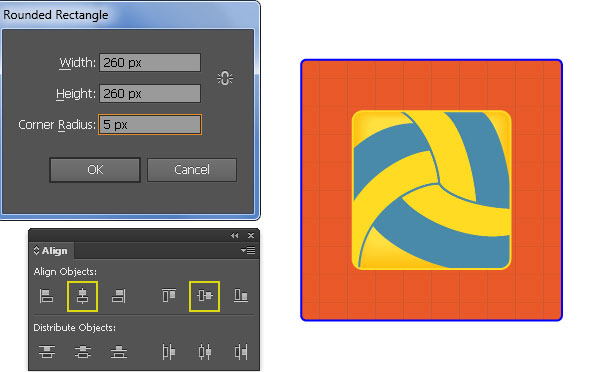
Pick the Rounded Rectangle Tool, simply click on your artboard and enter the data shown below, then click OK.
Keep this rectangle selected, hold down the Shift key, click on the clipping set of the volleyball icon created in Step 5. Then release the Shift key and click on the clipping set of the volleyball icon again (to fix its position).
Next open the Align palette (Window > Align) and click on the Horizontal Align Center button, then click on the Vertical Align Center button.
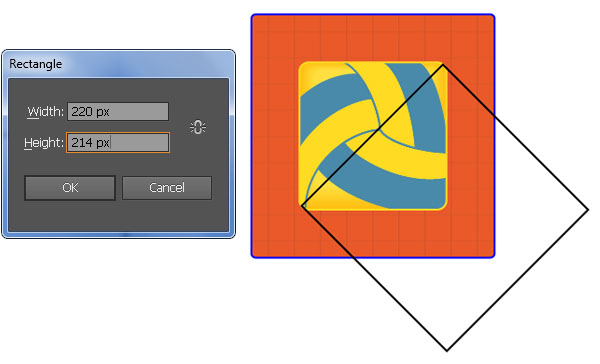
Pick the Rectangle Tool (M) and create a 220 by 214px rectangle. Rotate the newly created rectangle to an angle of about 45 degrees and then place it in the correct position as you see in the second image.
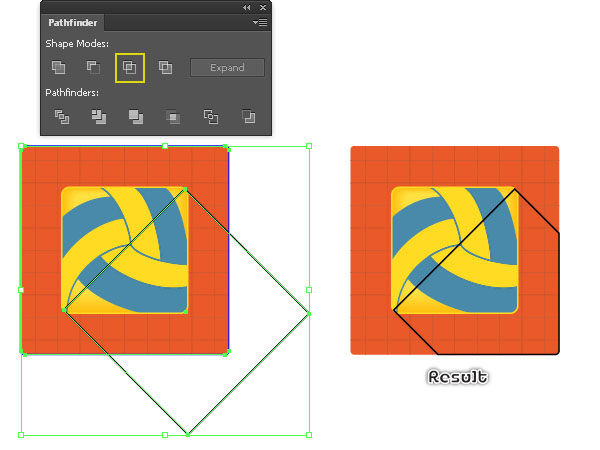
Now reselect two new rectangles created in this step, open the Pathfinder palette (Window > Pathfinder) and click on the Intersect button. The resulting object should look like the last image below.
Step 41
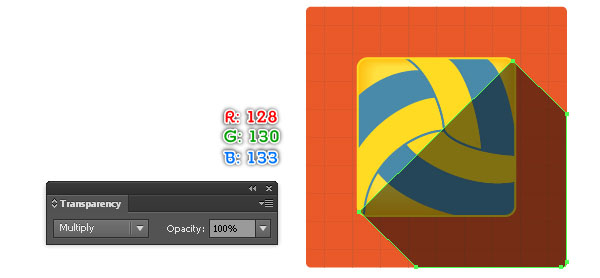
Select the black object created in Step 40 and fill it with R=128, G=130, B=133, then remove its stroke.
Next change the Blending Mode of the newly created shape to Multiply and hide it behind the volleyball.
At this point your volleyball icon should look like in the last image.

Step 42
Likewise, repeat the same process as the previous steps to add long shadows to the remaining icons.
You should end up with something like this:

And We’re Done!
