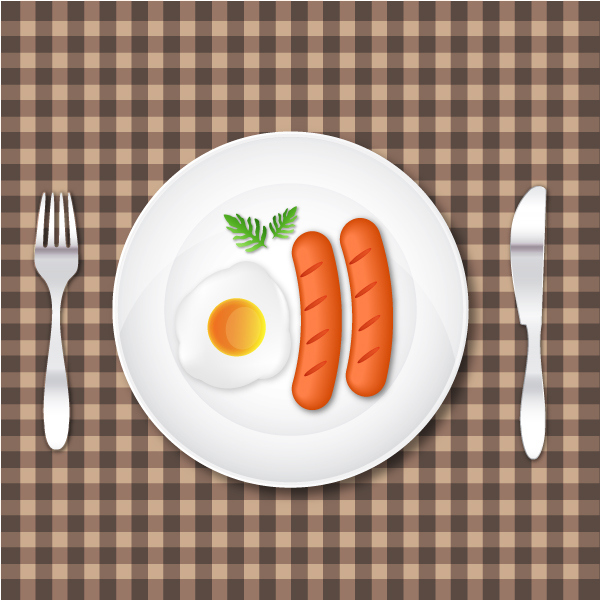
In this tutorial, you will learn how to create a delicious breakfast with egg and sausages from scratch using several techniques in Adobe Illustrator.
Final Image
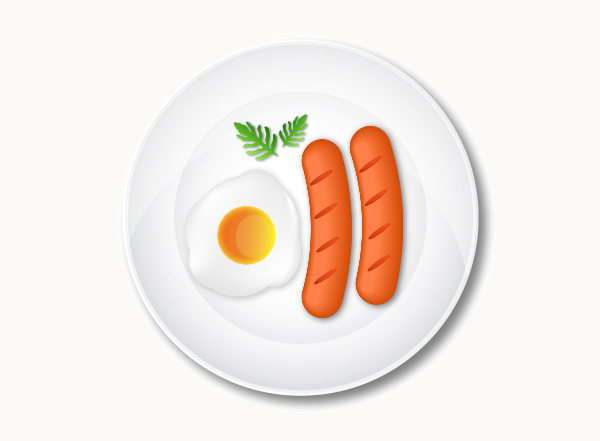
As always, this is the final image that we’ll be creating:

Tutorial Details
- Program: Adobe Illustrator CS3
- Estimated Completion Time: 45 minutes
- Difficulty: Beginner-Intermediate
Step 1
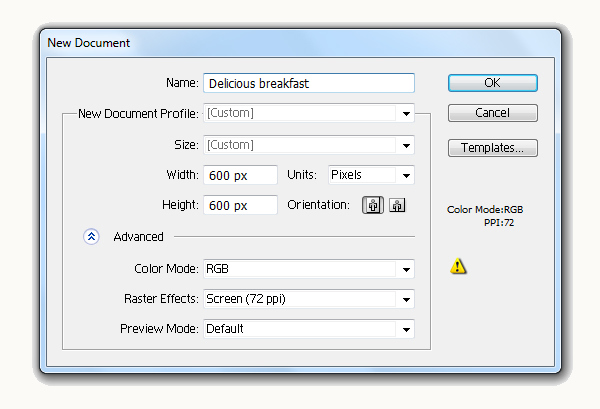
Let’s create a new document first. Make sure to set the dimensions to 600 x 600 pixels and the Color Mode to RGB.
Step 2
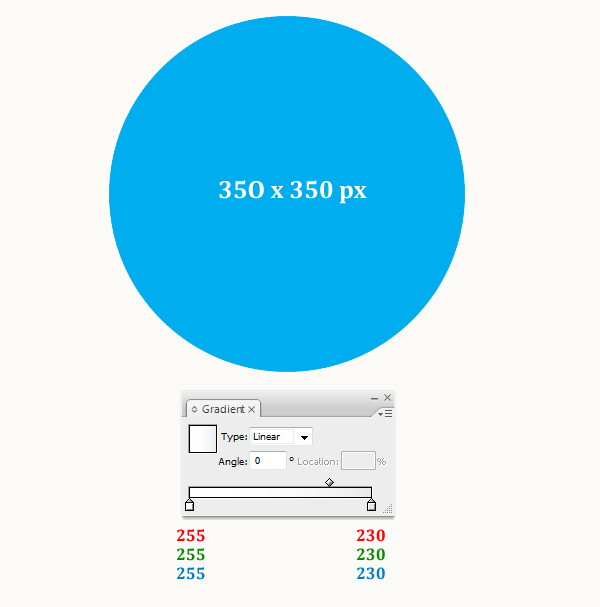
Let’s begin with the plate first. Using the Ellipse Tool (L) to create an ellipse with Width = 350px , Height = 350 px. Fill it with a Linear gradient as shown in the image below.
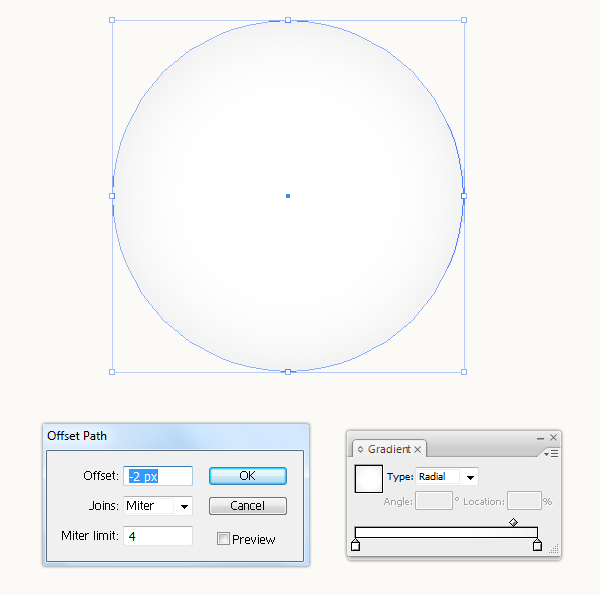
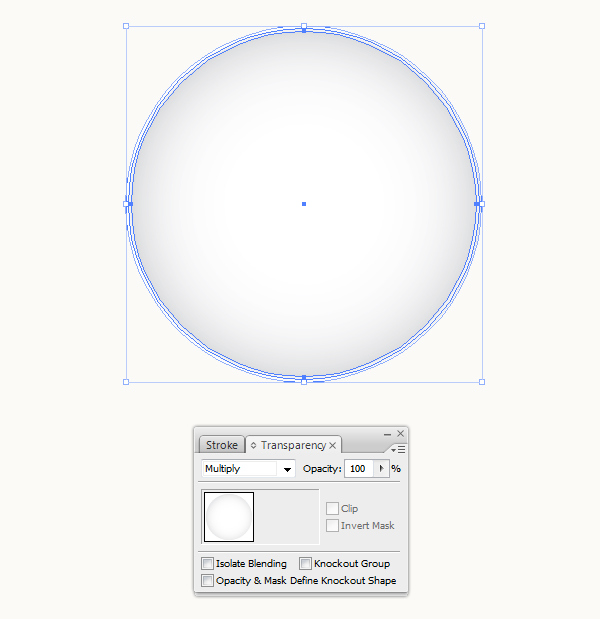
Select the ellipse we had created and go to Object > Path > Offset path and change the Offset = -2px. Then we change our gradient from Linear type to Radial. Now we have two ellipses.
Duplicate (Ctrl / Cmd + C, Ctrl / Cmd + F) the offset shape we had created then scale the copy to a little smaller, apply the Mutiply blending mode to it . Now you should have result with three ellipses as shown in the image below.
Step 3
Using the Ellipse Tool (L) create an ellipse with Width = 250px , Height = 250 px. Fill it with the same Radial gradient as we did in Step 2.
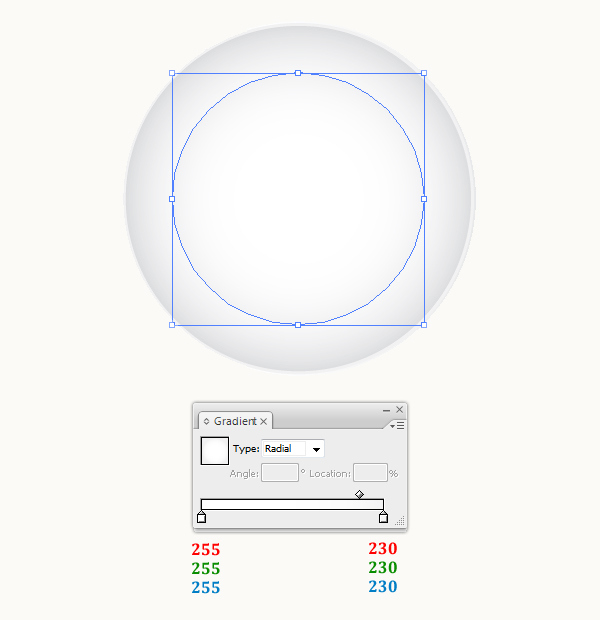
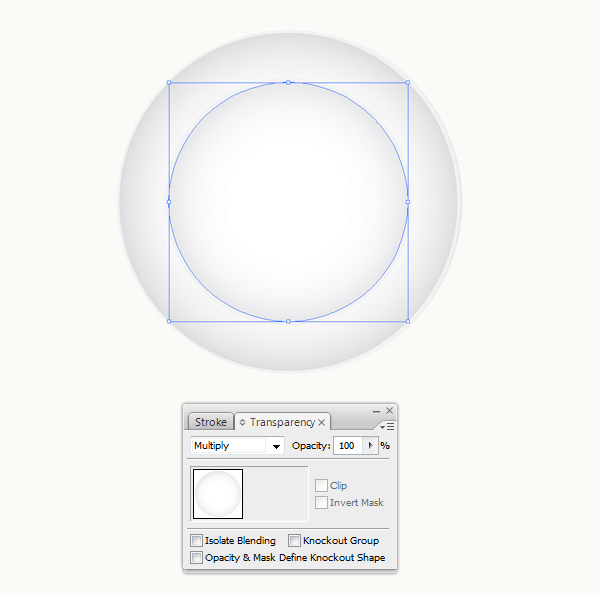
Duplicate (Ctrl / Cmd + C, Ctrl / Cmd + F) the ellipse shape we have created then scale the copy to a little smaller, apply the Mutiply blending mode to it.
Step 4
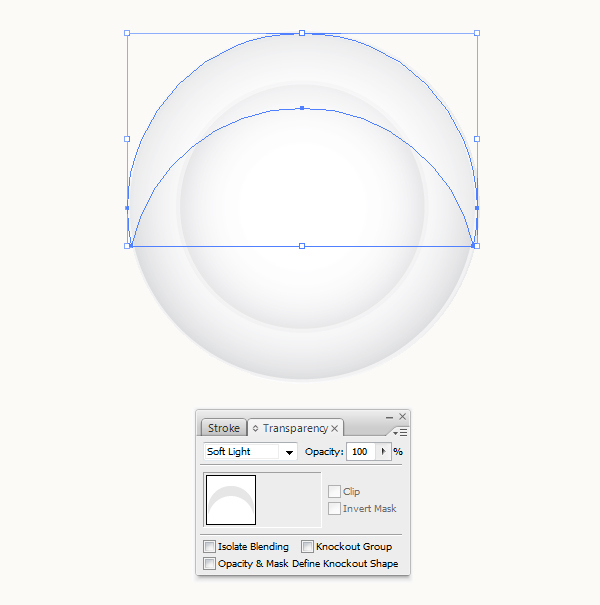
Create two ellipses with Width= 350px, Height = 350px and place them as shown in the image below. Select all elements we have created so far and under the Pathfinder Panel hit the Subtract from shape area button. Make sure to expand the shape. Select Object > Expand Appearance. It will turn the object into an editable shape. This shape represents the highlight on the plate.
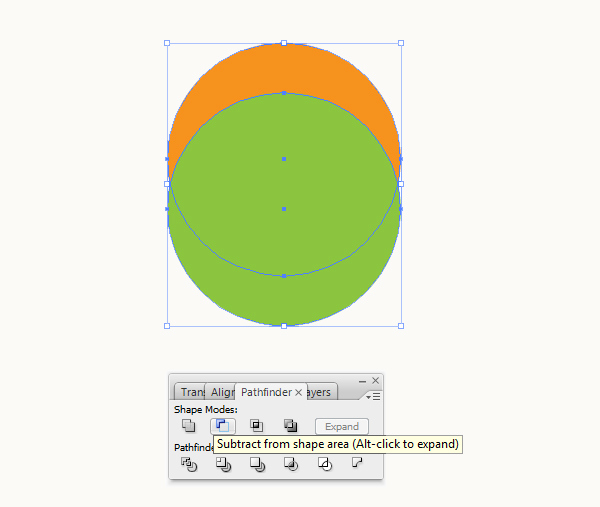
Fill the shape we had created with color #E6E6E6 , apply the Softlight blending mode to it. You should have a result as shown in the image below.
Step 5
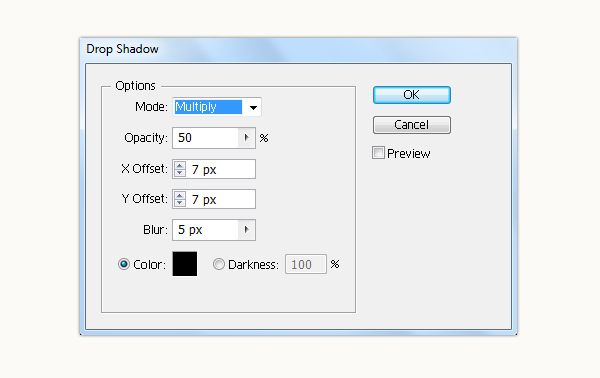
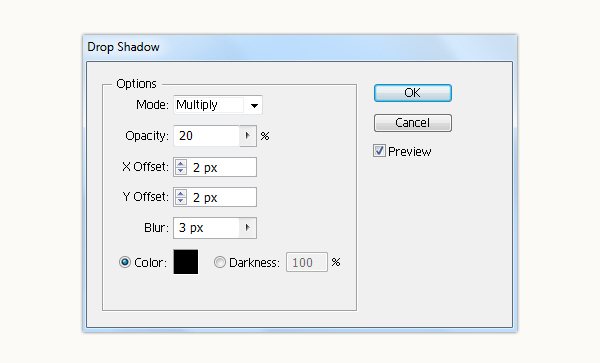
Now we Group ( Ctrl + G ) all the elements then go to Effect > Stylize > Drop shadow and change the settings as shown in the image.
In the end, you should have a result as shown in the below.

Step 6
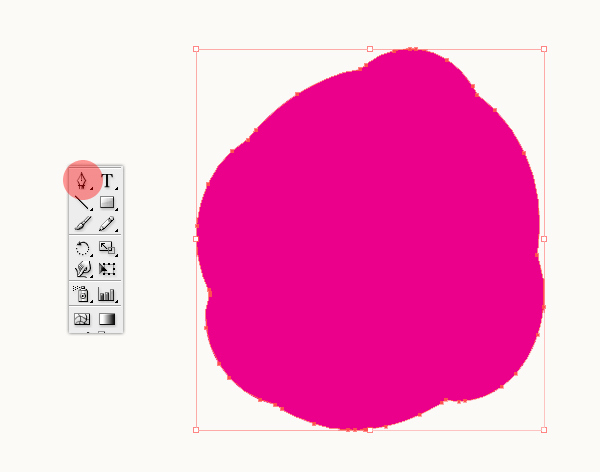
Now we’ll work with the fried egg. Pick the Pen tool (P) to create a shape representing the white part in the inside of an egg as shown in the image below.
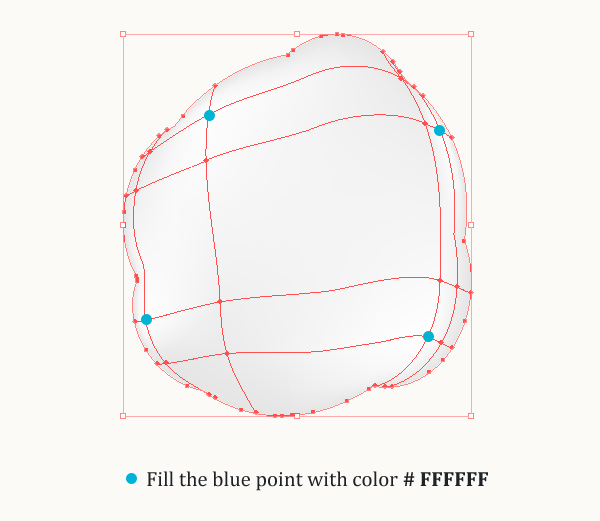
Fill the shape with color # E6E6E6 and add a point to a mesh by using the Mesh tool and clicking anywhere in the shape’s area. After converting a shape into a mesh, you can select points with three tools: Mesh tool, Direct selection tool, and the Lasso tool. All you have to do now to add color to the mesh is select a color as shown in the image below.
Use the Ellipse tool (L) to draw the yolk and fill with gradient as shown in the image below.
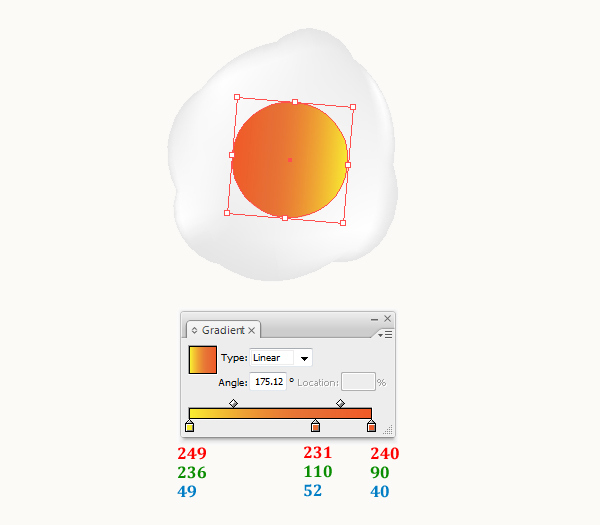
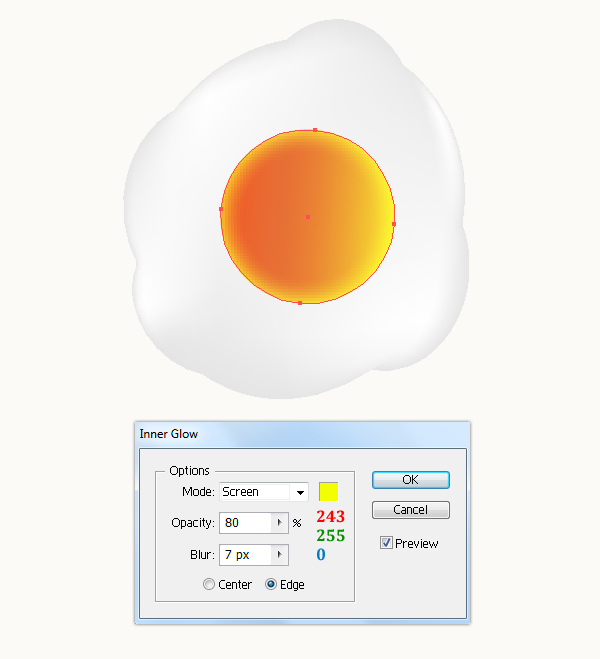
Select the ellipse shape we have created and go to Effect > Stylize > Inner glow. Here is the result.
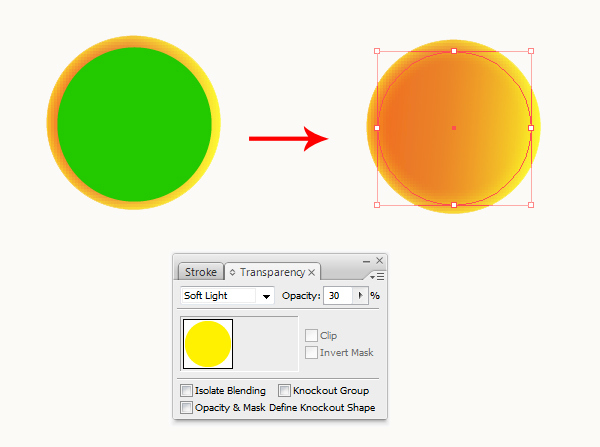
Now we use the Ellipse tool (L) to draw another ellipse a little smaller. Fill it with color # FFF100 and apply Softlight blending mode to it and lower Opacity = 30%.
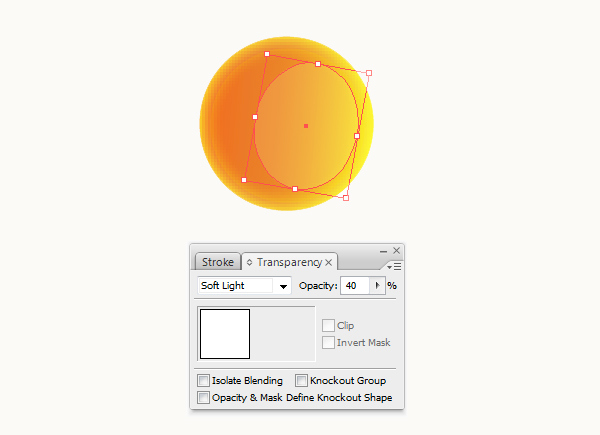
Now we have a nice looking egg but we need to add a little bit of shine. Using the Ellipse tool (L) draw an ellipse and fill with color # FFFFFF, apply Softlight blending mode to it and lower Opacity = 40%.
We group ( Ctrl + G ) the egg elements together and go to Effect > Stylize > Drop shadow and change the settings as shown in the image below.
In the end, you should have a result like this.

Step 7
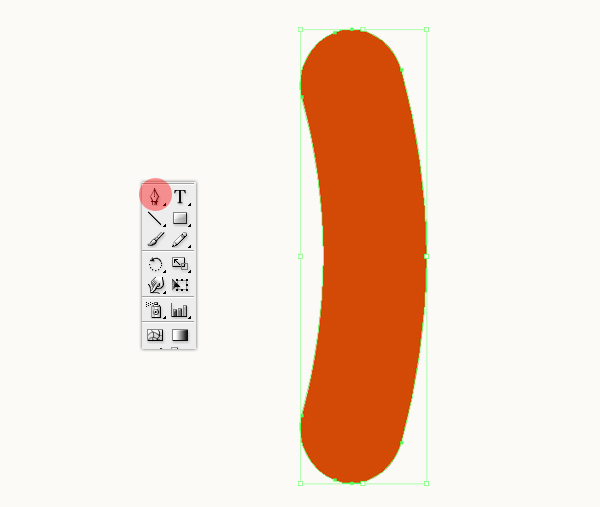
Now we’ll work with the grilled sausages. Pick the Pen tool ( P ) to create a shape and fill it with color #D34A05 as shown in the image below.
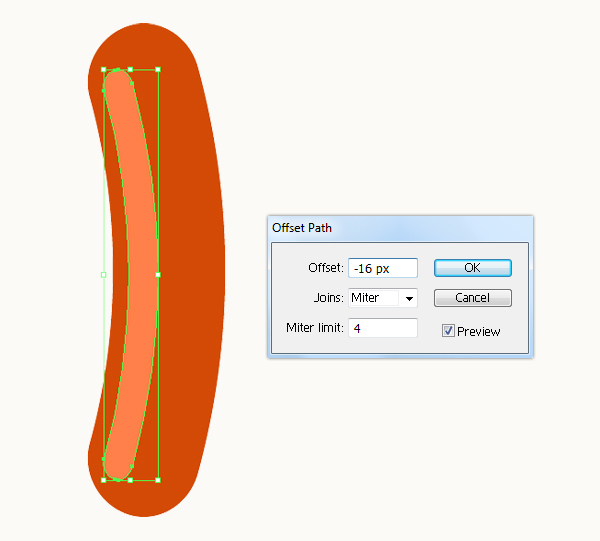
With the shape still selected, go to Object > Path > Offset path and change the settings as shown in the image below. Then we fill the Offset path with color # FF8048.
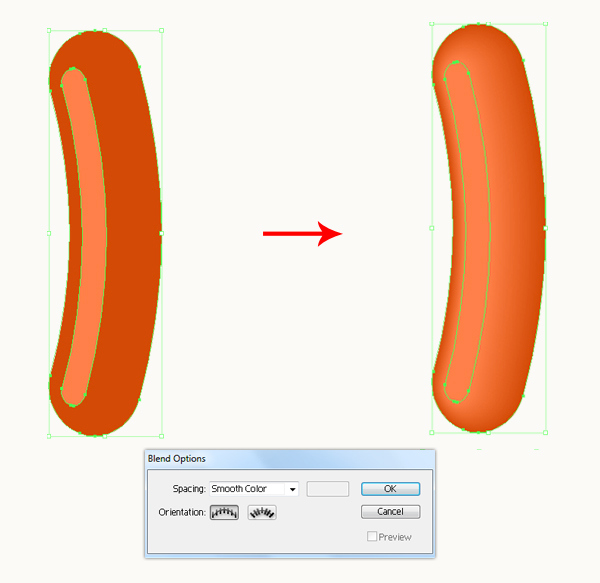
Now we select all of them and go to Object > Blend > Make.
Grab the Pen tool (P) draw a cut shape on the sausage. Fill the shape with gradient and apply Inner Glow effect as shown in the image below.
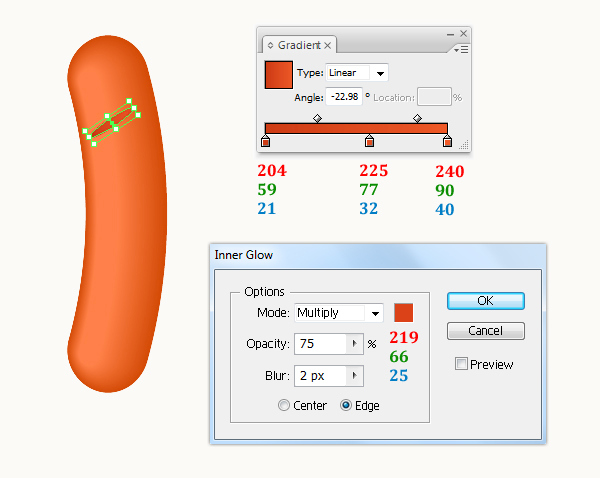
Duplicate (Ctrl / Cmd + C, Ctrl / Cmd + F) the shape we have created 3 times and place the copies as shown in the image below.
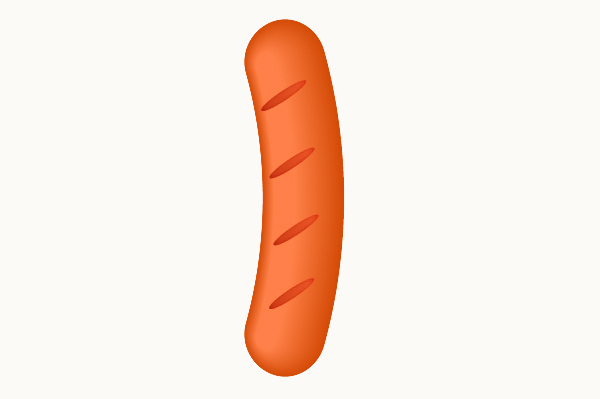
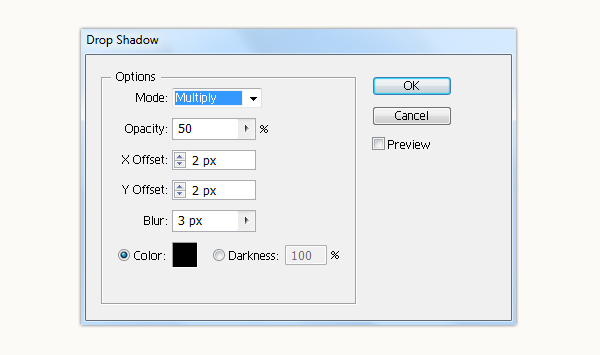
We group ( Ctrl + G ) the sausage elements together and go to Effect > Stylize > Drop shadow and change the settings as shown in the image below.
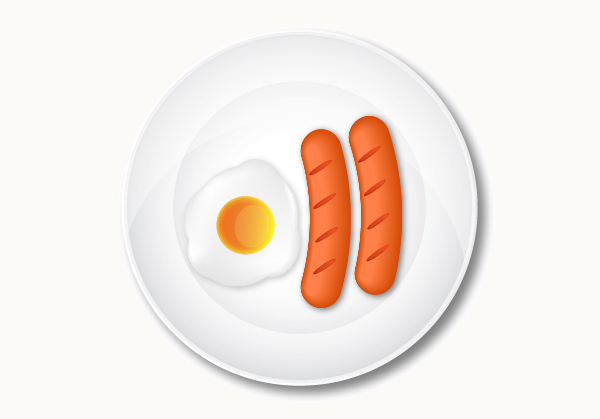
Duplicate (Ctrl / Cmd + C, Ctrl / Cmd + V) the sausage, you should have a result like this.
Step 8
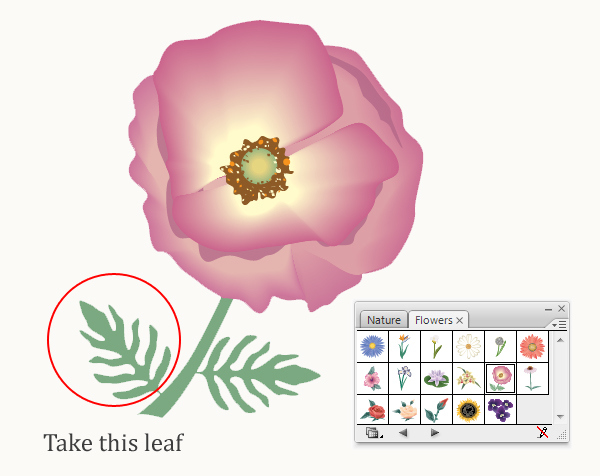
We’ve done with the grilled sausages. Now it’s time to decorate our plate with vegetables. In the Symbol palette go to Open Symbol Library > Flowers > Poppy. We select the poppy symbol and go to Object > Expand Appearance, then Ungroup (Shift + Ctrl + G), keep the leaf shape and remove the flower shape. This leaf represents a vegetable on the plate.
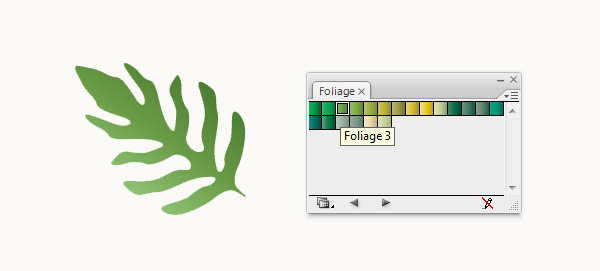
In the Symbol palette go to Open Swatch Library > Gradient > Foliage. Now we fill the leaf shape with gradient Foliage 3.
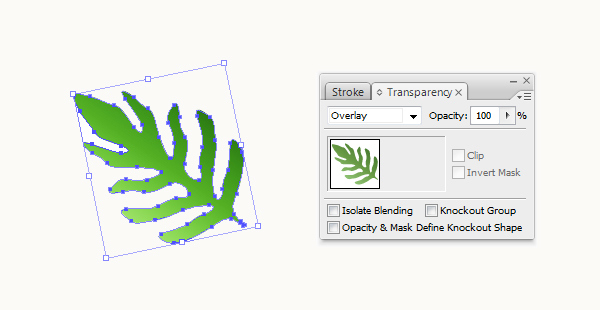
Duplicate (Ctrl / Cmd + C, Ctrl / Cmd + F) the leaf shape and apply Overlay blending mode to the copy as shown in the image below.
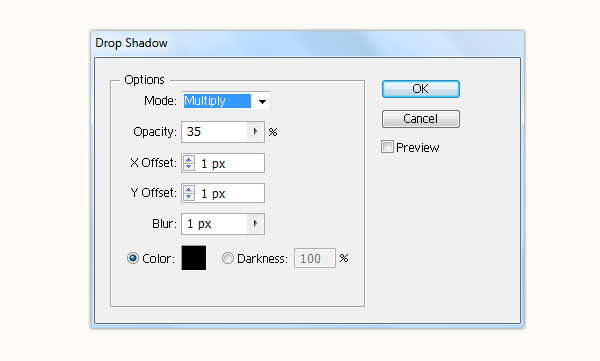
We group ( Ctrl + G ) the leaf and go to Effect > Stylize > Drop shadow . All we need to do now is the shadow cast by the vegetable on the plate.
Duplicate (Ctrl / Cmd + C, Ctrl / Cmd + V) the leaf , scale it a little smaller and place it as shown in the image below. And now we’ve done with the vegetable on the plate.
Step 9
Now let’s grab the Pen tool (P) to create the shapes for our fork ( You can use an image of fork as reference ).
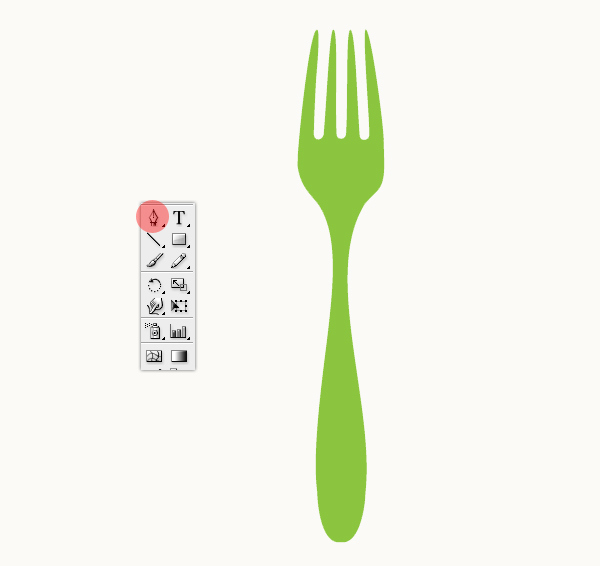
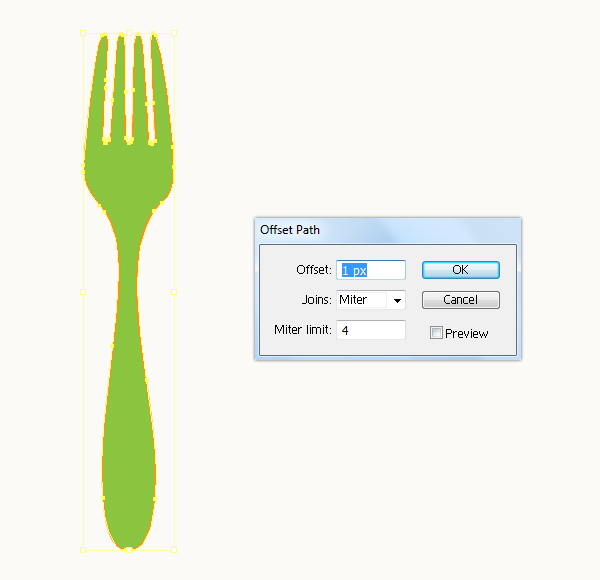
With the shape still selected, go to Object > Path > Offset path and set the values as shown below.
Now we add a gradient for our offset path of the fork.
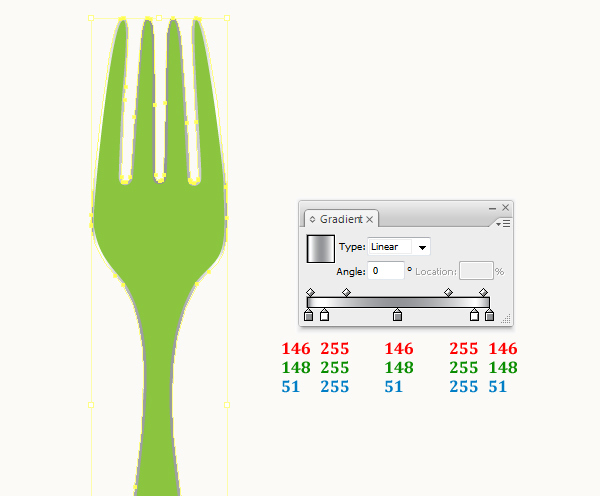
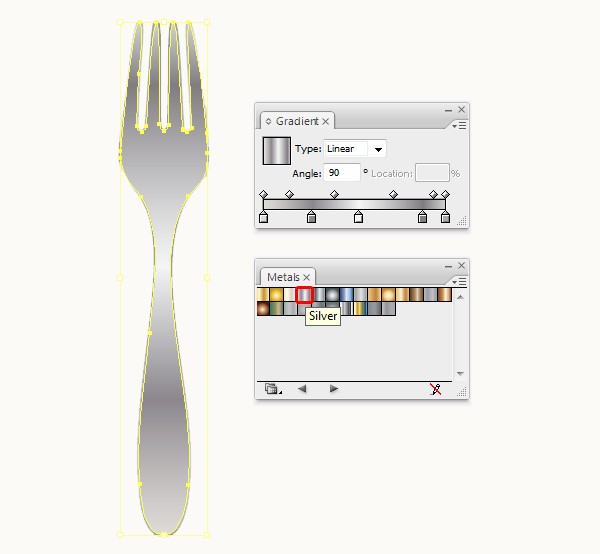
Let’s start coloring the main shape of the fork. We’ll be using Illustrator’s pre-made gradients for this. First, in the Swatches palette go to Open Swatches Library > Gradients > Metals. Apply the Silver gradient to the shapes shown and change the Angle to 90.
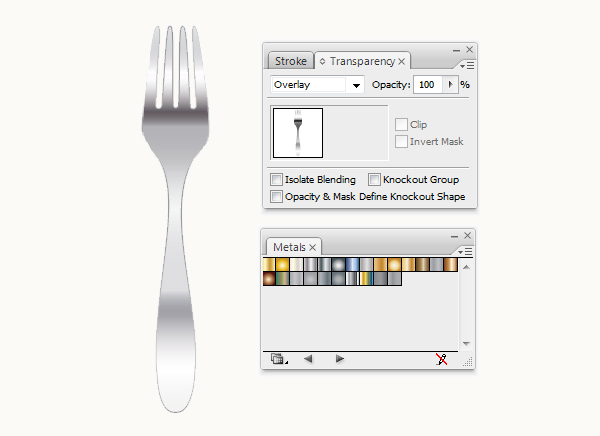
Duplicate (Ctrl / Cmd + C, Ctrl / Cmd + V) the main shape of the fork . Apply the Chrome gradient to the shapes shown and change the Angle to 90. Apply Overlay blending mode to the copy.
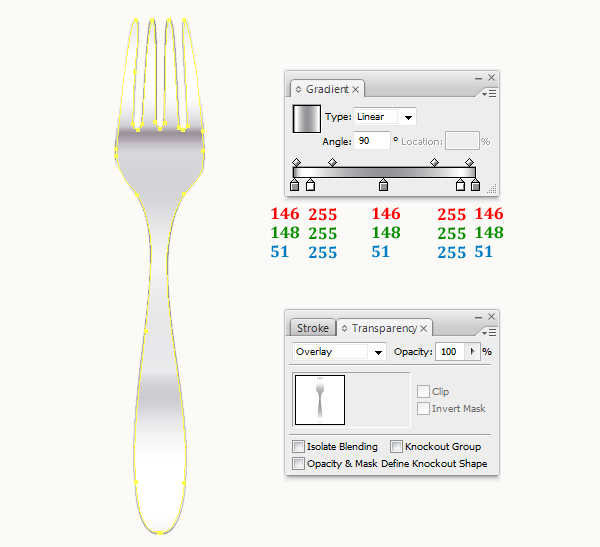
Duplicate (Ctrl / Cmd + C, Ctrl / Cmd + V) the main shape of the fork again. Apply a gradient to the shapes shown and change the Angle to 90. Apply Overlay blending mode to the copy.
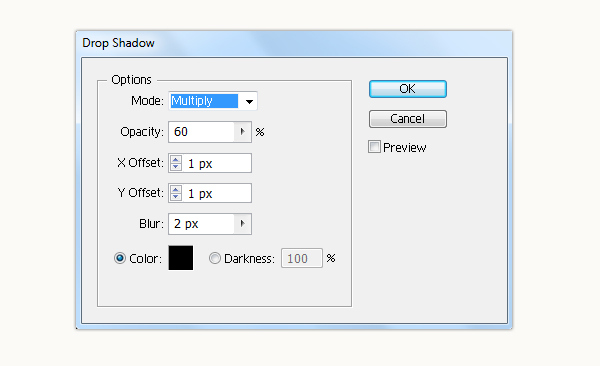
We group ( Ctrl + G ) the elements together and go to Effect > Stylize > Drop shadow, set the values as shown below.
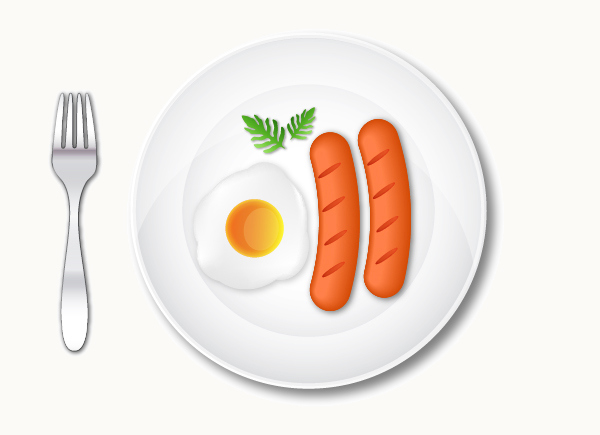
In the end, you should have a result like this.
Step 10
Next let’s grab the Pen tool (P) to create the shapes for our knife.
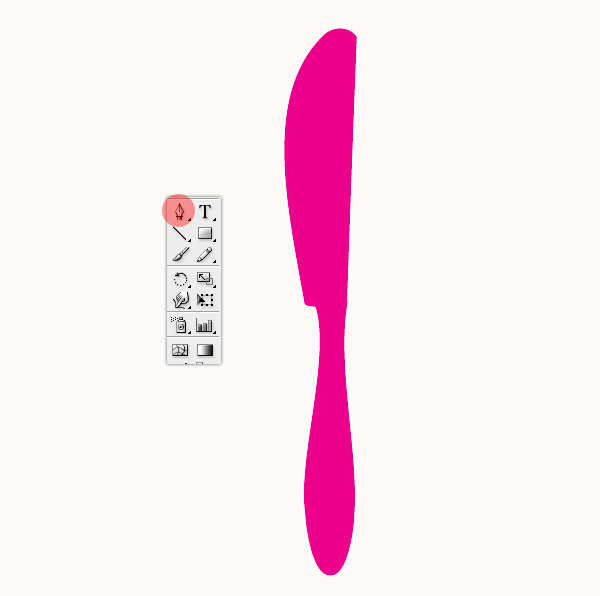
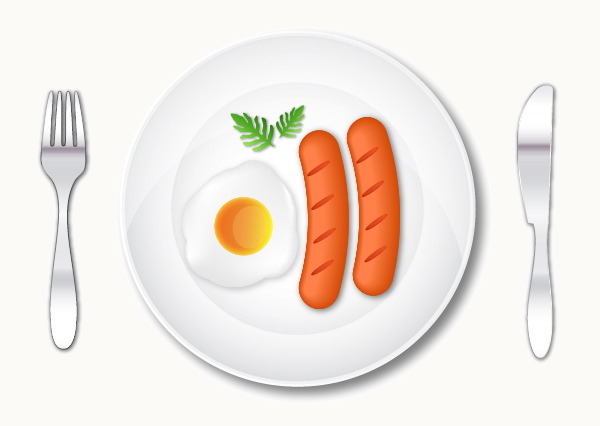
Repeat Step 9 and we’ll get the same result for our knife.
Step 11
It’s time to create a table cloth. Now we use the Rectangle Tool (M) to draw a rectangle with Width = 600px, Height = 600px, fill it with color # 5A4A42.
Next, we continue to use Rectangle tool to draw 2 yellow shapes and place them as shown in the image below.

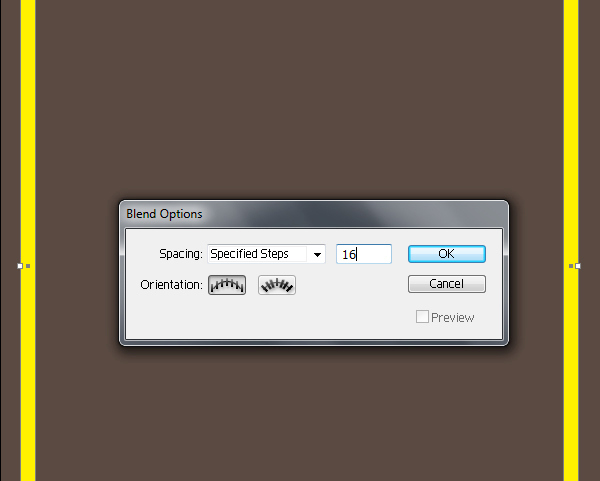
Select the 2 yellow shapes and go to Object > Blend > Make and set their values as shown below. Make sure to expand them, go to Obkect > Expand Appearance.
Fill the stripes with color #FFF1E4. Apply Overlay blending mode to the stripes and lower Opacity = 70%.
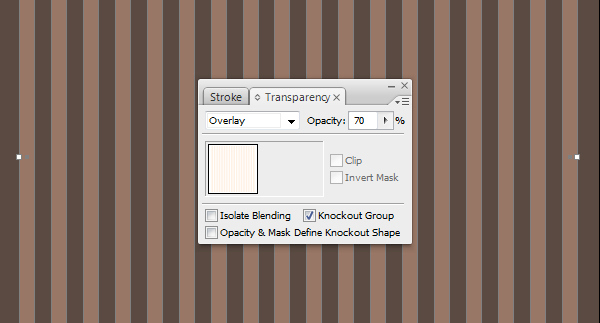
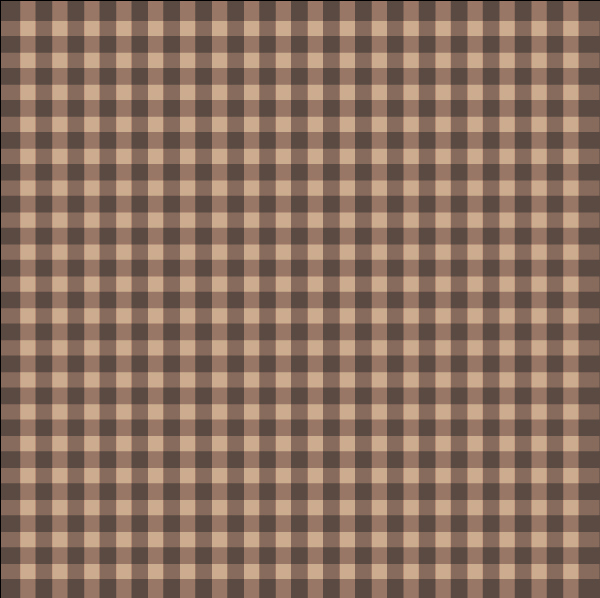
Duplicate (Ctrl / Cmd + C, Ctrl / Cmd + V) the stripes and go to Object > Transform > Rotate, set Angel = 90. Then lower Opacity = 50% for the copy. You should get a result as shown in the image below.
And We’re Done!
Here is how it should look. I hope you’ve enjoyed this tutorial and can apply these techniques in your future projects.
