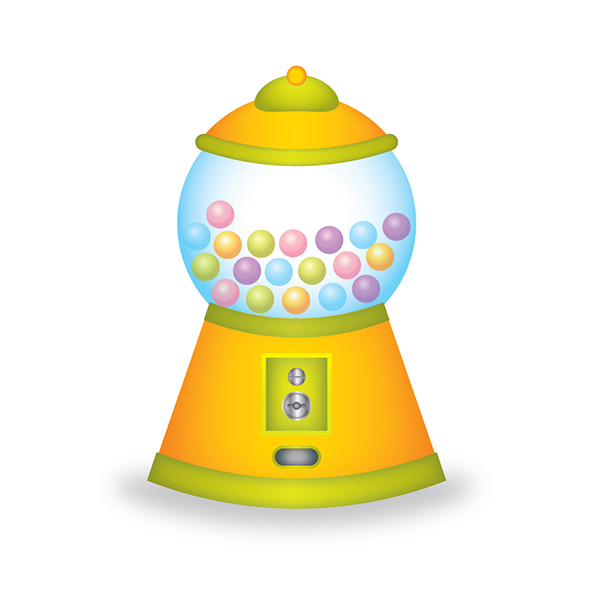
In this Illustrator tutorial, we will learn how to create a gumball machine using very simple techniques.
We’ll create the base, the glass casing, the money slot, and the opening where the bubble gum balls come out. We will use the effects along with some basic vector shape to achieve the final outcome in short time. Hopefully you will learn some useful tips work. Have fun while learning this Adobe Illustrator tutorial! We start now!
Final Image
As always, this is the final image that we’ll be creating:

Tutorial Details
- Program: Adobe Illustrator CS6
- Estimated Completion Time: 45 minutes
- Difficulty: Beginner-Intermediate
Step 1
Let’s create a new document first. Make sure to set the dimensions to 600 x 600 pixels and the Color Mode to CMYK.
Now we pick the Pen tool (P) and draw shape of the gumball like this.
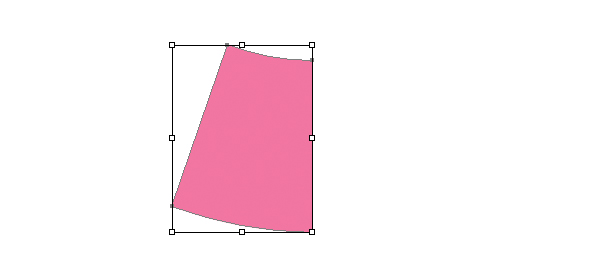
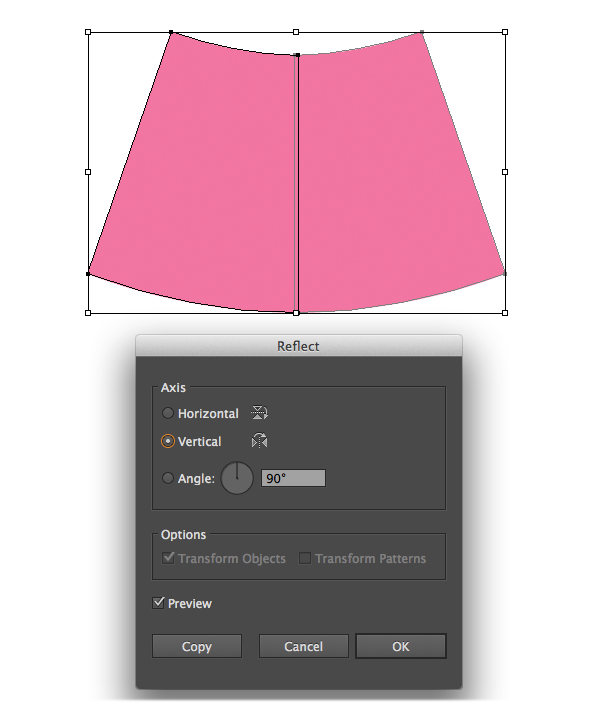
To save time, we just duplicate (Ctrl / Cmd + C, Ctrl / Cmd + V) and go to Object > Transform > Reflect > Vertical.
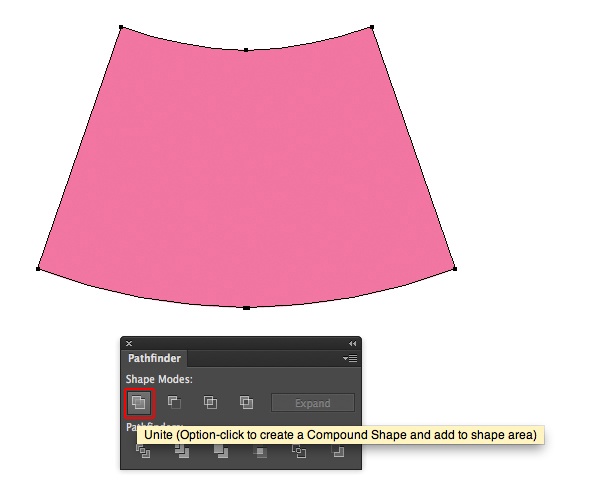
With the shapes still selected, go to Pathfinder > Unite, this effect helps us to combine objects into new shapes.
Step 2
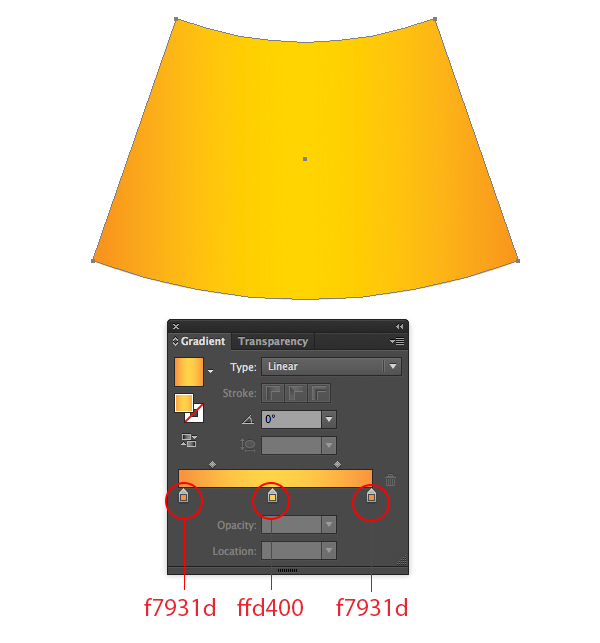
Now we fill with this gradient for the machine base.
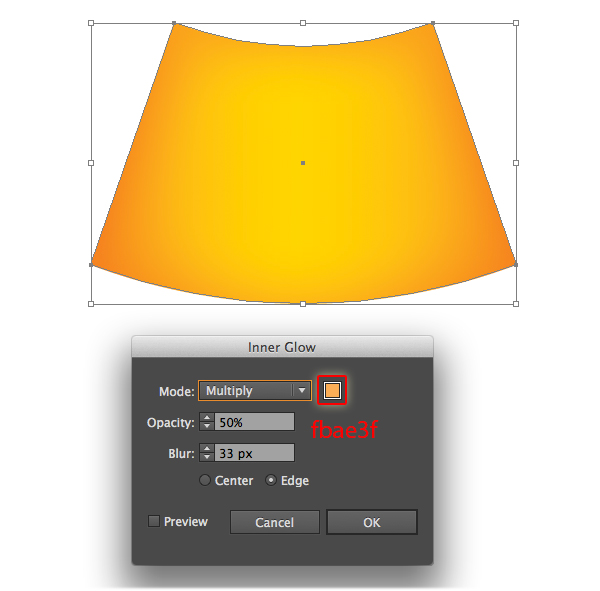
With the shapes still selected, go to Effect > Stylize > Inner Glow.
Step 3
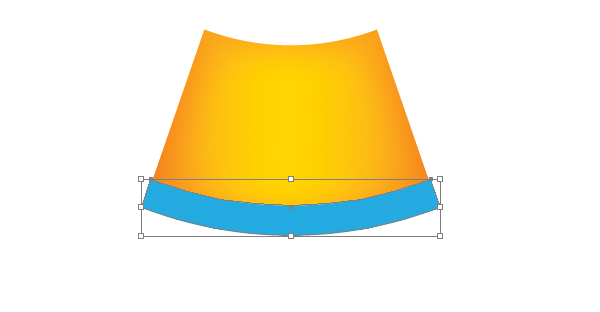
With the Pen Tool (P), draw a long, rectangular-like shape at the bottom of the gumball machine.
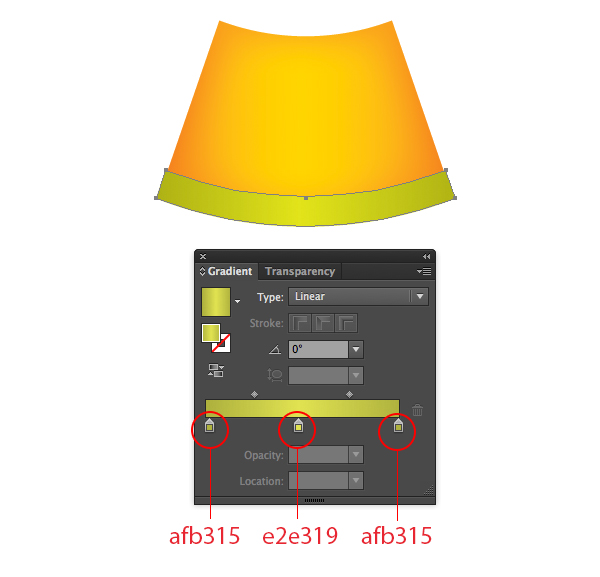
Select the bottom shape and apply the gradient shown below.
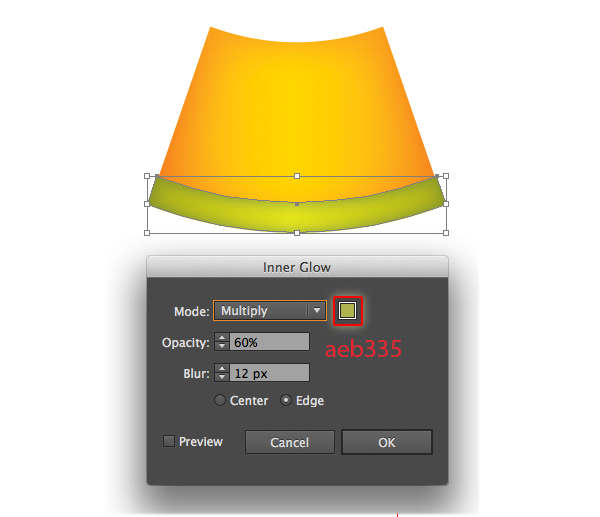
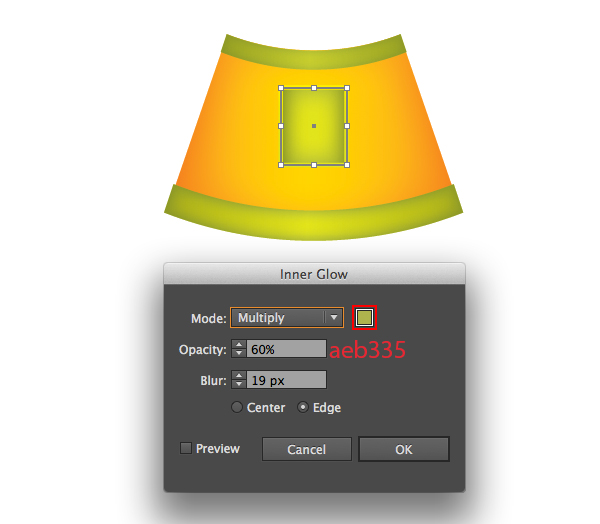
Make sure that your shape is selected, then go to Effect > Stylize > Inner Glow. Enter the attributes shown in the following image and then click the OK button. This will give an illusion of depth.
Step 4
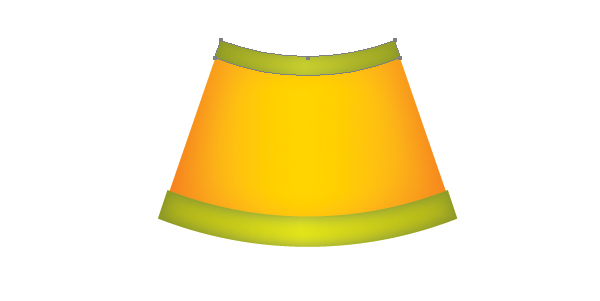
Now we repeat Step 3 for the rectangular-like shape on the top of the machine base. Apply the same gradient and Inner Glow effect from the previous step
Step 5
Let’s create the money slot.
Pick the Rectangle Tool (M) to create a long rectangle and apply the gradient you see in the image below.
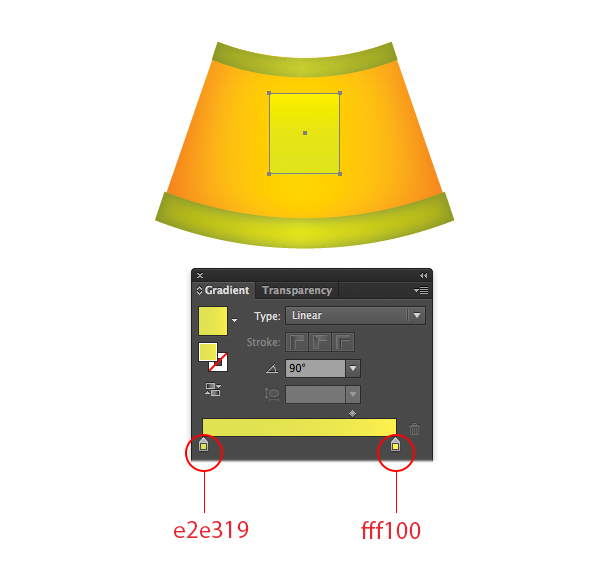
Pick the Rectangle Tool (M) to create a long rectangle just slightly smaller than the first one and place it slightly overlapping.
Align them centered vertically, then fill with this gradient.
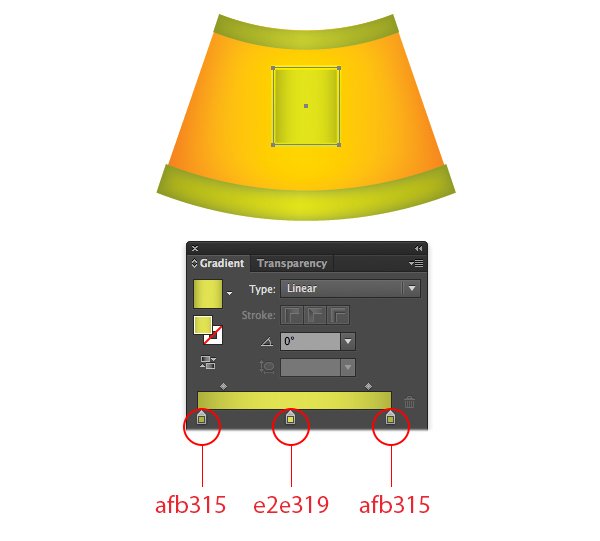
Make sure that your rectangle is still selected , go to Effect > Stylize > Inner Glow. Enter the attributes shown in the following image and then click the OK button.
Step 6
Let’s create the coin mechanism.
Pick the Ellipse Tool (L) and draw a circle, then go to Swatches palette. We can use a pre-made gradient in Illustrator, choose Open Swatches Library > Gradient > Metal.
Apply the Metal gradient to this circle.
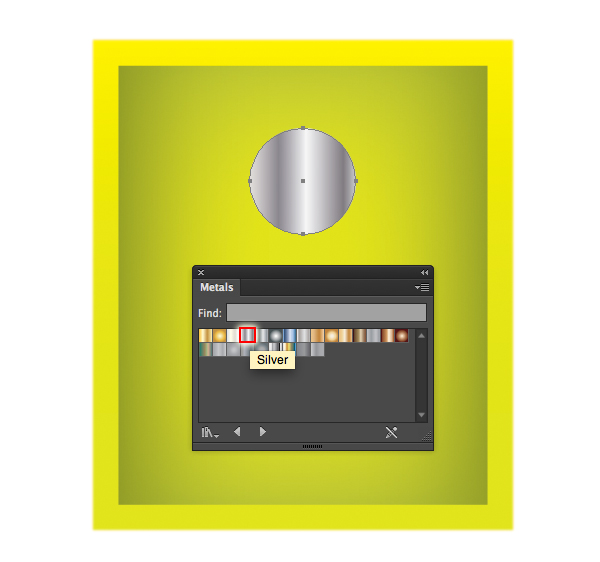
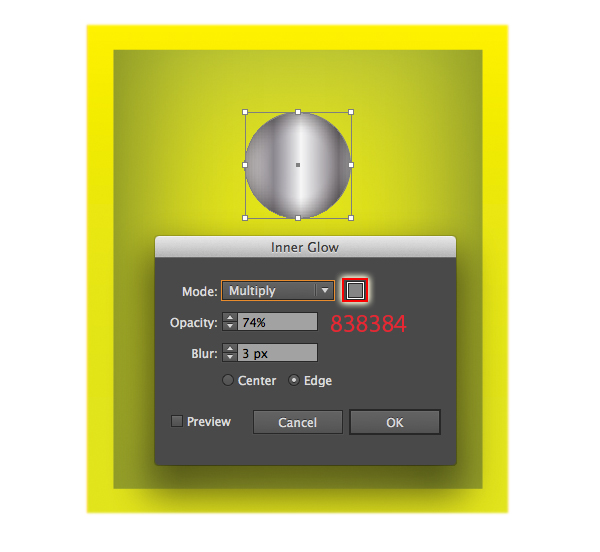
Make sure that your shape is selected, go to Effect > Stylize > Inner Glow and apply the settings you see in the image below. This will give an illusion of depth.
Step 7
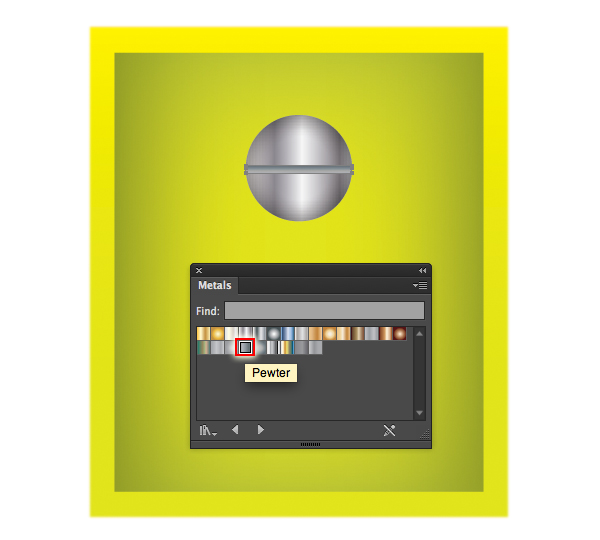
Pick the Rectangle Tool (M) to create a long rectangle and place it as in the image below. And we apply pre-made Pewter gradient from the Swatches Library for this long rectangle.
Step 8
Let’s create the turn knob.
Pick the Ellipse Tool (L) and draw a circle bigger than the first one and apply the pre-made Metal gradient from the Swatches Library for this circle.
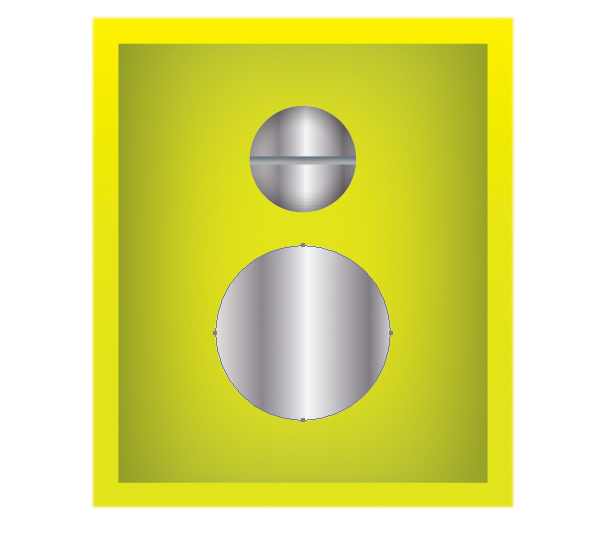
Duplicate (Ctrl / Cmd + C, Ctrl / Cmd + F) this circle and put it in front.
Resize the copy circle a little smaller. And with the shapes still selected, go to Effect > Stylize > Inner Glow and apply the settings you see in the image below.
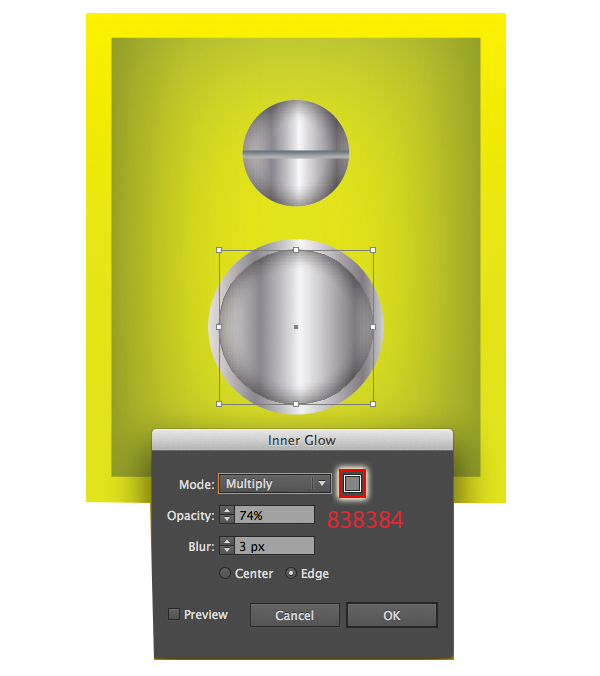
Pick the Rounded Rectangle Tool to create a long rectangle and place it as in the image below. And we apply a gradient for this long rectangle.
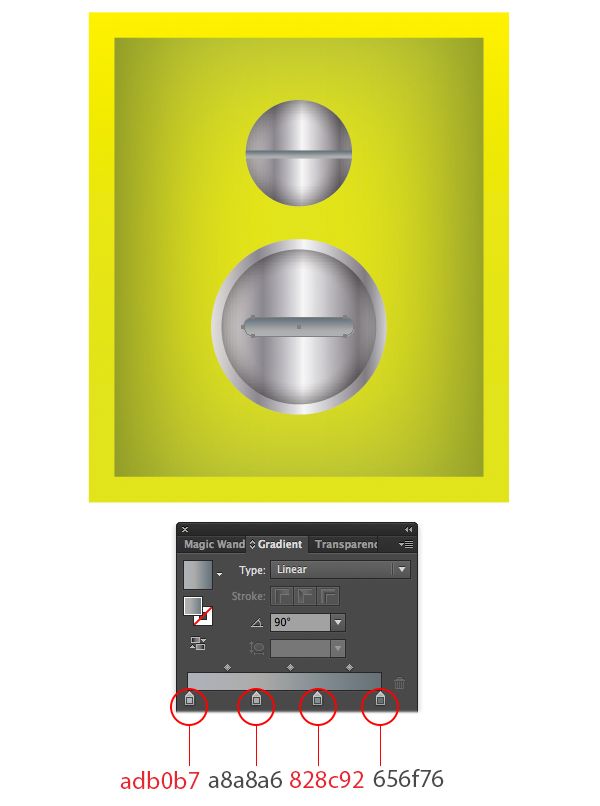
Make sure that your shape is selected, go to Effect > Stylize > Inner Glow and apply the settings you see in the image below.
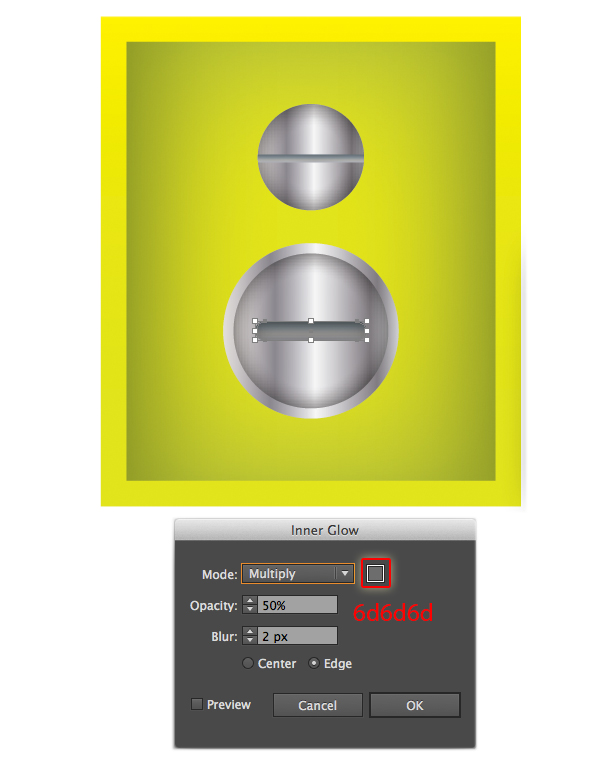
Pick the Ellipse Tool (L) and draw a circle and place it as shown below.
Select the long rectangle and a circle, then center both vertically and horizontally.
Make sure that circle is still selected, then go to Swatches palette, choose Open Swatches Library > Gradient > Metal. Apply the Pewter Radial gradient for this circle.
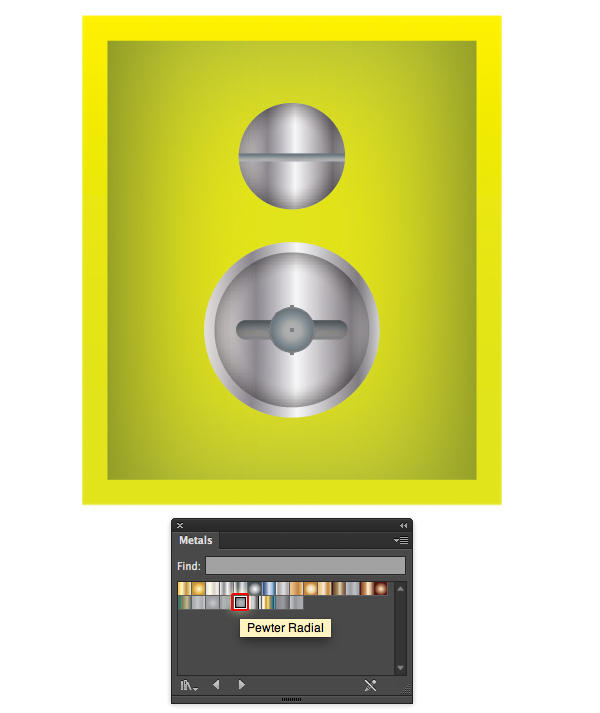
With the shapes still selected, go to Effect > Stylize > Inner Glow and apply the settings you see in the image below.
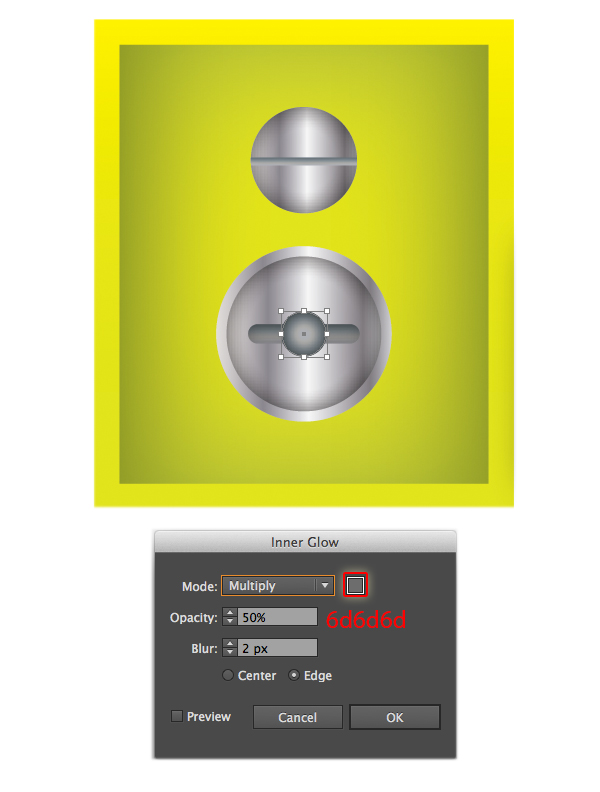
Step 9
Let’s create a hole for the opening.
Now we pick the Pen tool (P) and draw a shape as in the image below and fill it with gradient.
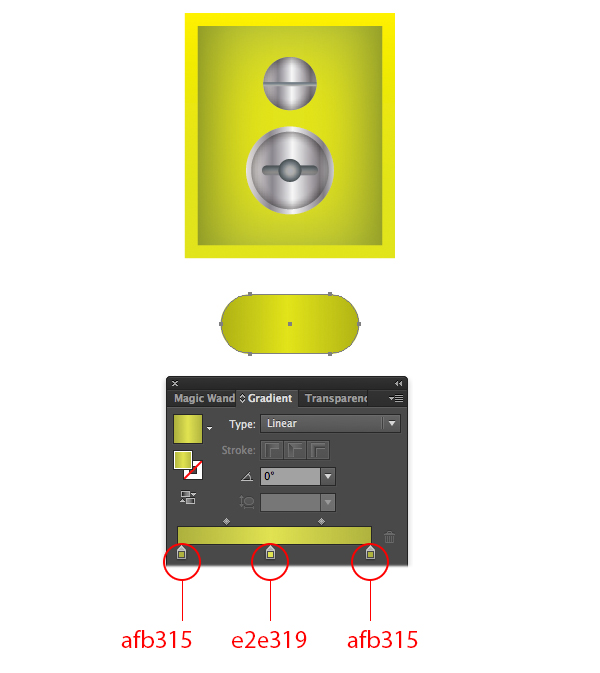
Give an illusion of depth, with the shapes still selected, go to Effect > Stylize > Inner Glow. Enter the attributes shown in the following image and then click the OK button.
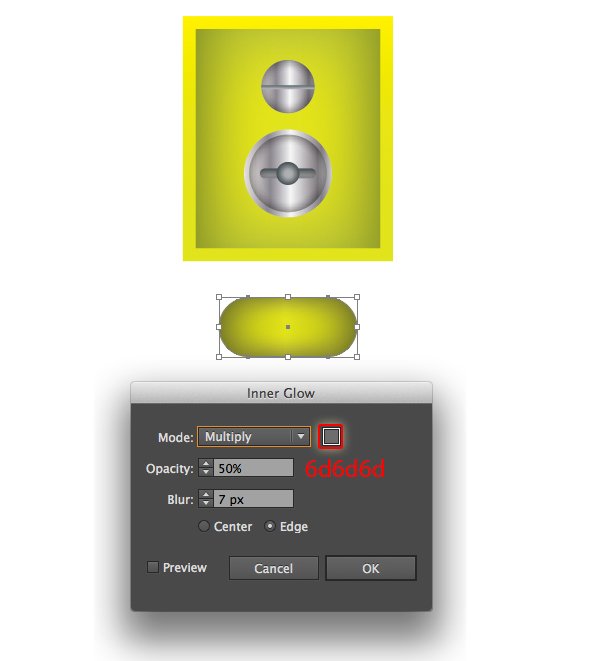
Duplicate (Ctrl / Cmd + C, Ctrl / Cmd + F) this shape and put it in front.
Resize the copy shape a little smaller. And with the shapes still selected, apply Pewter Radial gradient to it.
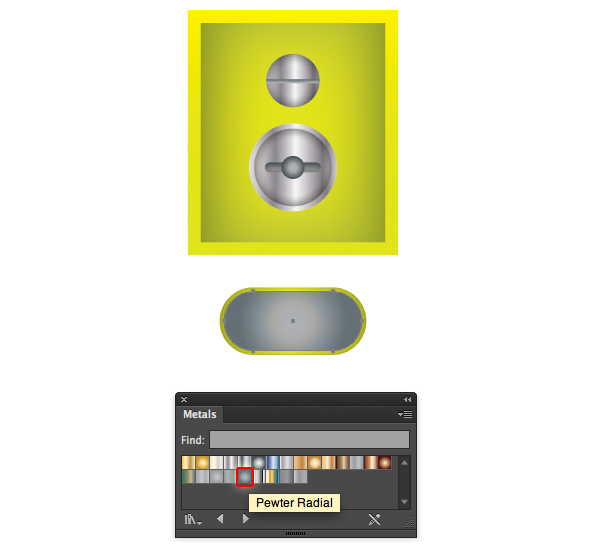
Go to Effect > Stylize > Inner Glow and apply the settings you see in the image below.
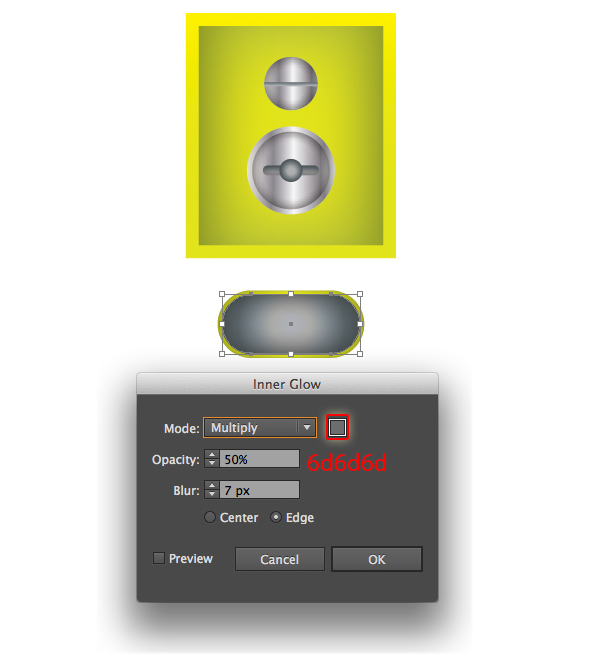
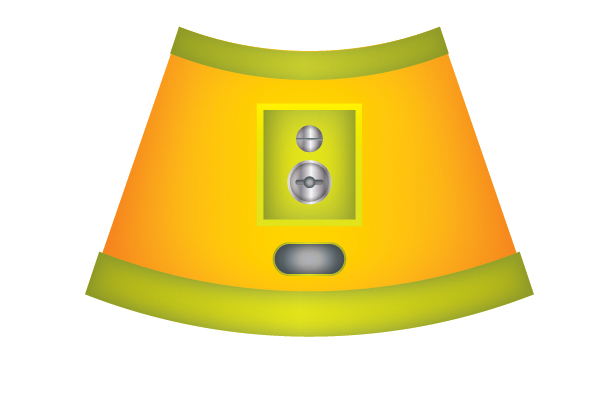
Now you should have a result like this.
Step 10
Let’s create the glass container.
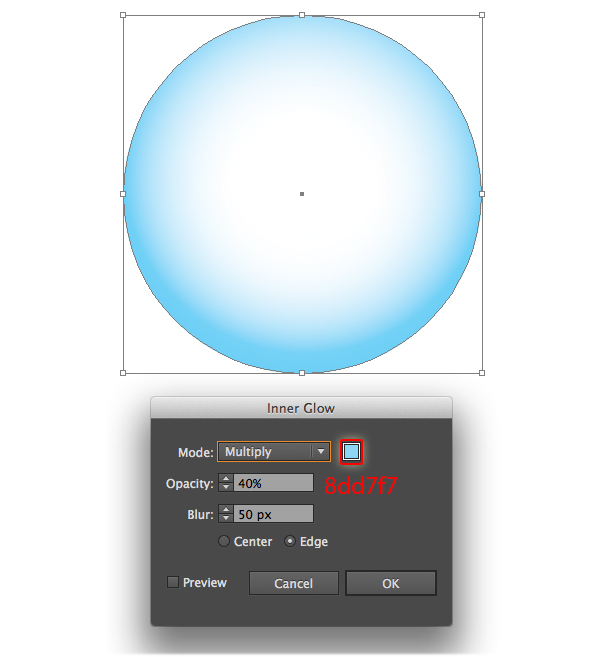
Pick the Ellipse Tool (L) and draw a circle and place it behind the machine base. Then we fill it with gradient as shown below.
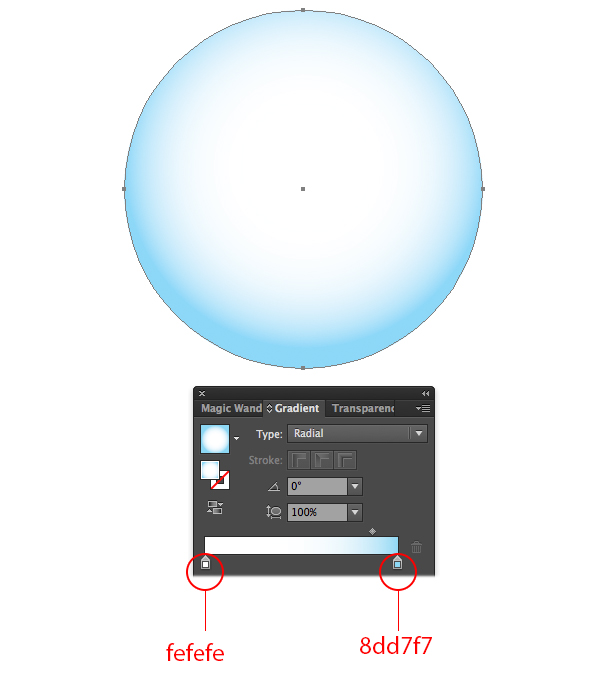
With the shapes still selected, go to Effect > Stylize > Inner Glow and apply the settings you see in the image below.
Step 11
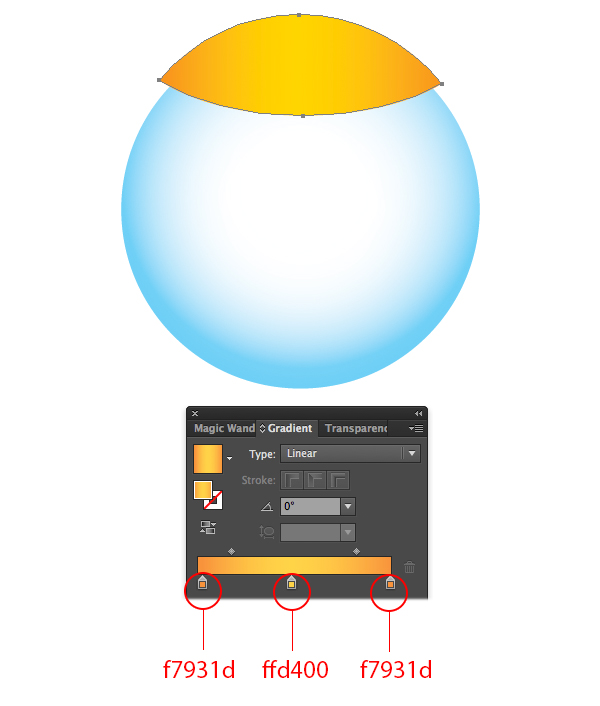
For the top of the glass container, we pick the Pen tool (P) and draw a shape as in the image below. Then we apply this gradient for our top of the glass container.
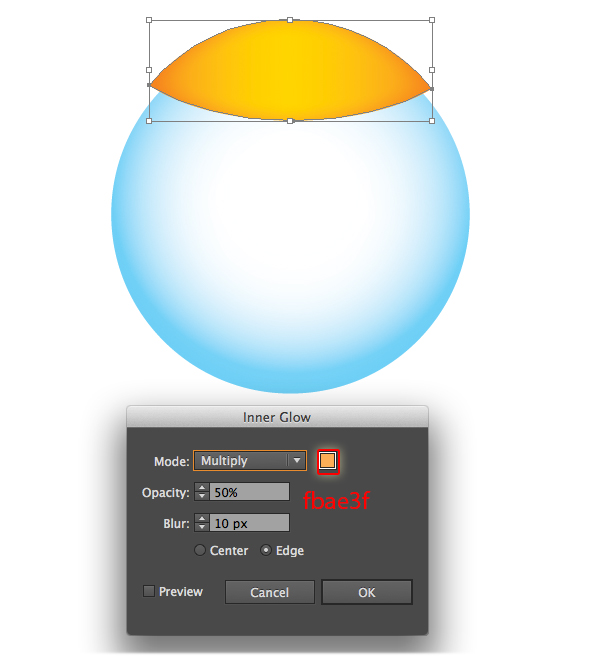
Make sure that your shape is selected, go to Effect > Stylize > Inner Glow. Enter the attributes shown in the following image and then click the OK button.
Step 12
With the Pen Tool(P), draw a long, rounded rectangle – like the shape at the top of the gumball machine.
Then we apply the same gradient and set the same values for Inner Glow setting for this shape as in Step 3.

Step 13
Next, we use the Pen tool (P) to draw a shape and place it on top of the gumball machine. Fill it with the gradient shown in the following image .
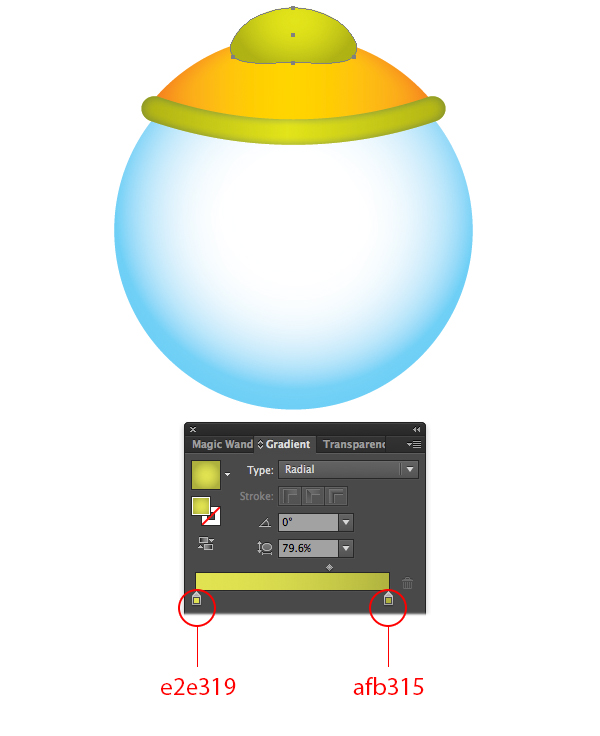
Make sure that your shape is selected, go to Effect > Stylize > Inner Glow and apply the settings you see in the image below.
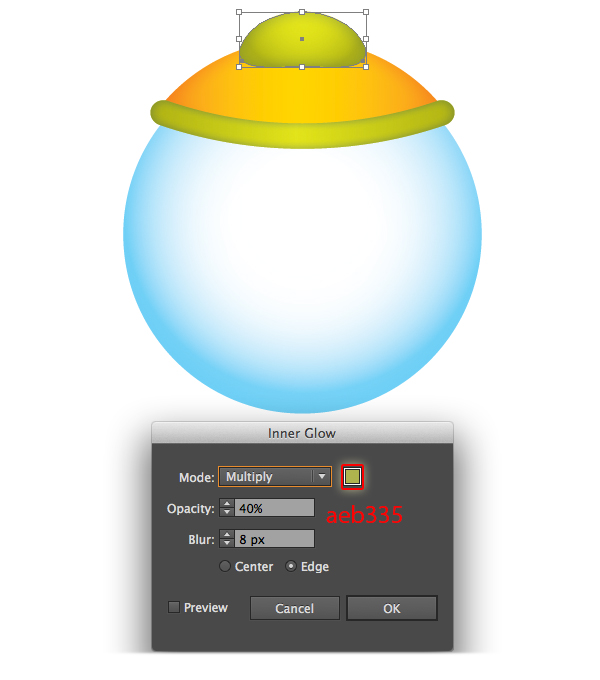
Step 14
Next, we pick the Ellipse Tool (L) and draw a circle and place it on top of the machine. Fill it with this gradient.
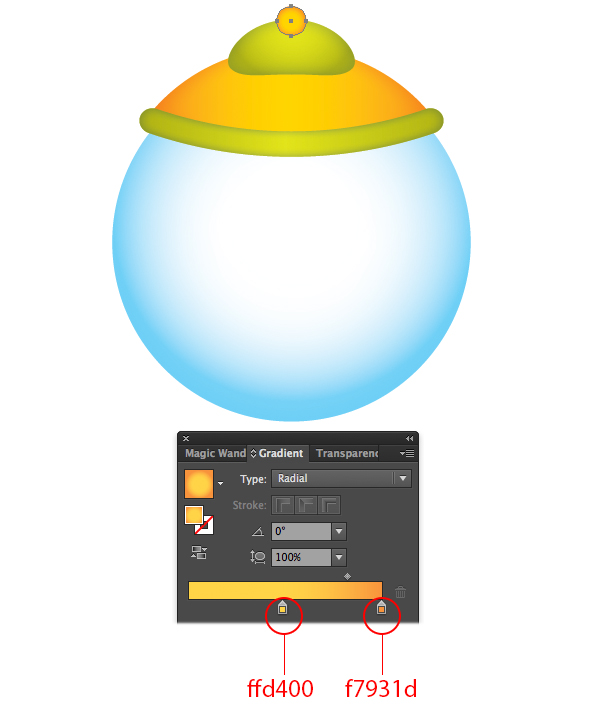
With the shapes still selected, go to Effect > Stylize > Inner Glow and apply the settings you see in the image below.
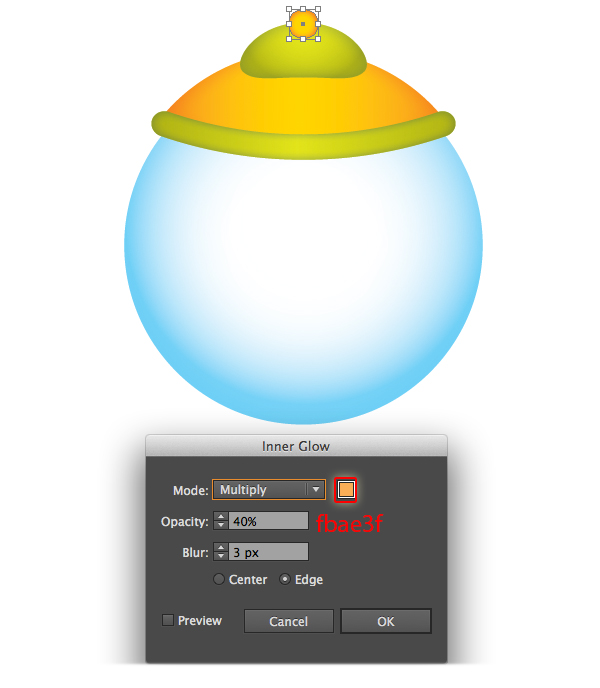
Step 15
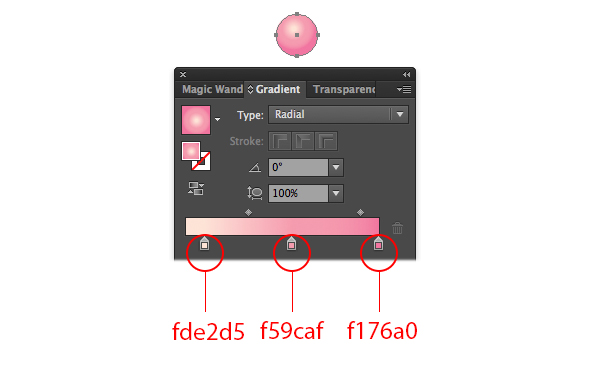
I added some bubble gum balls.
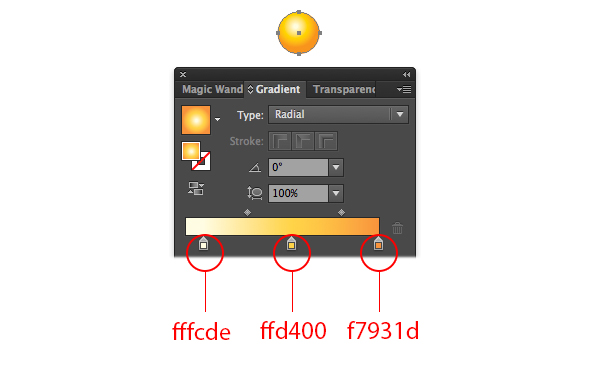
You can easily create some gum balls by picking the Ellipse Tool (L) and draw a circle and fill it with this gradient. Make as many as you want in different colors.
Step 16
I decided on five colors in total for my gumballs. How many colors you choose is entirely up to you.
Step 17
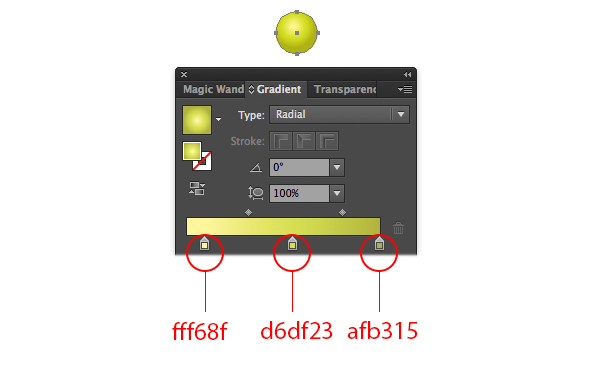
And here is the green gumball.
Step 17
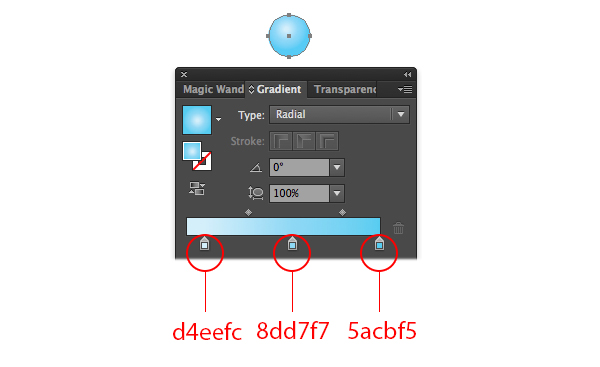
Apply this gradient for the blue gumball.
Step 18
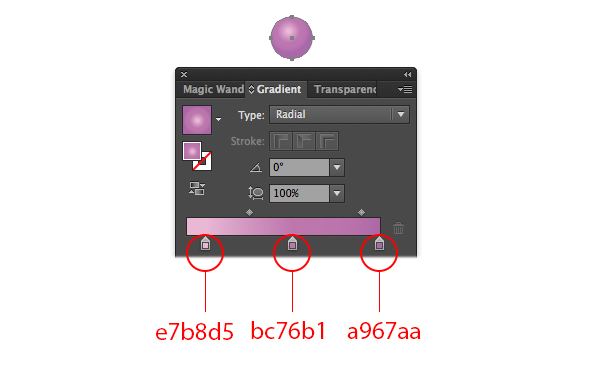
Apply this gradient for the purple gumball.
Step 19
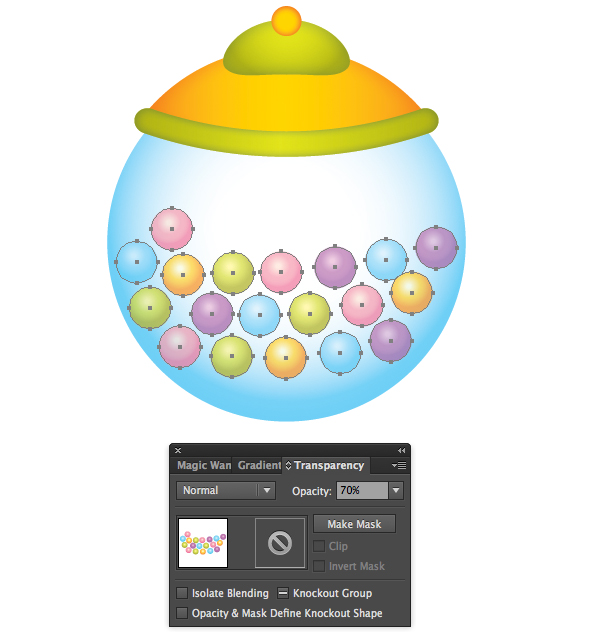
Now, we group (Cmd + G) the gumballs together. Then lower Opacity = 70% in order to make the glass case look transparent.
Step 20
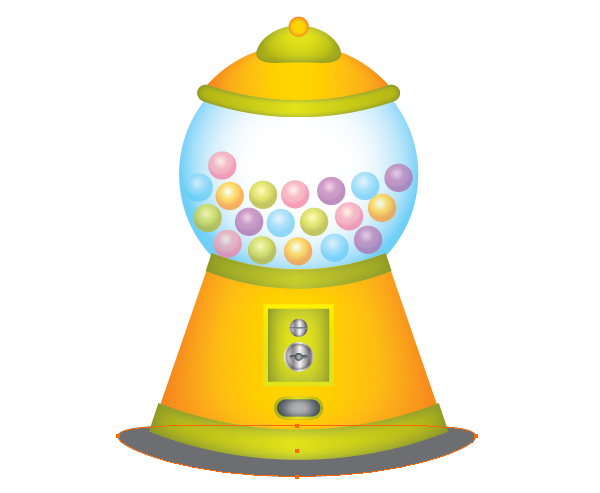
We need to add some shadow below the base shape.
We use the Pen tool (P) to draw a shape as in the image below and fill it with #6d6e70.
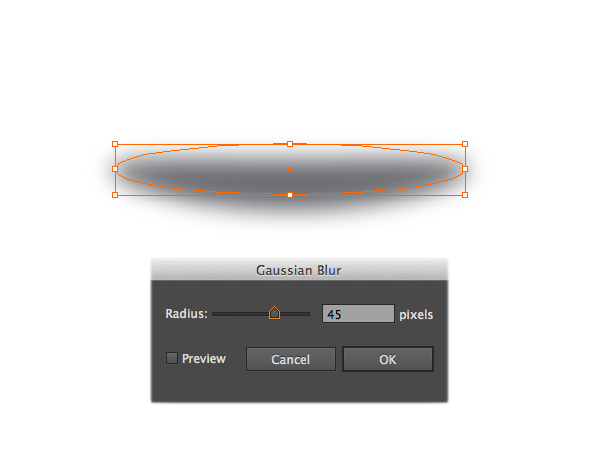
With the shapes still selected, go to Effect > Blur > Gaussian Blur and apply the settings you see in the image below.
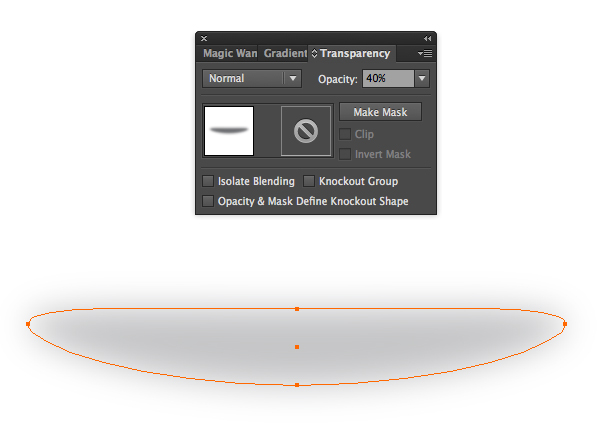
Then lower Opacity = 40%.
And We’re Done!
Here is how it should look. I hope you’ve enjoyed this tutorial and can apply these techniques in your future projects.
