In this Illustrator tutorial, you will learn how to create a tasty cupcake icon.
We will start with basic shapes and then add color, texture, and shading to create an icon that looks good enough to eat.
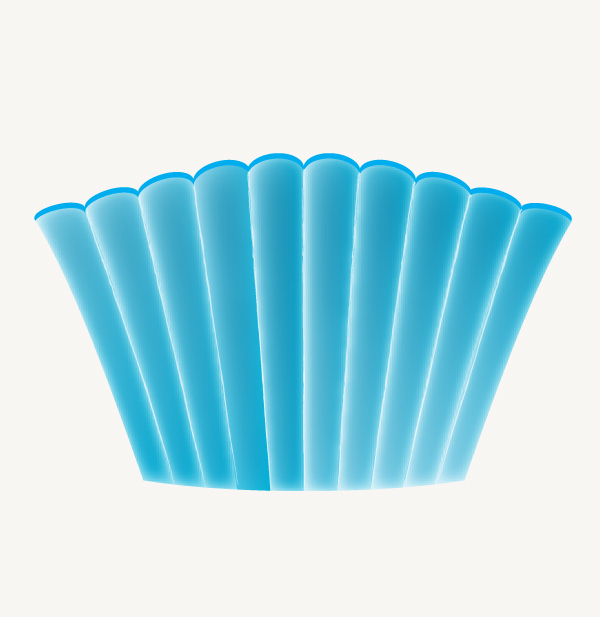
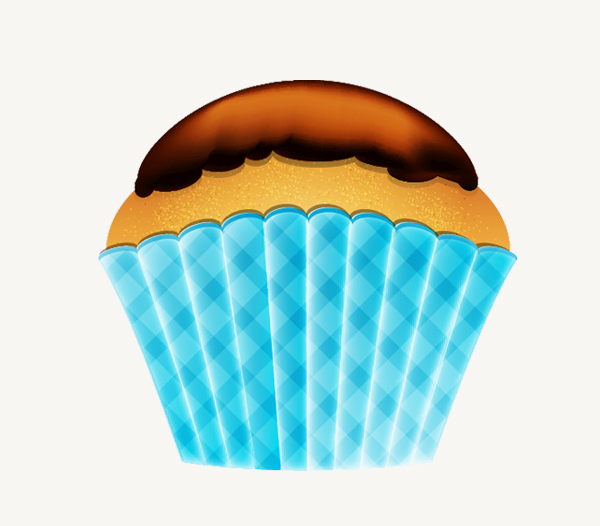
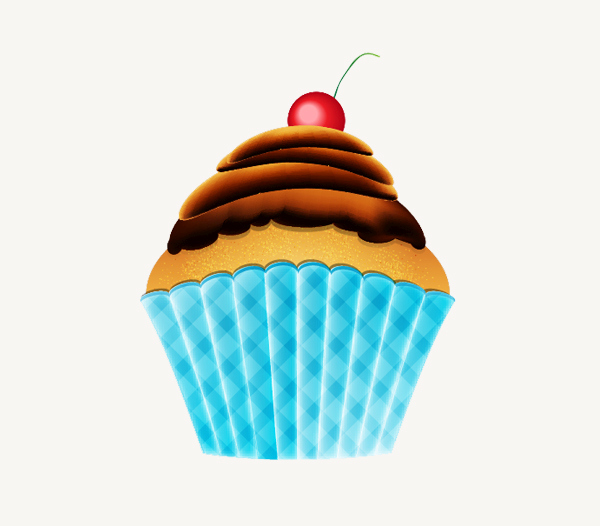
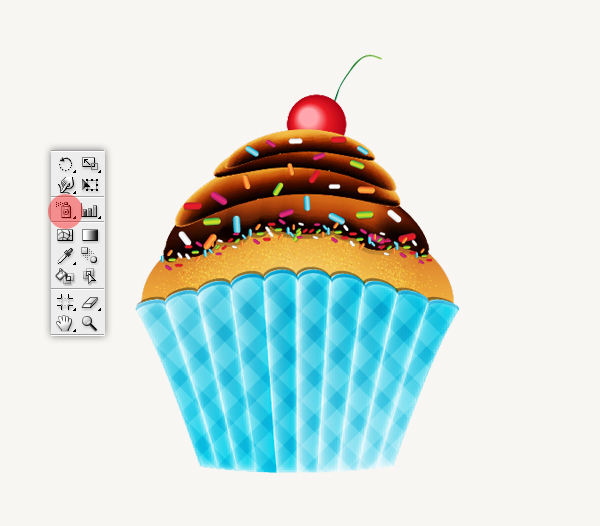
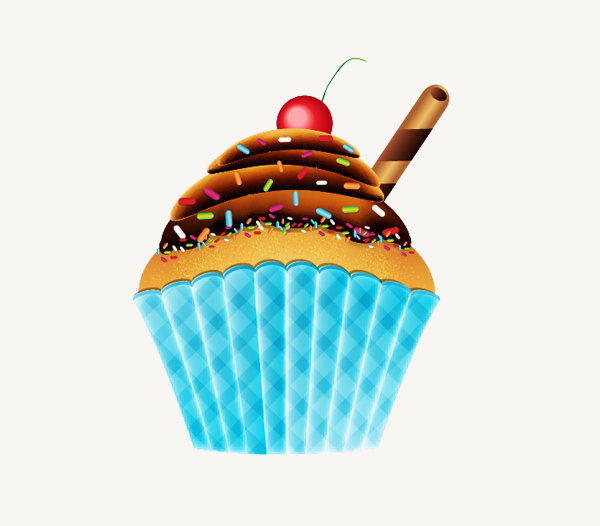
Final Image
As always, this is the final image that we’ll be creating:

Tutorial Details
- Program: Adobe Illustrator CS3
- Estimated Completion Time: 1 hour
- Difficulty: Beginner-Intermediate
Step 1
Let’s create a new document first. Make sure to set the dimensions to 600 x 600 pixels and the Color Mode to RGB.

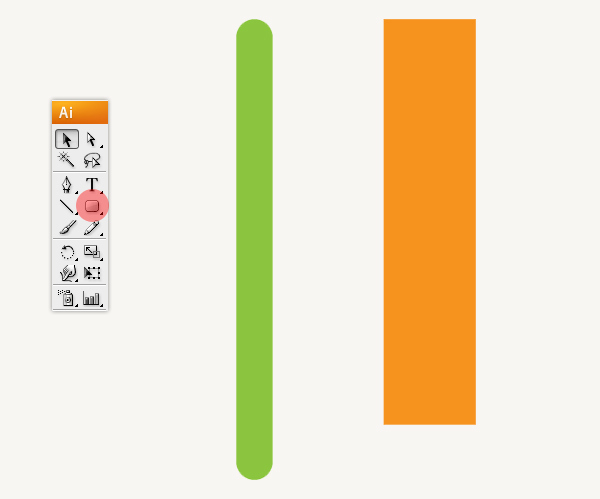
Step 2
Pick the Rounded rectangle tool and create 2 shapes like in the image below, the size is not important..
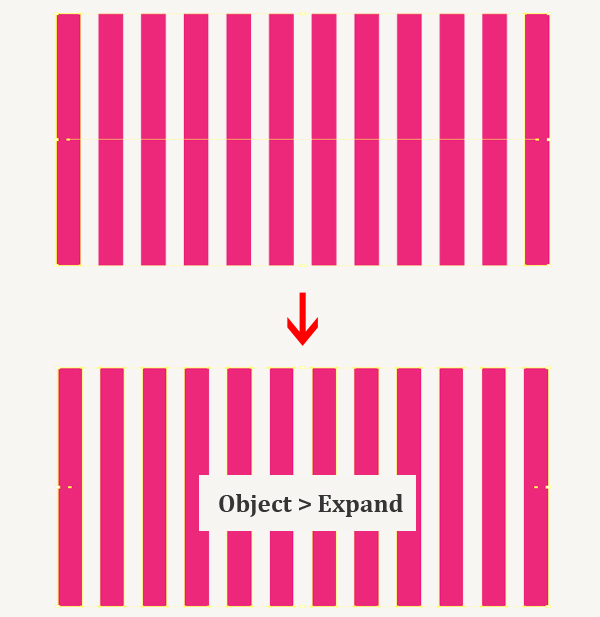
Next, we pick the orange shape and put it in front of the green shape. Then hit Intersect shape area button in Pathfinder panel, make sure to expand the shape, go to Object > Expand Appearance
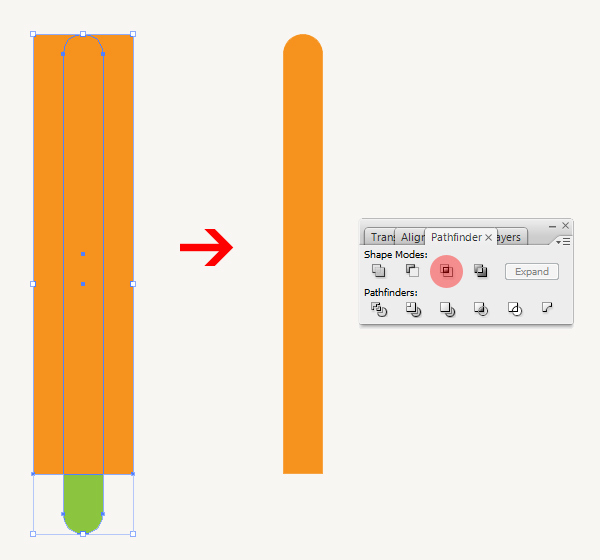
Now we select the new shape that we have just created, duplicate it 9 times and group ( Ctrl + G ) them.
Step 3
Click on the shape you have created. Drag your cursor to the Effect Menu on the top horizontal toolbar. Find the word “Warp” under “Illustrator Effects” . Drag your cursor to the word and hover until the option drops down on the right-hand side. Then go to Object > Expand Appearance to expand the shape.
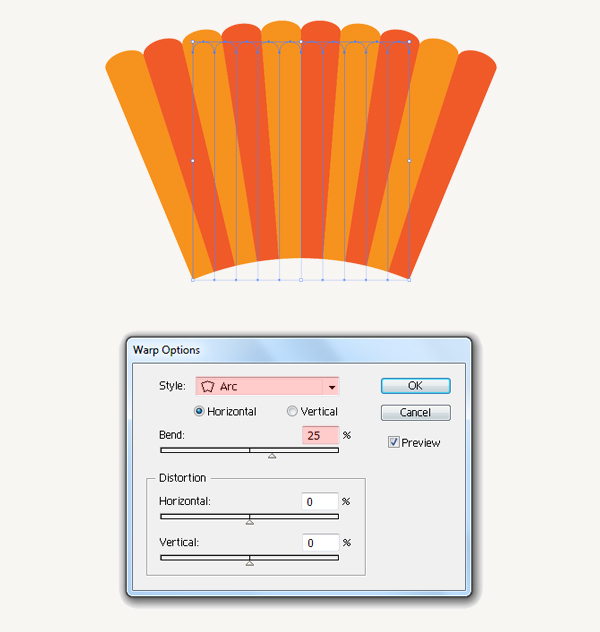
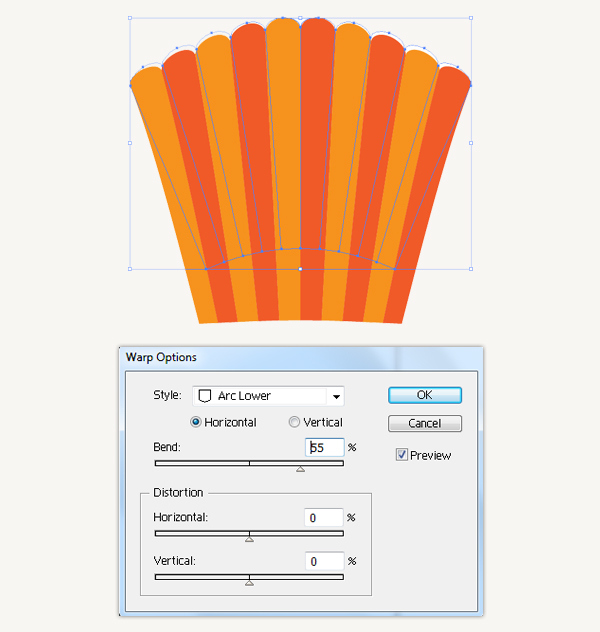
Next, we warp our shape into Arc Lower as in the image below. Make sure to expand it.
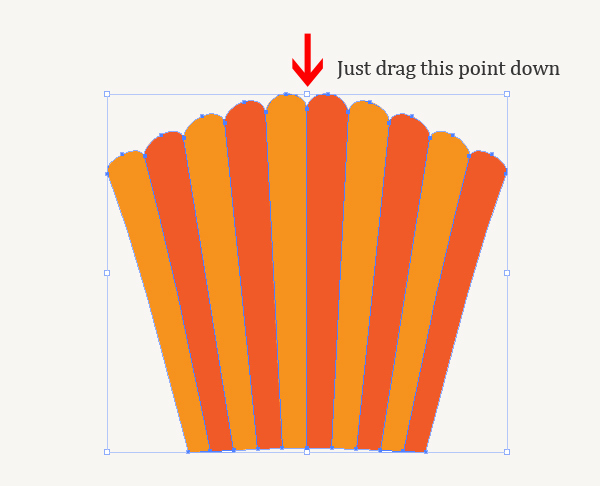
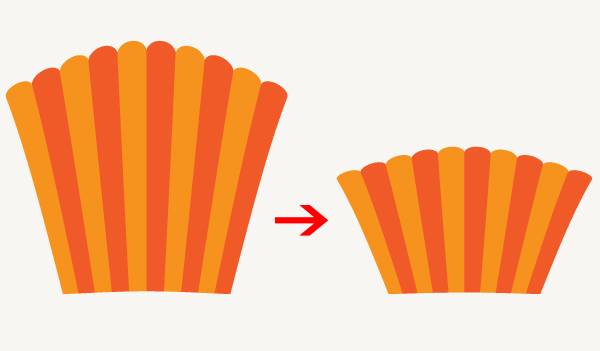
Now we scale our shape and modify it a little bit.
You should have a result like this image below.
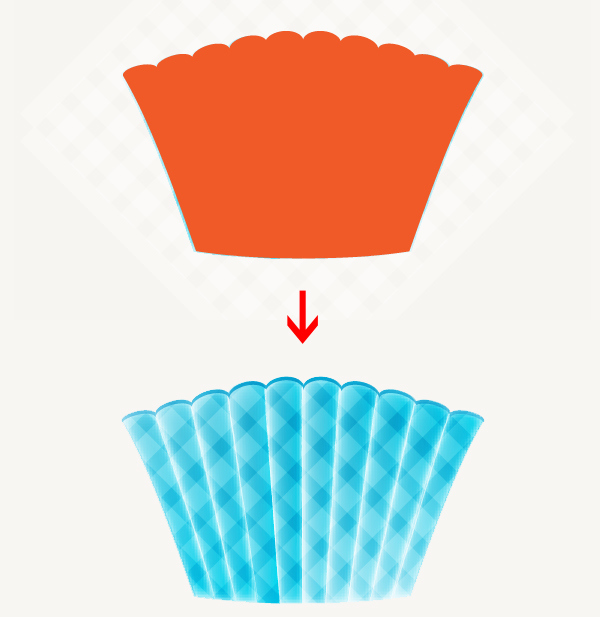
Step 4
In this step, we warp our new shape into Arc Lower one more time and don’t forget to expand it.
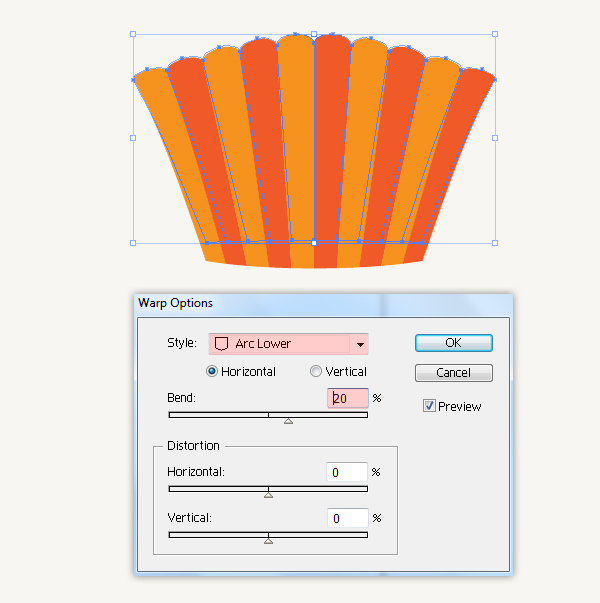
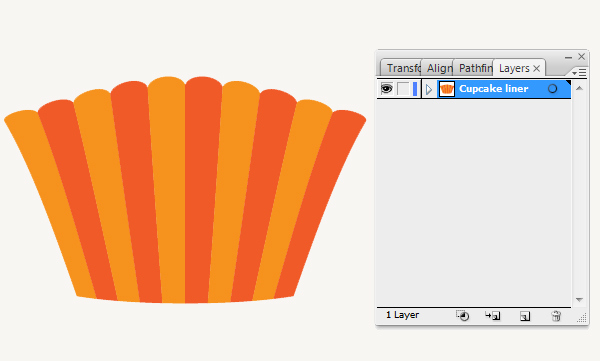
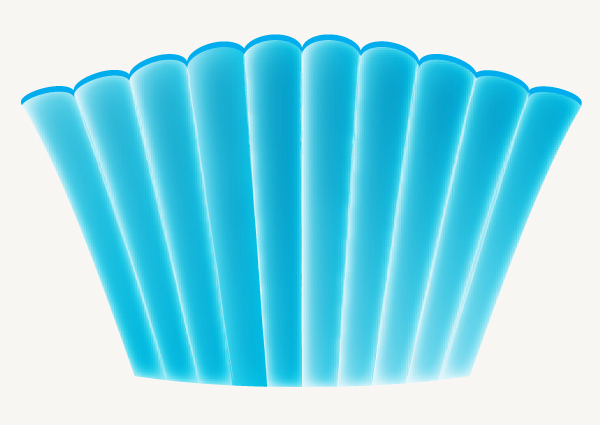
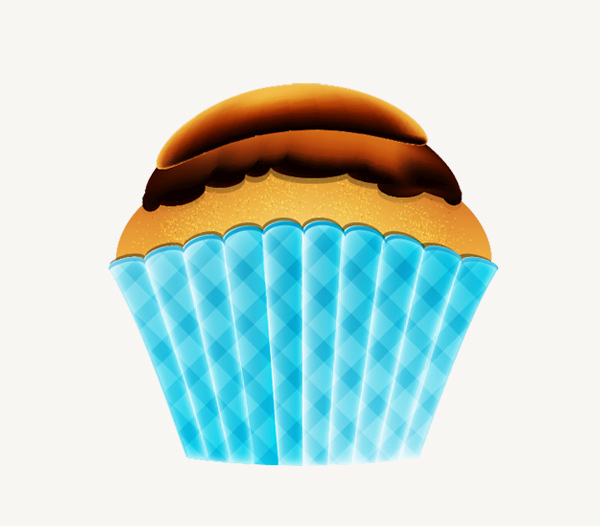
Now we get the result as in the image below. Label this layer as ” Cupcake liner”.
Step 5
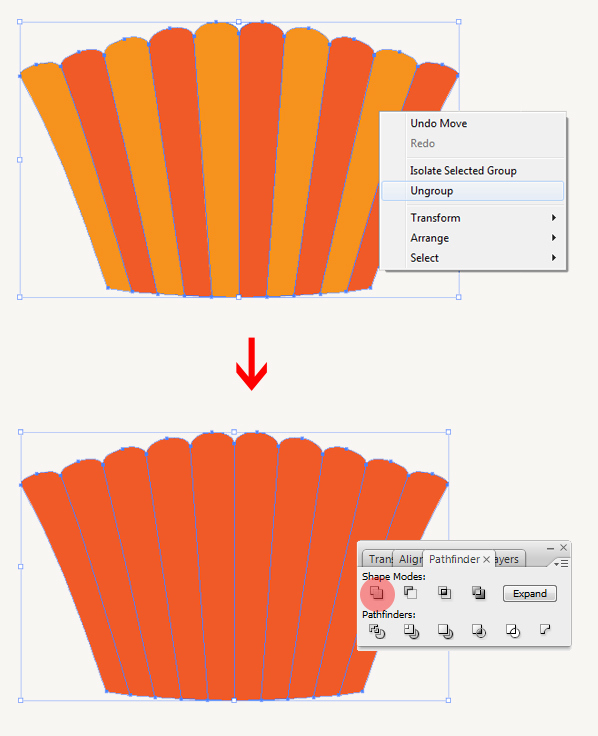
Duplicate (Ctrl / Cmd + C, Ctrl / Cmd + F) the ” Cupcake liner “,select the copy and Ungroup ( Shift + Ctrl + G ) (or we can right-click on it and choose Ungroup) the shape, then under the Pathfinder Panel hit the Add to shape area button. Make sure to expand it.
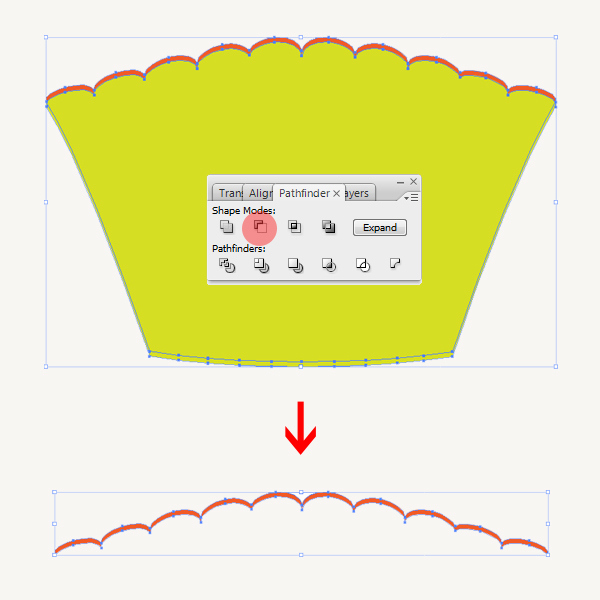
Now we duplicate (Ctrl / Cmd + C, Ctrl / Cmd + F) the new shape we have created twice and place a copy of the shape off to the side of the artboard, which we’ll use later. Place another copy of it to the side of the Artboard, and under the Pathfinder Panel hit the Subtract from shape area button. Make sure to expand it.
In the end, you should have something like this.
Step 6
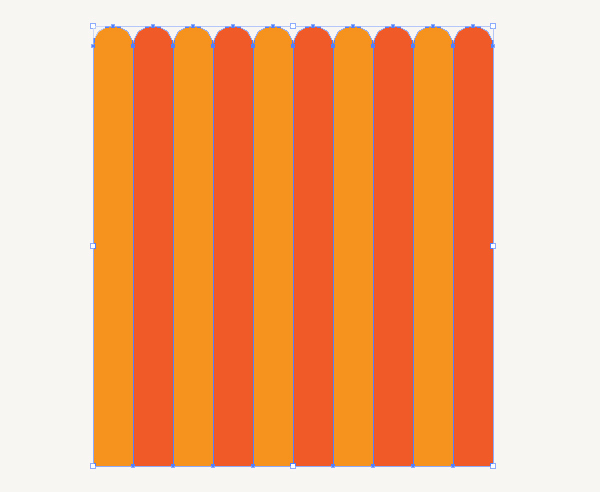
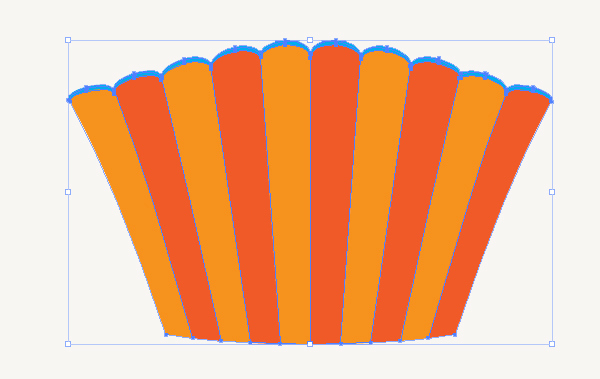
Now we use the Pen tool (P) to create some stripes like in the image below.
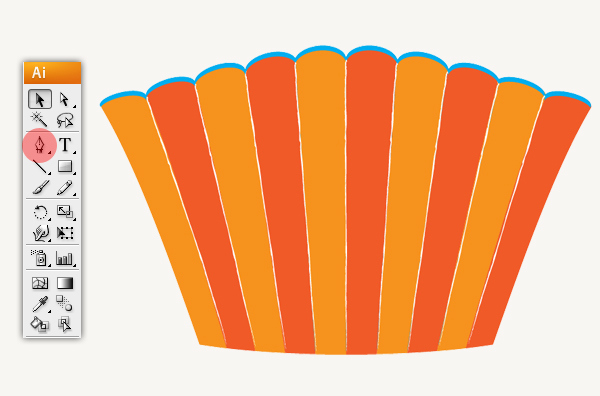
Step 7
Our “Cupcake Liner “ is now ready to get some nice color gradients. We will be using only linear color gradients.
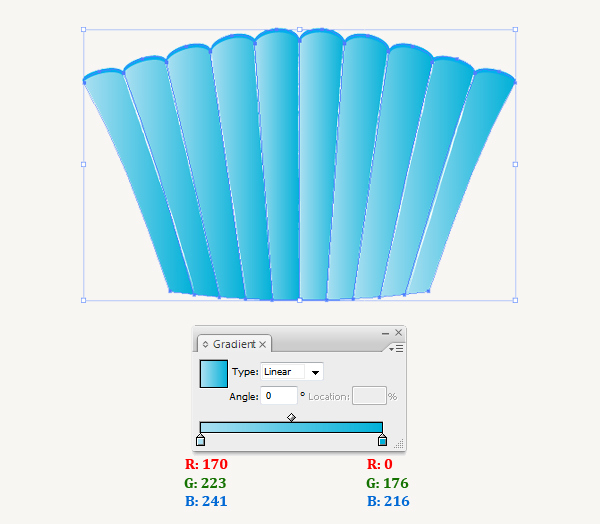
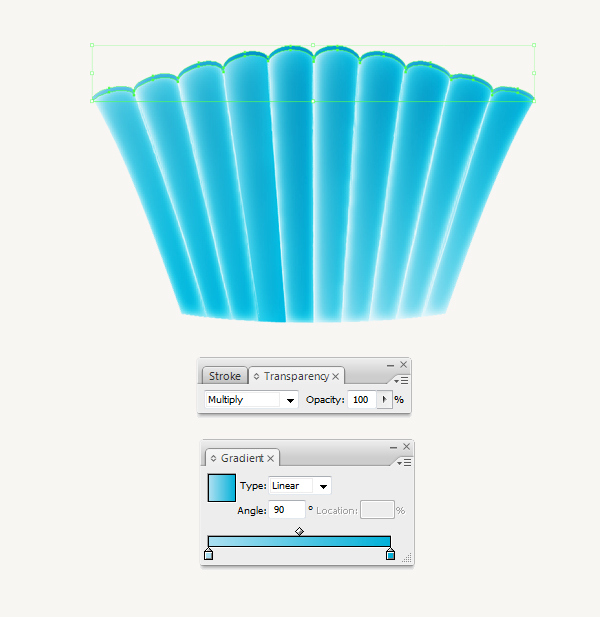
Now we Ungroup ( Shift + Ctrl + G ) the ” Cupcake Liner “ and apply Inner Glow effect for each part , just go to Effect > Stylize > Inner Glow. Change the settings as shown in the image below.
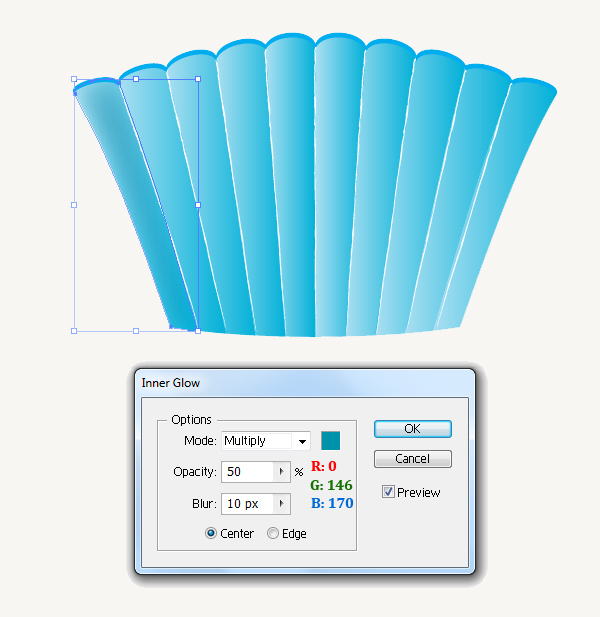
I want to add Inner Glow effect one more time. Now we go to Window > Appearance to view and adjust the appearance attributes. Then Click the Duplicate Selected Item button.

Now we Double click to edit the effect as in the image below.
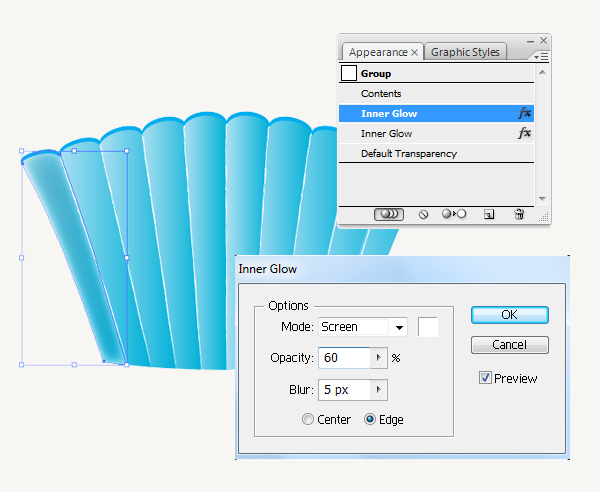
Step 8
Repeat Step 7 for the other parts of the ” Cupcake Liner “ and lower Opacity =40% for our white stripes. Then you should get the result as in this image below.
Step 9
We want the “Cupcake Liner “ color to be much lighter than it is so duplicate ( Ctrl / Cmd + C, Ctrl / Cmd + F) it and apply the Soft Light blending mode for the copy.
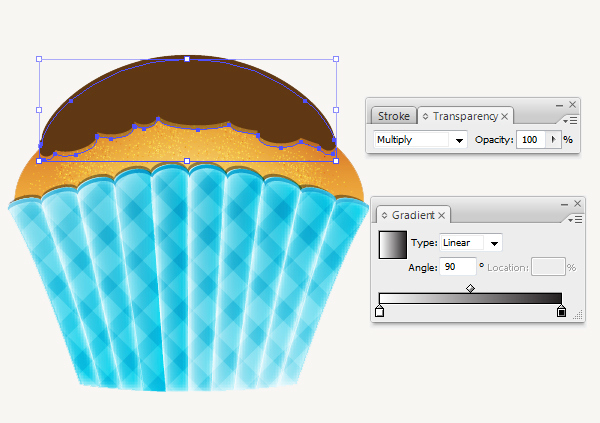
Now we apply the same linear gradient for the blue shape on top of ” Cupcake Liner “. Make sure to change the gradient Angle = 90 and apply the Multiply blending mode for it.
Step 10
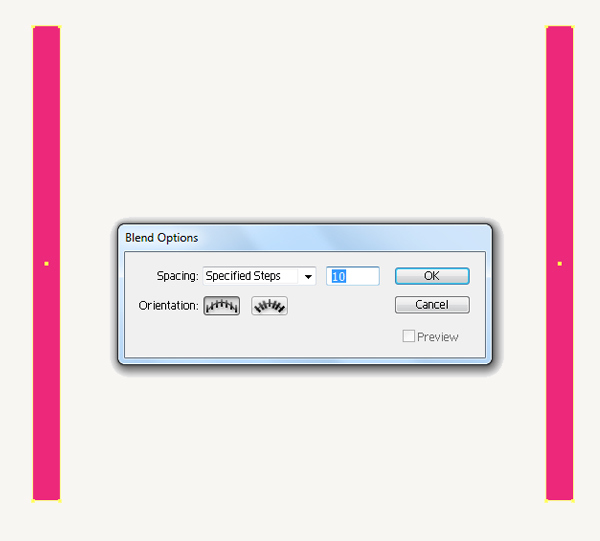
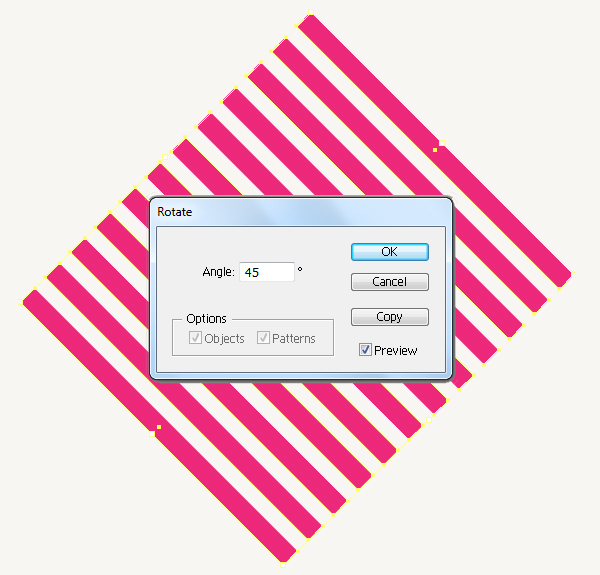
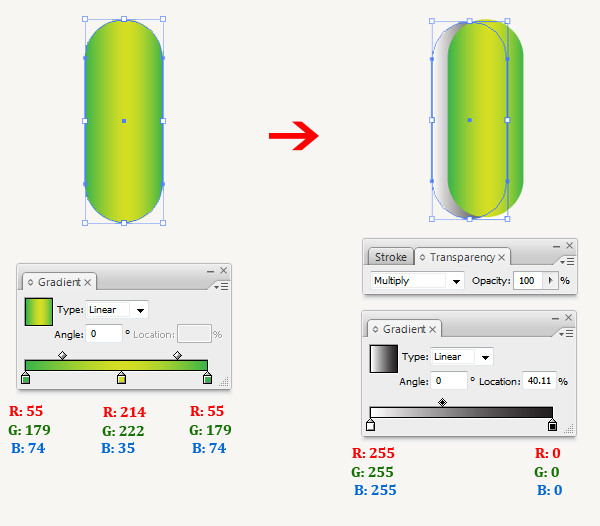
With the Rectangle Tool (U) draw 2 parallel rectangular shapes, place these two shapes as shown in the image below. Select them then go to Object > Blend > Make.
Now you should have this result. Don’t forget to expand them, just go to Object > Expand. It will turn the object into an editable shape.
With the shape still selected , go to Object > Transform > Rotate and enter a value for the Angle option in the panel.
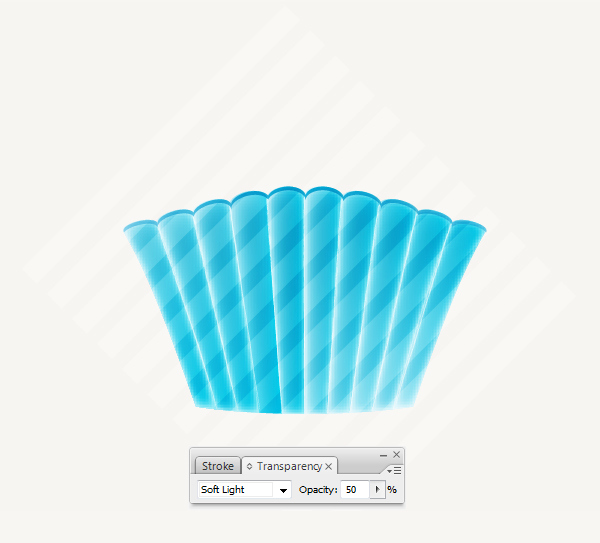
Change the shape to white #FFFFFF. Apply the Soft Light blending mode to it and lower Opacity = 50%.
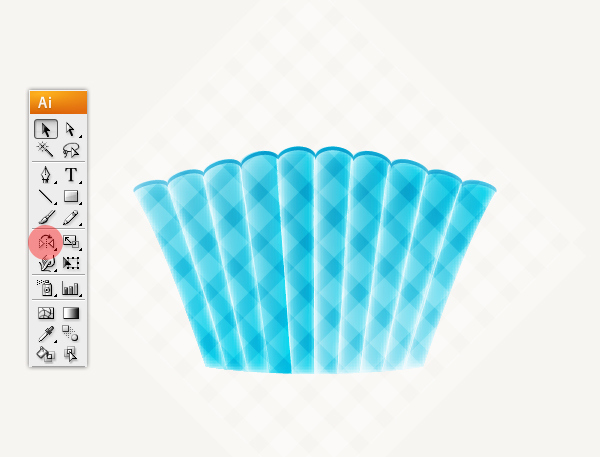
Duplicate ( Ctrl / Cmd + C, Ctrl / Cmd + F) the shape and select the Reflect tool (O) to reflect the copy shape. Now you should get the result shown in the image below.
Step 11
Back in Step 5, I mentioned placing a copy of the cupcake liner shape we had created. Go ahead and grab that shape now. Place another copy of it to the side of the Artboard, as we’ll use this shape again later.
Now we grab the cupcake liner shape place it as shown. Select all the elements and go to Object > Clipping Mask > Make.
Now we place another cupcake liner copy to the back. Fill it with black color #000000. Apply Multiply blending mode to it and lower Opacity = 40%.

Step 12
We’re done with the cupcake liner. It’s time for the muffin now.
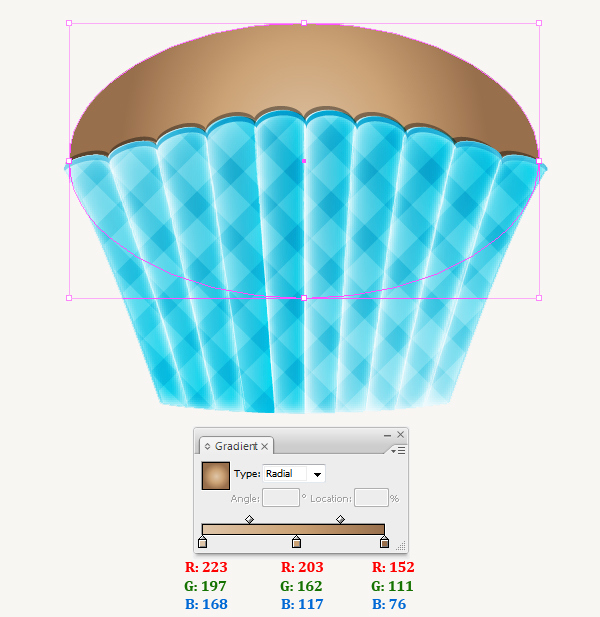
Create a new layer and name it ” Muffin “, put it under ” Cupcake Liner ” . Using the Ellipse tool (L) to draw an ellipse and fill with the gradient as in the image below.
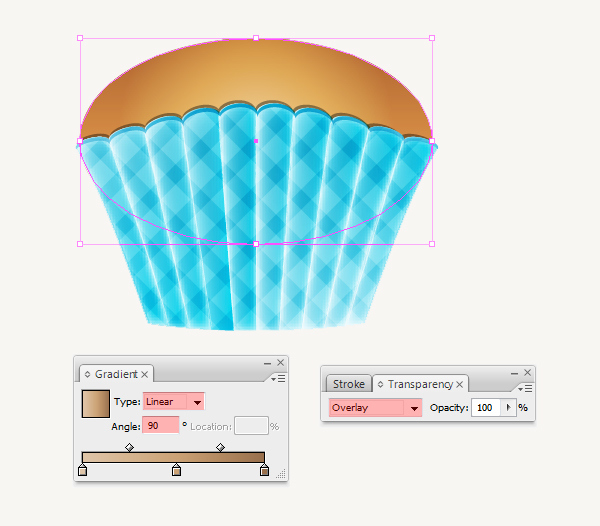
Duplicate ( Ctrl / Cmd + C, Ctrl / Cmd + F) the muffin, change the gradient type to Linear with Angle = 90 and apply Overlay blending mode to the copy. Now you should get the result shown here.
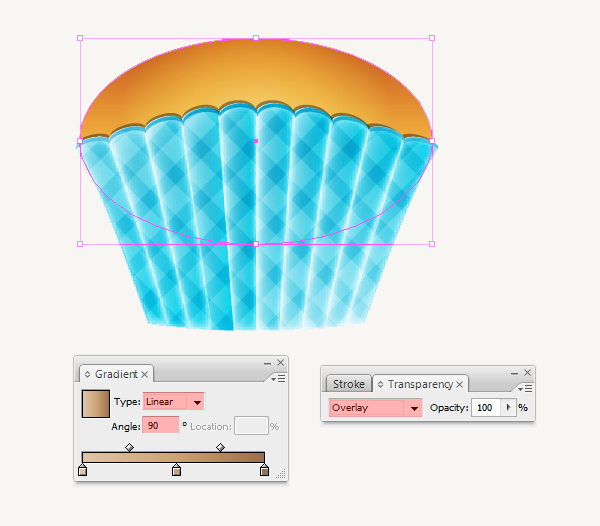
We want the muffin color to be much lighter than it is so duplicate ( Ctrl / Cmd + C, Ctrl / Cmd + F) it one more time. Here is the result.
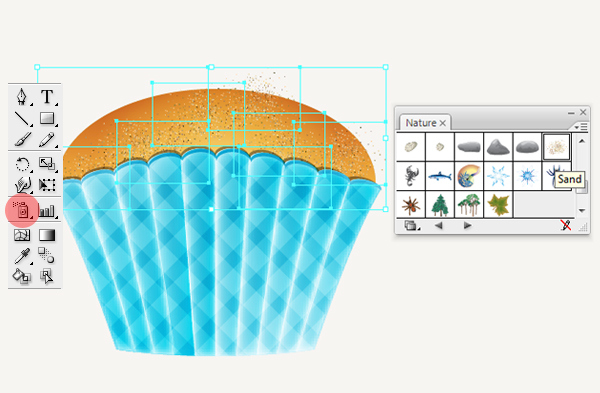
In the Symbol palette go to Open Symbol Library > Nature > Sand . Now let’s add sand texture to our muffin to make it look more realistic . Feel free to modify it however you like then apply Overlay blending mode to it with lower Opacity = 80%. Make sure to expand them , go to Object > Expand .
Step 13
Well, now it’s time to make the frosting.
Pick the Ellipse tool (L) to draw an ellipse like in the image below. With the ellipse still selected, go to Effect > Warp > Arc. Make sure to expand the shape.

Now duplicate ( Ctrl / Cmd + C, Ctrl / Cmd + F ) the new shape we have created and place a copy of the shape off to the side of the artboard, which we’ll use later.
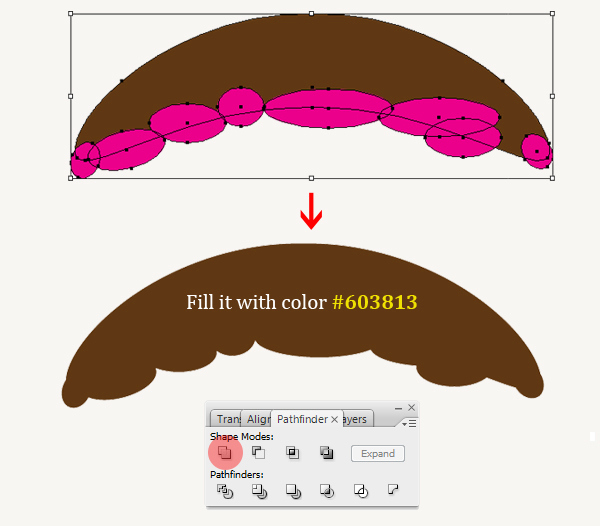
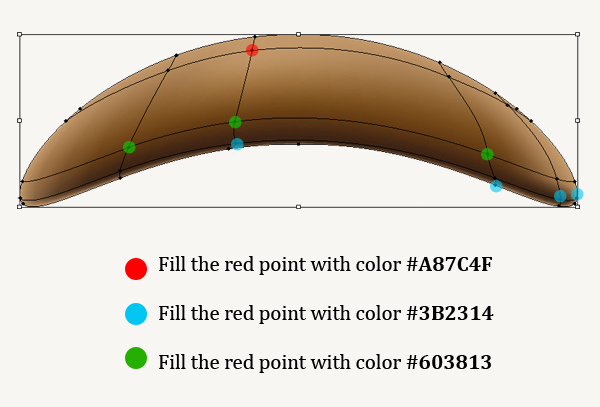
Next, let’s work with this frosting, as you know the frosting on the cupcake is never perfect, so try to make it a bit irregular. Now we use the Ellipse Tool (L) create some ellipses and put them as shown in the image below. Select the new shape we have just created and the ellipse then click on the Add to shape area button from the Pathfidner palette. Don’t forget to expand the shape . Fill our new shape with #603813.
Duplicate ( Ctrl / Cmd + C, Ctrl / Cmd + F ) the new frosting shape and put it back to represent as frosting shadow. Apply the Linear Gradient with white to black and change the blending mode to Multiply.
Step 14
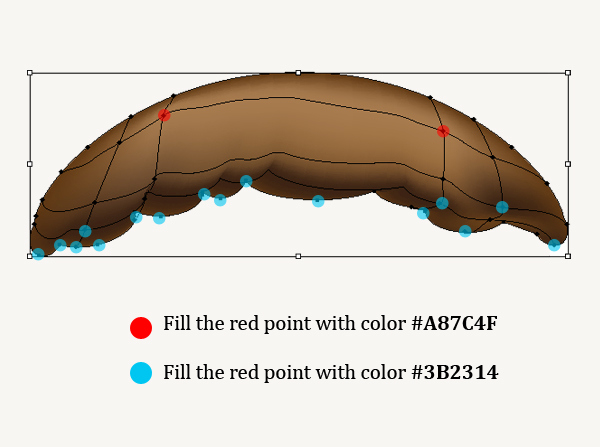
Now we select the frosting and add a point to a mesh by using the Mesh tool (U) and clicking anywhere in the shape’s area. After converting a shape into a mesh, you can select points with three tools: Mesh tool, Direct selection tool, and the Lasso tool. All you have to do now to add color to the mesh is select a color as in the image below.
Duplicate ( Ctrl / Cmd + C, Ctrl / Cmd + F) the frosting 2 times, and apply Overlay blending mode to the copies. Here is my result.
Step 15
Back in Step 13, I mentioned placing a copy of the frosting shape we had created. Go ahead and grab that shape now. Place the copy of it to the side of the Artboard, and fill it with #A87C4F. Then we convert this shape into a mesh.
Duplicate ( Ctrl / Cmd + C, Ctrl / Cmd + F) the frosting 2 times, and apply Overlay blending mode to the copies. Place them as shown in the image below. Here is my result:
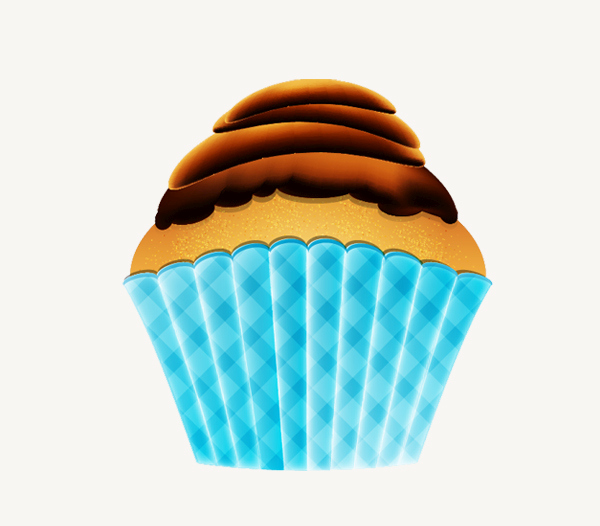
Now we duplicate ( Ctrl / Cmd + C, Ctrl / Cmd + F) the top frosting, modify however you like. Here is my result.
Step 16
Time for the sweet cherry!
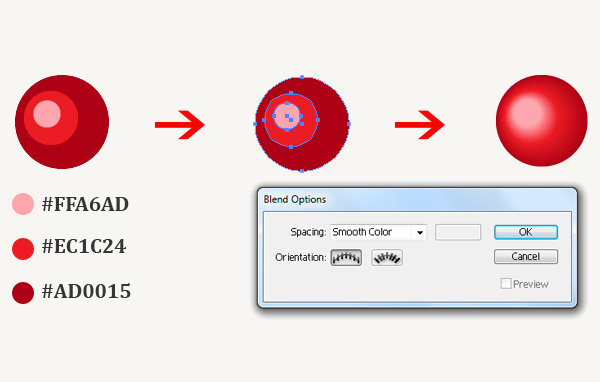
Now we pick the Ellipse tool (L) and draw 3 ellipses as shown in the image below. Then select all of them and go to Object > Blend > Make. Name this layer ” Cherry ” and place this layer under ” Frosting “.
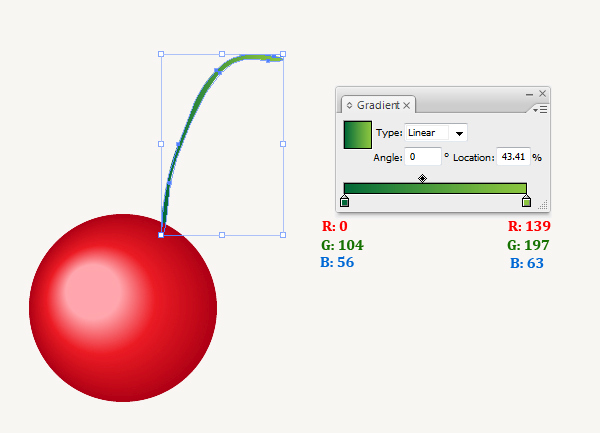
Using the Pen tool (P) draw the stem and apply a linear gradient as shown in the image below.
In the end, your result should be similar to mine.
Step 17
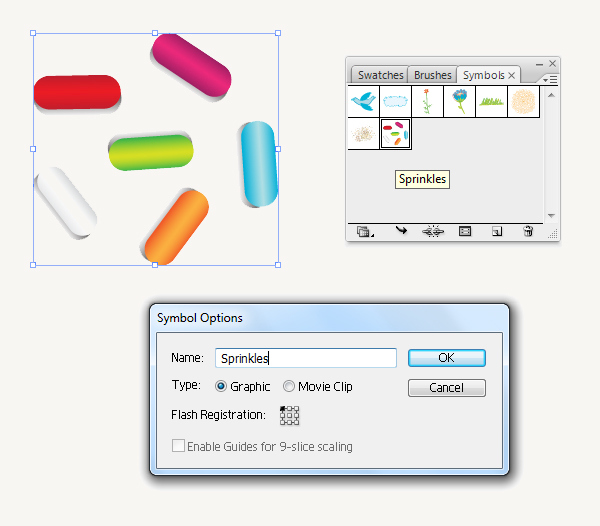
Now we’re going to create sprinkles. Pick the Rounded rectangle and create the sprinkle shape and fill it with a linear gradient as shown in the image below. Then duplicate ( Ctrl / Cmd + C, Ctrl / Cmd + B ) the sprinkle shape we have created and paste it to the back. We present this shape as a shadow of the sprinkle. Apply the Linear Gradient with white to black and change the blending mode to Multiply for the shadow of the shape.
Now we duplicate ( Ctrl / Cmd + C, Ctrl / Cmd + F) the sprinkle shape with shadow and change the linear gradient for our multi-colored sprinkles. Fill them with any color you like. Here is my result.

Now we open the Symbol panel and drag the sprinkles we have created to the panel. It will bring up the Symbol Option box, type the name ” Sprinkles “ for our new symbol.
Add sprinkles to our frosting. You can modify them however you like and make sure to expand the shapes. Here is my result.
Step 18
In this step, we create a new layer as ” Rolled wafer “ and put it under ” Muffin “ layer. Pick the Rounded rectangle and draw 5 shapes and place them as shown in the image below.
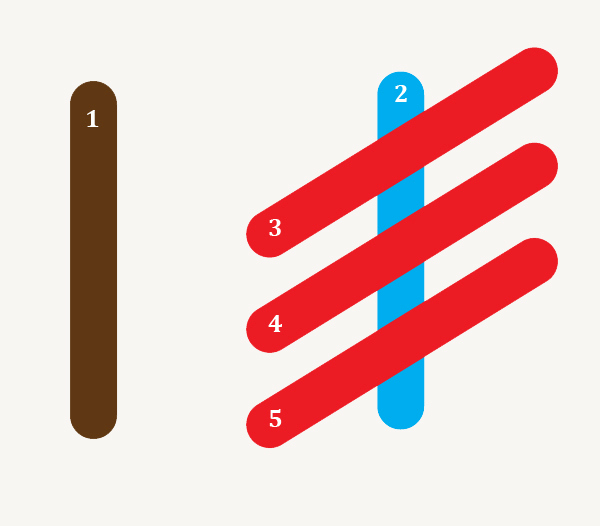
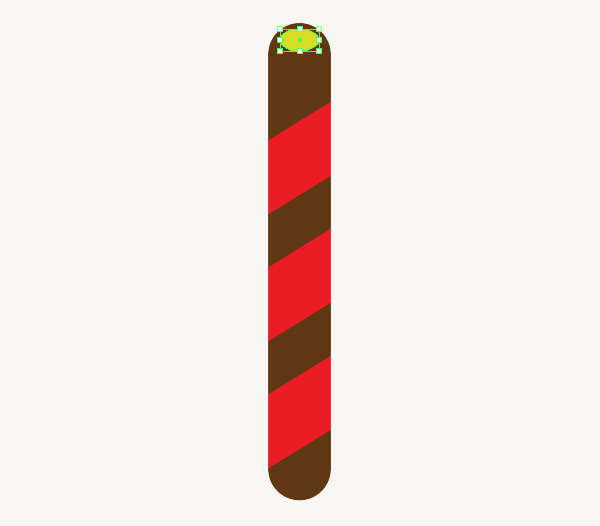
Now we group (Ctrl + G) the 3 red shapes together. Next, select the shapes 2,3,4,5 then go to the Pathfinder panel and hit Intersect shape area. Make sure to expand the shape. You should get the following result:
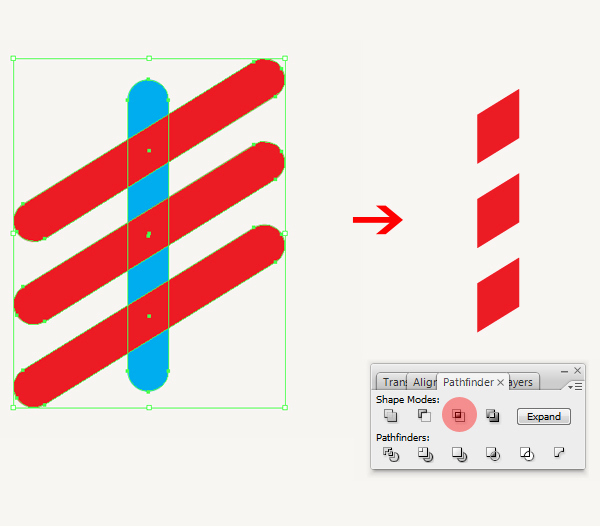
Next, we pick the Ellipse tool (L) to draw an ellipse on top of the rolled wafer . Now we have the basic shape for our rolled wafer
Step 19
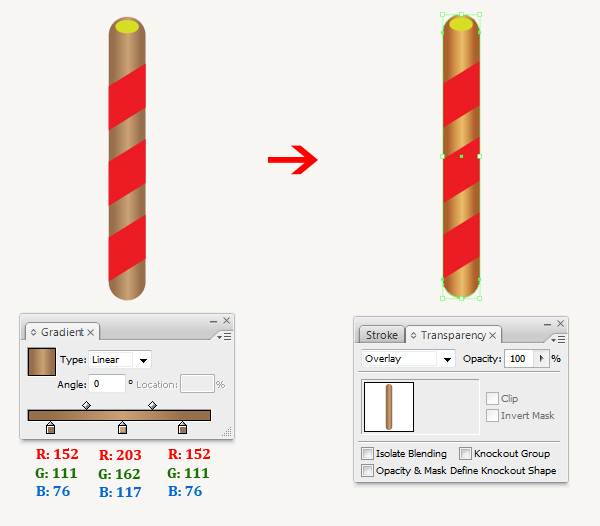
Now we color the main shape of the rolled wafer with a linear gradient as shown in the image below. Duplicate ( Ctrl / Cmd + C, Ctrl / Cmd + F) the main shape, and apply Overlay blending mode to the copy.
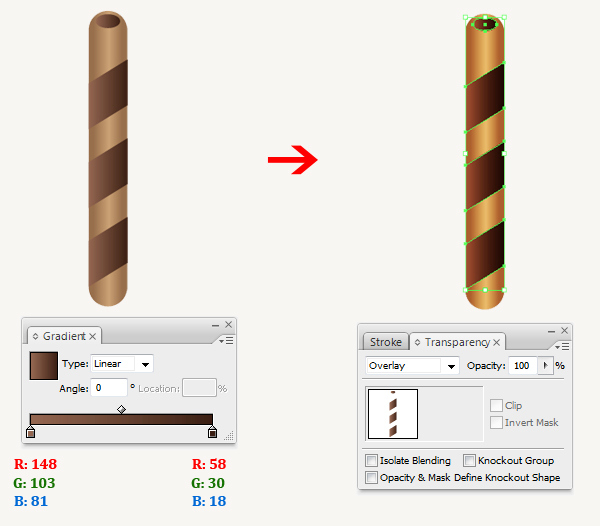
Next, we fill with color for the chocolate of the rolled wafer. Duplicate ( Ctrl / Cmd + C, Ctrl / Cmd + F) the chocolate shapes and apply Overlay blending mode to the copy.
We group (Ctrl + G) the rolled wafer and rotate it a little bit and place it as shown in the image below. Here is my result.
Step 20
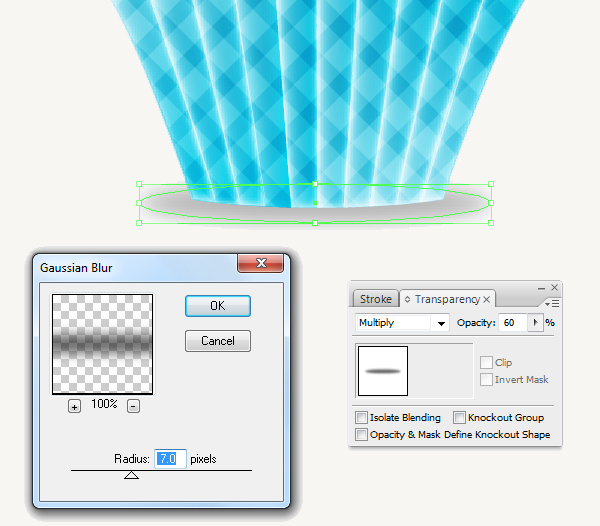
Pick the Ellipse tool (L) to draw an ellipse and fill it with black #000000, place it under the cupcake bottom as in the image below. Then go to Effect > Blur > Gaussian blur and change the Radius = 7px . Apply the Multiply blending mode and lower the Opacity = 60%
Step 21
Let’s set a background for our final design. Grab the Rectangle Tool (M) from the Tools Panel and click somewhere on the Artboard. The Rectangle Options box will pop up. Set the dimensions to 600 x 600 pixel.
Apply the gradient as shown in the image below. Then duplicate ( Ctrl / Cmd + C, Ctrl / Cmd + F) the background we have created and apply the Overlay blending mode to the copy.

And We’re Done!
Here is how it should look. I hope you’ve enjoyed this tutorial and can apply these techniques in your future projects.
