Today we will be learning how to create a shiny Infinity sign in Adobe Illustrator. Our tool of choice will be the Pen Tool. We will be also using a Reflection feature in order to create symmetrical shapes. Nice linear gradients will give our infinity sign an amazing look.
The purpose of this tutorial is to show how artwork created with just few simple shapes can look very nice and attractive. So let’s skip the talking and do some work.
Final Image
As always, this is the final image that we’ll be creating:

Tutorial Details
- Program: Adobe Illustrator CS5
- Estimated Completion Time: 1 hour
- Difficulty: Intermediate
Step 1
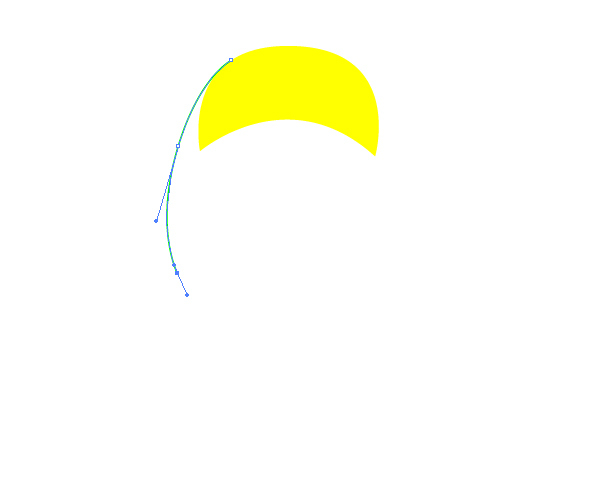
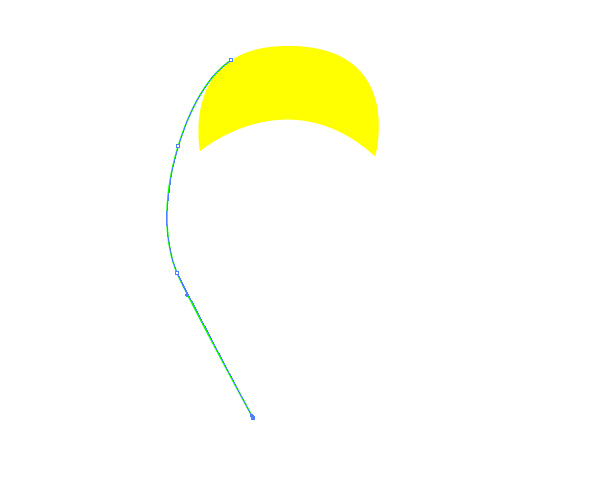
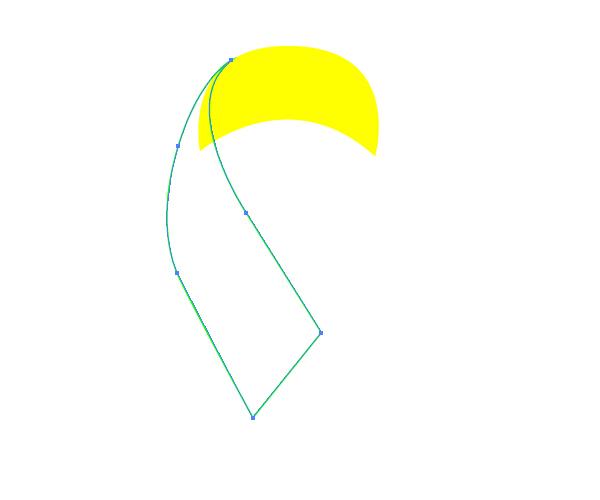
Select the Pen Tool (P) from the Tool Panel and draw the shape as shown on the picture below.
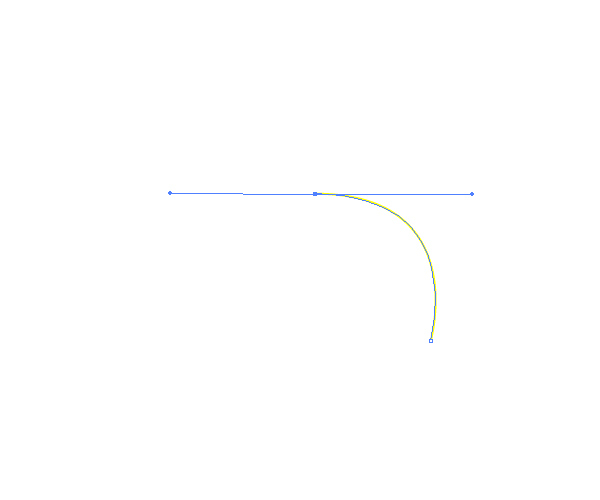
 As you can see, the shape doesn’t need to be perfect, just make sure to create nice and smooth paths.
Step 2
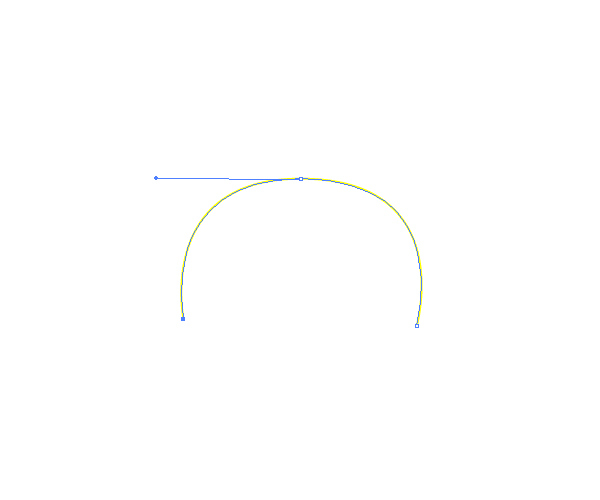
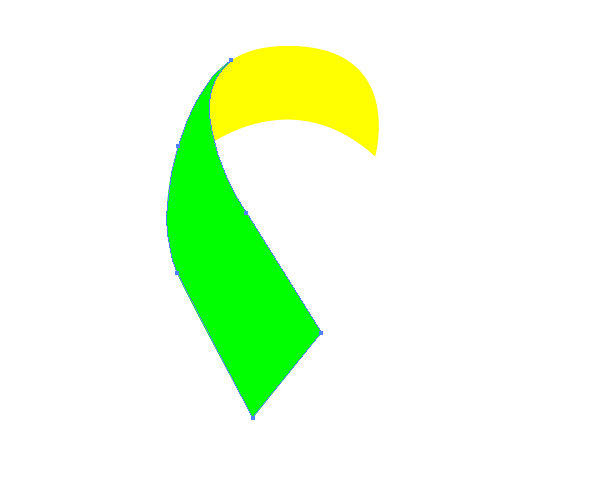
Now we need to create another shape with the Pen Tool (P).
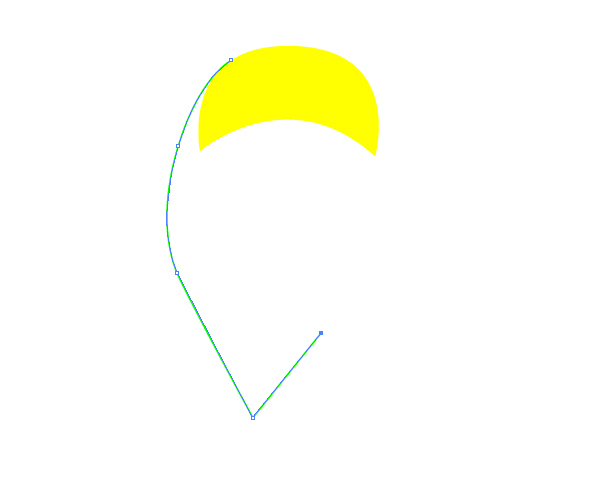
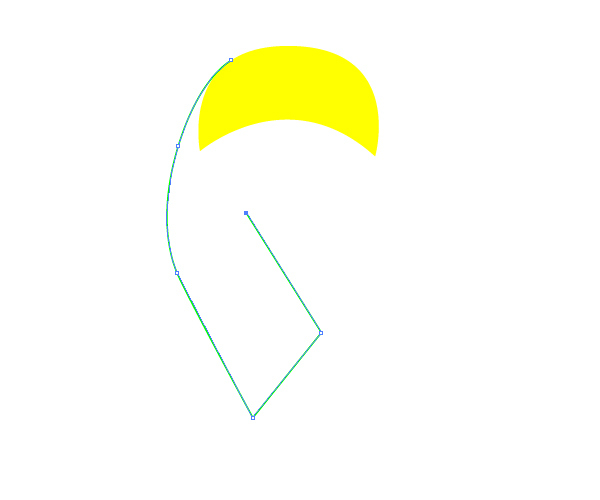
 You should end up with something like this.
Step 3
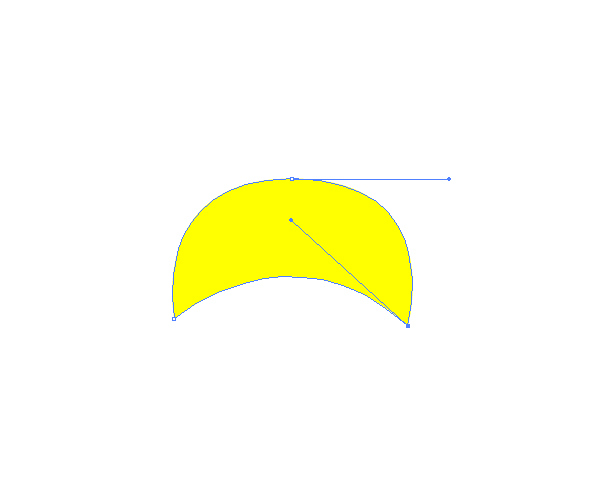
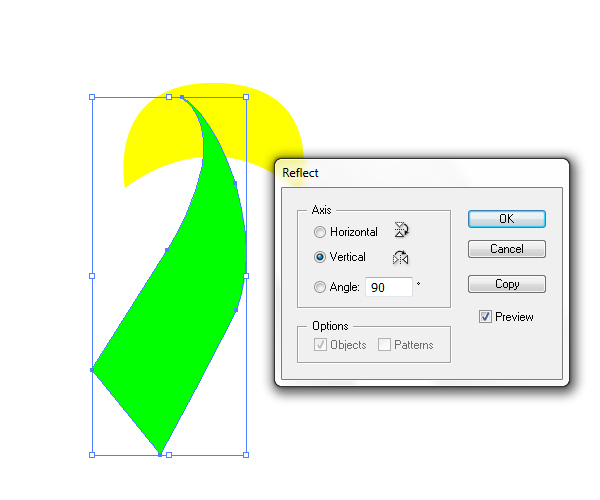
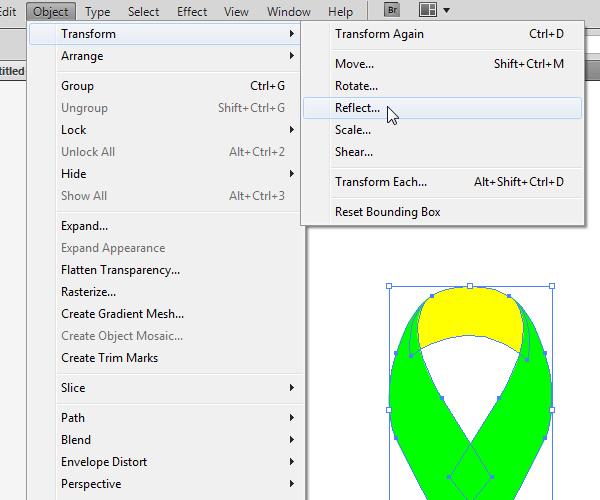
We are going to create a reflected copy of the shape from the previous step. Select the green shape and under Object select Transform > Reflect. Set the Axis to Vertical and hit the Copy button.
Step 4
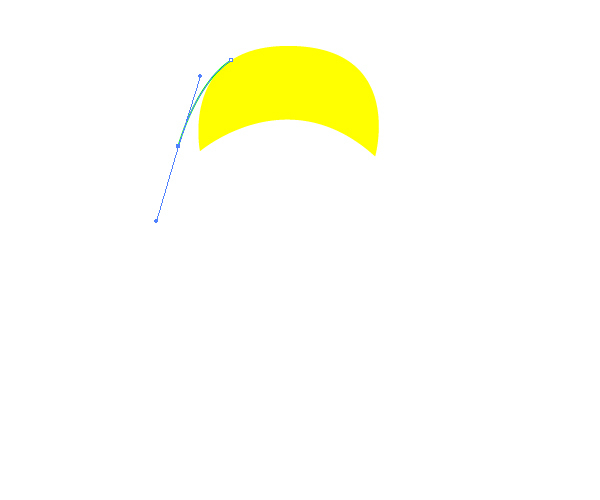
Place the copy we have just created as shown on the picture below.
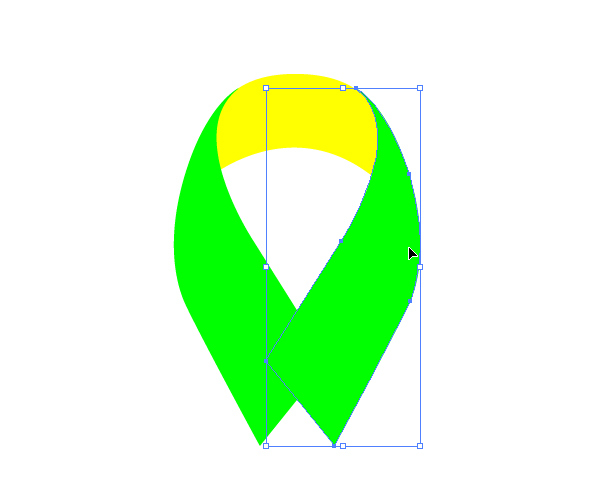 Feel free to adjust the position of the anchor points and the angles of theirs handles in order to achieve a perfect match.
Step 5
If you are satisfied with the first half of the infinity sign let’s create the other half.
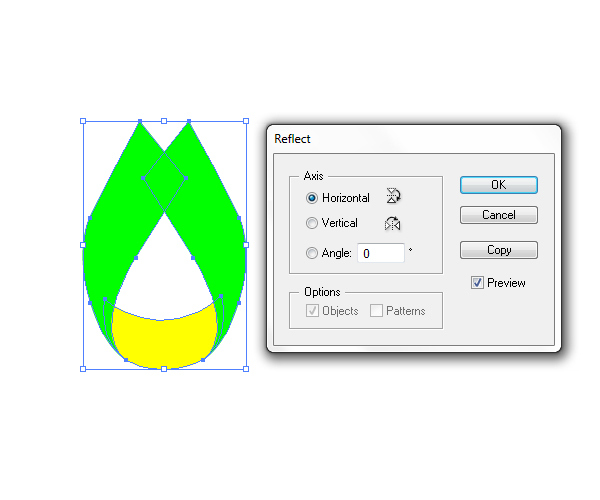
Select all elements we have created so far and under Object select Transform > Reflect, set the Axis this time to Horizontal and hit the Copy button. It will create a mirror image of our sign.
Step 6
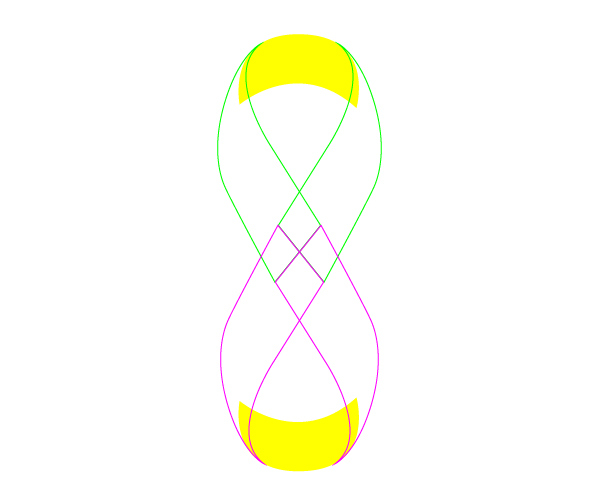
Place the copy we have just created as shown on the picture below. Make sure to avoid any mismatch.
Step 7
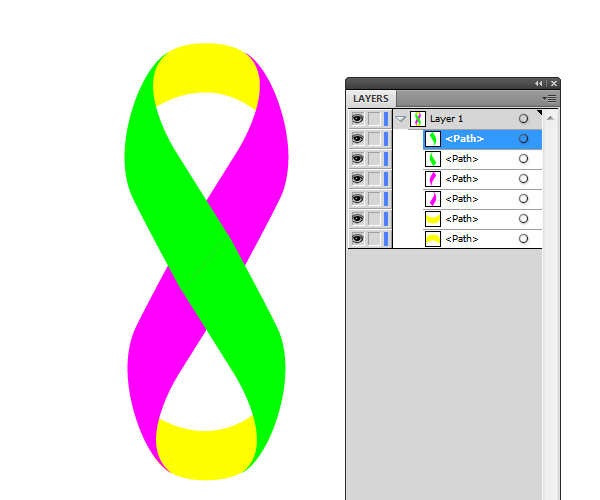
Let’s change the Fill color of individual shapes so we can re-arrange them in the Layer Panel. Make sure to place the green shapes on the top and the purple right underneath them.
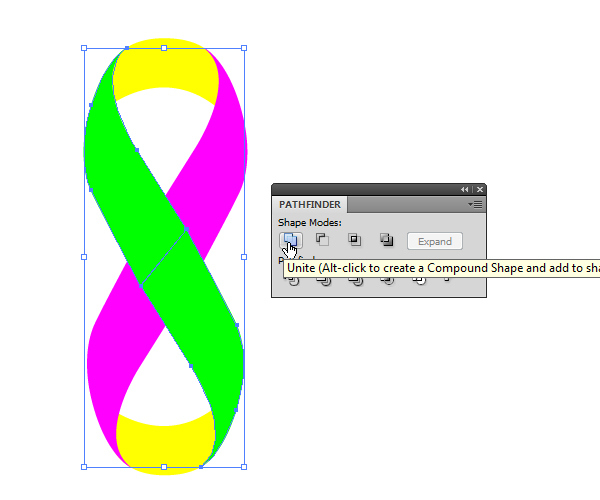
Step 8
Select both green shapes and under the Pathfinder Panel hit the Unite button. It will unite both green shapes into one. This way we will be able to apply a linear gradient and to adjust it nicely.
 Repeat this step for the purple shapes as well.
Step 9
Basic shapes of our infinity sign are ready. We are going to apply nice gradients and make our icon looks shiny. So let’s get started.
First, we are going to rotate our infinity sign. Select all elements and under Object select Rotate. Set the Angle to 90 degrees and hit the OK button.

Step 10
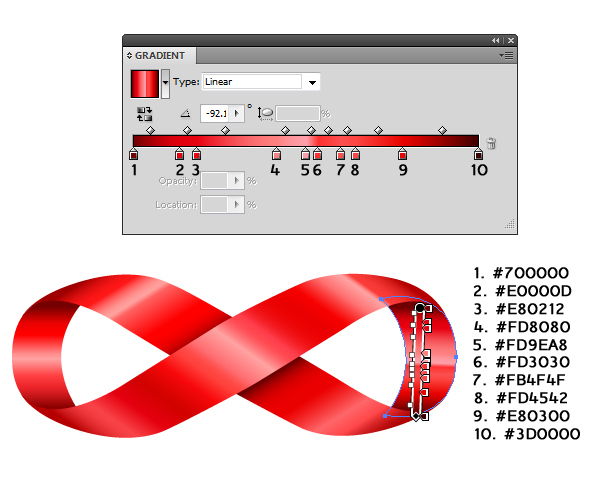
Now we are ready to do some coloring. Let’s apply a red linear gradient to the green shape on the top of the infinity sign. As you can see we will be using numerous red shades in order to simulate nice light reflections.
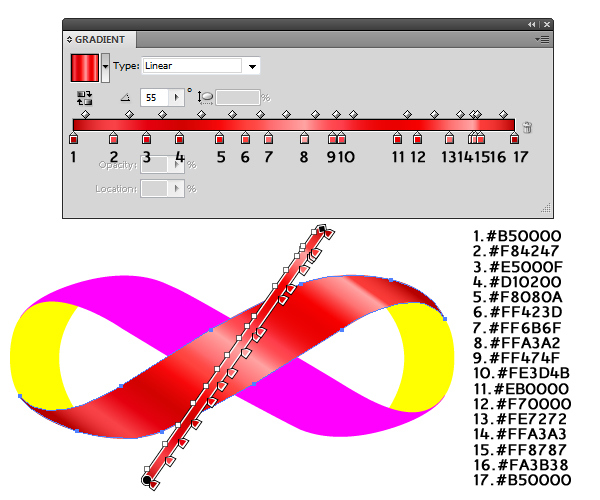 Beside applying different shades of red, we also need to think about the angle at which the gradient will be applied. This is a very important aspect we need to be aware of, if we want to create a semi realistic illustration.
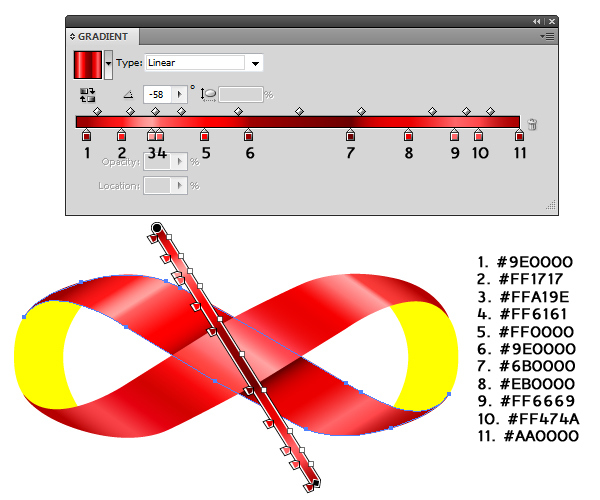
Step 11
For the purple shape we are going to use a different red linear gradient. The idea is to use more dark shades in order to simulate the shadow that the shape on the top is casting on the shape right underneath. Light reflections also needs to look different.
Step 12
Let’s move on with the lateral side of the infinity sign.
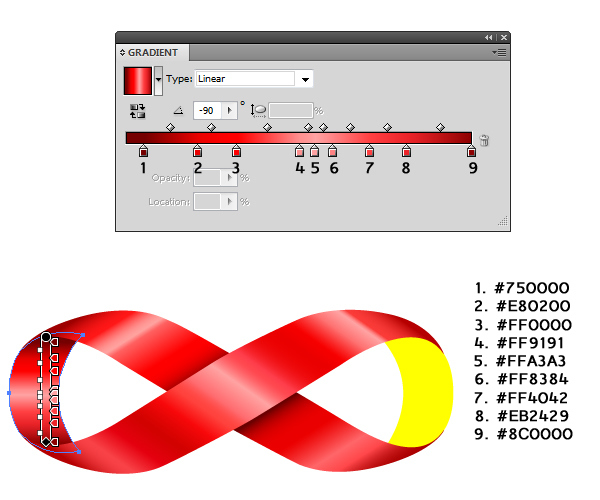
Step 13
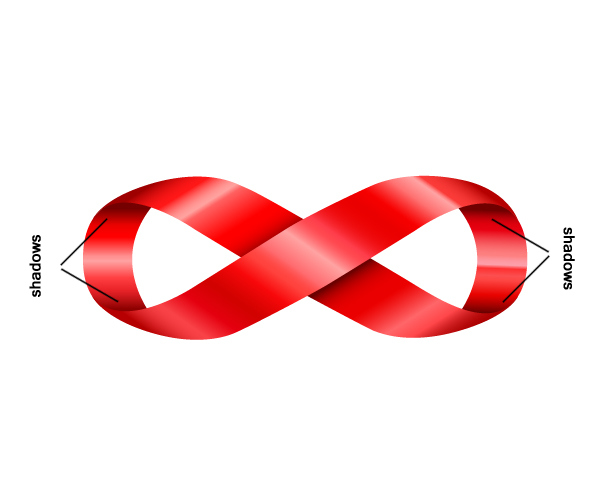
For the yellow shape on the right side we will be using a different linear gradient from the one we have used for the yellow shape on the left. However, even though we are going to use different gradient we have to keep in mind one thing – shadows. Folded parts of the infinity sign are casting a small shadow on both lateral shapes.
 As you can see, we have created shadows on both sides of the infinity sign.
Step 14
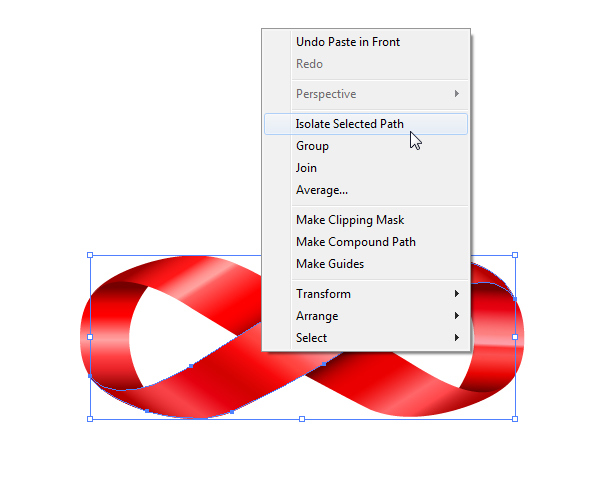
In this step we are going to create a small detail that will help us increase the depth in our illustration. We will create a tiny edge for the infinity sign.
Duplicate (Ctrl / Cmd + C, Ctrl / Cmd + F) the shape on the top of the sign. Under the right click select Isolate Selected Path. This way we will be able to make some adjustments on the copy we have just made without messing up the rest of the illustration.
Step 15
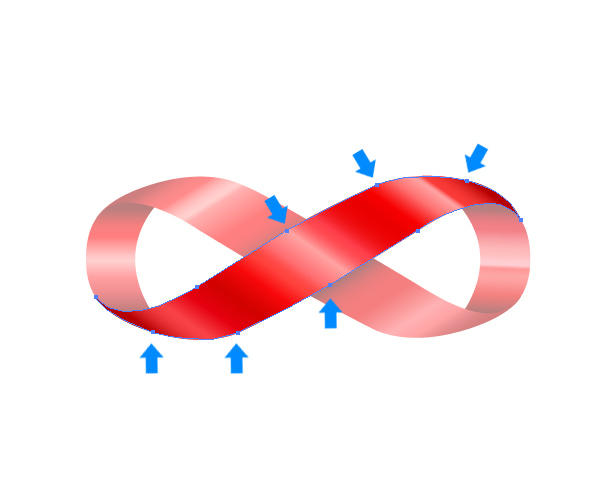
Select the Direct Selection Tool (A) from the Tool Panel, select and remove (by hitting Delete key on your keyboard) anchor points as shown on the picture below.
Step 16
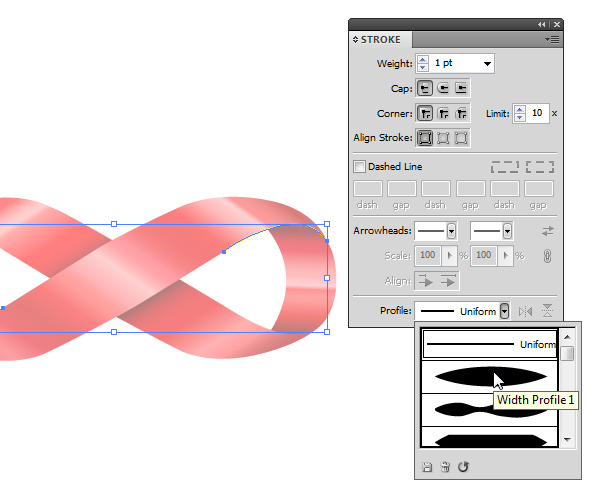
Remove the Fill color (in our case gradient) for the remaining paths and set the Stroke color to any color you like (we will change those colors very soon). In the Stroke Panel leave everything as default. The only thing we need to change is the Profile to Width Profile 1.
Step 17
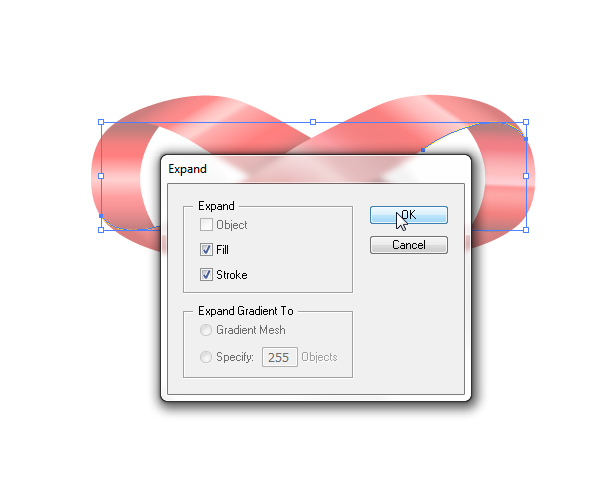
Select both paths with adjusted stroke and under the Object select Expand, it will turn our paths into shapes. Now we can change the Fill color.
Step 18
We are going to do the exact same thing with the shape on the bottom. Duplicate (Ctrl/ Cmd + C, Ctrl / Cmd + F) the shape. Under the right click select Isolate Selected path.
With the Direct Selection Tool (A) select and remove anchor points in order to have just the paths as edges on the folded part of the shape.
Remove the Fill color (gradient) and set the Stroke color to any color you like.
In the Stroke Panel make sure to set Profile to Width Profile 1. Under Object select Expand in order to turn paths into shapes.
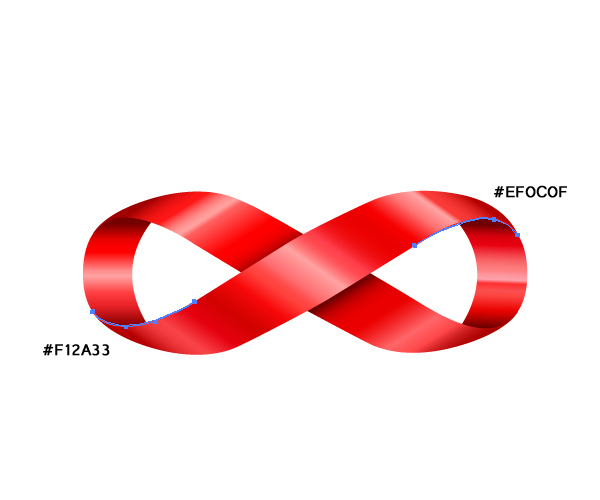
Set the Fill color of the new edges as it shown on the picture below.
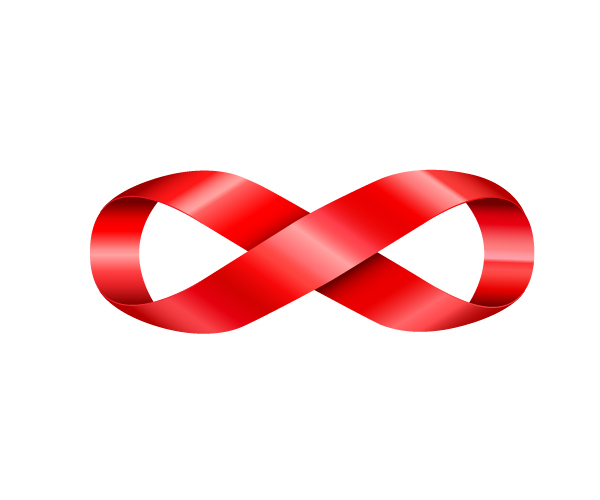
 You should end up with something like this.
Step 19
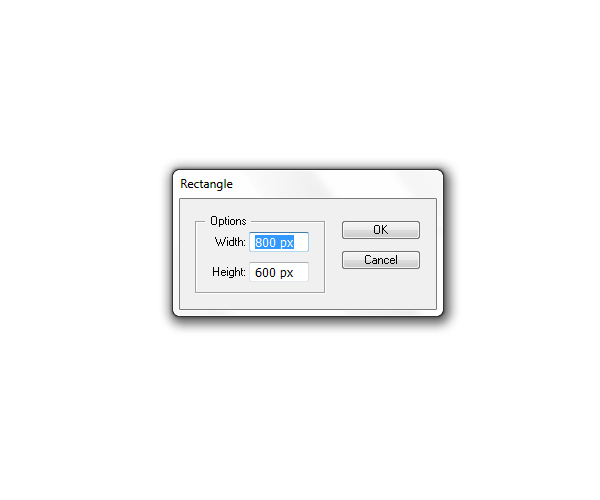
Let’s create a nice background. To do that we will be using a radial gradient. But, first grab the Rectangle Tool (M) from the Tool Panel and click somewhere on the Artboard. It will bring up the Rectangle Option box. Set dimensions to 800×600 pixels.
Step 20
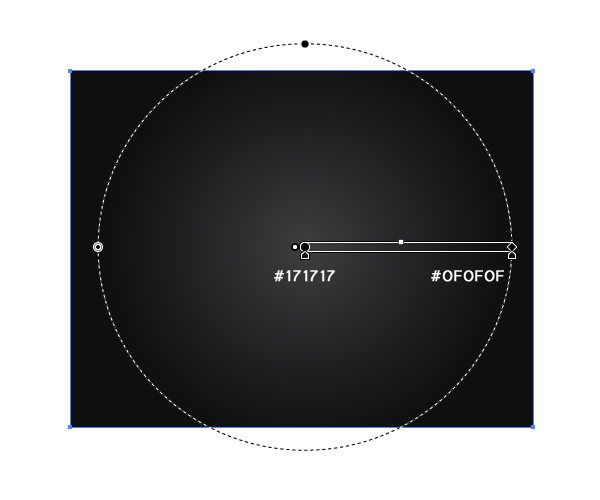
Apply a radial gradient as shown on the picture below.
Step 21
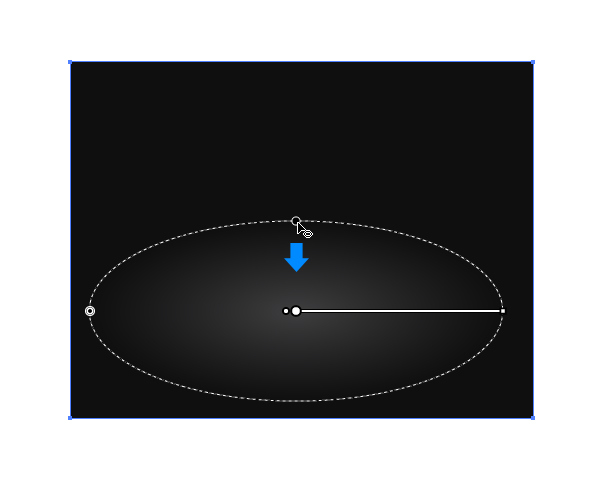
We need to adjust the gradient a bit. Grab the upper handle of the gradient circle and scale it downwards in order to create an elliptical gradient.
Step 22
Place the infinity sign as shown on the picture below.

Step 23
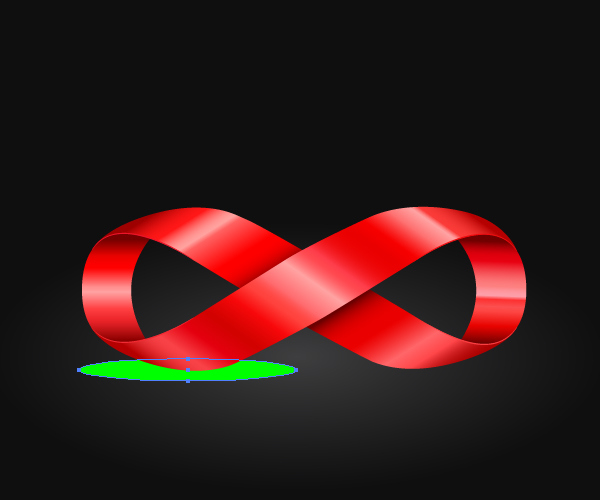
As you can see, our infinity sign looks like it’s floating in the air. We can fix that by creating a simple shadow.
Grab the Ellipse Tool (L) from the Tool Panel and create the ellipse as shown on the picture below. Make sure to place it underneath the infinity sign (you can do that by changing the order of layers in Layer Panel).
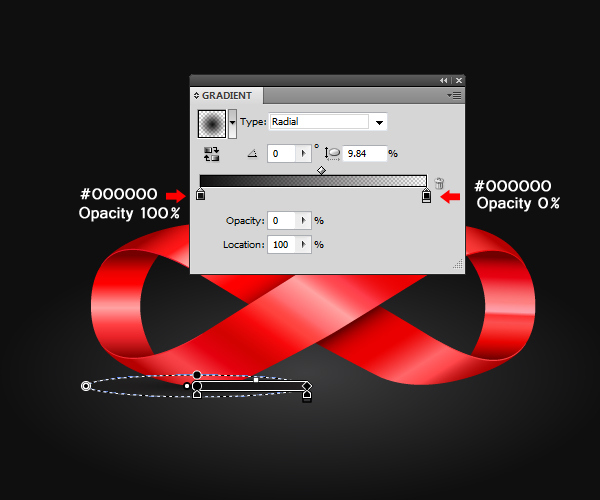
Step 24
Apply a radial gradient to the green ellipse and turn it into elliptical by skewing it down (just like we did with background gradient). Use the same settings as shown on the picture below.
Step 25
Holding the Alt / Option key on your keyboard click and drag the ellipse with radial gradient to the right. This way we will create a second shadow for our infinity sign.

And we are done!
If you are fan of Buzz Lightyear from Toy Story grab the Type Tool (T) from the Tool Panel and type text as shown on the picture below.
The main purpose of this tutorial was to show that pretty design often can be created in just a few simple steps, but with clever use of colors and details. Right combinations of those things is the most important part in the creation process. It takes lots of trying and deleting, but as you all know, practice makes perfect. Keep trying and it will pay off.
I hope you enjoyed reading this tutorial as much as I enjoyed creating it. Thank you for following along.
