In today’s tutorial, we’re going to take a look behind the process of creating a scary illustration using mostly a couple of basic geometric shapes.
So, assuming you already have Adobe Illustrator up and running let’s jump straight into it!
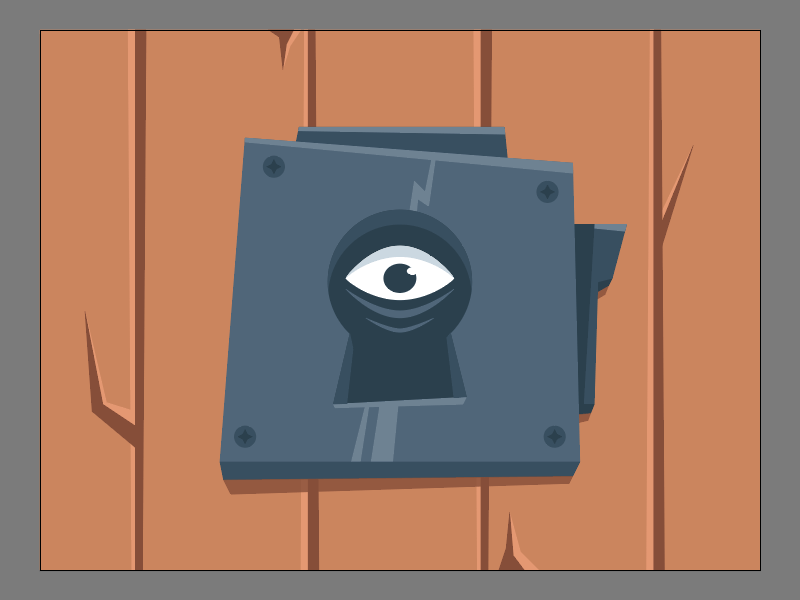
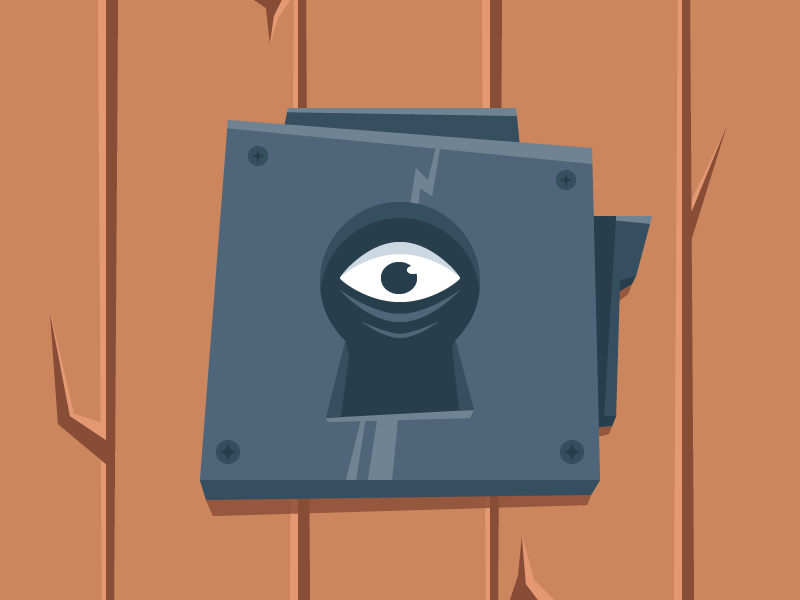
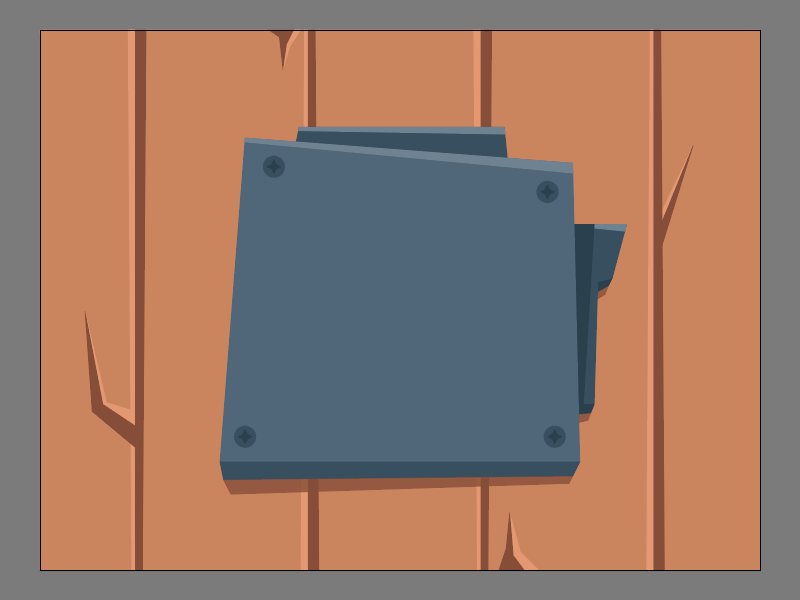
Final Image
As always, this is the final image that we’ll be creating:
Tutorial Details
- Program: Adobe Illustrator CC (2018)
- Estimated Completion Time: 45 minutes
- Difficulty: Beginner-Intermediate
Step 1
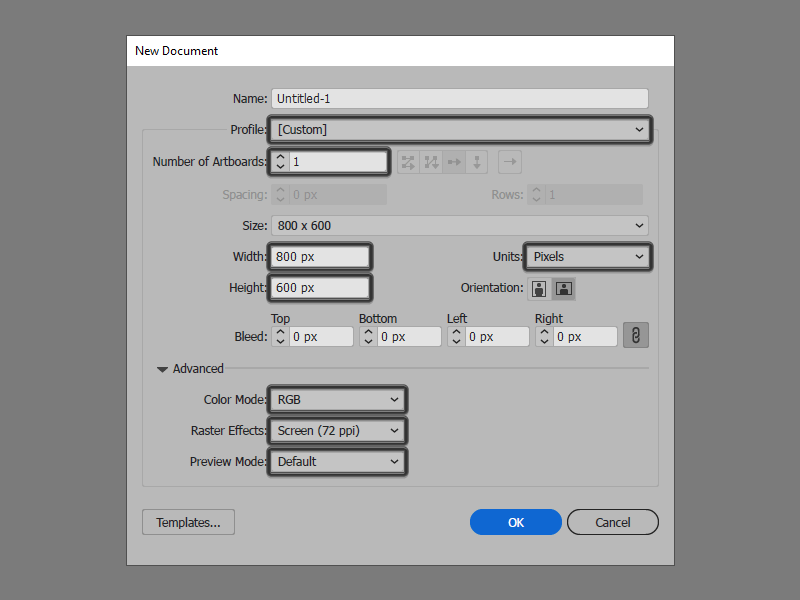
Let’s kick off the project by setting up a New Document by going to File > New or using the Control-N keyboard shortcut, which we will adjust as follows:
- Number of Artboards: 1
- Width: 800 px
- Height: 600 px
- Units: Pixels
And from the Advanced tab:
- Color Mode: RGB
- Raster Effects: Screen (72 ppi)
- Preview Mode: Default
Step 2
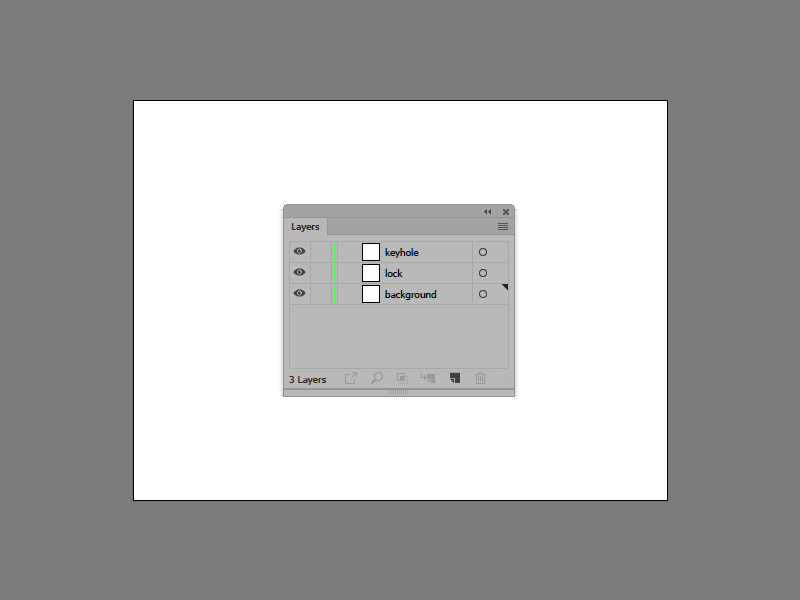
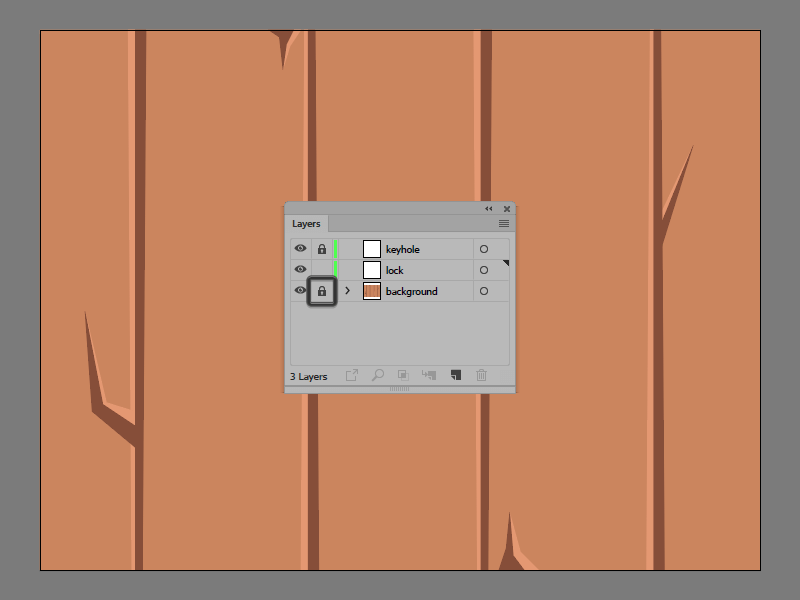
As soon as we’ve finished setting up our project file, we should take a couple of moments and structure our document, so open up the Layers panel and create a total of three layers, which we will rename as follows:
- layer 1: background
- layer 2: lock
- layer 3: keyhole
Step 3
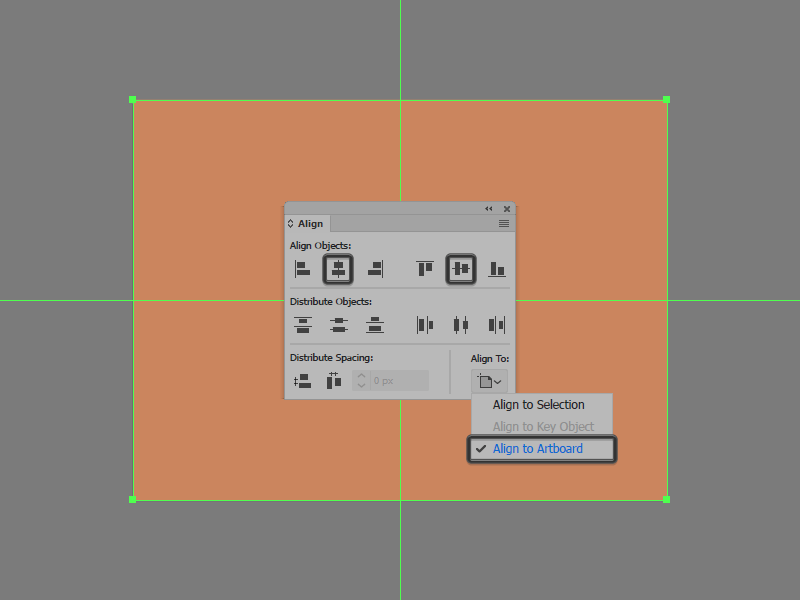
Make sure you’ve positioned yourself onto the first layer, and let’s start working on the background by creating an 800 x 600 px rectangle which we will color using #CC865E, and then center align to the underlying Artboard.
Step 4
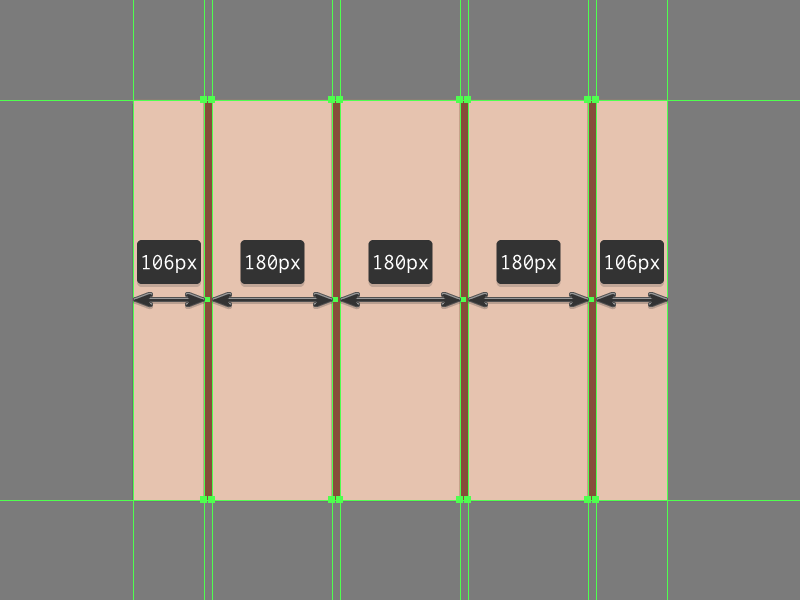
Add the vertical detail lines that will help define the door’s wooden segments using four 12 x 600 px rectangles which we will color using #874D36, and then horizontally distribute at 180 px from one another, making sure to position them to the center of the Artboard as seen in the reference image.
Step 5
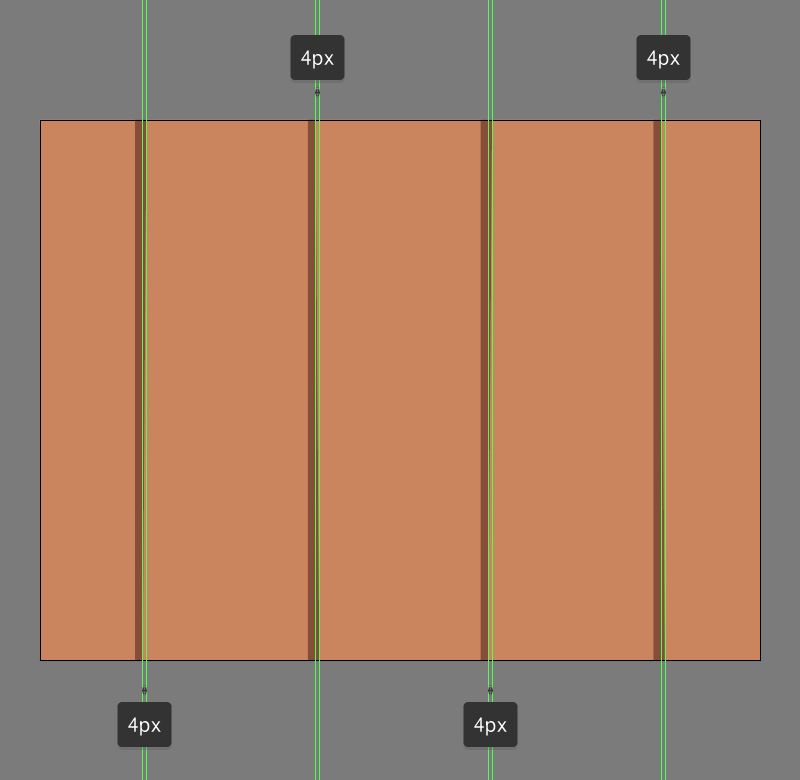
Adjust the shapes that we’ve just created by individually selecting either their top or bottom right-sided anchor points using the Direct Selection Tool (A) and then pushing them to the inside by a distance of 4 px using either the directional arrow keys or the Move tool (right click > Transform > Move > Horizontal > + / – 4 px depending on which side you start with). Take your time, and once you’re done move on to the next step.
Step 6
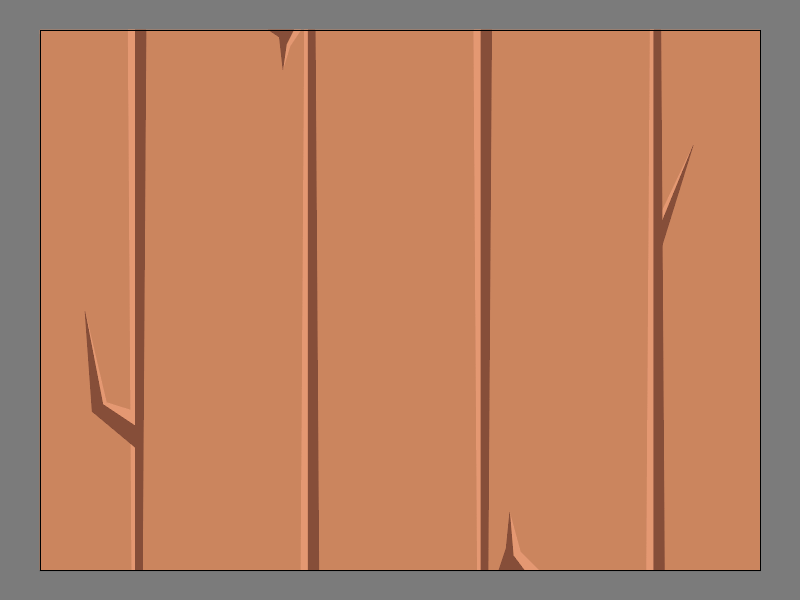
Select the Pen Tool (P) and using #874D36 as your Fill color, quickly draw the little wood cracks using the reference image as your main guide.

Step 7
As soon as you’ve finished adding the little cracks, we can add the subtle highlights using four distorted 8 x 600 px rectangles (#874D36) for the vertical detail lines, and a couple of drawn segments (#874D36) for the wooden cracks. Take your time and once you’re done, make sure you select and group all of detail shapes together using the Control-G keyboard shortcut.
Step 8
As soon we’ve finished grouping all the little details together, we can lock the current layer and then move on to the next section of our composition.
Step 9
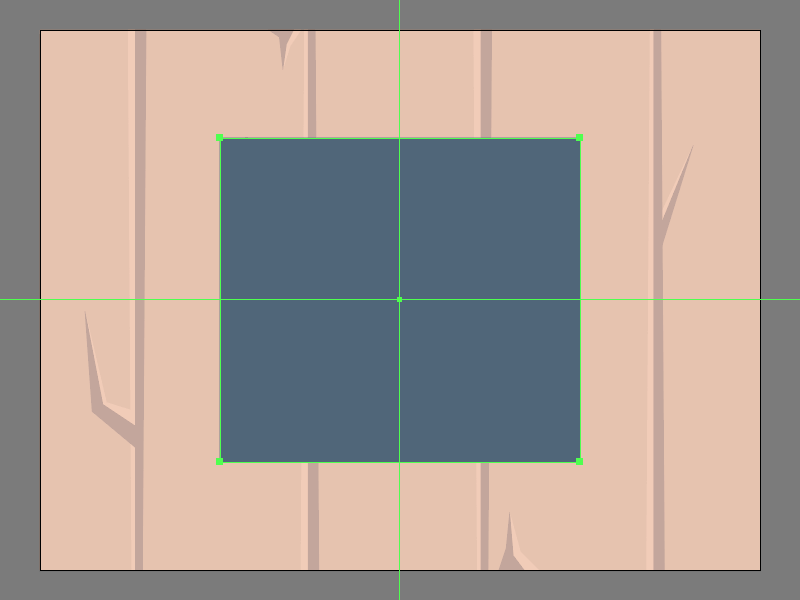
As soon as we’ve finished working on the background, we can move on to the next layer (that would be the second one) where we will start working on the lock, by creating the main shape for the front section using a 400 x 360 px rectangle which we will color using #4F667A, and then center align to the larger Artboard.
Step 10
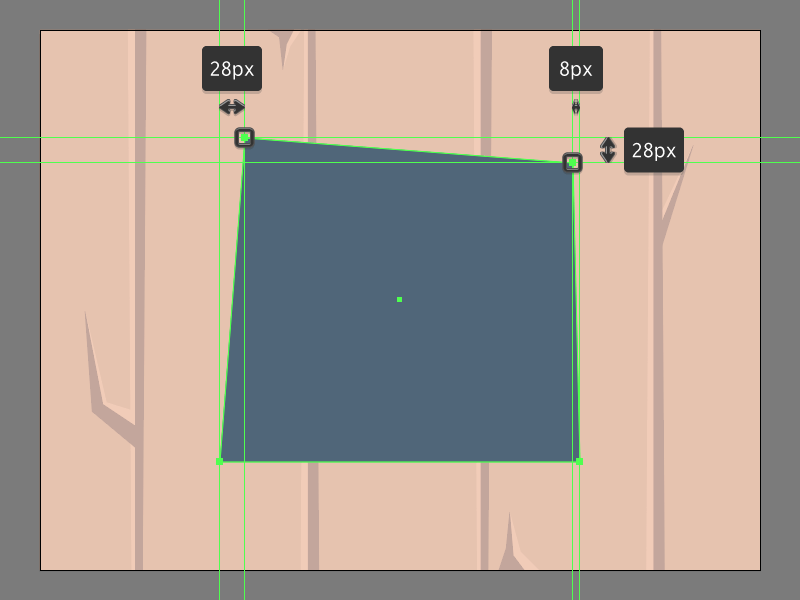
Next, we’re going to stylize the shape that we’ve just created by individually selecting and re positioning its indicated anchor points as seen in the reference image using the Move tool (right click > Transform > Move > Vertical / Horizontal > and then entering the indicated values).
Step 11
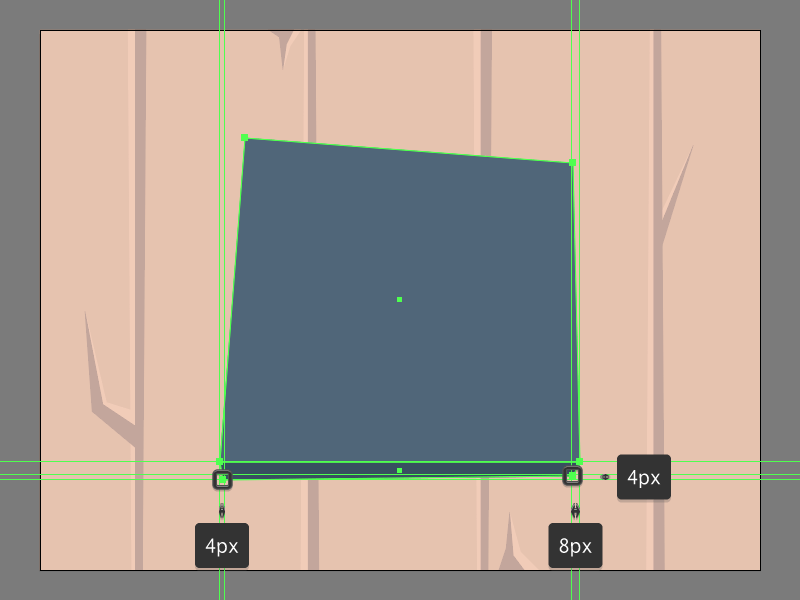
Add the bottom section that will add depth to our lock using a 400 x 20 px rectangle (#354E60) which we will position below the previous shape and then distort as seen in the reference image.
Step 12
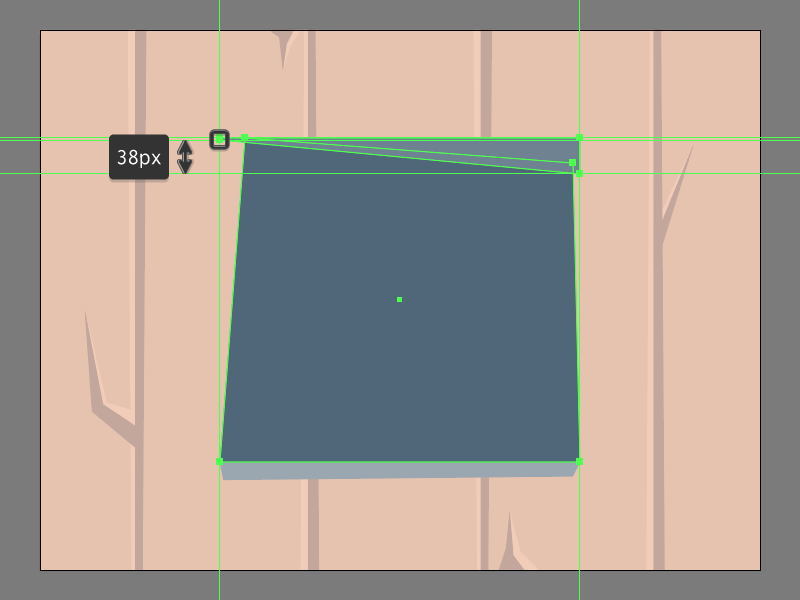
Create the top highlight using a 400 x 40 px rectangle (#6F8393), which we will distort by selecting and pushing its bottom-left anchor point to the top by a distance of 38 px using the Move tool (right click > Transform > Move > Vertical > -38 px). Once you’re done, center align the resulting shape to the upper edge of the lock’s front section.
Step 13
Since we want the shape to remain confined to the surface of the larger underlying shape, we’ll have to mask it using a copy (Control-C) of the lock’s front section which we will paste in front (Control-F) and then with both shapes selected > right click > Make Clipping Mask.
Step 14
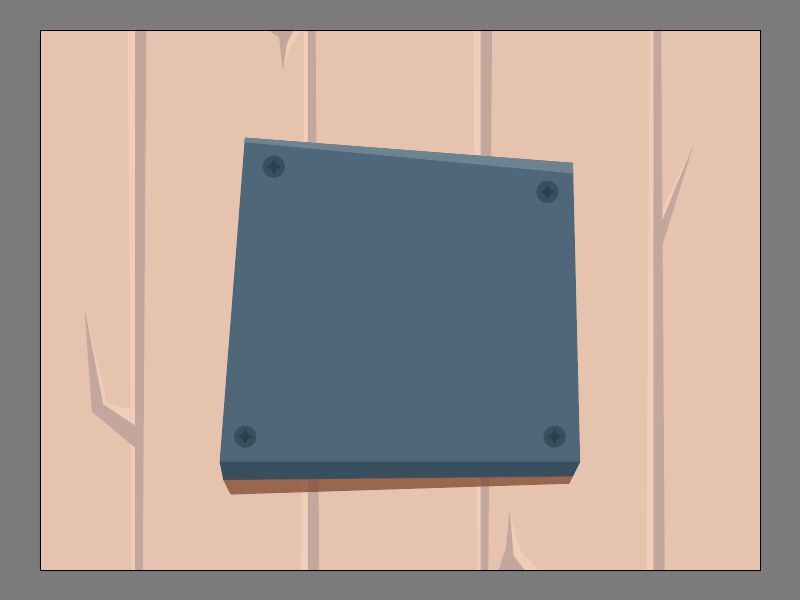
Once we’ve masked the highlight, we can now add the little screws which we will create using four 24 x 24 px circle (#354E60) on top of which we will draw a 16 x 8 px rhombus (#273E4C) followed by another 8 x 16 px one (#273E4C). Once you’re done, individually group (Control-G) each screw, positioning them onto the outer edges of the lock’s front section.

Step 15
Select the Pen Tool (P), and draw the subtle shadow using #874D36 as your Fill color, lowering the Opacity of the resulting shape to 80%. Once you’re done make sure you select and group (Control-G) all of the lock’s composing shapes before moving on to the next section.
Step 16
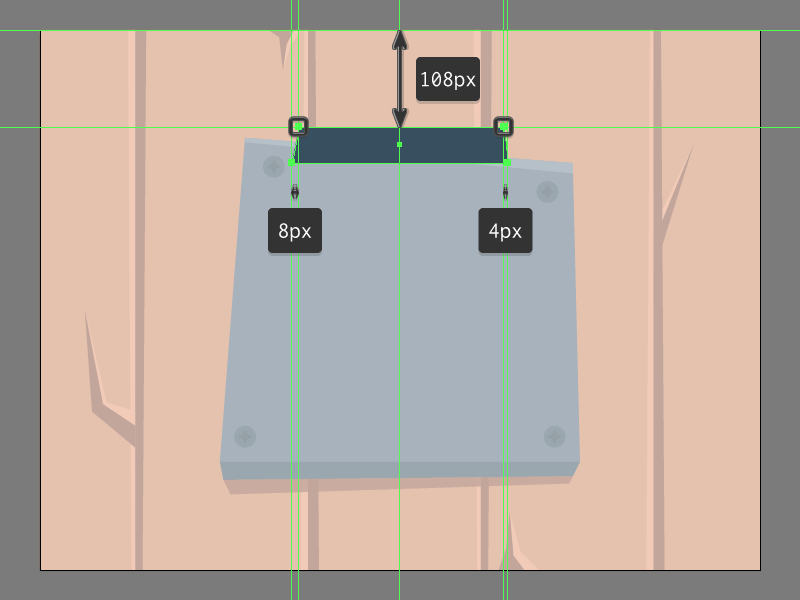
Create the main shape for the lock’s upper section using a 240 x 40 px rectangle (#354E60), which we will position at a distance of 108 px from the center of the Artboard’s top edge and then distort by individually selecting and pushing its top anchor points to the inside as seen in the reference image.
Step 17
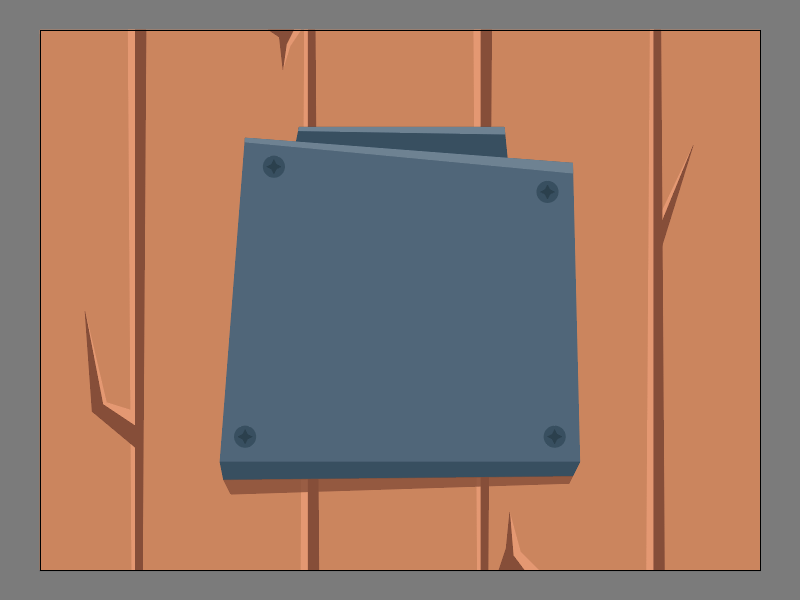
Give the resulting shape a subtle highlight (#6F8393) as we did with the lock’s front section, making sure to group (Control-G) and then position the shapes underneath by using the Arrange > Send to Back option.
Step 18
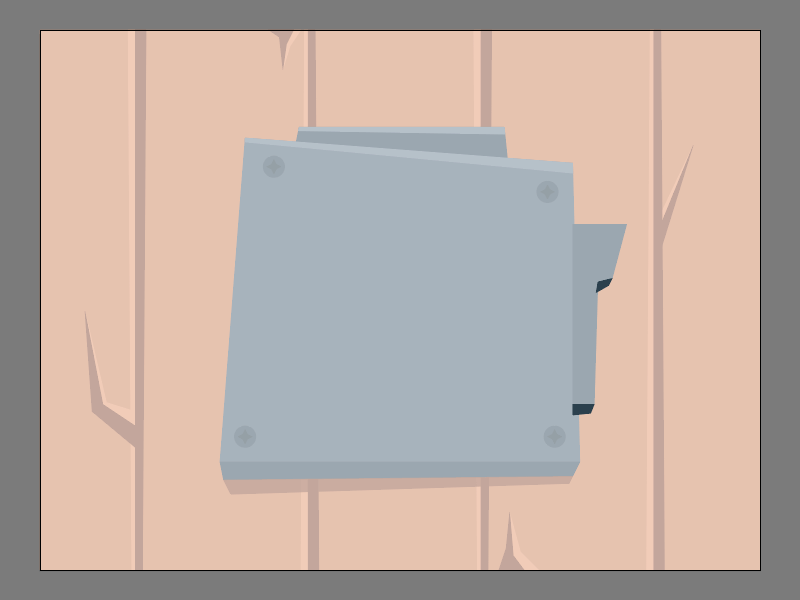
Move on to the right side of the lock, and using the reference image as your main guide quickly draw the main fill shape which we will color using #354E60.
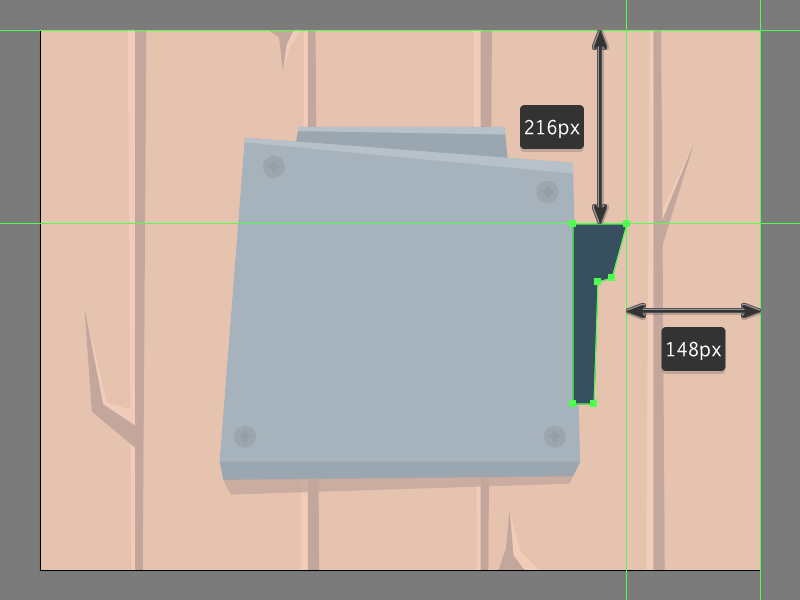
Step 19
Give the resulting shape some depth by drawing the two darker segments (#273E4C), making sure to position them underneath afterwards (right click > Arrange > Send to Back).
Step 20
Add the subtle highlight (#6F8393) and shadow (#273E4C), making sure to mask them to the surface of the larger underlying shape.
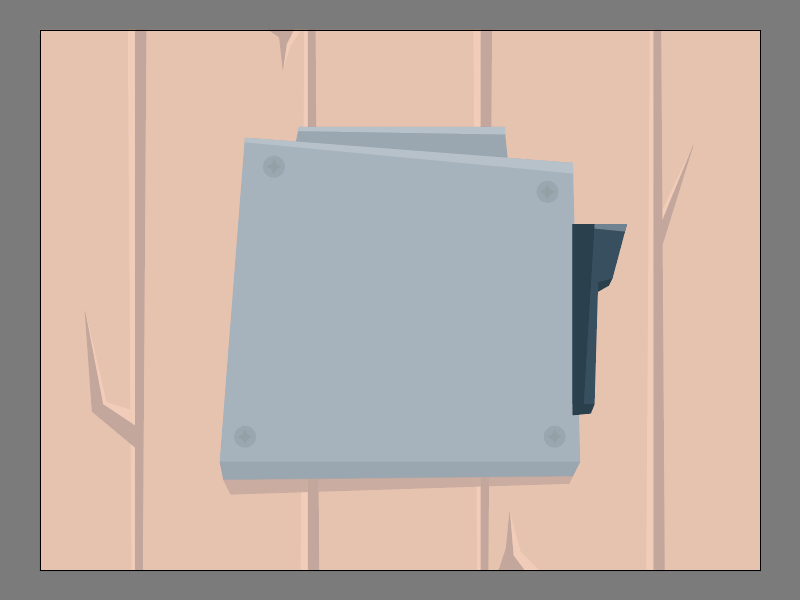
Step 21
Finish off the current section by adding the two subtle shadows using #874D36 as your Fill color, making sure to lower their Opacity to 80%. Once you’re done, select and group (Control-G) all of its composing shapes together, making sure to position them underneath of the lock’s front section (right click > Arrange > Send to Back).
Step 22
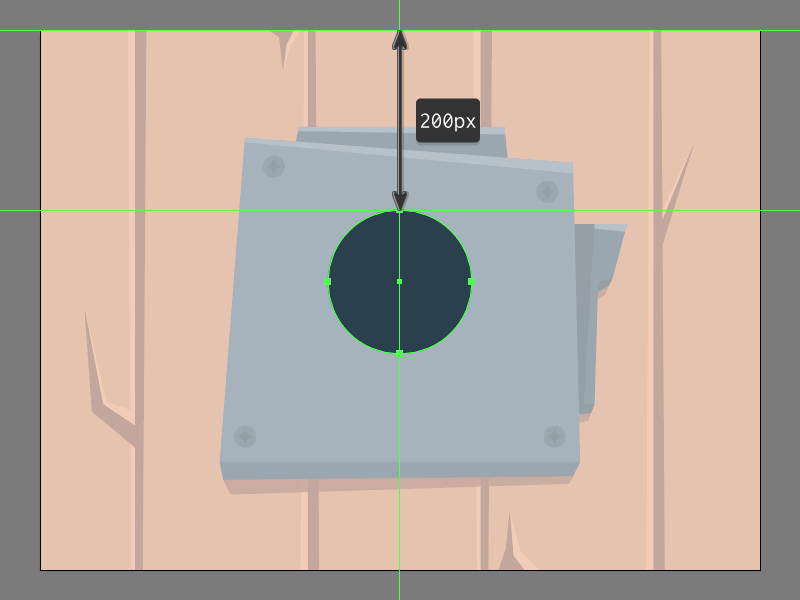
For the moment, we’re going to move on to the next layer (that would be the third one) where we will gradually build the keyhole section. Start by creating the circular section using a 160 x 160 px circle which we will color using #273E4C, and then position at a distance of 200 px from the center of the Artboard’s top edge.
Step 23
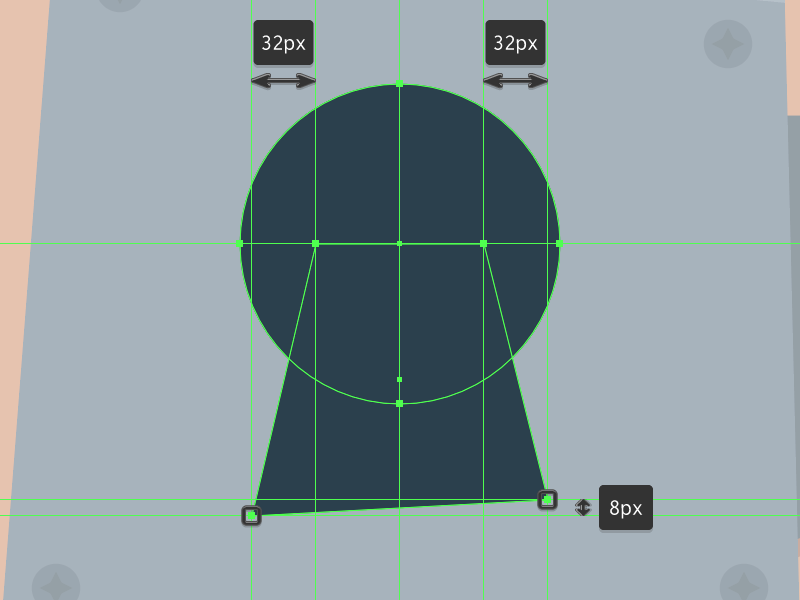
Add the keyhole’s lower section using an 84 x 136 px rectangle (#273E4C), which we will distort and then position onto the lower half of the previous shape.
Step 24
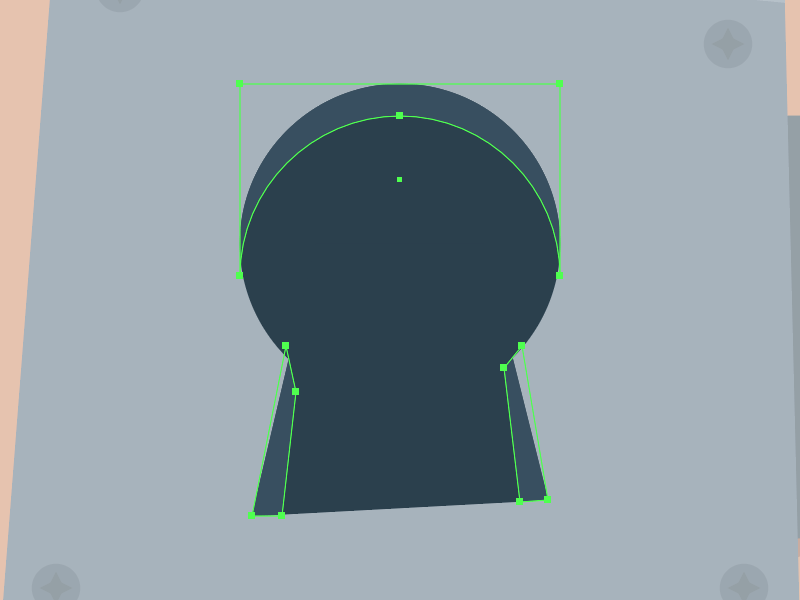
Take a couple of moments and add depth to the keyhole using #354E60 as your Fill color, making sure to mask the resulting shapes afterwards.
Step 25
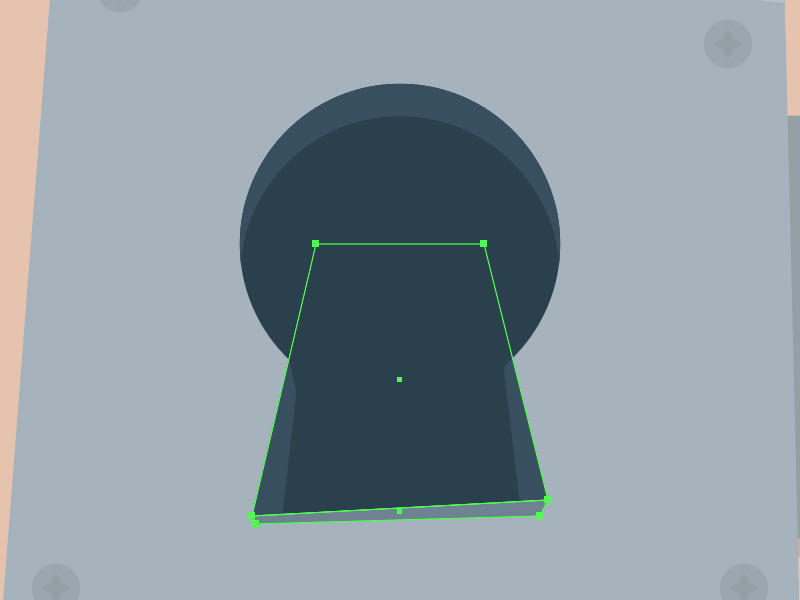
Grab the Pen Tool (P) and quickly draw the subtle highlight using #6F8393 as your Fill color, making sure the resulting shape’s upper edge overlaps that of the keyhole’s bottom one. Once you’re done, select and group (Control-G) all of the created shapes before moving on to the next step.
Step 26
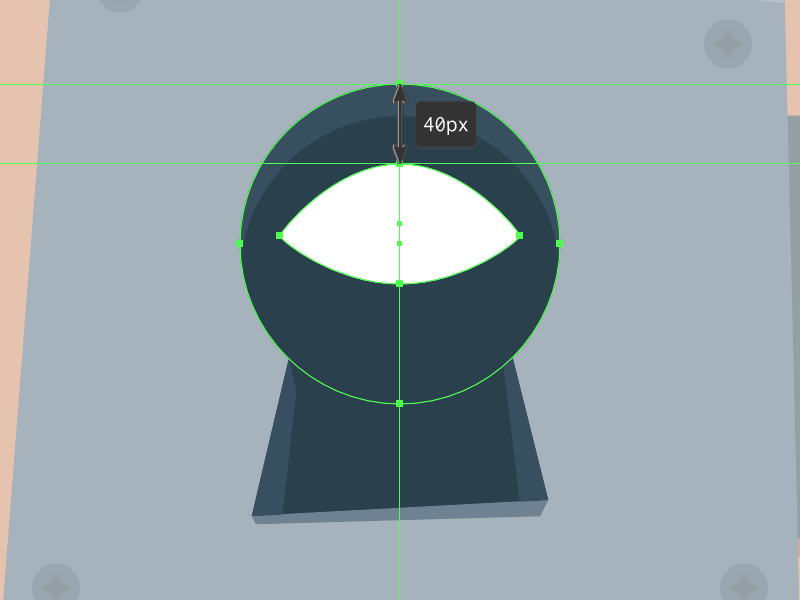
Start working on the eye by creating the main shape for its sclera using a 120 x 60 px ellipse (#FFFFFF), which we will adjust by pinching its left and right anchor points using the Anchor Point Tool (Shift-C) in order to make them pointy. Then, push the two selected anchors to the bottom by a distance of 6 px positioning the resulting shape as seen in the reference image.
Step 27
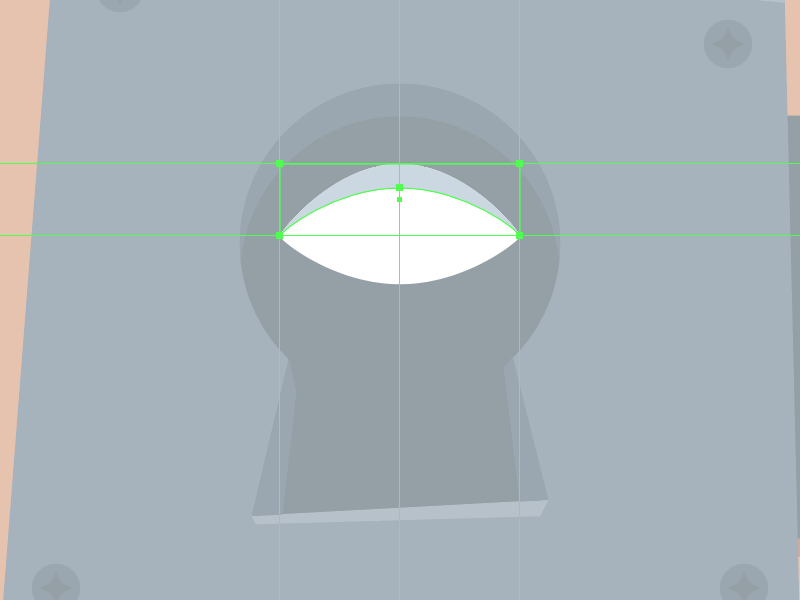
Add the subtle shadow using #CCD9E2 as your Fill color, making sure to mask the resulting shape before moving on to the next step.
Step 28
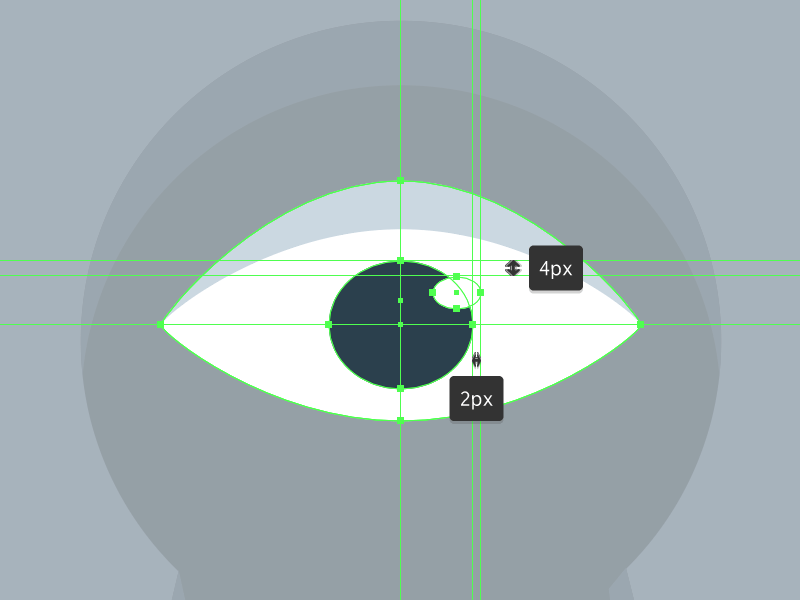
Create the main shape for the iris using a 36 x 32 px ellipse (#273E4C), onto the top-right side of which we will add a smaller 12 x 8 px (#FFFFFF) circular highlight. Position the shapes as seen in the reference image, making sure to select and group (Control-G) all of the eye’s composing shapes before moving on to the next step.
Step 29
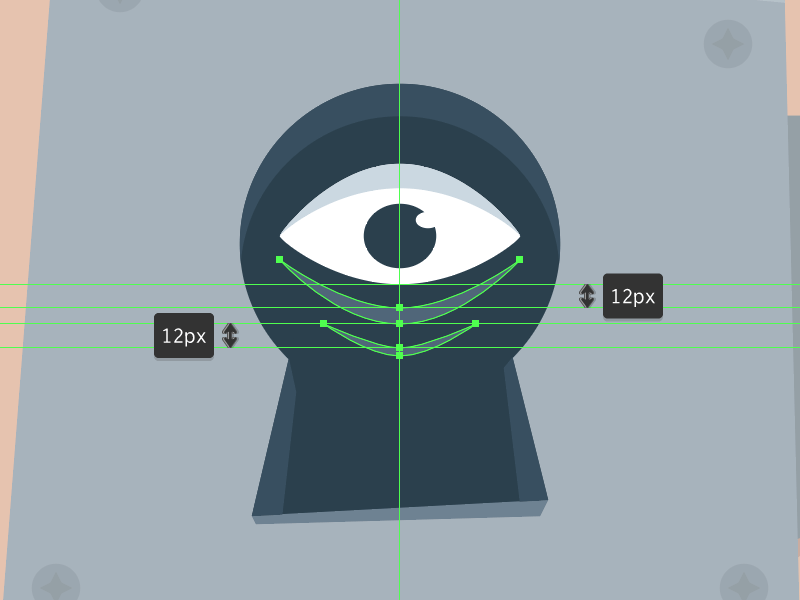
Grab the Pen Tool (P) and with the Fill color set to #4F667A use it to quickly draw the two highlighted wrinkle lines. Take your time and once you’re done, make sure you select and group (Control-G) all of the lock’s composing shapes before moving on to the next step.
Step 30
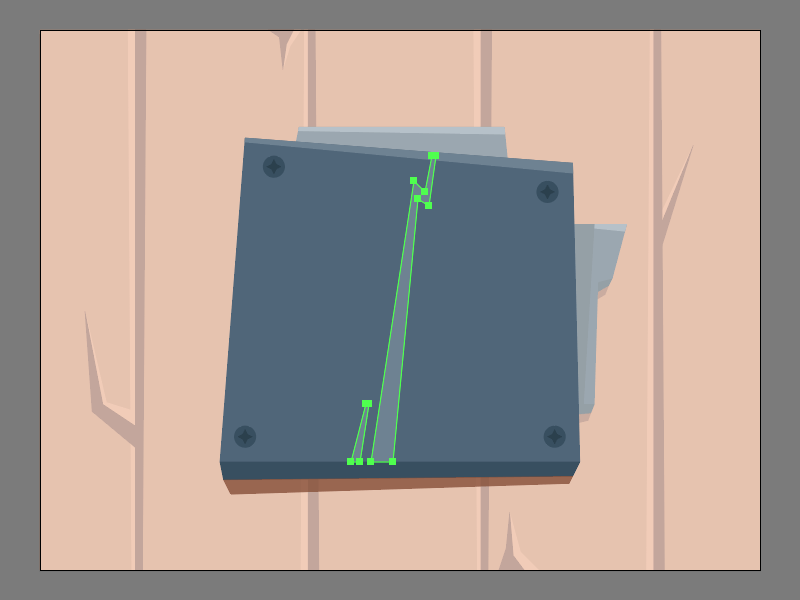
Finish off the illustration and with it the project itself by locking the current layer and then going back to the second one, where we will isolate the lock by double clicking on it, and then draw the two vertical highlights using #6F8393 as our Fill color. Once you’re done, exit Isolation Mode by simply pressing the Escape key.
Great Job!
There you have it folks, a nice an easy tutorial on how to put together a scary composition using nothing more than some basic shapes and tools.