In this Illustrator tutorial learn how to draw a tubes of paint text effect.
The tutorial is composed of two main parts, creating the oil-paint text and creating the tubes. You will start from basic shapes, fill them with some complex linear gradient and then apply the Gaussian blur effect for the results. Next, you will learn how to create tubes using basic blending and vector shape building techniques along with some complex linear gradients. So, let’s begin!
Final Image
As always, this is the final image that we’ll be creating:

Tutorial Details
- Program: Adobe Illustrator CS6
- Estimated Completion Time: 60 minutes
- Difficulty: Beginner-Intermediate
Step 1
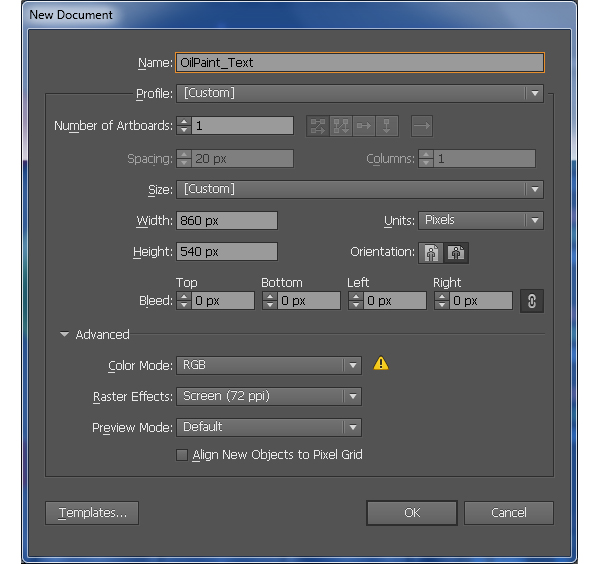
Launch Illustrator and then press (Ctrl + N) to create a New document. Select Pixels from the Units drop-down menu, enter 860 in the width box and 540 in the height box then click on the Advanced button. Select RGB, Screen (72ppi) and make sure that the Align New Objects to Pixel Grid box is unchecked before you click OK.
Step 2
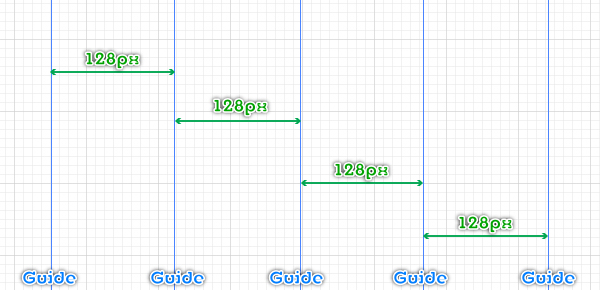
Show the Rulers (View > View Rulers > Show Ruler) or (Ctrl +R). Next drag five vertical guides from the Rulers (if the guides are locked, go to the View > Guides > Lock Guides) or (Ctrl +Alt + ;), then place them to the correct positions as shown in the first image below. Next drag four horizontal guides and then place them to the positions as shown in the second image.

Step 3
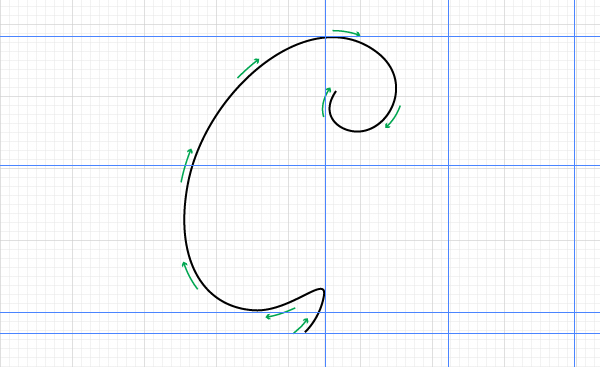
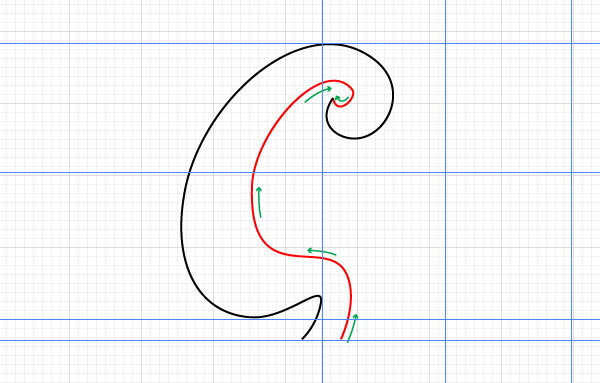
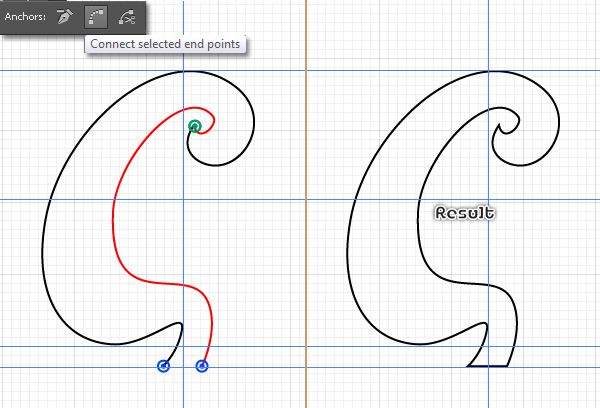
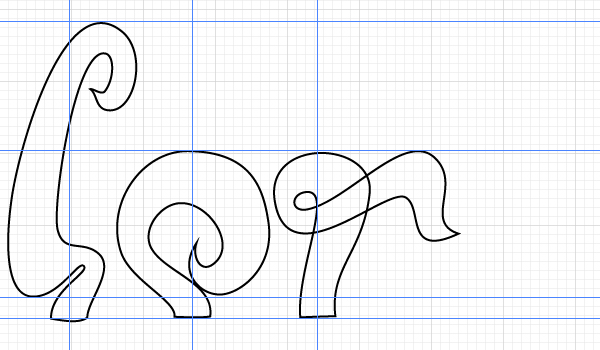
Start with drawing two curved paths using the Pen Tool (P) like in the images. Once your paths are drawn, pick the Direct Selection Tool (A), hold down the Shift key and select the two anchor points highlighted with blue, then click on the “Connect selected end points” button from the Properties bar. Next connect the two anchor points highlighted with green.
Step 4
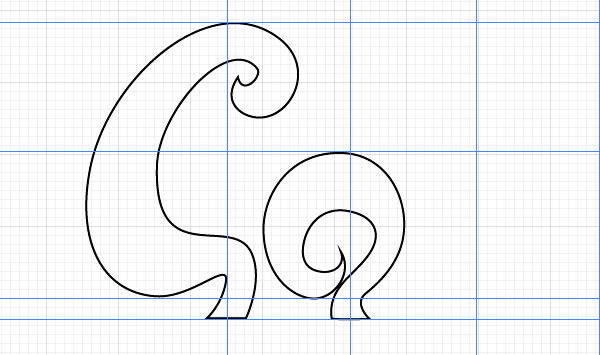
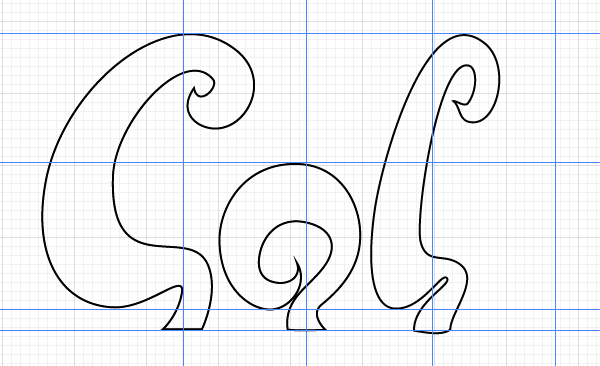
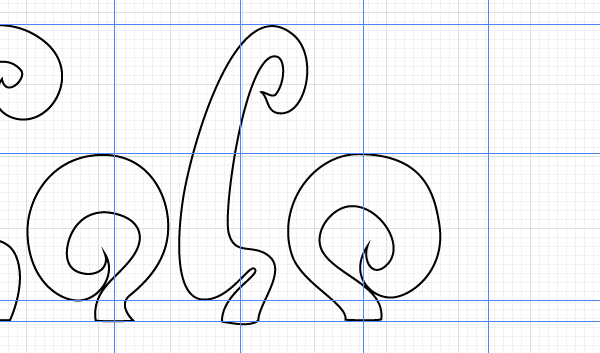
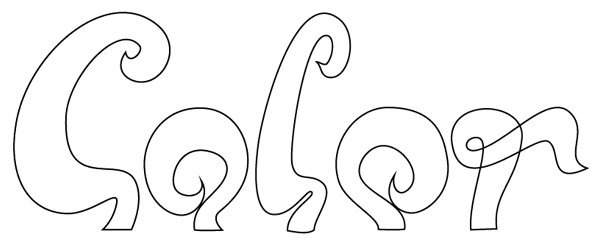
Repeat the same process as in the previous step to draw the remaining four letters similar to the ones hown below. Also you can see them all in the final image.
Step 5
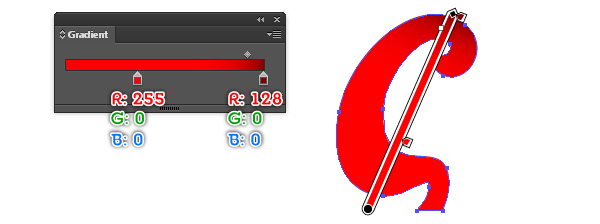
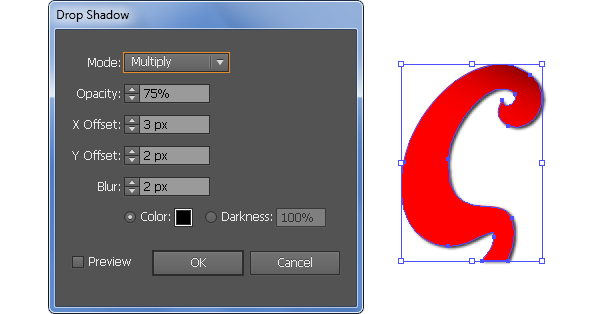
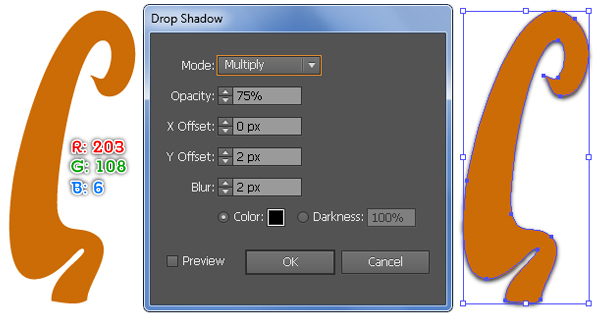
Fill the “C” object with the linear gradient as shown below. Keep the resulting shape selected, go to the Effect > Stylize > Drop Shadow… Follow the data as you see in the second image and then click OK.
Step 6
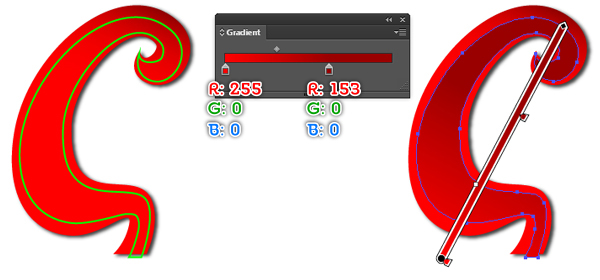
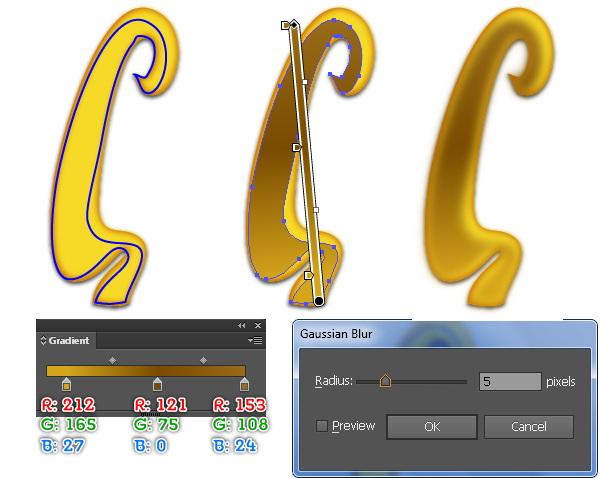
With the help of the Pen Tool (P) draw a green object and then fill this object with the linear gradient as shown below.
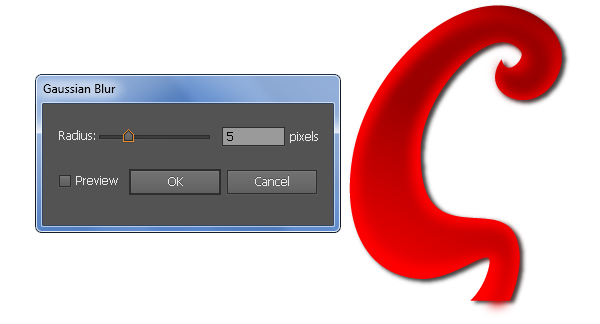
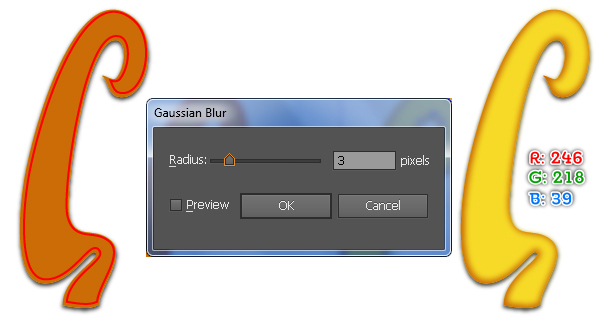
Make sure that the resulting shape is still selected, go to the Effect > Blur > Gaussian Blur… Enter a 5px Radius and then click OK.
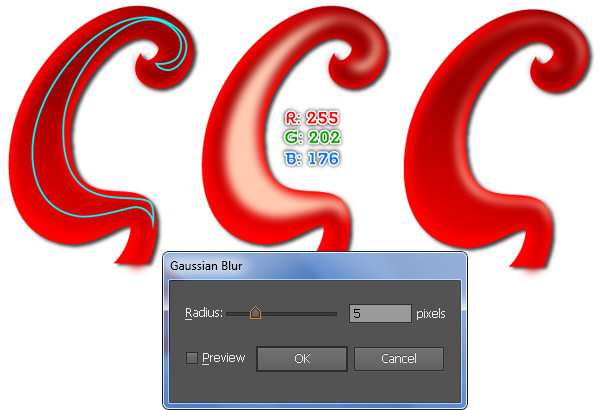
Next draw another object with the Pen Tool (P) as in the fourth image.
Once your object is drawn, fill it with R=255, G=202, B=176.
Next apply a 5px Gaussian Blur effect for the resulting shape and then send it backward (Ctrl +Left Square Bracket).
Step 7
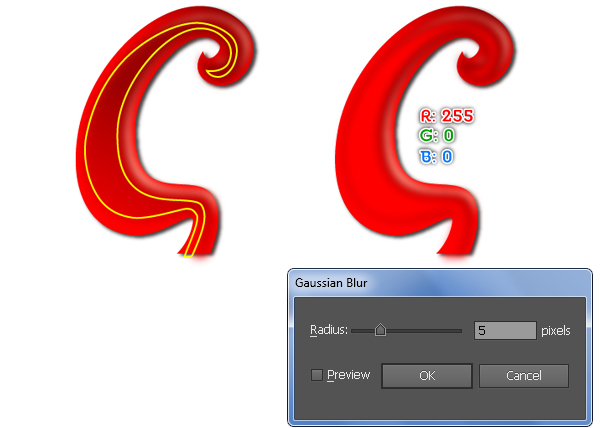
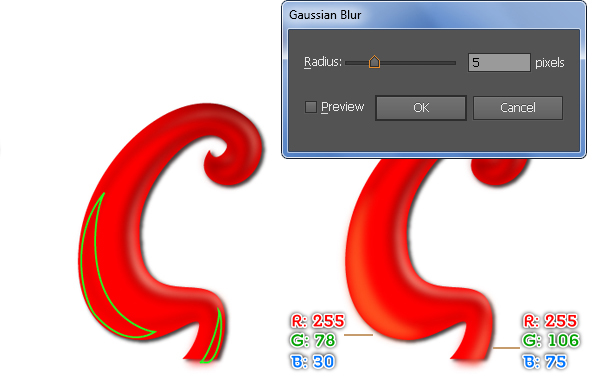
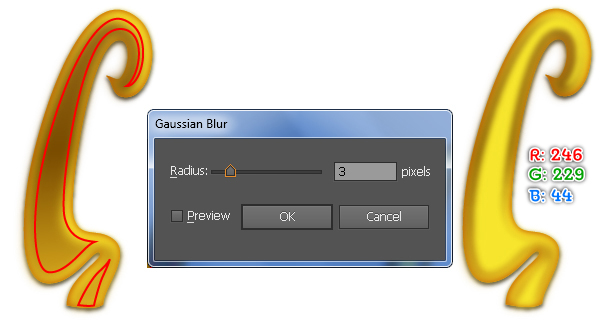
Continue with the Pen Tool (P), draw a yellow object as shown below and then fill this object with R=255, G=0, B=0.
Next apply a 5px Gaussian Blur effect for the resulting shape.
Continue to draw two green objects as you see in the third image.
Once your objects are drawn, fill the bigger object with R=255, G=78, B=30 and then fill the remaining object with R=255, G=106, B=75.
Finally reselect the two newly created shapes and apply a 5px Gaussian Blur effect to them.
Step 8
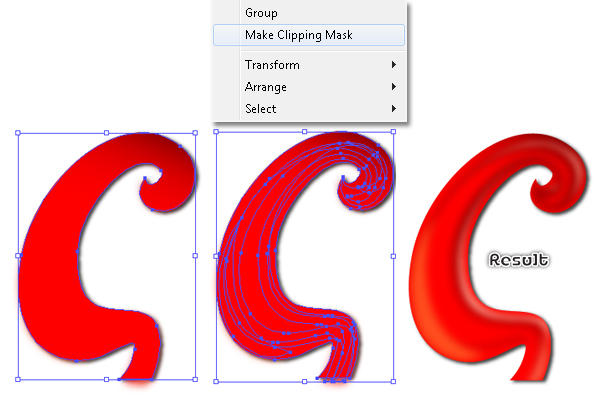
Select and group (Ctrl +G) all shapes created from the beginning of step 6 to this time.
Now select the shape created in the step 5, duplicate (Ctrl +C, Ctrl +F) it once and bring the copy to front (Ctrl +Shift +Right Square Bracket).
Keep the new shape selected, go to the Appearance panel (Window > Appearance) and remove the Drop Shadow section.
Make sure that the resulting shape is still selected, hold down the Shift key, click on the new group and go to the Object > Clipping Mask > Make (Ctrl +7).
Step 9
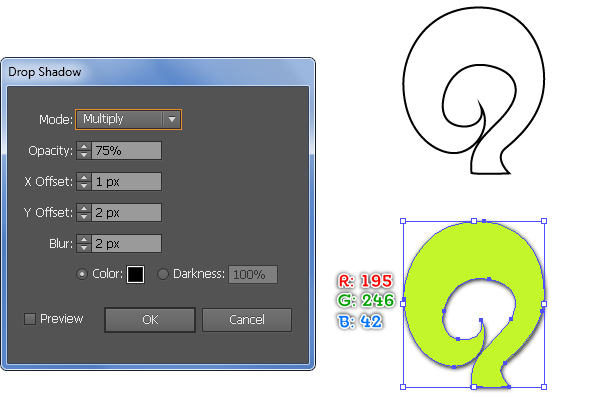
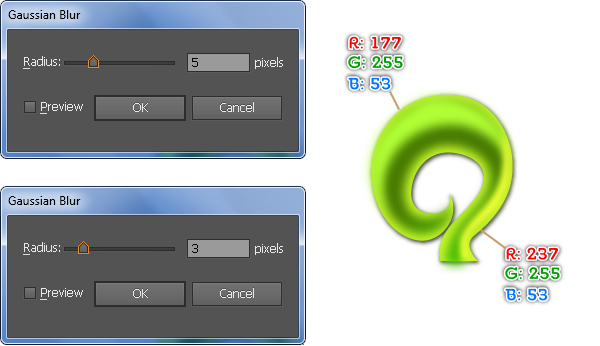
Next comes the letter “O”. Fill this object with R=195, G=246, B=42 and go to the Effect > Stylize > Drop Shadow… Follow the data as shown below and then click OK.
Step 10
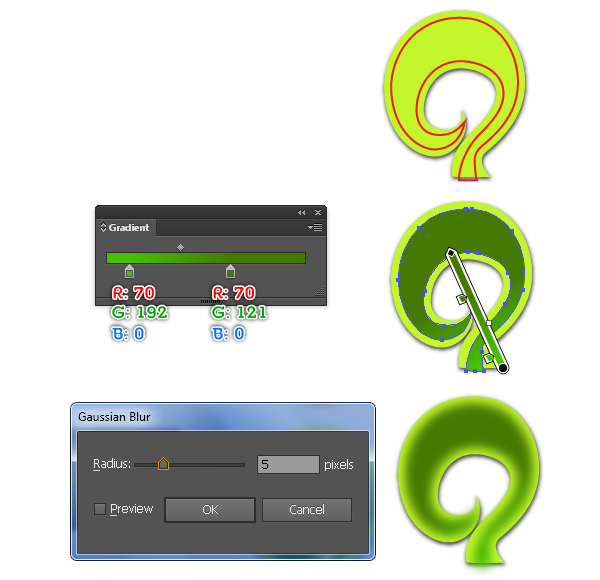
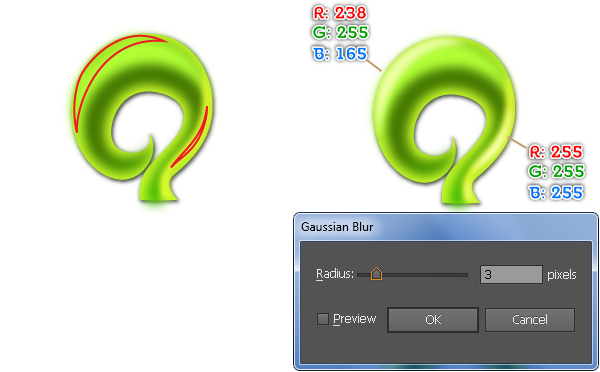
Follow the sequence of images and add some details to the letter “O” similar to the ones shown below.

Step 11
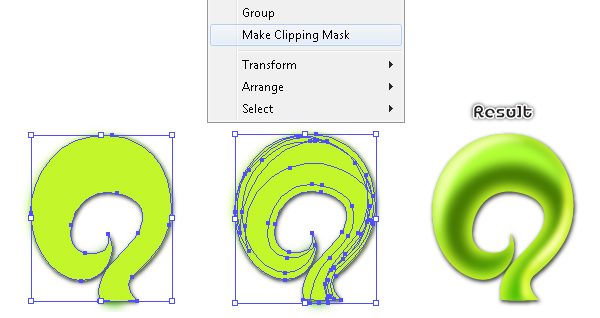
Select and group (Ctrl + G) all shapes created in step 10.
Next select the shape created in step 9, duplicate (Ctrl +C, Ctrl +F) it once and bring the copy to front (Ctrl +Shift +Right Square Bracket).
Keep the new shape selected, go to the Appearance panel (Window > Appearance) and remove the Drop Shadow section.
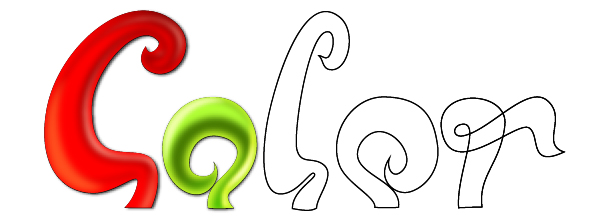
Make sure that the resulting shape is still selected, hold down the Shift key, click on the new group and go to the Object > Clipping Mask > Make (Ctrl +7). At this point your text should look like in the final image below.
Step 12
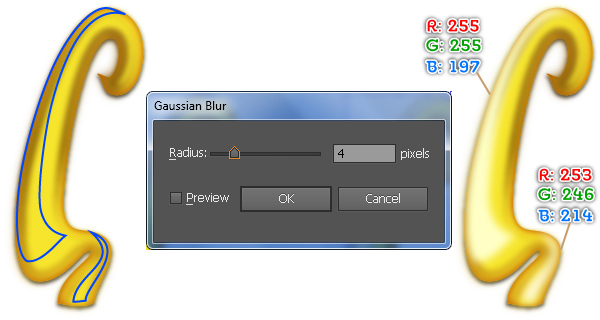
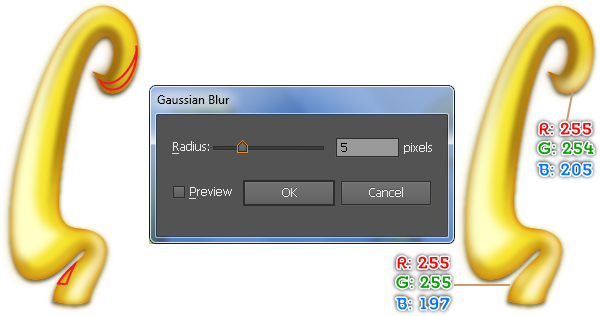
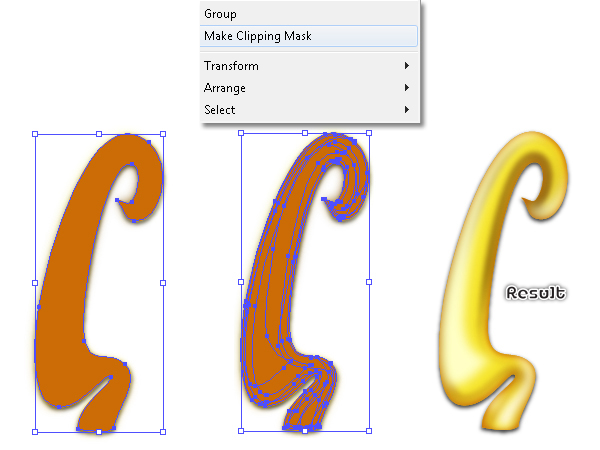
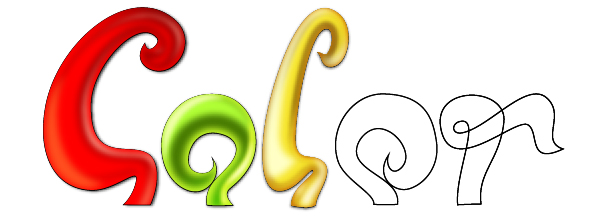
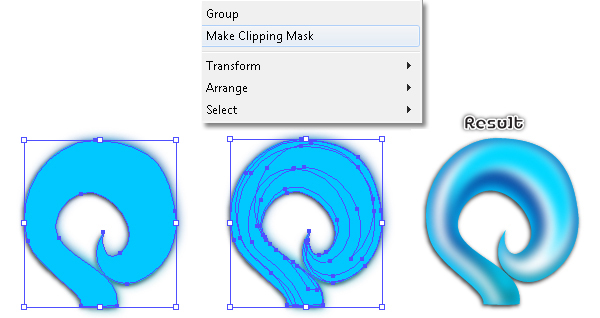
Let’s work on the creation of the letter “L”. Repeat the same process as the previous steps and follow the sequence of images to create the letter “L”. In the end your text should look like the final image shown.
Step 13
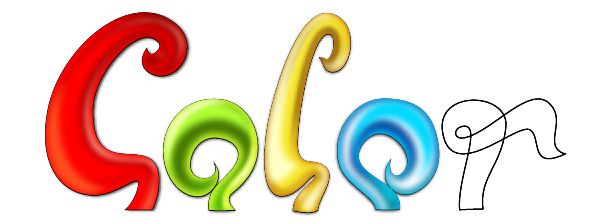
It’s time to draw another letter “O”.
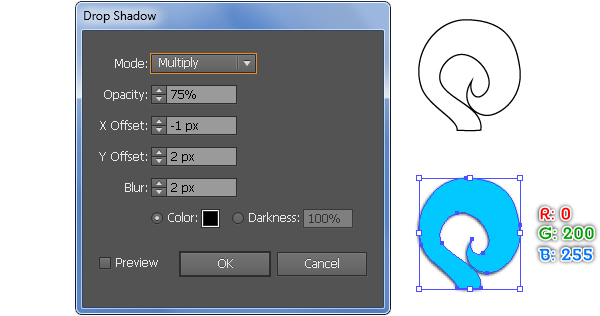
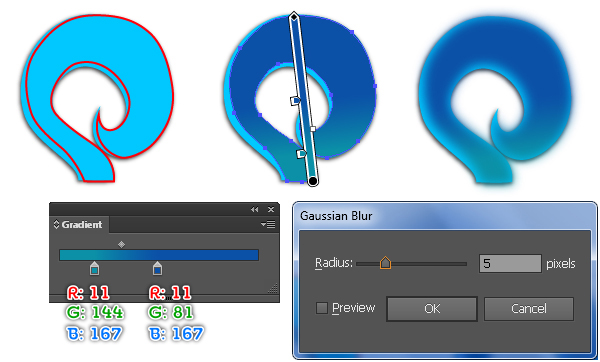
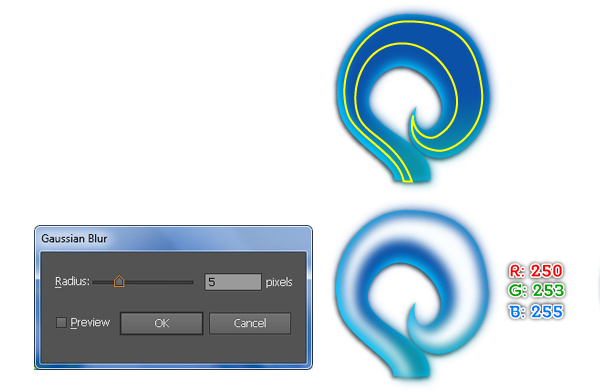
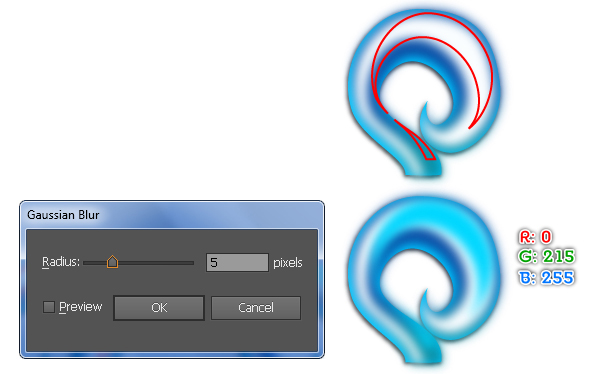
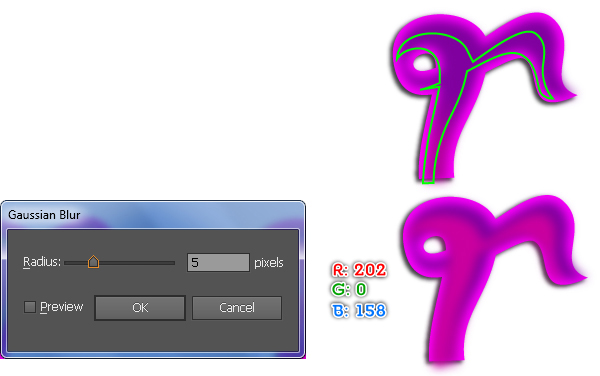
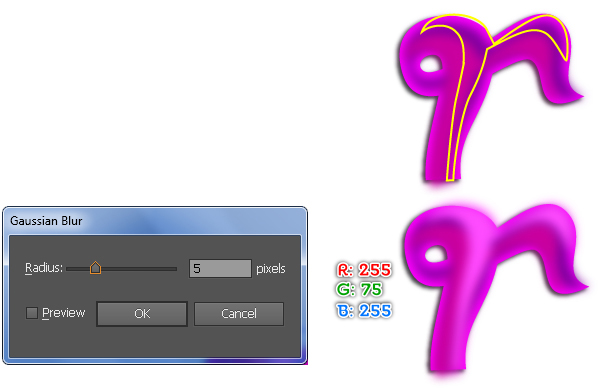
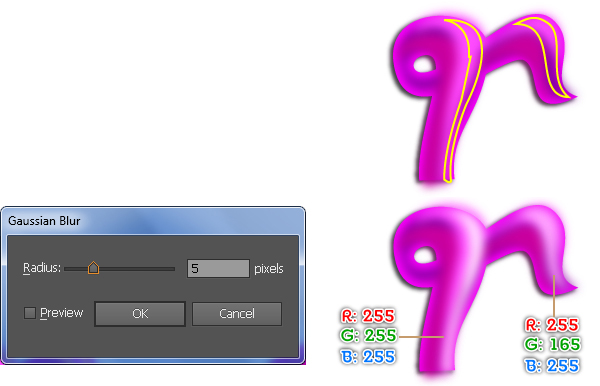
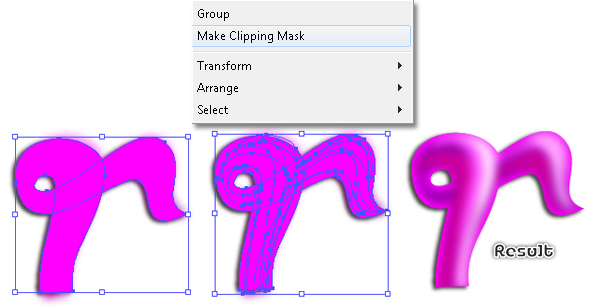
Step 14
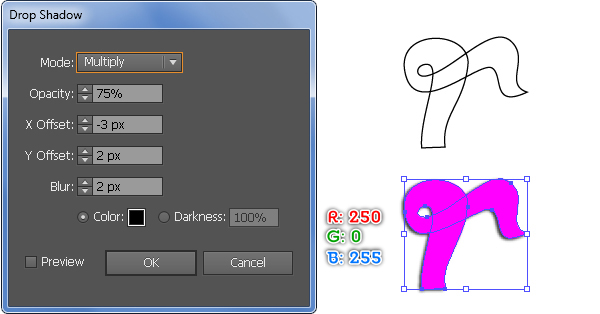
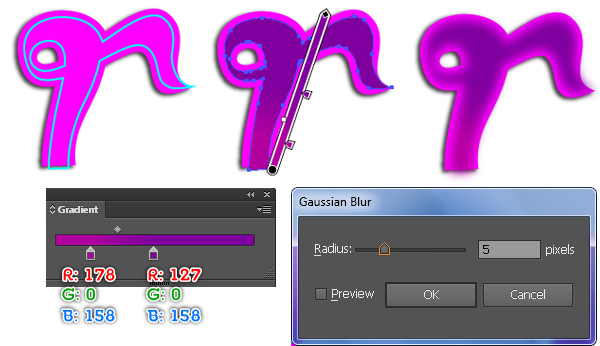
Let’s create the final letter-“R”.
Step 15
Here is how the text should look.

Step 16
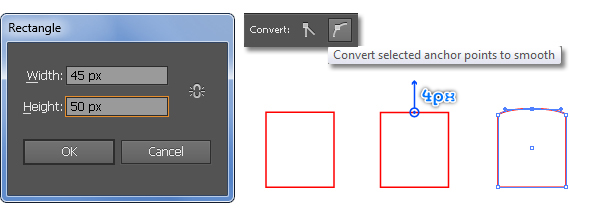
It’s time to draw the tube. Let’s start by creating the neck of the tube. With the Rectangle Tool (M) create a 45 by 50px object.
Next pick the Add Anchor Point Tool (+) and add an anchor point highlighted with blue. Keep the new anchor point selected and click on the “Convert selected anchor points to smooth” button from the Properties bar.
Pick the Direct Selection Tool (A), click on the new anchor point and move it 4px up.
Keep working with the Direct Selection Tool (A), hold down the Shift key then click on the left handle of the new anchor point and move it to the left.
Next do the same with the right handle of the new anchor point (but move it to the right). After you are done adjusting the shape of the new object, apply a linear gradient to it as shown below.
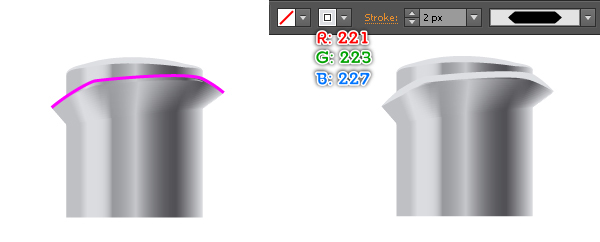
To add some details on the neck, first draw a curved path with the Pen Tool (P) like in the fifth image.
Next fill this path with none and add a 2px stroke (R=221, G=223, B=227), then apply the Width Profile 1 for the result.


Step 17
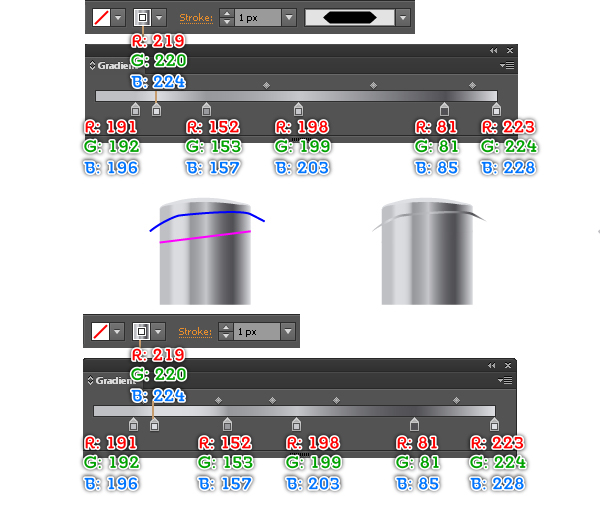
Next come the threads. With the Pen Tool (P) draw two paths as shown below. Once your paths are drawn, fill the blue path with none and add a 1px stroke (apply the linear gradient within stroke), then apply the Width Profile 3 for the result.
Next fill the remaining path with none and add a 1px stroke (apply the linear gradient within the stroke).
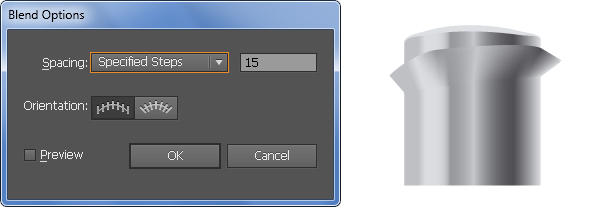
Now reselect the two new objects and go to the Object > Blend > Blend Option… Follow the data as you see in the third image and click OK, then go to the Object > Blend > Make (Ctrl +Alt +B).
Step 18
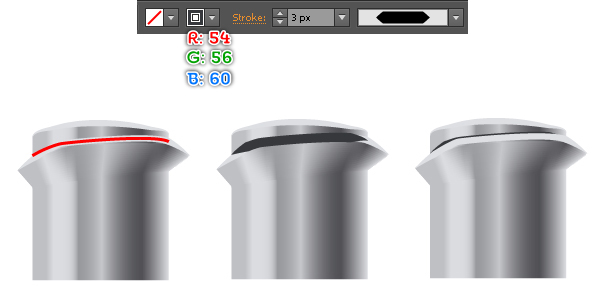
To add some details on the thread, first draw a curved path as shown below. Next fill this path with none and add a 2px stroke (R=221, G=223, B=227), then apply the Width Profile 3 for the result.
Continue to create another path like you see in the third image. Once your path is drawn, fill it with none and add a 3px stroke (R=54, G=56, B=60), then apply the Width Profile 3 for the result.
Keep the new object selected and press (Ctrl +Left Square Bracket) twice to hide it behind the thread.
Step 19
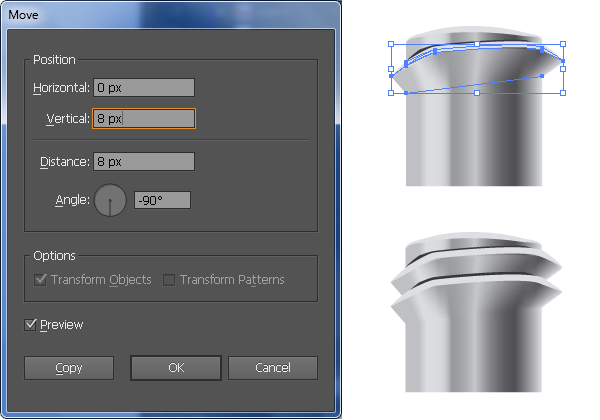
Select and group (Ctrl + G) all objects created from the beginning of step 17 to this time, then go to the Object > Transform > Move… Enter a 8px in the Vertical box and click Copy.
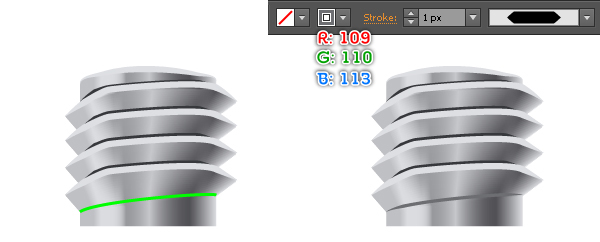
Next press (Ctrl +D) twice to get the results as you see in the third image.
Continue to create a curved path as shown in the fourth image. Next fill this path with none and add a 1px stroke (R=109, G=110, B=113), then apply the Width Profile 3 for the result.

Step 20
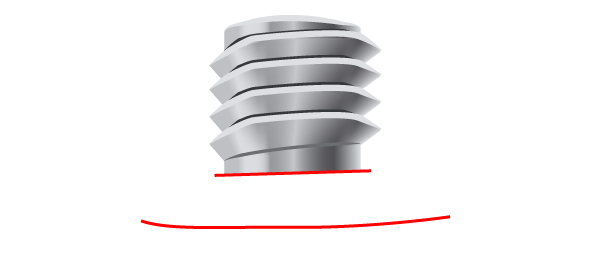
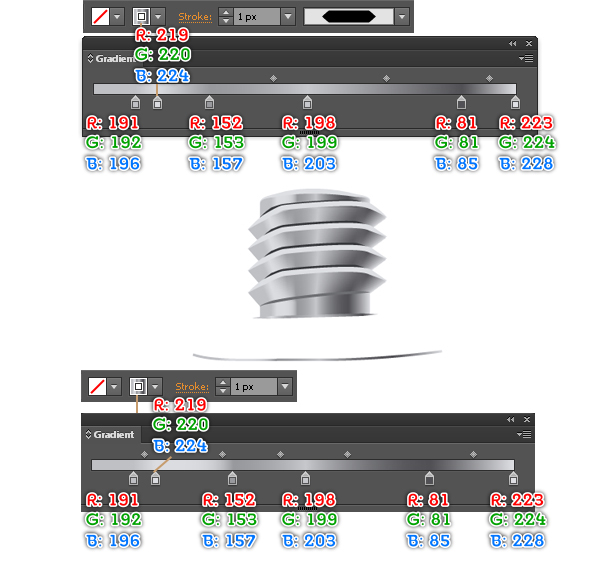
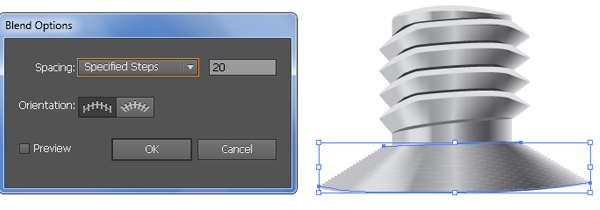
Let’s start by creating the front part of the tube. First with the help of the Pen Tool (P) draw two paths as shown below.
Once your paths are drawn, fill the shorter path with none and add a 1px stroke (apply the linear gradient within stroke), then apply the Width Profile 3 for the result.
Next fill the remaining path with none and add a 1px stroke (apply the linear gradient within stroke).
Now reselect the two new objects and create a blend between them.
Step 21
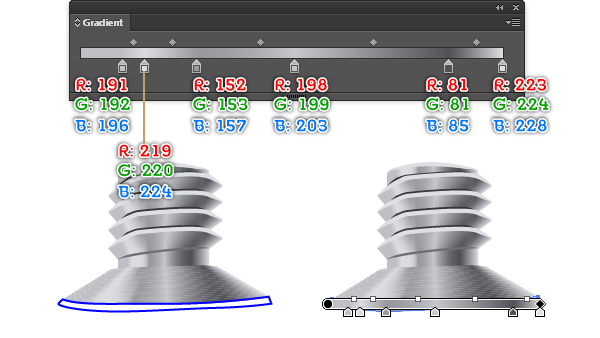
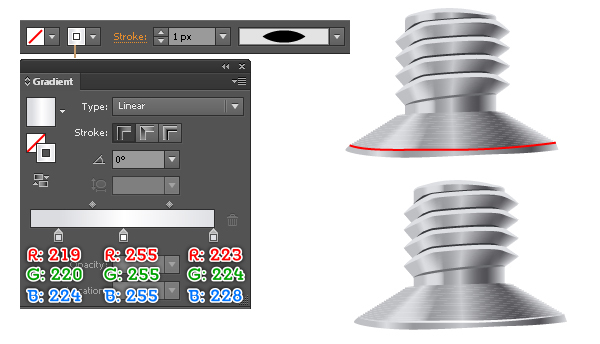
To add some details, first draw an object and then fill it with the linear gradient as shown below.
Continue with the Pen Tool (P) and create a curved path like you see in the third image.
Once your path is drawn, fill it with none and add a 1px stroke (apply the linear gradient within stroke), then apply the Width Profile 1 for the result.
Step 22
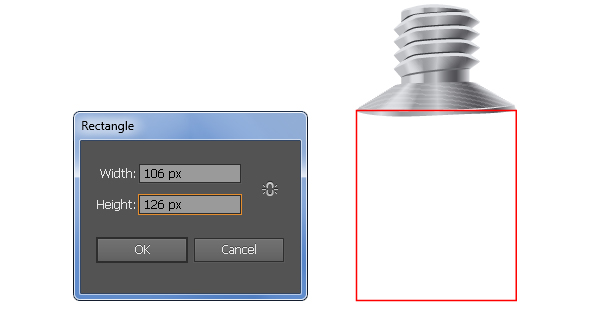
It’s time to draw the middle part of the tube. Using the Rectangle Tool (M) create a 106 by 126px object.
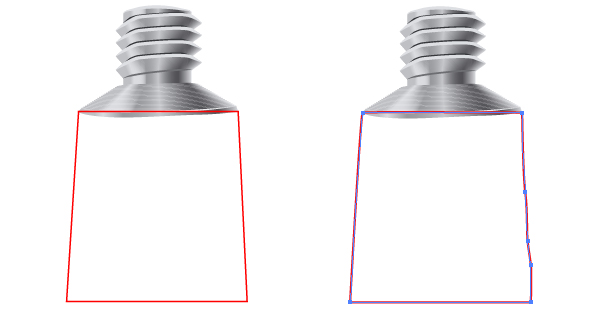
With the Direct Selection Tool (A) select the bottom-left anchor point of the new rectangle and move it 8px to the left.
Next select the bottom-right anchor point and move it 6px to the right.
With the help of the Add Anchor Point Tool (+) add some anchor points on the new object and then adjust them to give it a more irregular look for the tube.
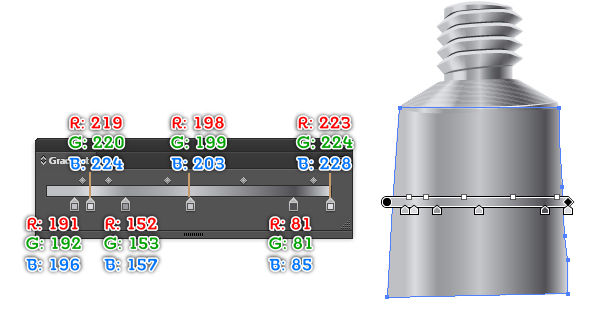
After you are done adjusting the shape of the middle part apply a linear gradient as shown in the fourth image below.
Step 23
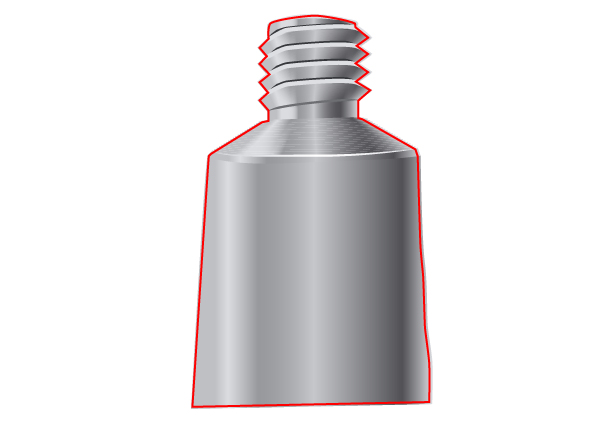
Now we’ll add the texture on the tube. Using the Pen Tool (P) create an object as shown in the picture below.
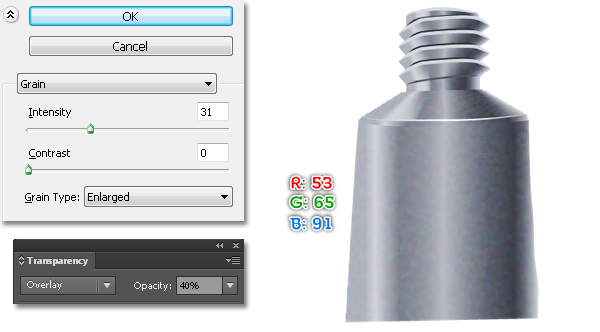
Once your object is drawn, fill it with R=53, G=65, B=91 and go to the Effect > Texture > Grain… Follow the data as shown below and then click OK.
Keep the resulting shape selected, set the Blending Mode of it to Overlay and reduce the Opacity to 40%.
Step 24
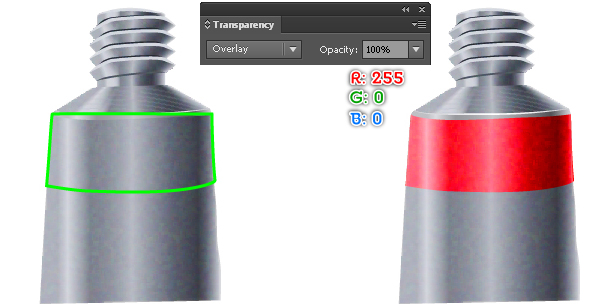
With the Pen Tool (P) create an object as shown below.
Next fill it with R=255, G=0, B=0 and change the Blending Mode of the resulting shape to Overlay.
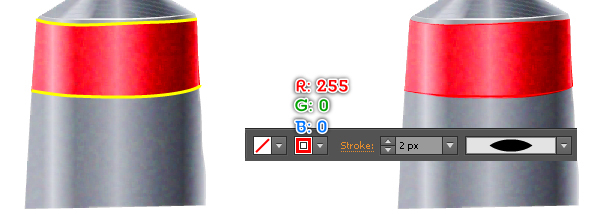
Continue with the Pen Tool (P) and create two curved paths like you see in the third image.
Once your paths are drawn, fill them with none and add a 2px stroke (R=255, G=0, B=0), then apply the Width Profile 1 for the results.
Step 25
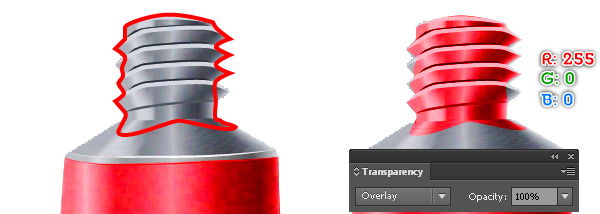
Let’s create an area of paint that covers the neck of the tube. First draw an object with the Pen Tool (P) as in the image.
Next fill this object with R=255, G=0, B=0 and then set the Blending Mode of the resulting shape to Overlay.
Now select and group (Ctrl + G) all objects created from beginning of step 16 to this time, then name this group “red-tube”. At this point the tube of paint is ready and looks like the third image.

Step 26
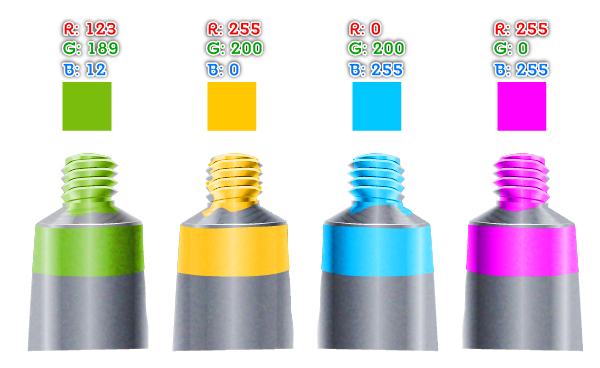
Make some new group copies and change their colors as shown in the following image. To give the four new “tube” groups a more irregular look, you can change the shape of the areas of paint that cover the necks of the tubes. And you can also reflect the new “tube” groups vertically, like I did.
Step 27
Place the “tube” groups to the correct positions as shown below.

Step 28
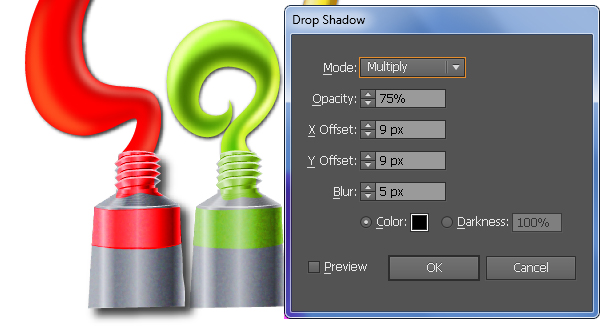
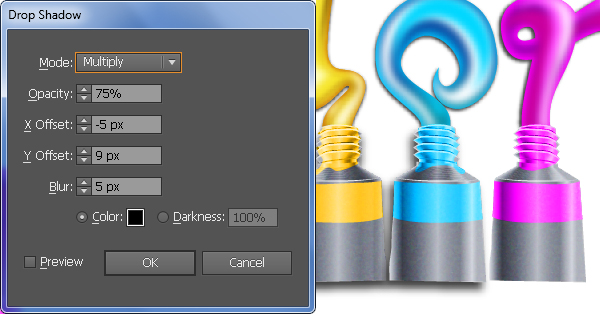
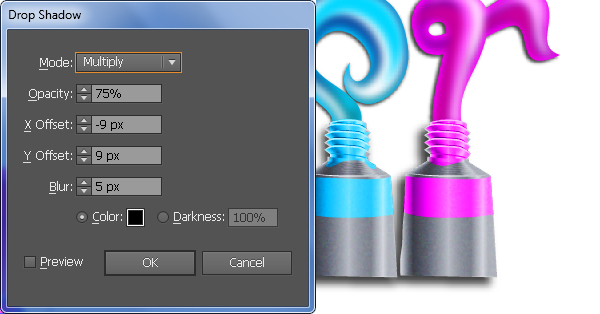
To give a more realistic look I’m going to be adding some hard shadows on the “tube” groups. First select the “red-tube” group and go to the Effect > Stylize > Drop Shadow… Follow the data as shown below and then click OK.
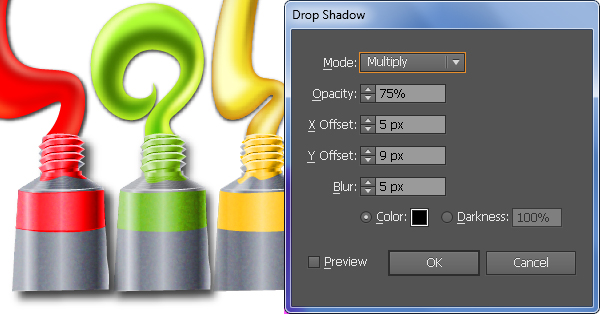
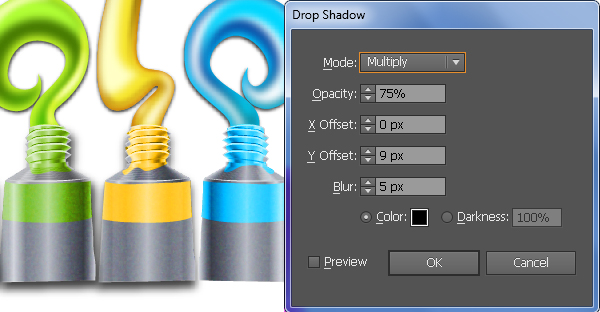
Now, follow the sequence of images and add the shadows for the remaining “tube” groups. In the end your artwork should look like the final image shown.

Step 29
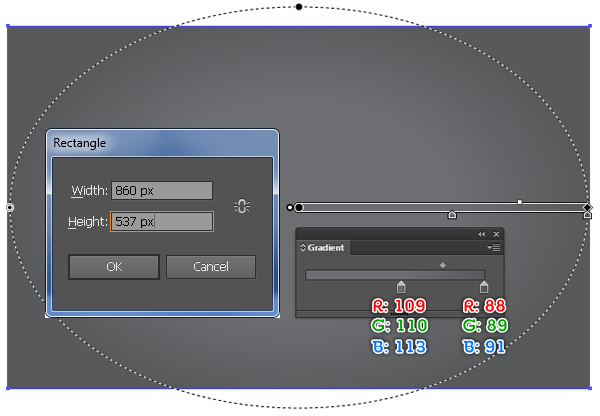
It’s time to create the background. With the Rectangle Tool (M) create a 860 by 537px object and then fill it with the radial gradient.
The last thing to do is place your artwork in position as you see in the second image.
And We’re Done!
I hope you enjoyed creating this text effect and that you’ve learned a few new things.
