A Loading bar is one of the very important user interface (UI) elements. Waiting for something to load (web page, download or upload process) can be quite annoying. This is the exact reason why your loading bar should look interesting and eye catching (to entertain us while we are waiting). So, let’s start Adobe Illustrator and get some work done.
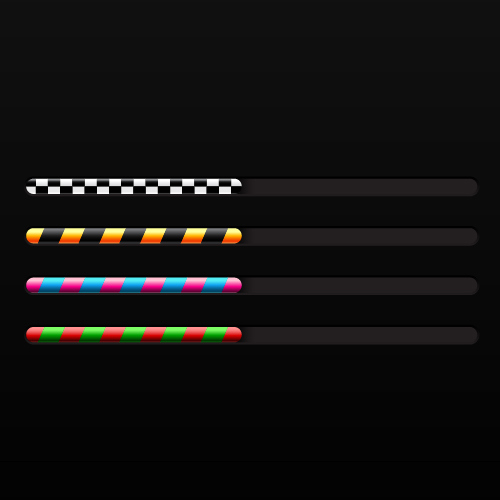
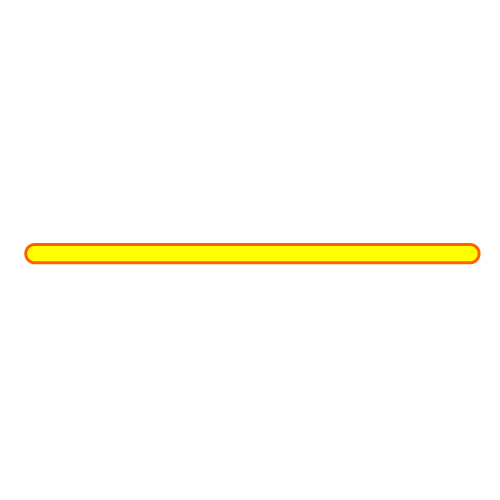
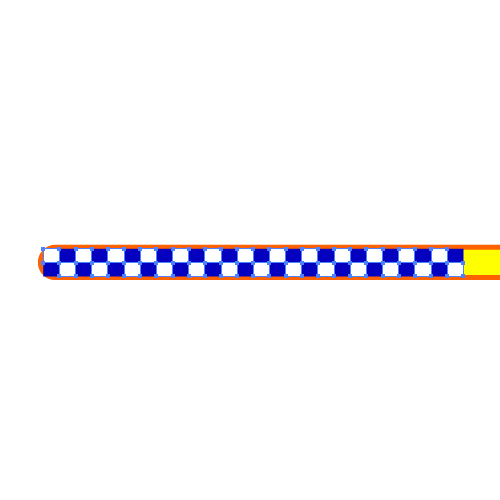
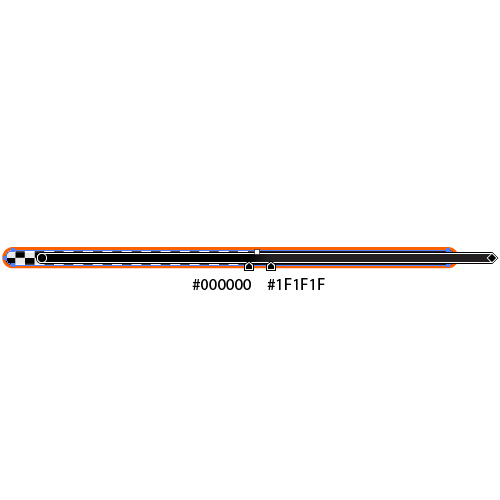
Final Image
Tutorial Details
- Program: Adobe Illustrator CS5
- Estimated Completion Time: 1 hour
- Difficulty: Intermediate
Step 1
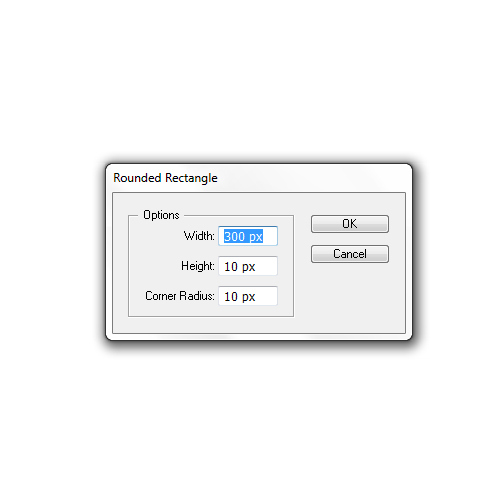
There are a few different shapes of loading bar we can create, but for this tutorial we will be using the Rounded Rectangle Tool to create a basic shape. Select it from the Tool Panel and click somewhere on the Artboard. The Rounded Rectangle option box will pop up. Make sure to set the dimensions as it shown in the picture below and hit the OK button.
Step 2
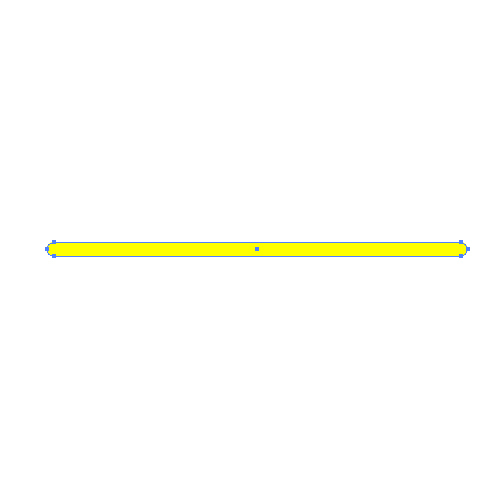
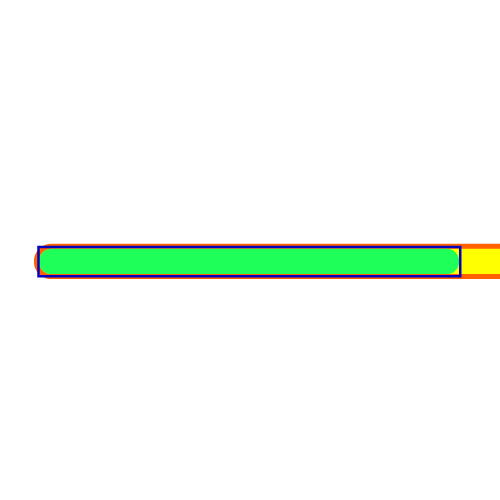
We have created the basic shape for our loading bar.
Step 3
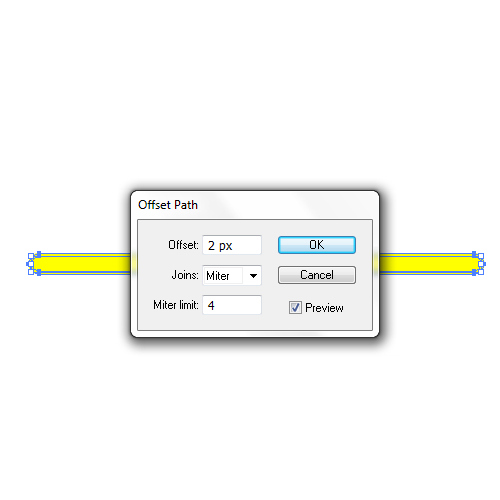
Let’s create a small edge for the shape we have just created. That edge will increase the depth for our design element. Select the basic shape from the previous step and under the Object select Path > Offset Path. Set the value for Offset to 2 pixels.
You should end up with something like this.
Step 4
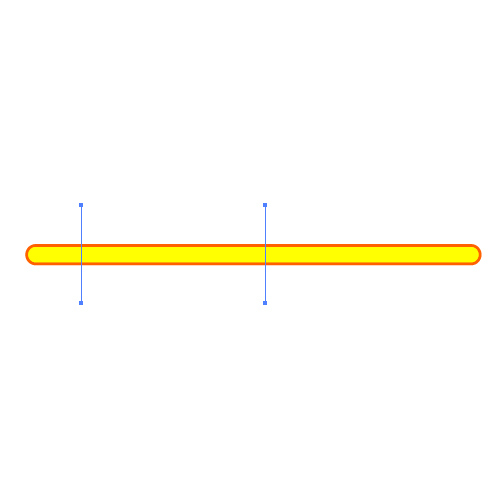
Now we are going to create the loading part of the loading bar (the part that actually moves during the load).
Duplicate the smaller shape (Ctrl / Cmd + C, Ctrl / Cmd + F). Select the Line Tool (/) from the Tool Panel, create two vertical lines and place them as shown on the picture below (don’t forget to hold the Shift key on your keyboard for the straight dragging).
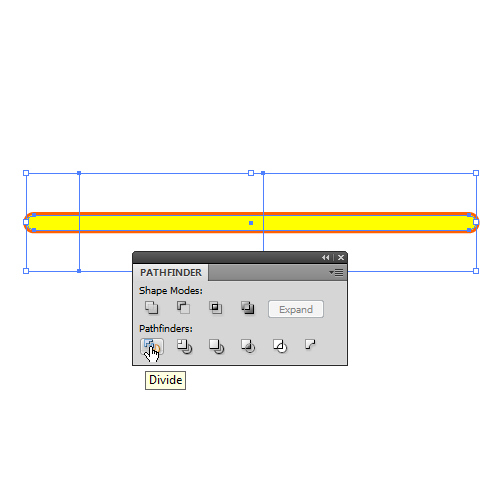
Step 5
Select both vertical lines and the copy of the smaller shape we have just created and under the Pathfinder Panel hit Divide button. It will divide the yellow shape into three smaller shapes.
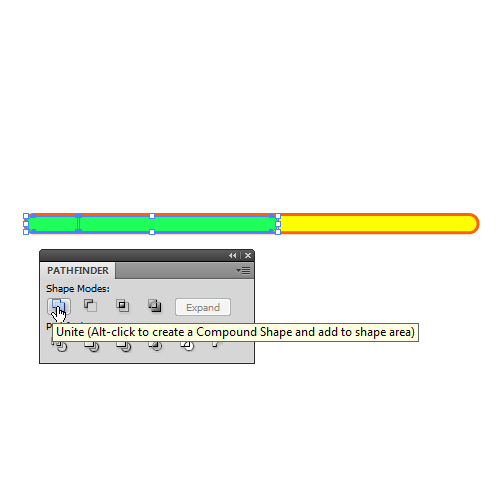
Step 6
Ungroup (Shift + Ctrl / Cmd + G) the divided shape and remove the middle part by hitting the Delete key on your keyboard. You should end up with something like this.

Step 7
Make sure to move the green shape on the right to meet the one on the left side (don’t forget to hold the Shift key for the straight dragging). Select both green shapes and under the Pathfinder Panel hit the Unite button. It will turn both shapes into one.
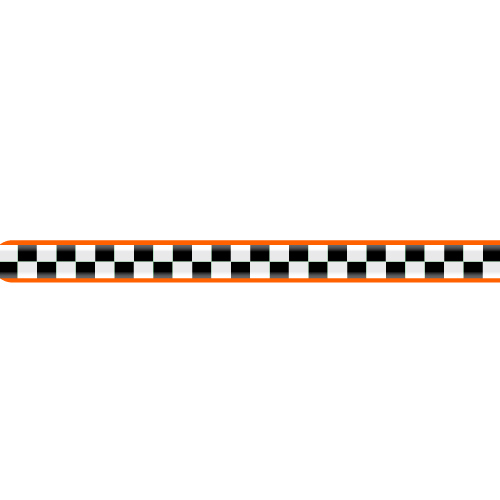
Now we need to create a nice pattern for our loading bar. It can be anything you want; stripes pattern, grungy metal pattern,…anything you like. In this tutorial we will be creating a checkered pattern.
Step 8 – Creating a Pattern
Let’s start with the Rectangle Tool (M). Grab it from the Tool Panel and draw a rectangle as shown on the picture below. Just make sure to create a rectangle slightly larger then the loading part of the loading bar.
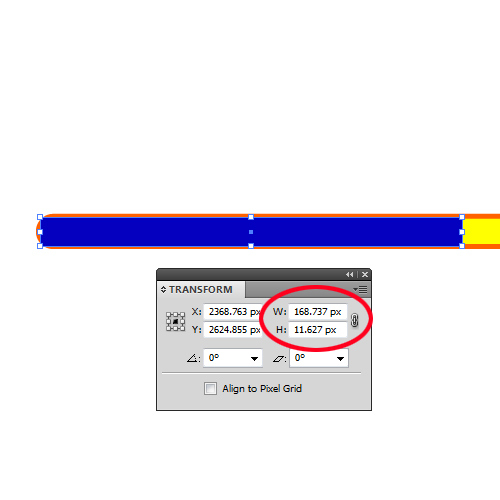
Step 9
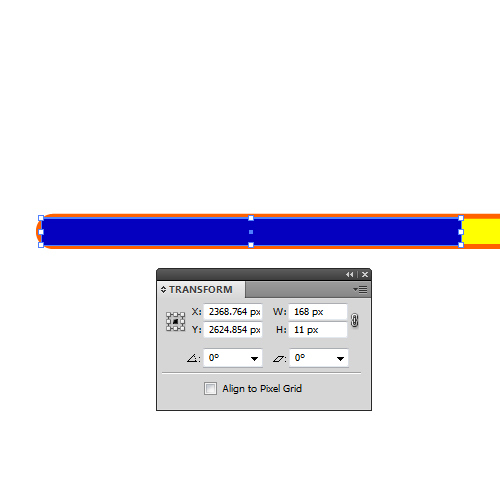
Remove the Stroke color and set the Fill color to any color you like (color is not important). Now we are going to adjust the size of the new rectangle. Make sure to open Transform Panel (Window > Transform). Select the new rectangle and make sure to adjust its dimensions under the Transform Panel (W and H). Just set them to the closest, lower round number. For this tutorial it will be W=168 and H=11.
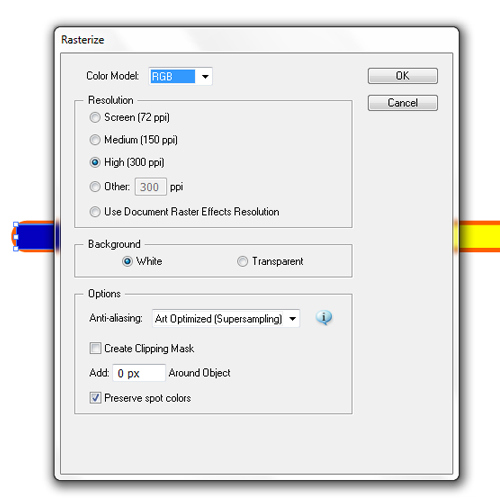
Step 10
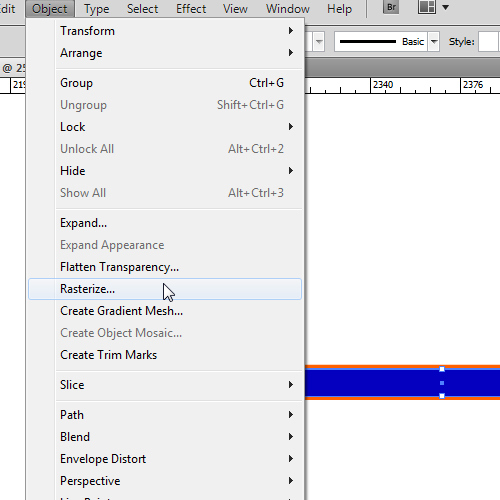
Under the Object select Rasterize, leave the default settings and hit the OK button.
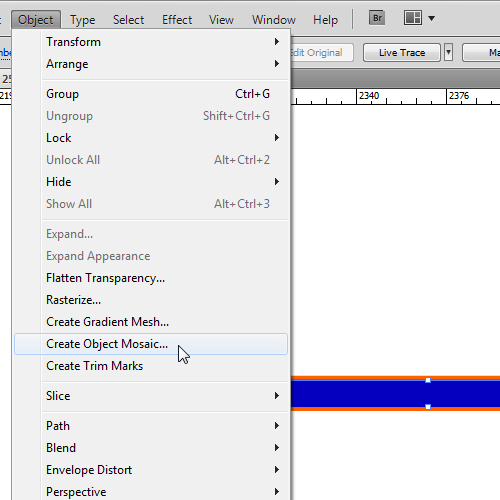
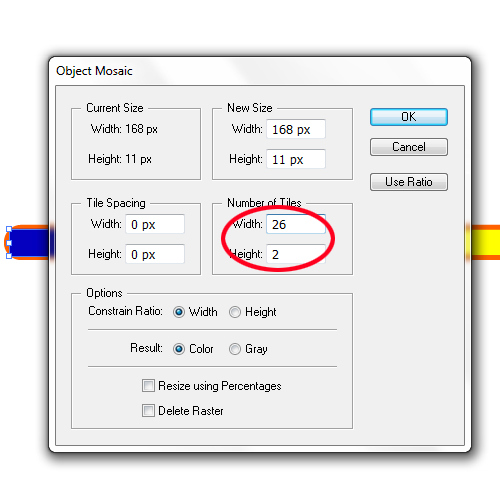
Step 11
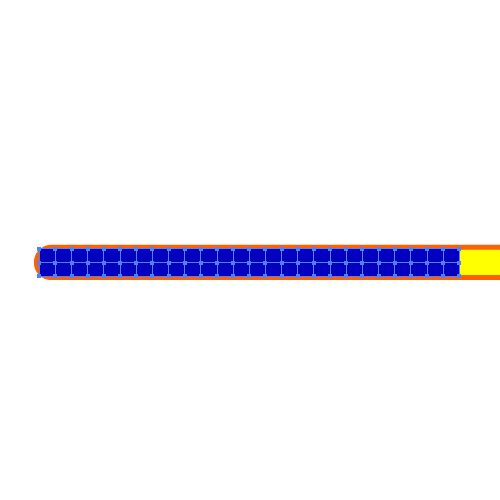
Now select Object > Create Object Mosaic. We are going to set the numbers of tiles to 26 and 2.
You should end up with nice even squares.
Step 12
Now, we are going to Ungroup (Shift + Ctrl / Cmd + G) the group of squares. We will end up with 52 squares. Underneath all of them there is a large rectangle we are going to remove. Just look for it in the Layer Panel (Just scroll the list of layers down and remove the large rectangle).

Step 13
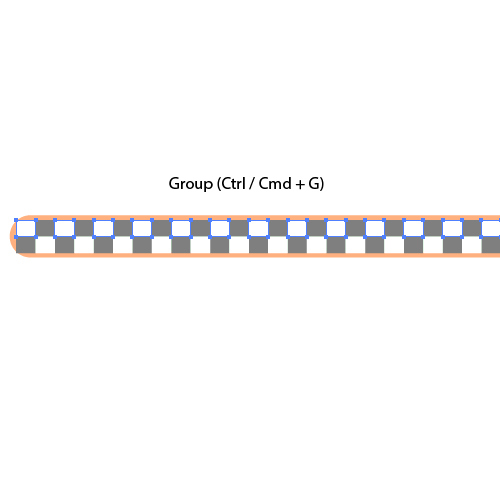
Select every second square and Group them (Ctrl / Cmd + G). Set the Fill color to White (#FFFFFF).
Step 14
Select the rest of the blue squares and Group them as well (Ctrl / Cmd + G). Set their Fill color to Black (#000000).
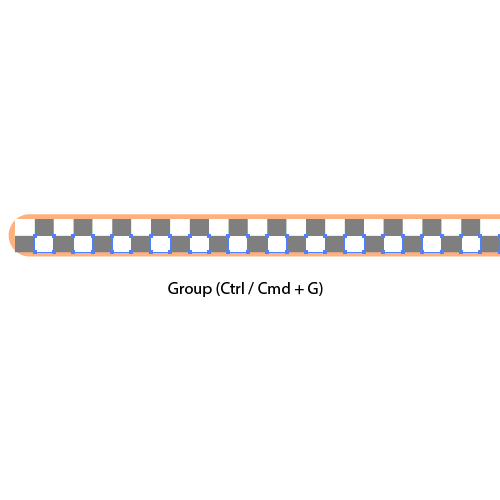
Step 15
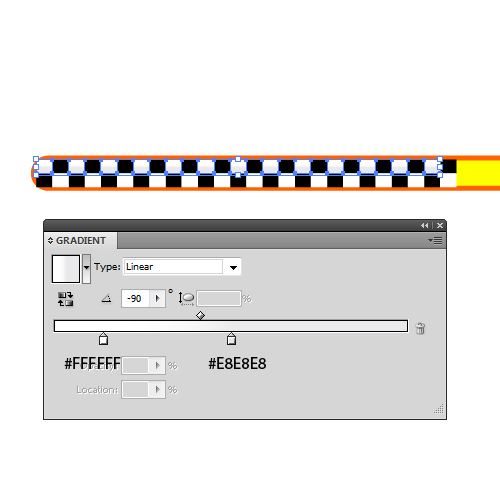
As you can see, our checkered design looks a bit flat. Lets fix that. We need to make it appear to stand out more. Linear gradients will help us to do that. We just need to find a great match of solid colors that will constitute the gradient. Lets start with the white part. We will be using a mix of white and light gray tones.
We have grouped all the white squares together but we need to adjust that group of elements. Select the white squares and from the Right click menu select Isolate Selected Group.

Step 16
Now select all the white squares in the upper row and Group them (Ctrl / Cmd + G). Repeat the same thing for the white squares on the bottom row.
Step 17
We are going to apply a nice linear gradient to both groups (upper and lower).
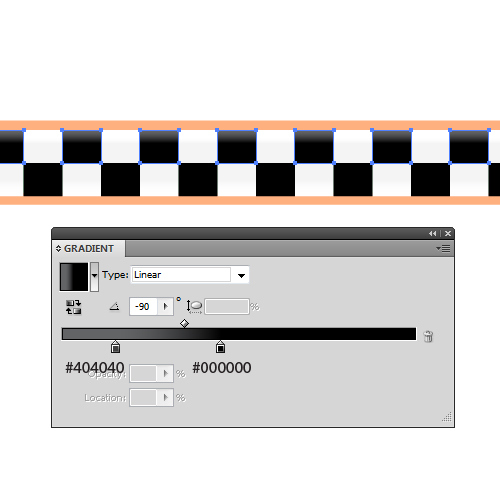
Step 18
We are going to do the same thing for the black squares. Inside the group we already have created two separate groups (upper and lower) by repeating step 16. Apply a nice black / gray linear gradient to both groups.
Step 19
Make sure to match the color transition for both group of squares so they are equal.
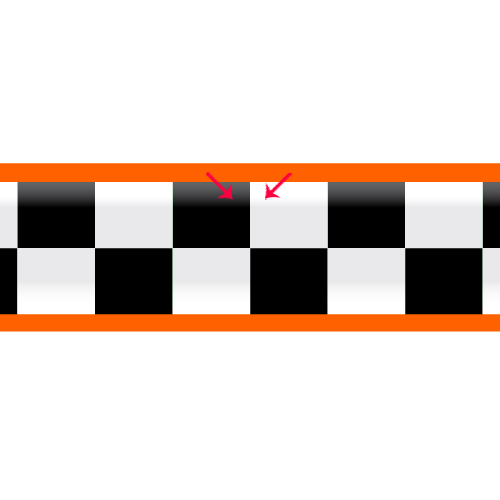
Repeat the same thing for the lower group of black squares.
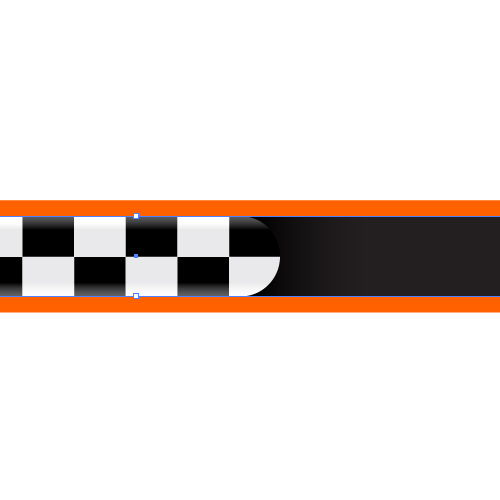
Step 20
When you are satisfied with the result select all squares (black and white) and Group them (Ctrl / Cmd + G). If you remember, underneath all the squares we have the basic shape of the loading bar. Now we are going to use it. Make sure to bring it to the top (you can easily find it in the Layer Panel). Shortcut for bringing the layer to the top is Shift + Ctrl / Cmd + ].
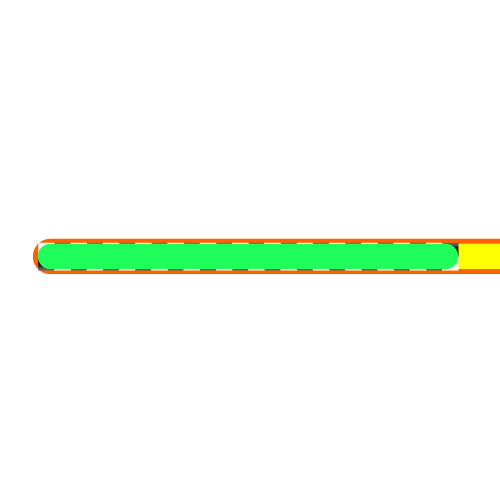
Step 21
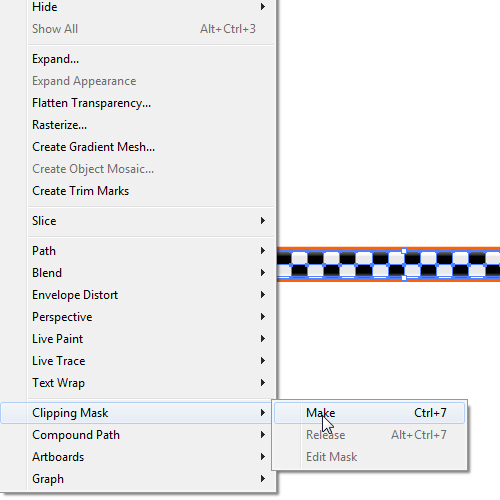
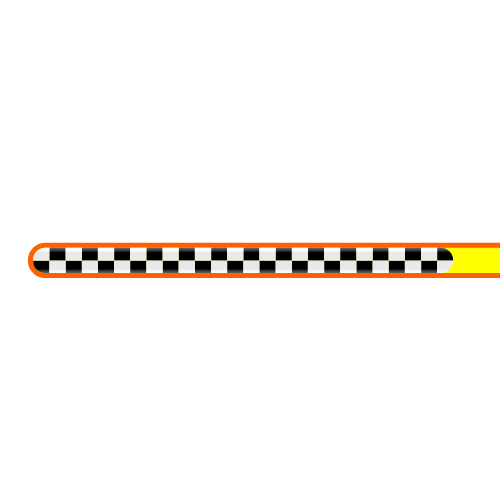
Make sure to remove the Fill color of the loading part of the loading bar. Select it along with the group of squares and under the Object select Clipping Mask > Make.
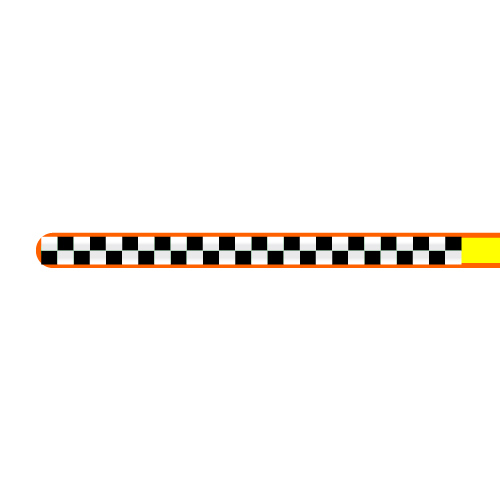
You should end up with something like this.
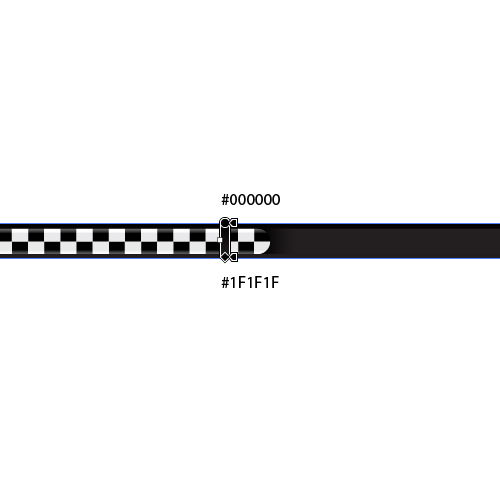
Step 22
Now we need to change the Fill color of other elements. For the inner part of the loading bar we will be using a linear gradient. It will allow us to create an interesting shadow.
The closeup should look like this.
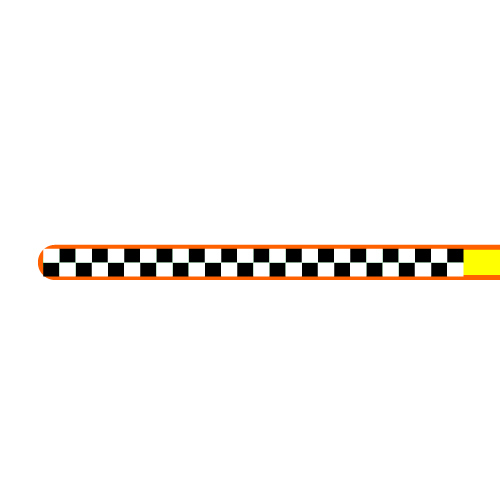
Step 23
We are going to apply a nice linear gradient to the orange shape as well. Just make sure to place a darker tone on the top.
Conclusion
Set the Fill color for the background to #121212. And we are done!
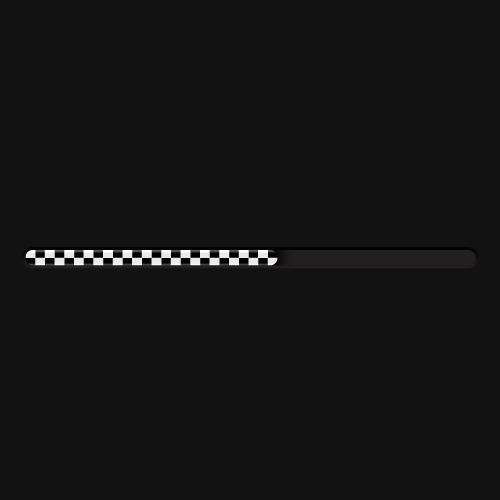
As you can see, with just a few very basic steps and without fancy effects we have managed to create quite a neat loading bar in vector form. There are some variations you can create just by modifying the techniques we have shown in this tutorial. As always, I am encouraging you to be creative and to combine different types of shapes in order to get interesting results. Don’t forget to experiment with colors too.

I hope you enjoyed reading this tutorial as much as I enjoyed creating it. Thanks for following along.
