Today we will be creating another cute icon (padlock icon in Illustrator) that can be used in webdesign field. We will make sure to create a nice and eye-catching illustration in perspective.
This time we will make sure to create the icon with just a little help from 3D effects and a big help from color gradients.
Final Image

Step 1
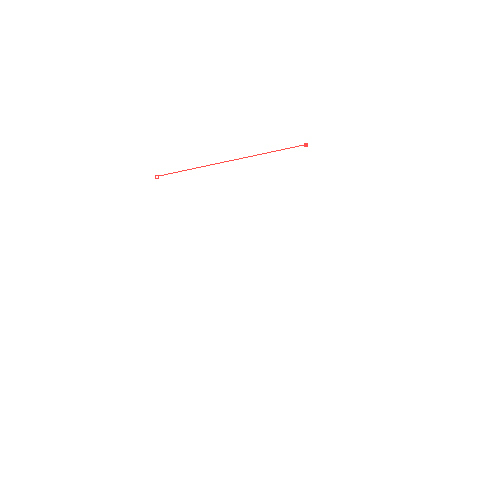
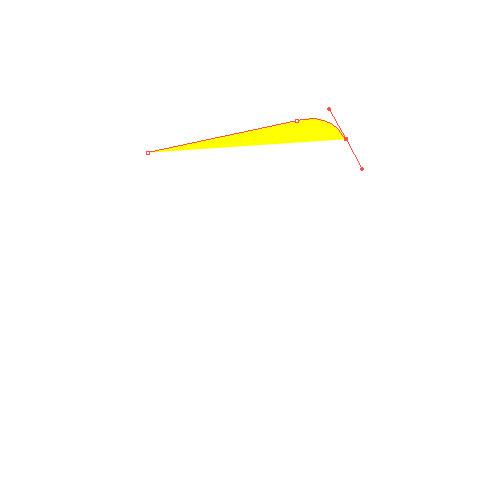
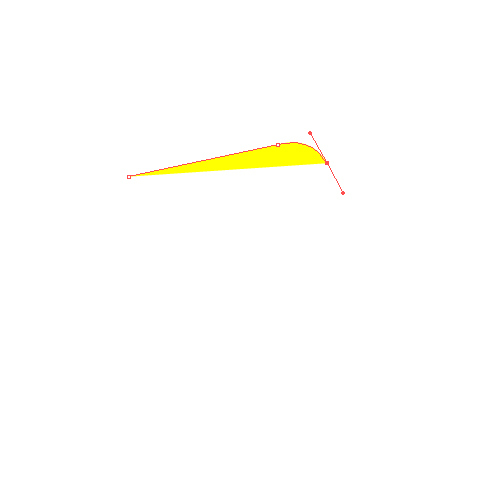
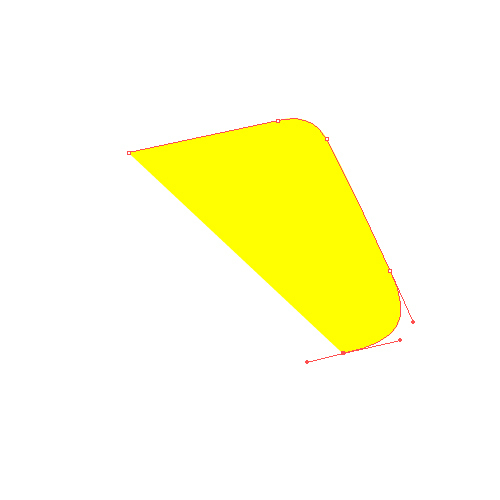
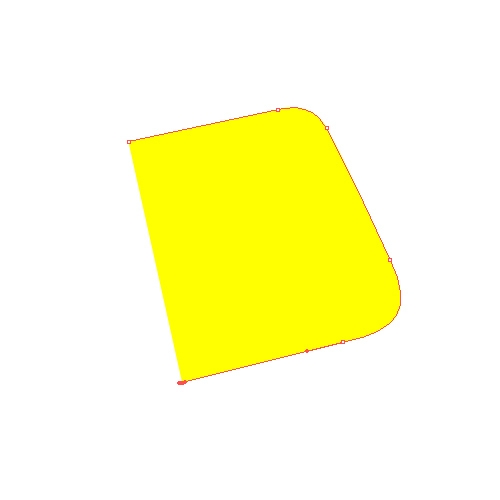
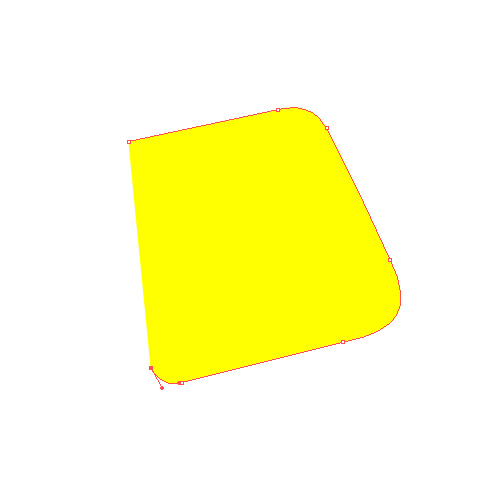
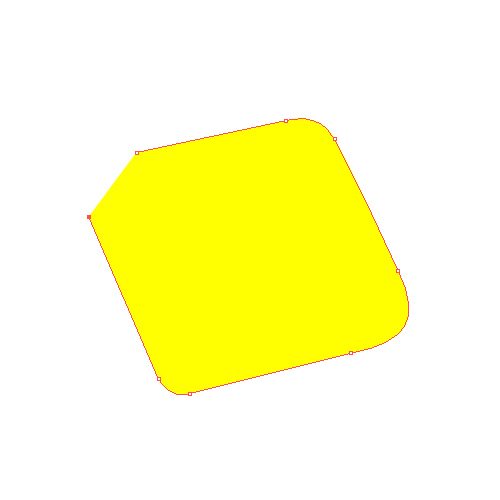
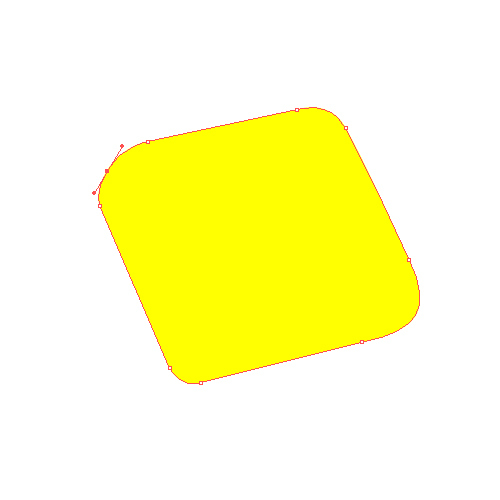
We will start by drawing a simple shape, as shown in the following pictures. Grab the Pen Tool (P) from the Tool Panel and start drawing.
Step 2
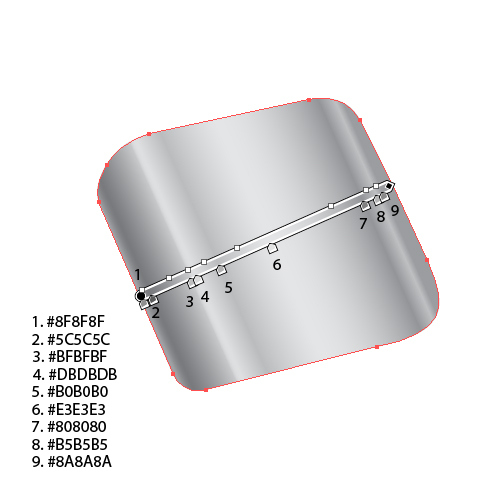
Let’s try to simulate the “metal look of the padlock”. We can accomplish that by using a linear gradient with different tones of gray. Make sure to align the gradients tones to the edge of the padlock base.
Step 3
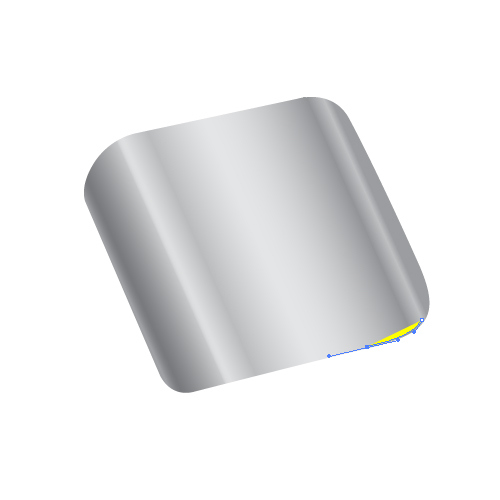
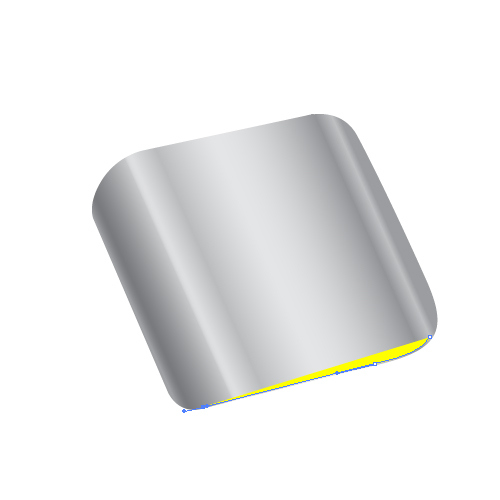
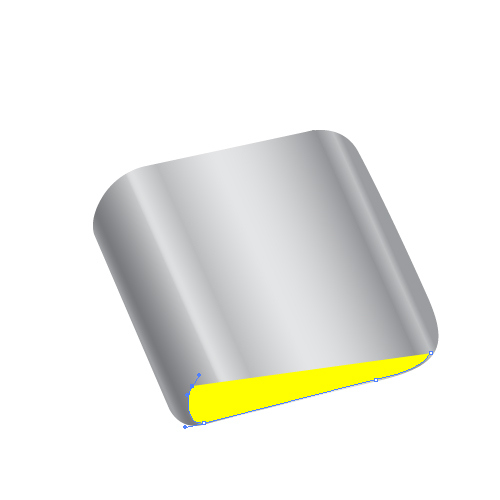
Select the Pen Tool (P) from the Tool Panel again and draw the shape that will represent the bottom of the padlock.
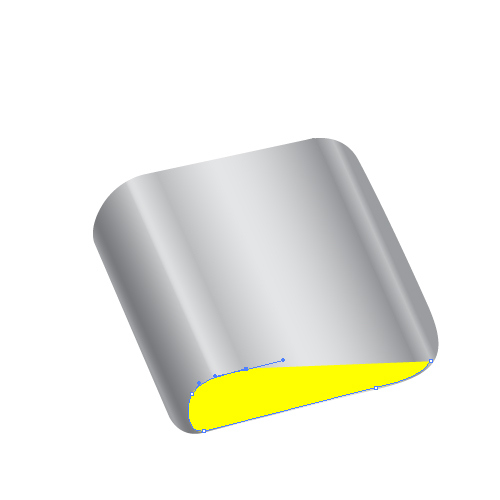
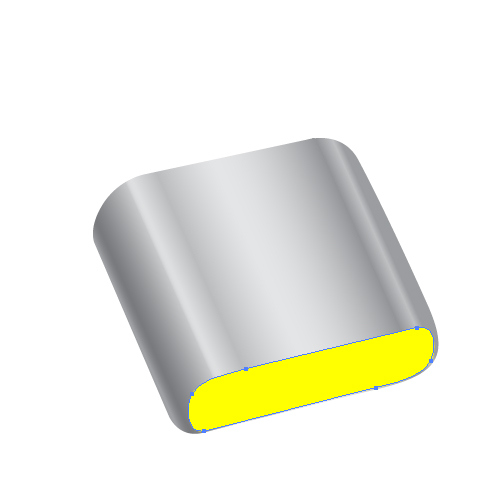
Step 4
We will apply a linear gradient to the bottom as well.
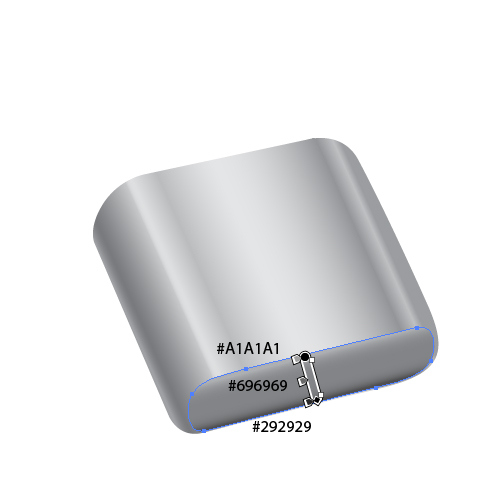
Make sure to place the sliders as shown in the picture below.
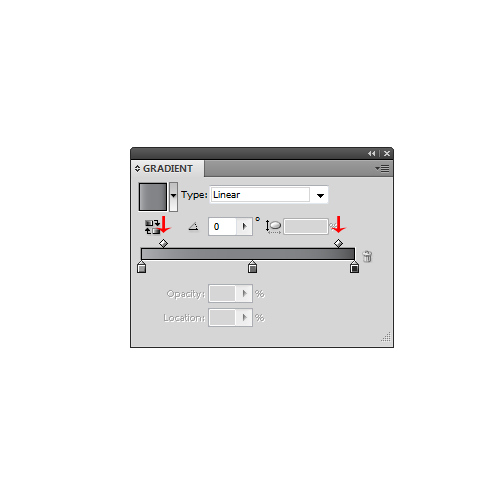
Step 5
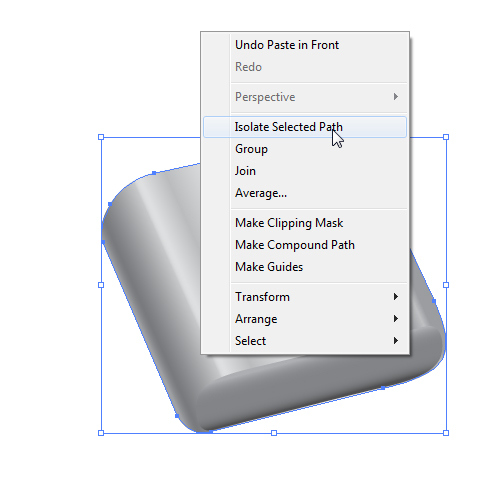
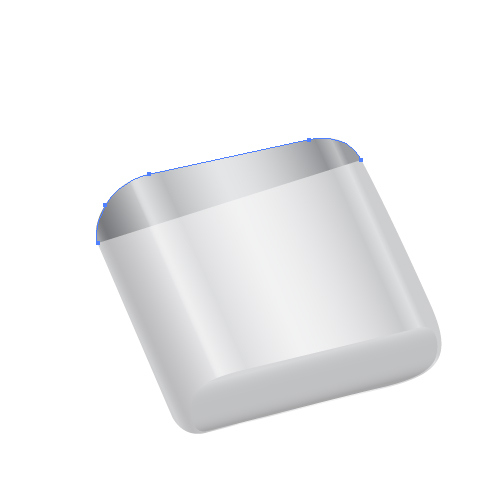
Now we have to divide the basic object in half. In order to maintain the shape of the padlock we have to create a perfect path that will help us divide the object. Duplicate (Ctrl / Cmd + C, Ctrl /Cmd + F) the basic shape of the padlock. Under Right Click select Isolate Selected Path. This will isolate the copy we have just created and allow us to edit it without messing up the rest of the illustration. Grab the Direct Selection Path (A) from the Tool Panel and select all the anchor points beside the ones on the upper side of the padlock. Hit the Delete key on your keyboard to remove all selected anchor points.
You should end up with something like this.
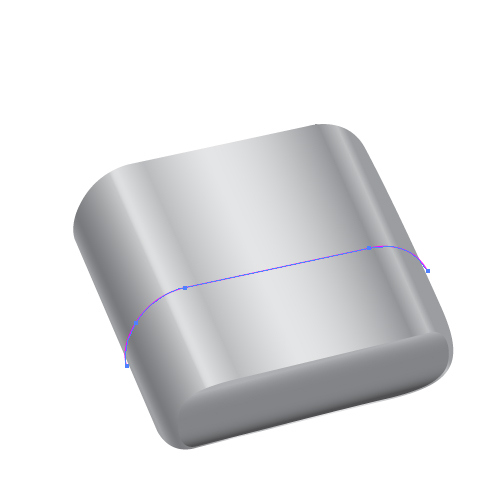
Remove the Fill color and set the Stroke color to any color you like (color is not important). Place the path as shown in the picture below. If you need to resize the path just do it. Just make sure that path is overlapping the shape underneath.
Step 6
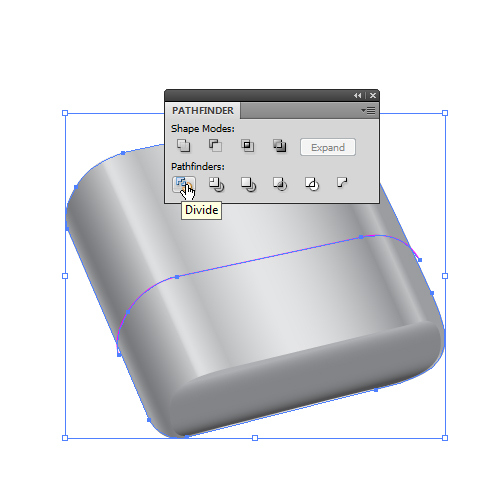
Duplicate (Ctrl / Cmd + C, Ctrl / Cmd + F) again the basic shape of the padlock. Select the purple path from the previous step and the copy we have just created and under the Pathfinder Panel hit the Divide button.
Step 7
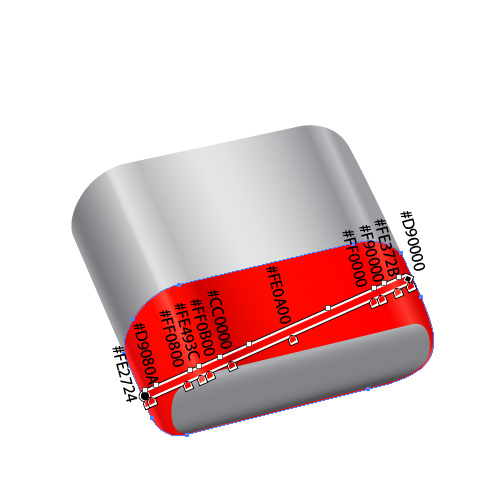
Ungroup (Shift + Ctrl / Cmd + G) new shape and remove the upper part. We will apply a nice red linear gradient to the lower part (make sure to place the new shape right underneath the bottom part of the padlock).
Step 8
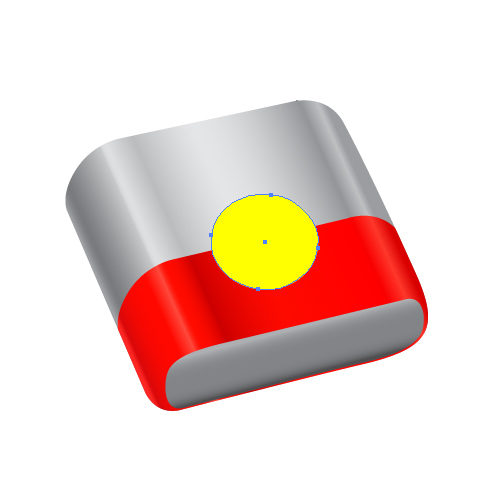
Now we are going to create a place for the keyhole. Grab the Ellipse Tool (L) from the Tool Panel and create an ellipse as shown in the picture below. Make sure not to create a perfect circle. We need to preserve the perspective. This is the reason why we need a distorted circle.
Step 9
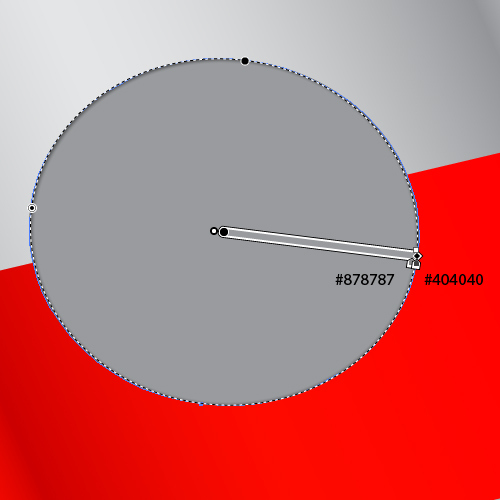
Let’s apply a radial gradient to our ellipse. We are going to place the gradients sliders very close to each other. Beside that, nudge the gradient a little bit downwards. This way we are going to have a nice thin line in the upper part of the ellipse. It will represent the small shadow.
Step 10
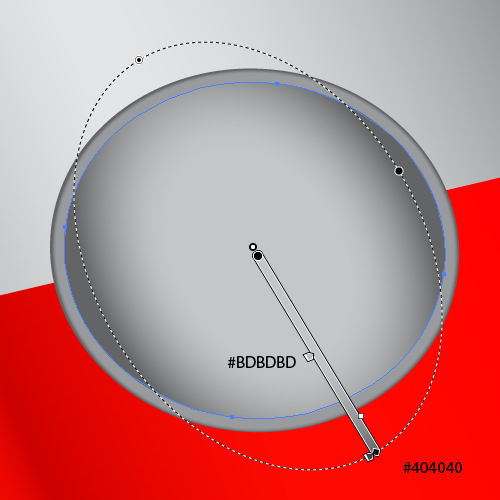
Duplicate (Ctrl / Cmd + C, Ctrl / Cmd + F) ellipse from previous step, scale it down a bit and apply a radial gradient as shown in the picture below.
Step 11
Repeat the previous step (duplicate [Ctrl / Cmd + C, Ctrl / Cmd + F] smaller ellipse) and apply a radial gradient.
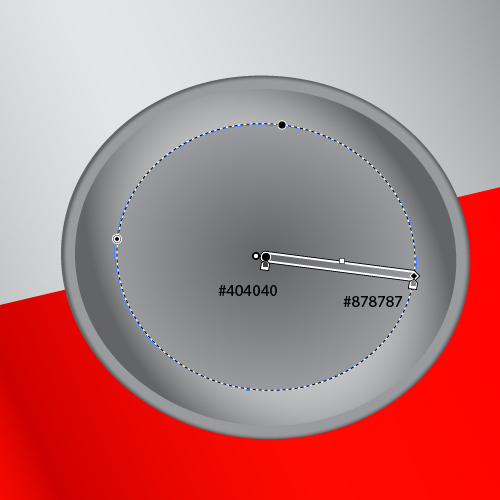
Step 12
We are going to repeat the previous step one more time. Make sure to scale down the new ellipse just a little bit. You can also use the Offset option. Select the smallest ellipse we have created so far and under the Object select Path > Offset Path. Set the value to -1 px and hit the Copy button. It will create a new scaled ellipse.We will apply a radial gradient to new ellipse as well.
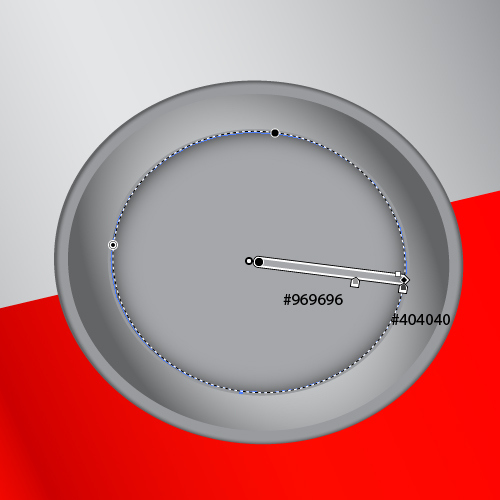
Step 13
Using the same technique and the same radial gradient create another smaller ellipse.
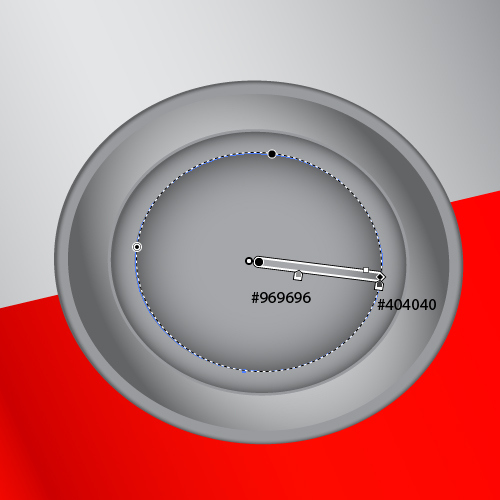
Step 14
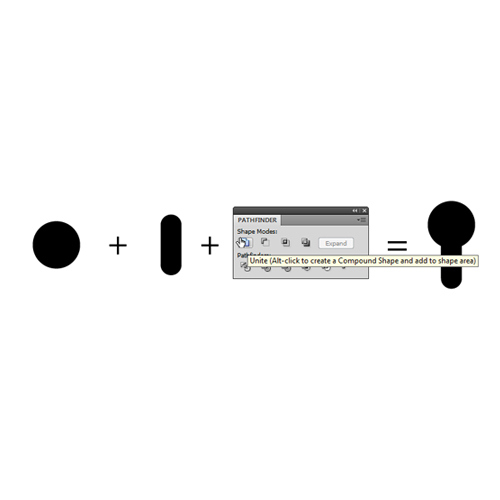
Let’s create a keyhole now. To do that we will be using the Rounded Rectangle Tool and the Ellipse Tool (L).
Step 15
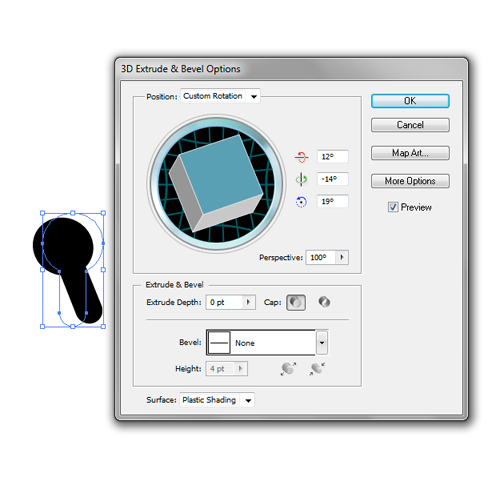
Now we need to rotate the keyhole to make it match the rest of the padlock. Select the keyhole and under the Effect select 3D > Extrude & Bevel. Set the Depth to 0 and Perspective to 100. Feel free to play around with the rotation a bit until you find the right angle for the keyhole.
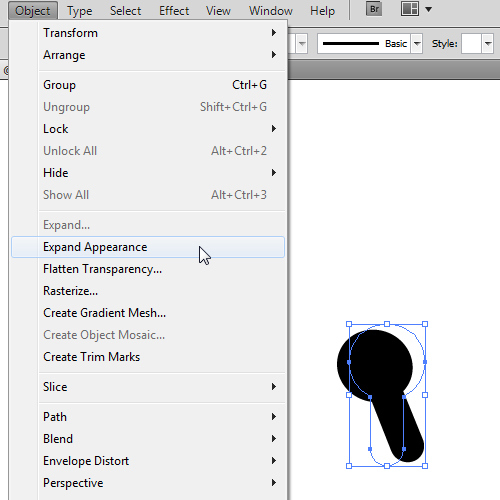
When you are satisfied with the result select Object > Expand Appearance.
Step 16
Set the Fill color of the keyhole to dark gray (#534741).

Step 17
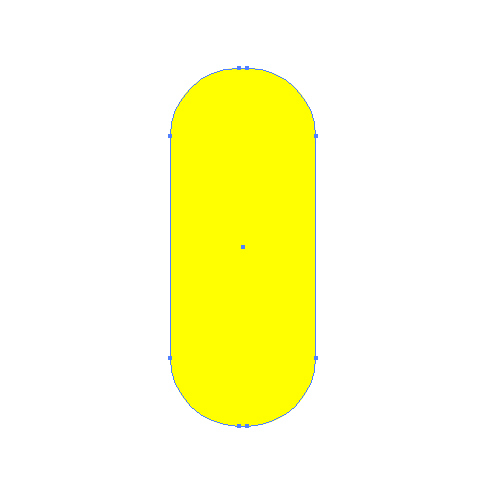
Grab the Rounded Rectangle Tool form the Tool Panel and create a shape as shown in the picture below.
Step 18
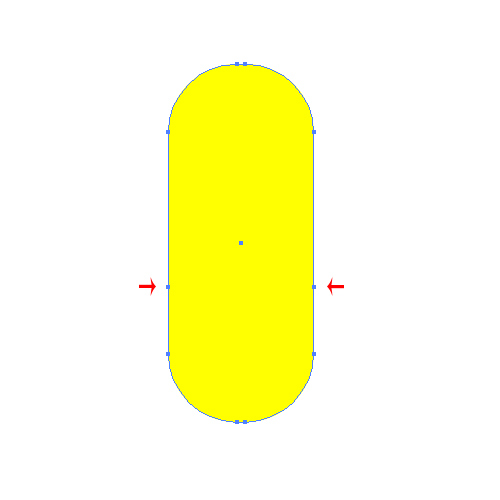
Now we need to add some anchor points and to remove others. Grab the Add Anchor Point Tool (+) from the Tool Panel and add two anchor points.
Step 19
Select the Direct Selection Tool (A) from the Tool panel, select all the anchor points below the new ones and remove them by hitting the Delete key on your keyboard. Remove the Fill color and set the Stroke color to any color you want. You should end up with something like this.
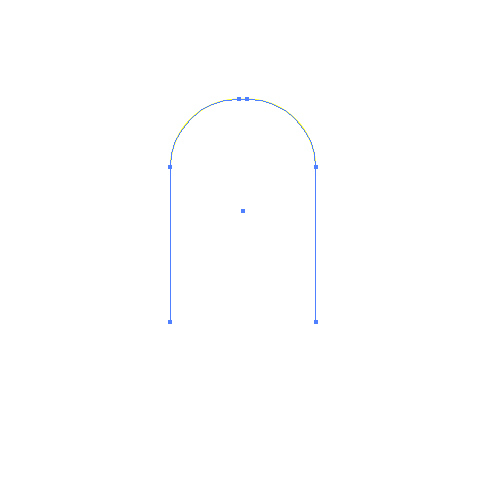
Step 20
Set the Stroke to 33.
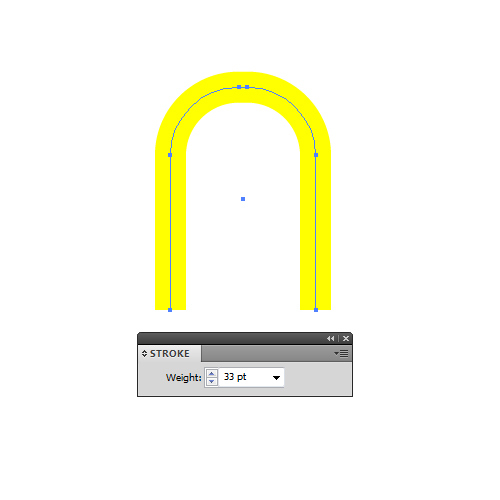
Step 21
Rotate the yellow shape a bit and apply 3D effect Extrude & Bevel in order to find the right perspective.
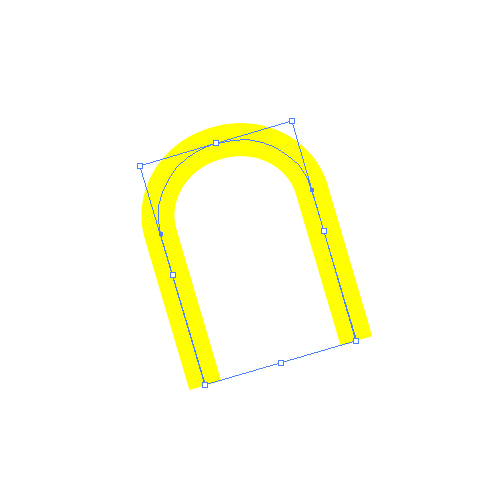
Step 22
Make sure to set the Depth to 0 and the Perspective to 100.
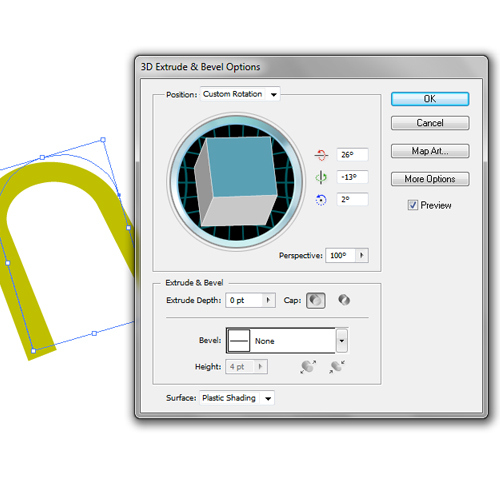
When you are satisfied with the result hit the Object > Expand Appearance.
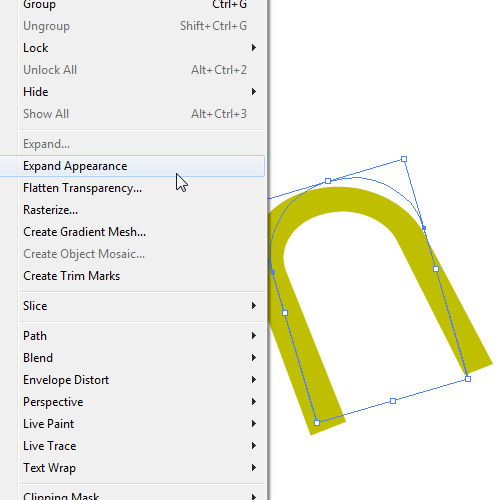
Step 23
Let’s place the new shape in its place.

Step 24
Duplicate (Ctrl / Cmd + C, Ctrl / Cmd + F) the largest shape of the padlock. Select the copy we have just created and the upper part of the padlock and under the Pathfinder Panel hit the Minus Front button.
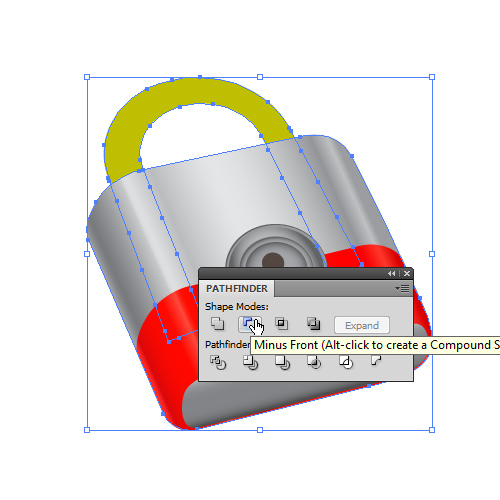
Step 25
We will apply a nice radial gradient to the new shape.
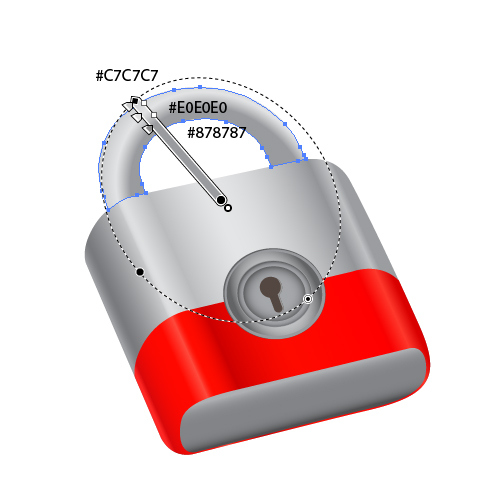
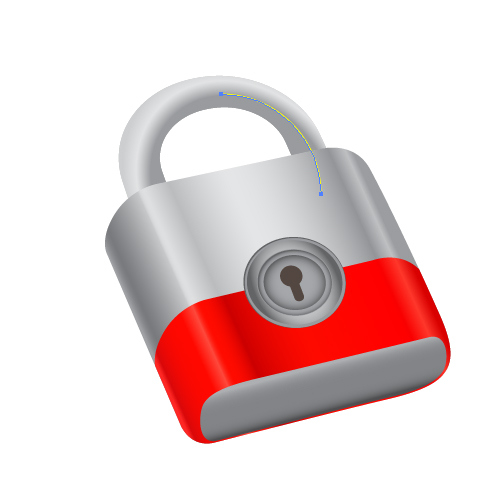
Beside applying a radial gradient we need to create a few more shadows and reflections. To do that we will create several arcs that we are going to transform to reflections and shadows by adjusting Stroke settings. Let’s get started.
Step 26
Grab the Arc Tool from the Tool Panel and right click somewhere on the Artboard. The Art Segment Tool Options window will pop up. Leave everything as it is and hit the OK button. It will create the arc which you should place as shown in the picture below.
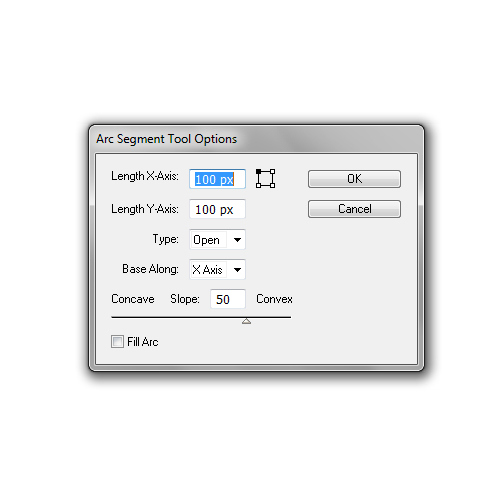
Step 27
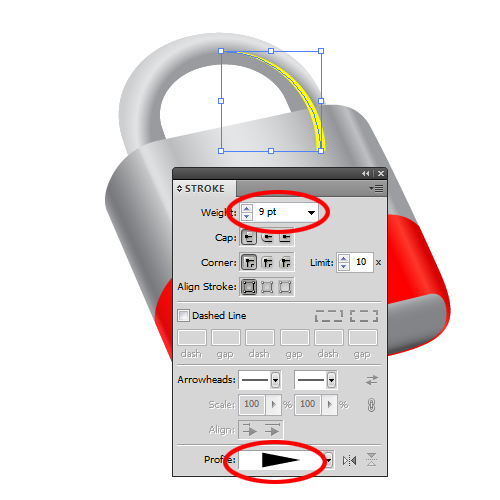
Now, open the Stroke Panel. We need to make few adjustments. We need to increase the Stroke Weight and to set the Stroke Profile to Width Profile 4.
Step 28
Under the Object select Expand Appearance, set the Fill color to #B3B3B3. You should end up with something like this.

Step 29
Repeat this step few more time using for each shape another tone of gray in order to create reflections and shadows.
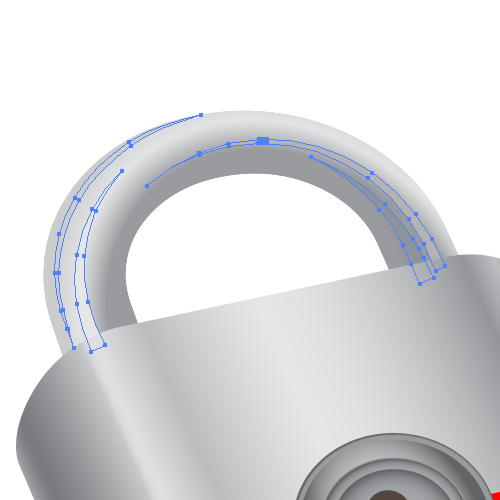

Basically, our padlock icon is done, but there are a few more things we can do. A few important details will refresh our illustration and make it more alive. Many people try to emphasize the edges by adding a basic stroke around some shapes. Actually, there are other more efficient ways to do that. We will be using the Pen Tool (P) to create irregular shapes that will be turned into reflections. Beside that we will do some duplicating and removing anchor points to make sure to create highlights that follow the edges. So, let’s get started.
Step 30
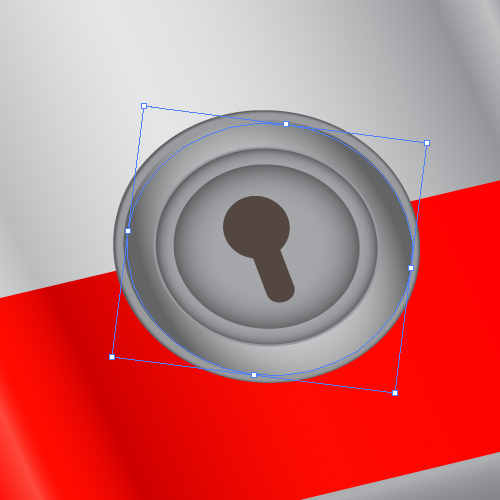
Select the ellipse that constitutes the middle part of the padlock. Duplicate (Ctrl / Cmd + C, Ctrl / Cmd + F) it twice and nudge one of the copies downwards by 1 pixel.
Step 31
Select both copies and under the Pathfinder Panel hit the Minus Front button. Set the Fill color of the new shape to #B3B3B3.
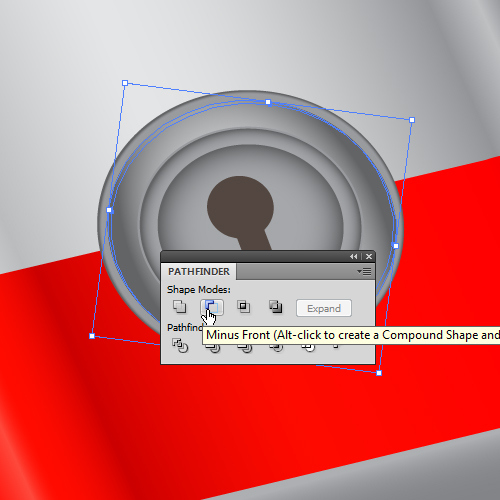
Step 32
You should end up with something like this.

Step 33
Repeat this step for the lower part as well.

Step 34
And, for the keyhole too.

Step 35
Select the largest ellipse and duplicate it (Ctrl / Cmd + C, Ctrl / Cmd + F). Nudge the copy 2 pixels downwards.
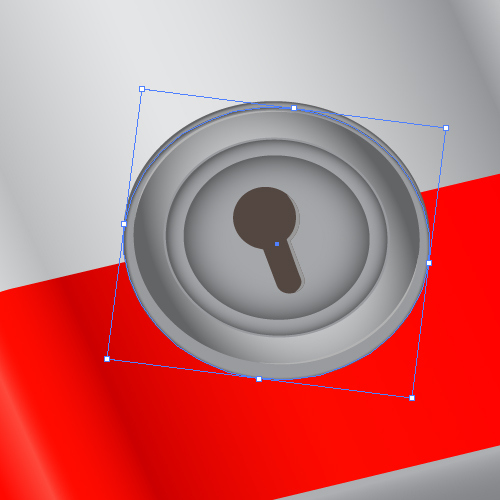
Step 36
Duplicate the red shape underneath the ellipses. Select both copies and under the Pathfinder Panel hit the Intersect button.
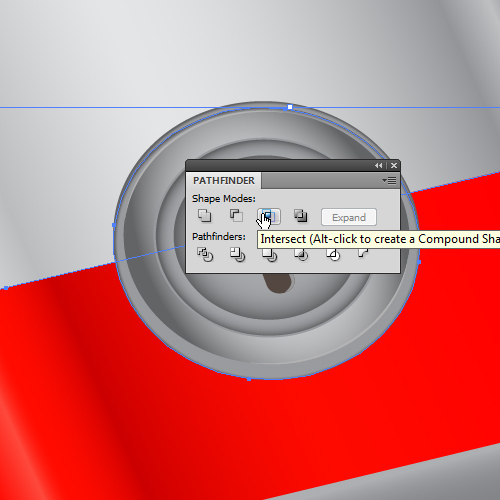
Step 37
Make sure to set the Fill color of the new shape to #D30403 and to place it underneath all ellipses. This shape is actually the shadow that the ellipses are casting on the red part of the padlock.

Step 38
Let’s duplicate (Ctrl / Cmd + C, Ctrl / Cmd + F) the red shape again. We will remove some anchor points that constitute this shape. Under the Right Click select Isolate Selected Path. This way we will only edit the copy of the red shape without messing up the rest of the illustration.
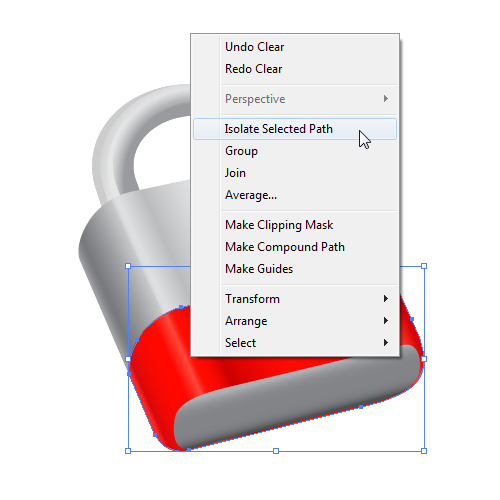
Step 39
Grab the Direct Selection Tool (A) from the Tool Panel select and remove the anchor points as shown on the picture below.
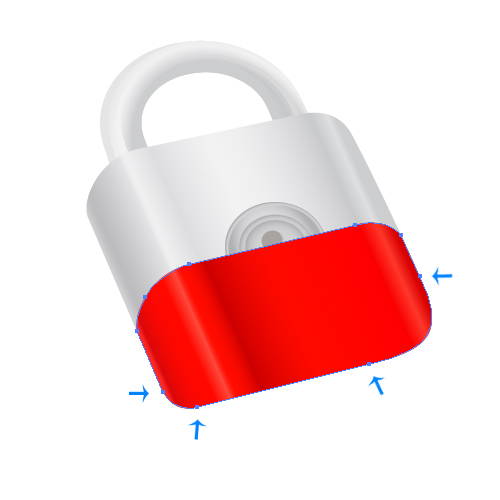

Step 40
Remove the Fill color and set the Stroke color to #FE4639. Also make sure to chose Width Profile 1 in the Profile drop down list.
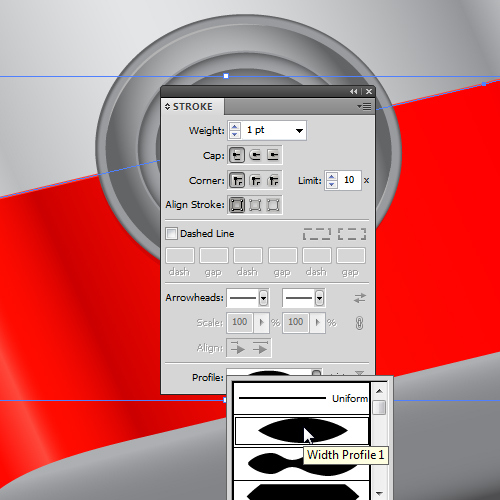
This way we have created a small thickness of the red part of the padlock.

Step 41
We will use exactly the same technique to create a few more shapes that will emphasize the edges. In the following pictures you can see where we are going to create them.
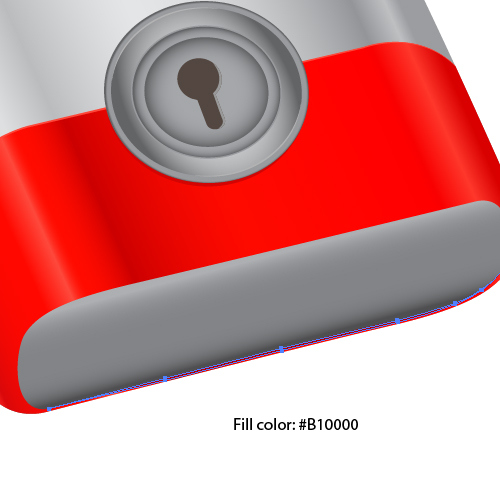
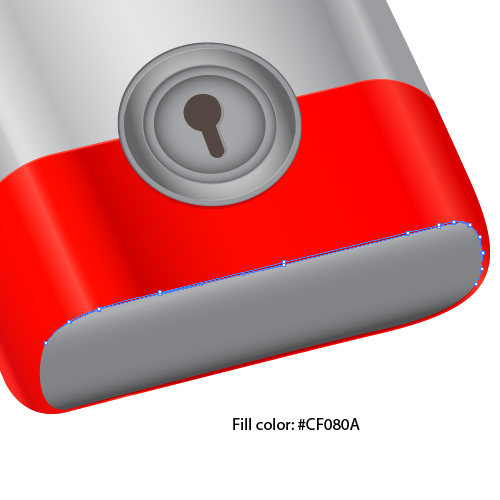
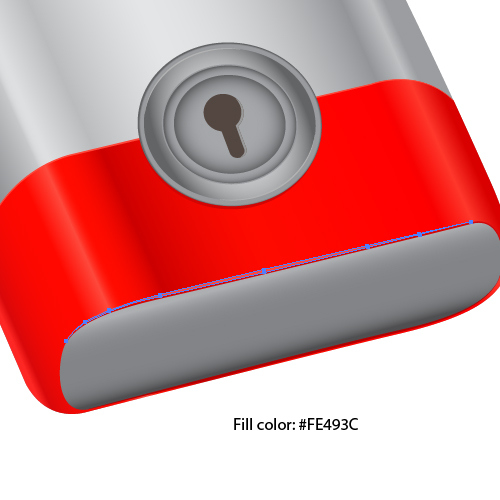
Step 42
We will also create another detail (not an important one, but can be useful). Duplicate (Ctrl / Cmd + F) the basic shape (metal shape) of the padlock and remove all anchor points beside the ones that constitute the upper side of the shape. Remove the Fill color and set the Stroke color to #969696. Move the path downwards and place it as it shown in the picture below.

Step 43
Grab the Pen Tool (P) from the Tool Panel one more time and create a shape like this.
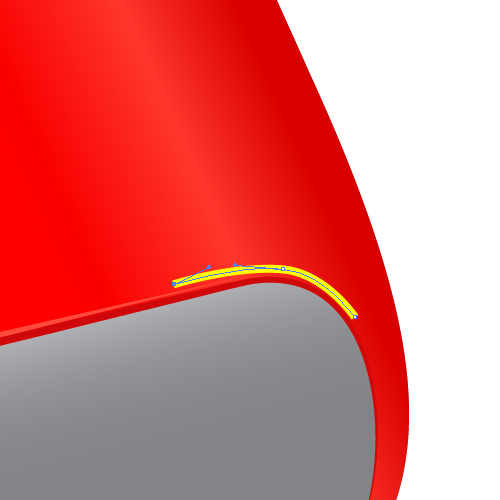
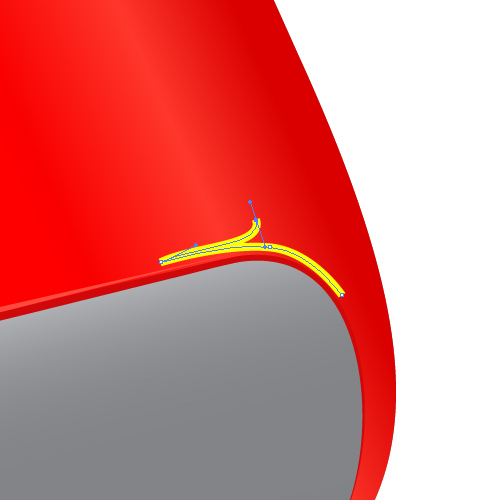
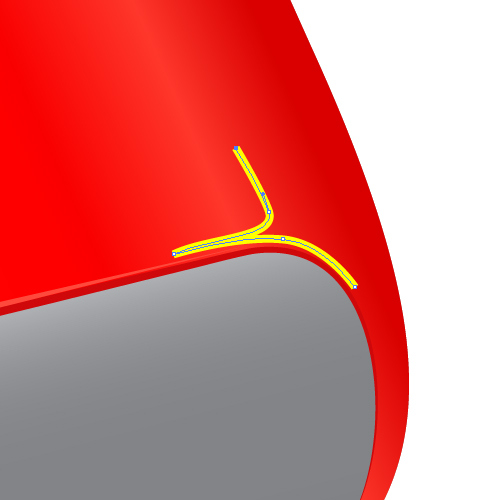
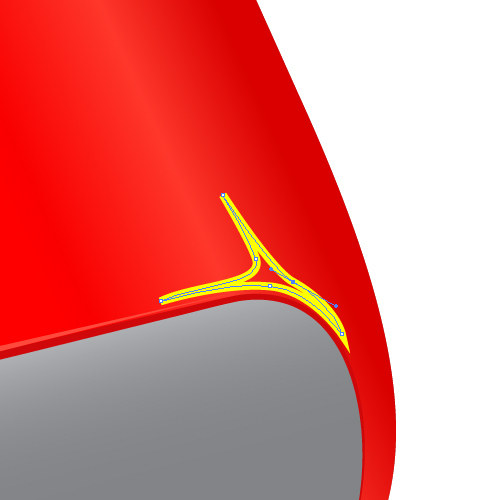
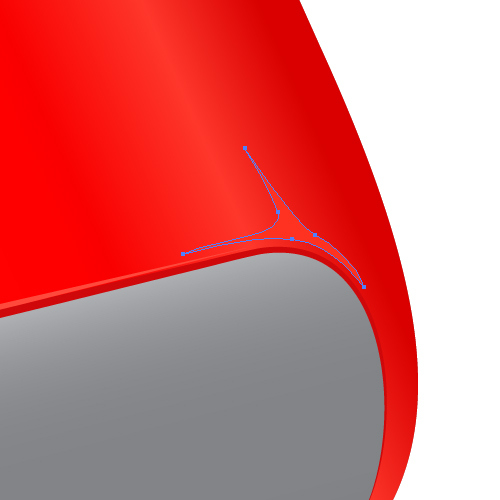
Remove the Stroke color and set the Fill color to #FE3220.
Step 44
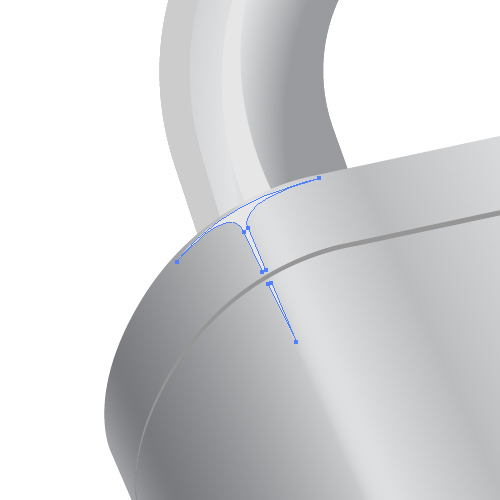
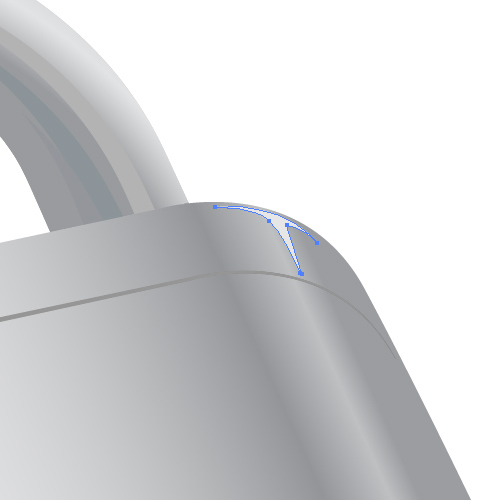
Create similar shapes for other corners of the padlock as well.
Step 45
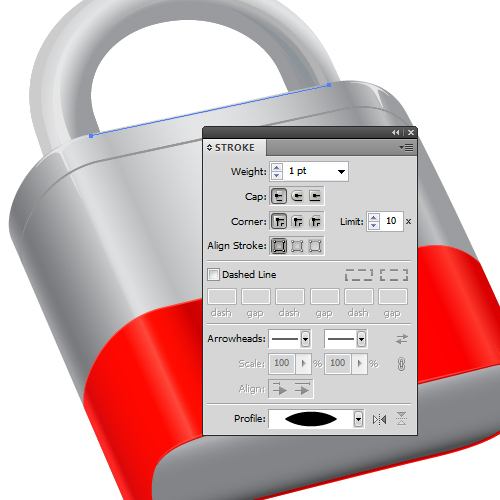
We need to create a straight line that will be parallel with the top side of the padlock. Just make sure to place it 1 pixel lower. Set the Stroke color to #B3B3B3 and make sure to set the Profile to Width Profile 1.
Step 46
Grab the Rectangle Tool (M) from the Tool Panel and create a rectangle as shown in the picture below.
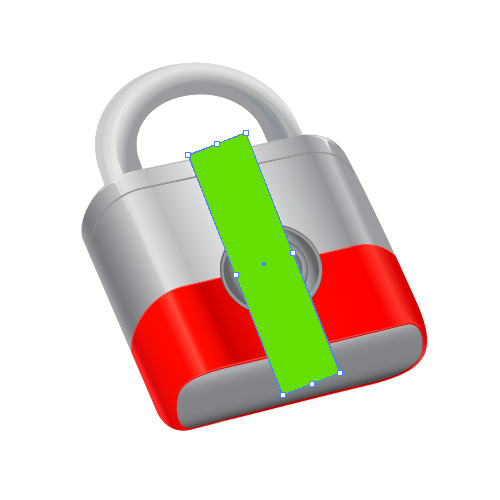
Step 47
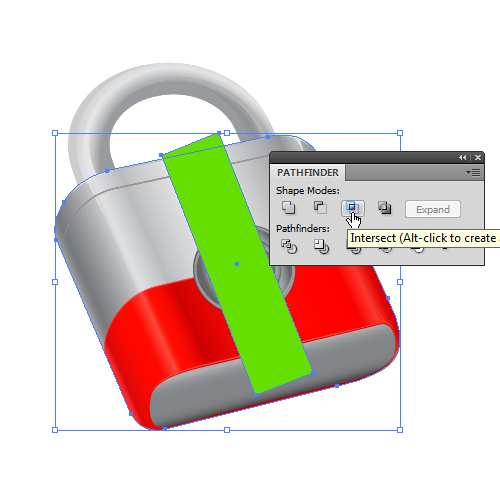
Duplicate (Ctrl / Cmd + C, Ctrl / Cmd + F) the largest shape of the padlock. Select the green rectangle and the copy we have just created and under the Pathfinder Panel hit the Intersect button.
Step 48
Place the green shape underneath the red part of the padlock. The easiest way of doing this is to open the Layer Panel (you can find it under Window), find the red part of the padlock in the Layer Panel and simple drag and drop the layer with the green shape right below the layer with the red shape.

Step 49
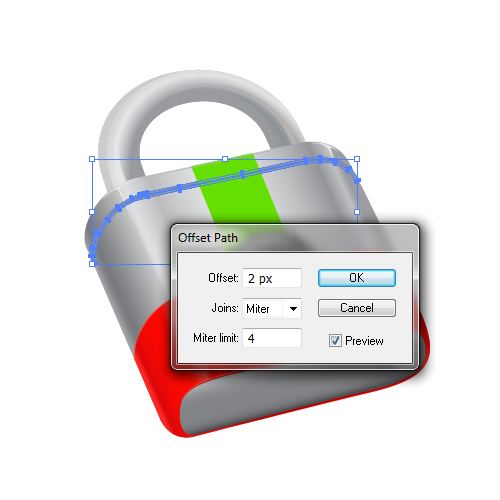
Select the line that goes accros the padlock and under the Object select Path > Offset Path. Set the value for Offset to 2 pixels and hit the OK button.
Step 50
Select the green shape and the shape from the previous step and under the Pathfinder Panel hit the Minus Front button.
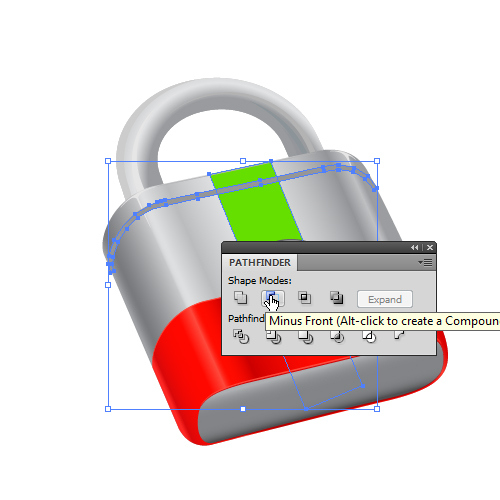
You should end up with something like this.

Step 51
Apply a nice linear gradient.
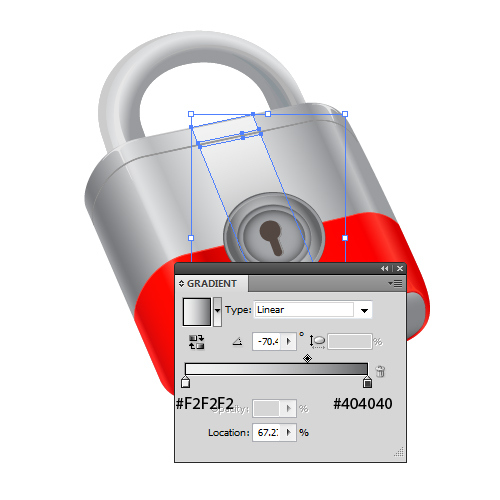
Step 52
There is one more thing to create. A shadow of the completed padlock. Select all elements that constitute the padlock and Group them (Ctrl / Cmd + G). Duplicate (Ctrl / Cmd + C, Ctrl / Cmd + F) the padlock. Select only one sample of the padlock and under the Pathfinder Panel hit the Unite button.
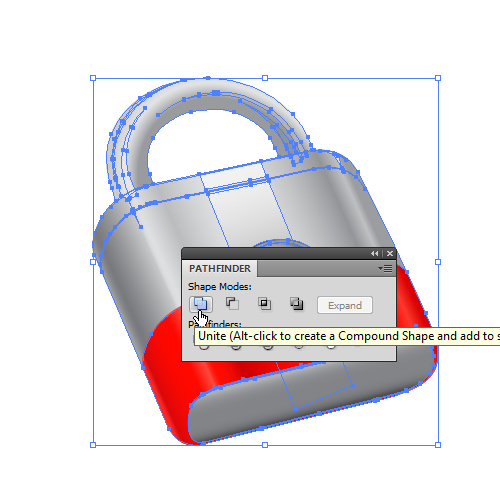
Step 53
Maybe you will have to Ungroup (Shift + Ctrl / Cmd + G) the new shape several times and to repeat the Unite action until you end up with something like this.
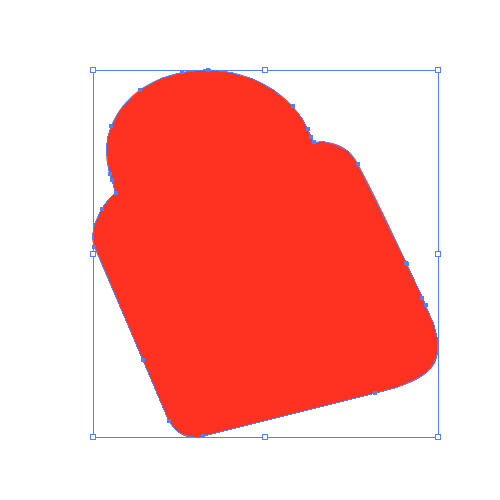
Step 54
Apply a linear gradient.
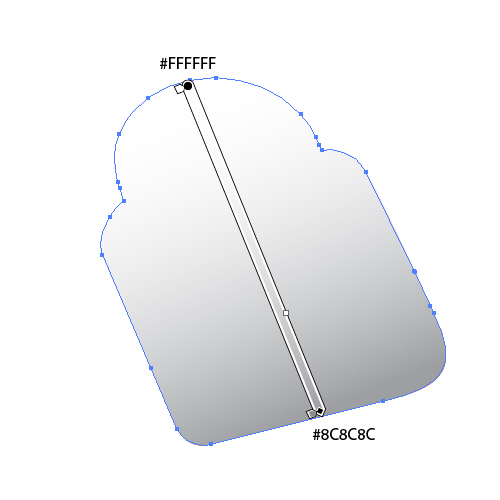
Step 55
Now we are going to scale down this shape using non-uniform scaling. Grab the middle top point of the selection box and move it downwards.
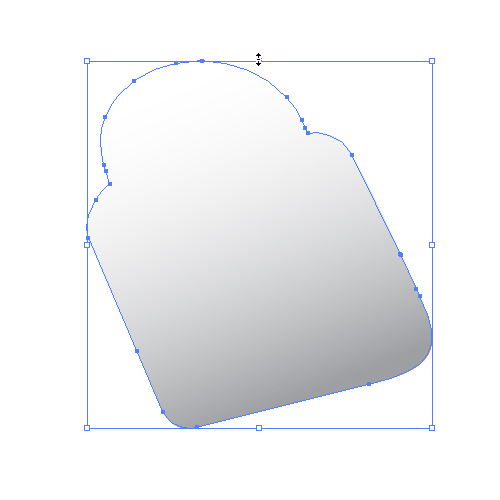
Place the shape behind the padlock (Shift + Ctrl / Cmd + [) and adjust the position and the angle until the shadow fits the padlock.
Conclusion
Here is how your final result should look.

Today we had some fun creating this cute padlock icon. Beside that we had the opportunity to see that we can accomplish a lot with few simple techniques. Do not be discouraged if you are not sure how to draw something. There is always a way to combine shapes and to tweak colors until you reach your goal.
If you have any questions or a request for the next tutorial please post it in the comments section below. Thank you for following along.